Harvesting Cannabis: Knowing When to Harvest Cannabis and Steps for Drying, Trimming and Curing Your Buds
Okay, it’s time for harvesting cannabis (or so you think), and you are getting excited to start jumping into trimming, curing, and all the fun stuff! You have officially gone from seed to leaf, to leaves, to buds, and now you have a mature plant. Pretty soon, you will have your own buds that are ready for the bowl, bong, joint, blunt — whatever smoke method you prefer.
Sometime around Weeks 10-14, it’s probably time for harvesting cannabis. This is not as simple as cutting and consuming, it’s a multi-week process, a stage unto itself. You’ve come this far, and it really pays to properly CHOP, TRIM, DRY and CURE your product, so you can avoid any last-mile problems and get the most quantity and quality from your cannabis harvest.
This post contains affiliate codes or links that are no additional cost to you, and I may earn a small commission when a purchase is made.
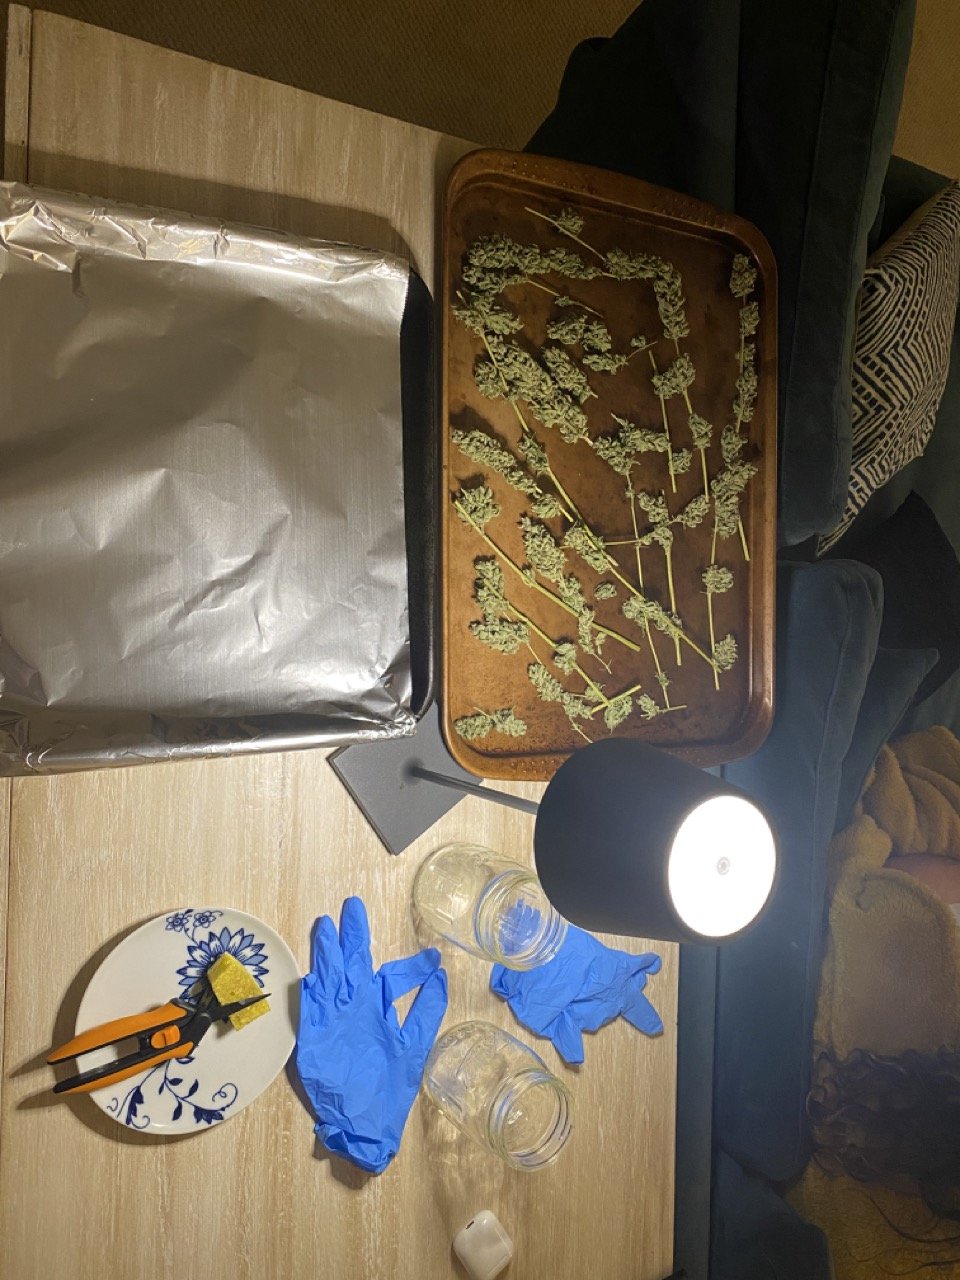
MATERIALS You Need
(optional) Herb dryer rack
Disclaimers: NOT FOR SALE OR TRADE. The following post features content about cannabis cultivation and other related substances that are illegal under federal law as well as under state law in certain states. This content has been produced by Thunderbird Disco—located in the Commonwealth of Virginia—for educational and entertainment purposes only. All cultivation described below was completed in accordance with Virginia law as authorized in § 4.1-1101 Home cultivation of marijuana for personal use; penalties.
NOTE: If you’ve arrived here cold and are just starting out, check out earlier installments of this series. For purely educational purposes, I highly recommend Homegrown Cannabis Co., which has terrific video content and information on seeds. I also recommend I Love Growing Marijuana, which has an excellent 70-page “Grow Bible” eBook for beginners and information on autoflower seeds.
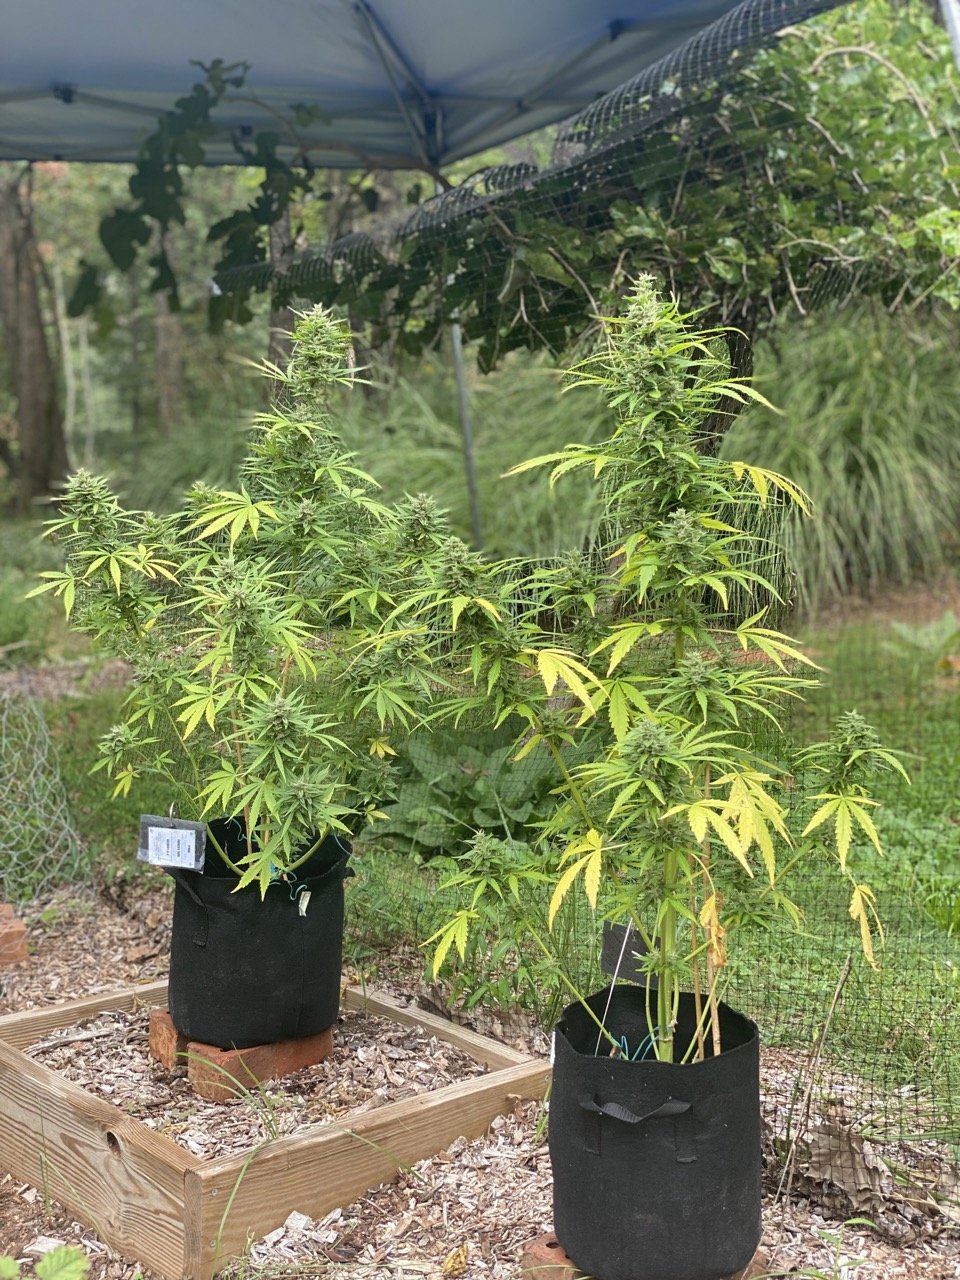


WEEKS 10-14: Prepare for harvesting Cannabis
Step 1: EYEBALL IT
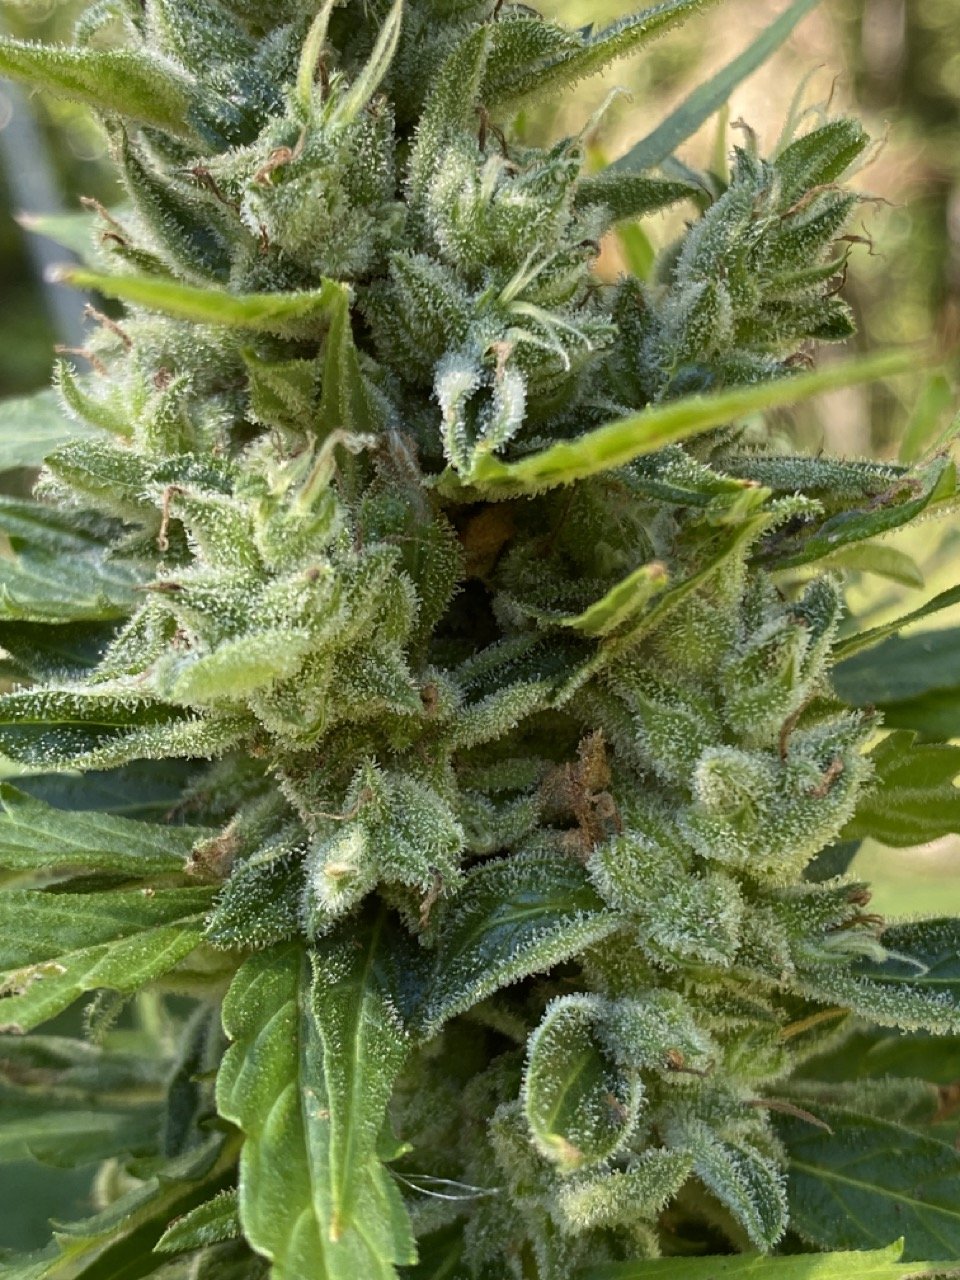
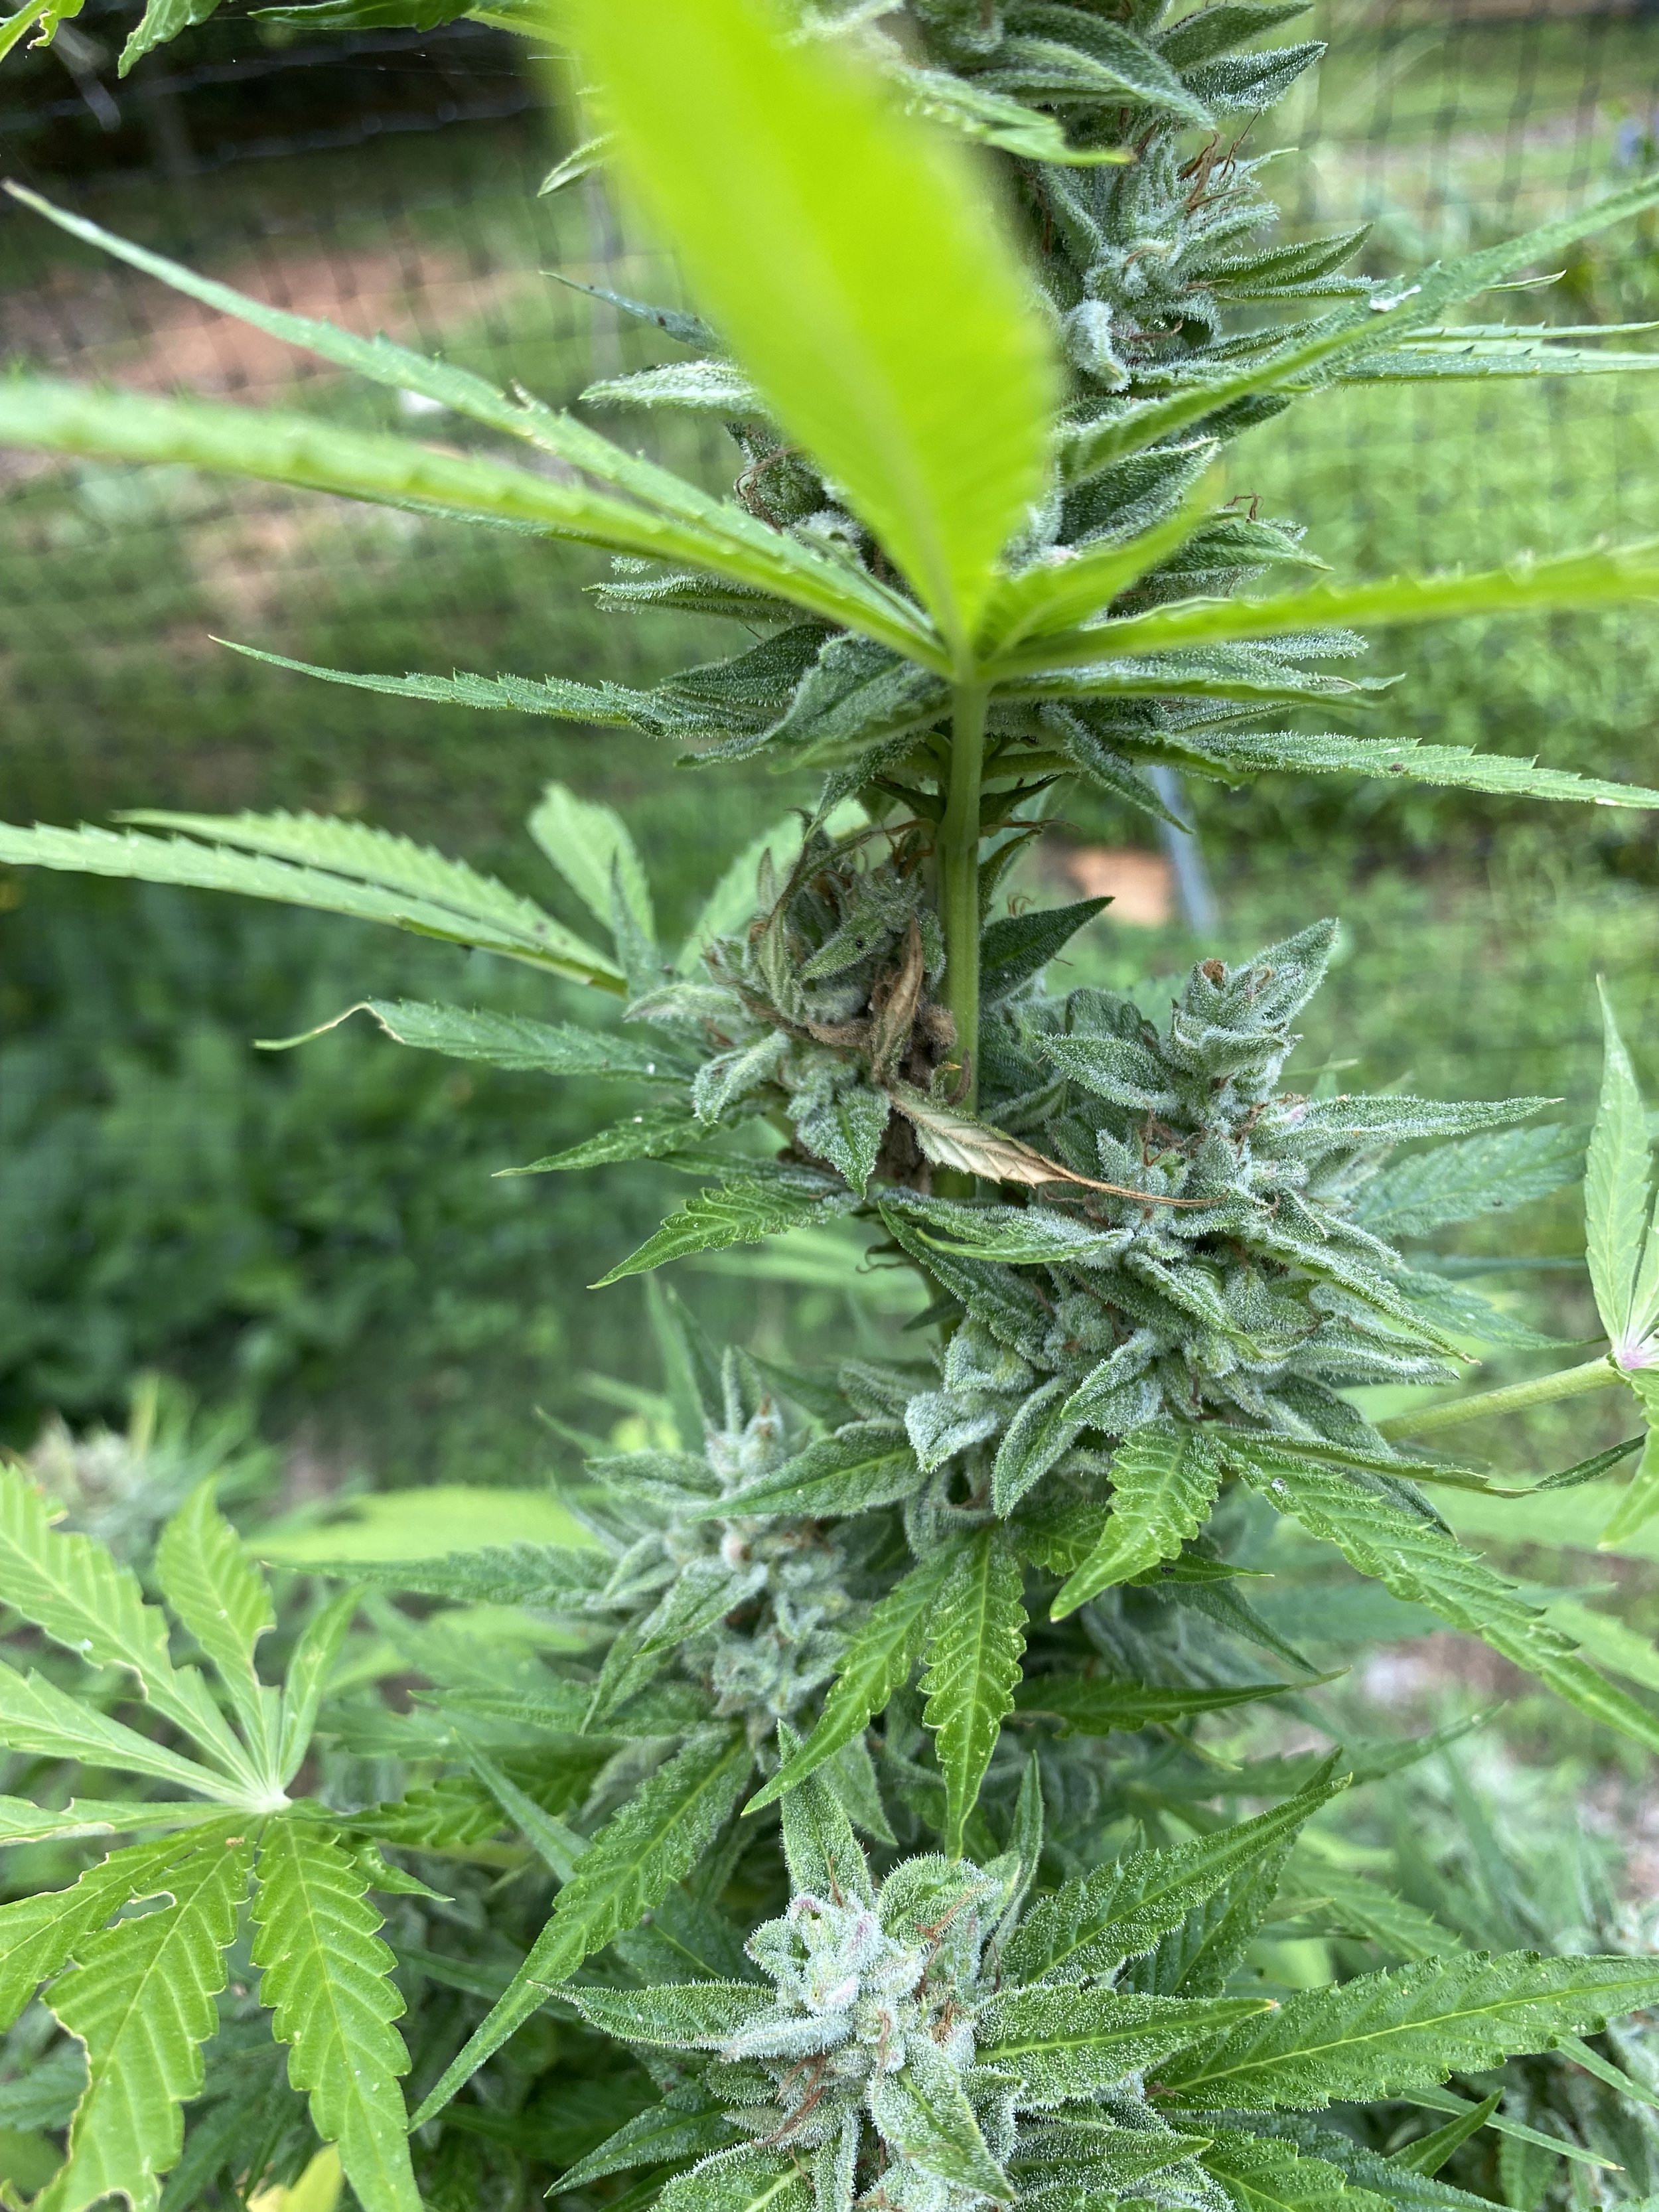
After you’ve flushed your plant 3-5 times, take a close gander at the plant — each leaf, and each bud. Final harvest could take longer than 10 weeks, so don’t judge by the calendar, judge by how she’s looking. Hopefully around this time:
Calyxes have fattened up
Stigmas have turned from whitish to brownish
Fan leaves are yellowing and/or falling off
All good signs. But the naked eye isn’t the final word on the matter and, as explained in Part #4 of this series, if you want deeper insight on whether your plants are “ready,” you need to look at the trichomes, specifically their color, and start to confirm your plant maturity.
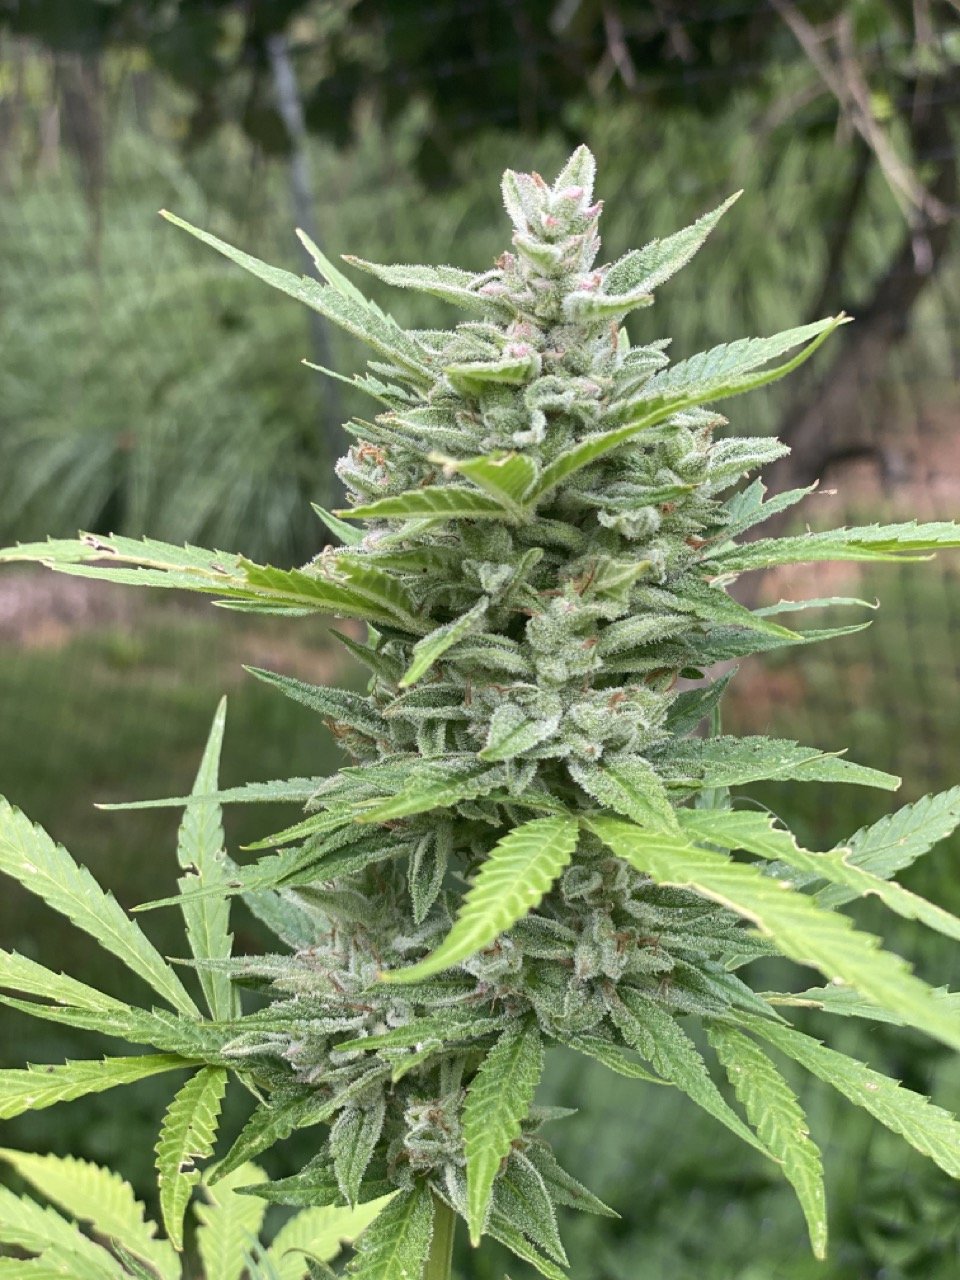
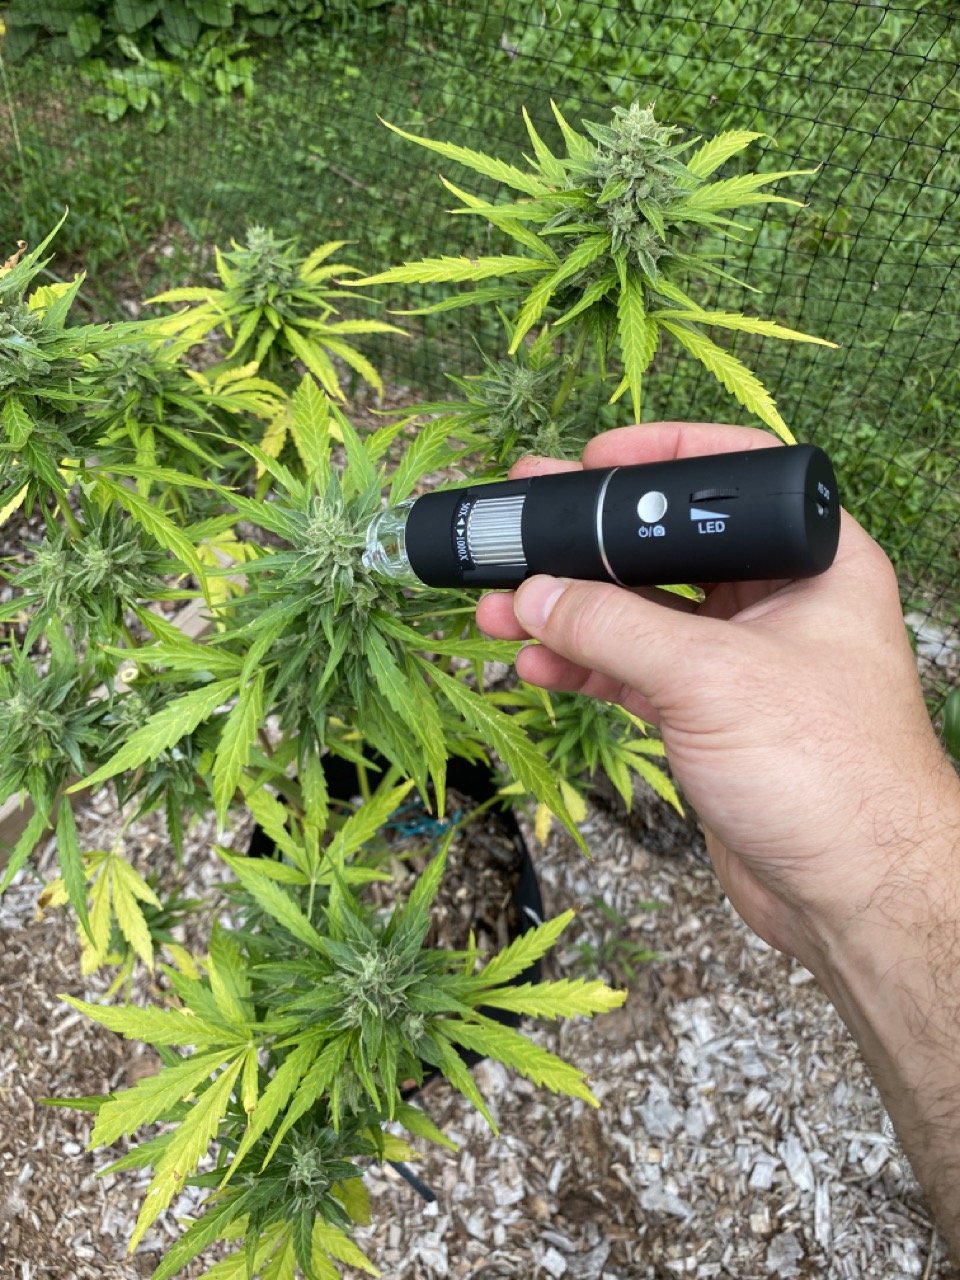
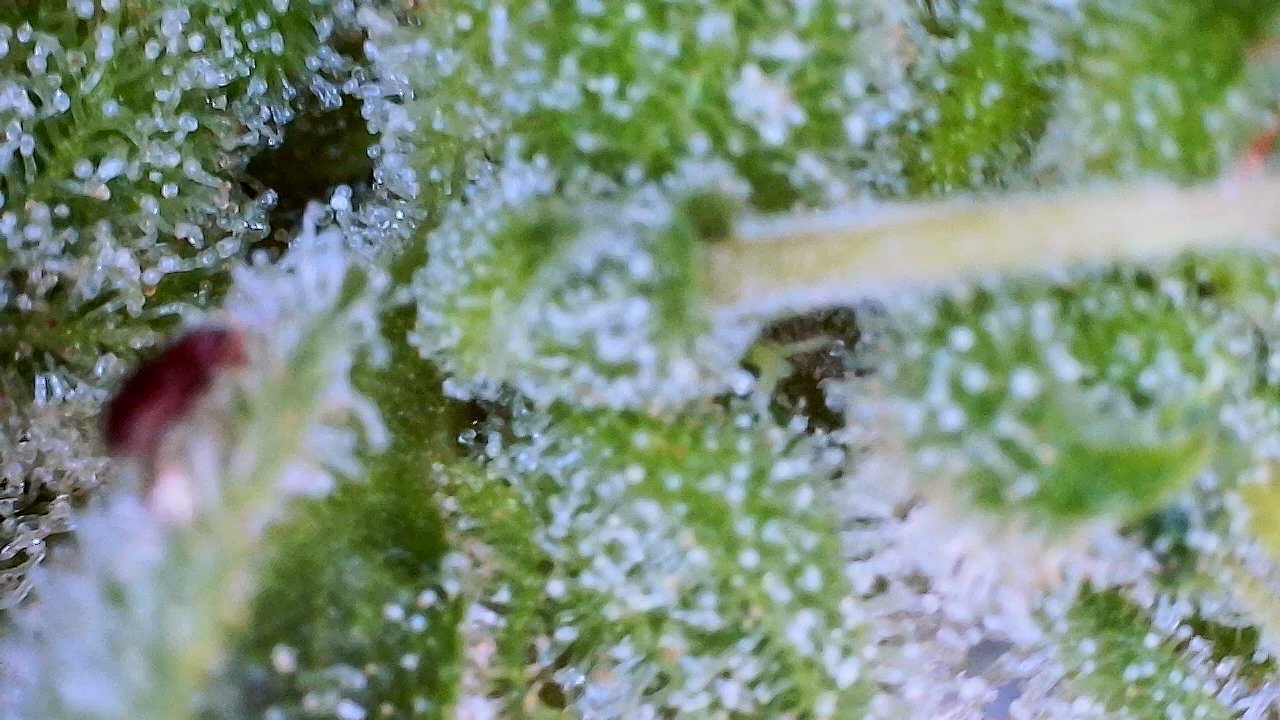
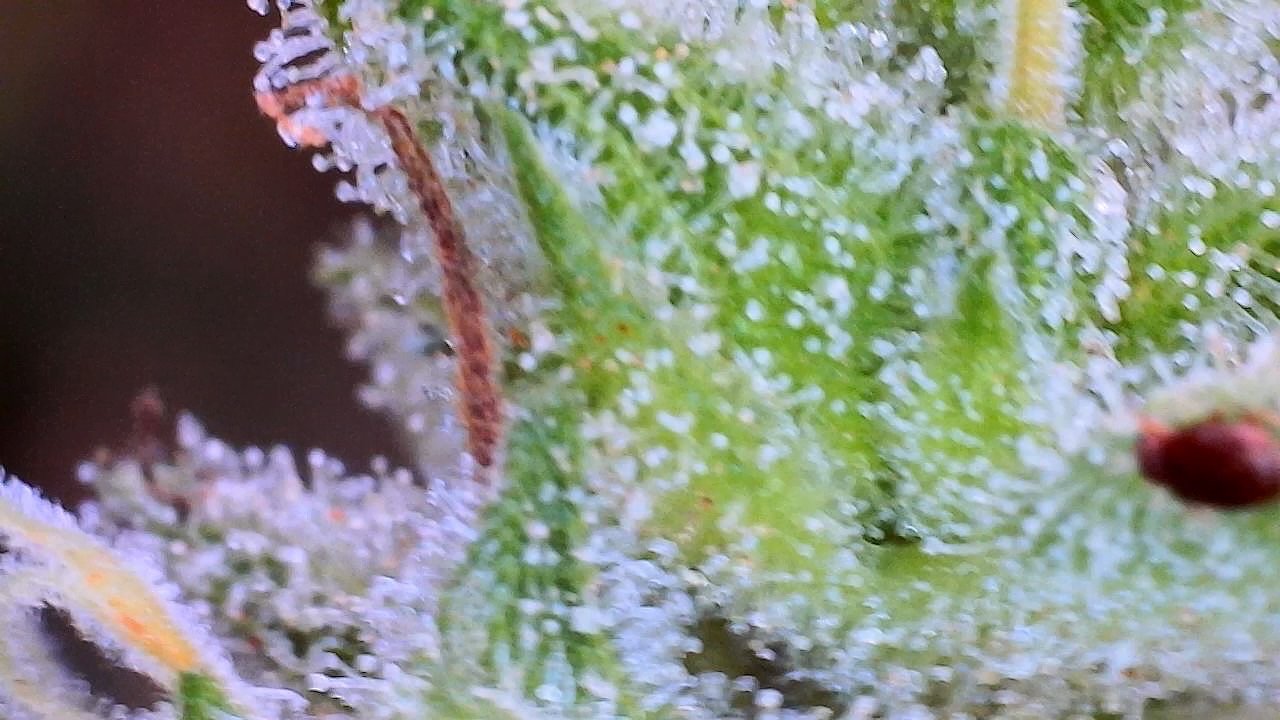
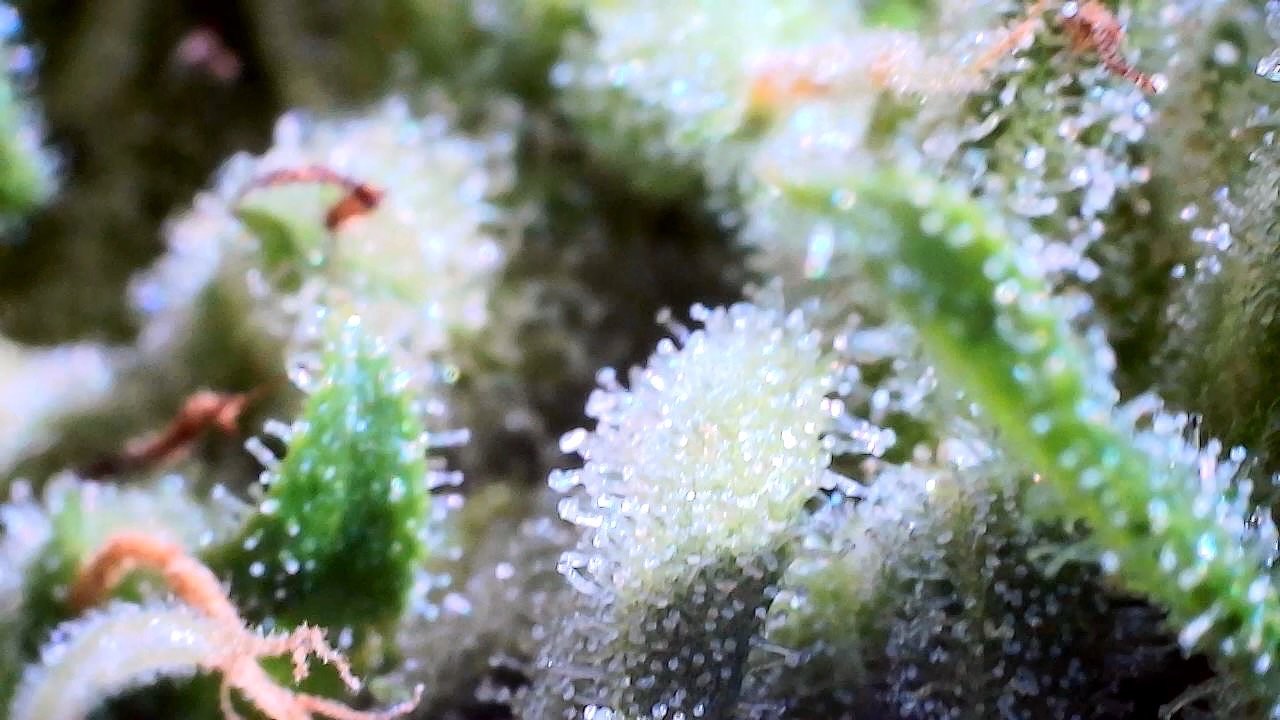
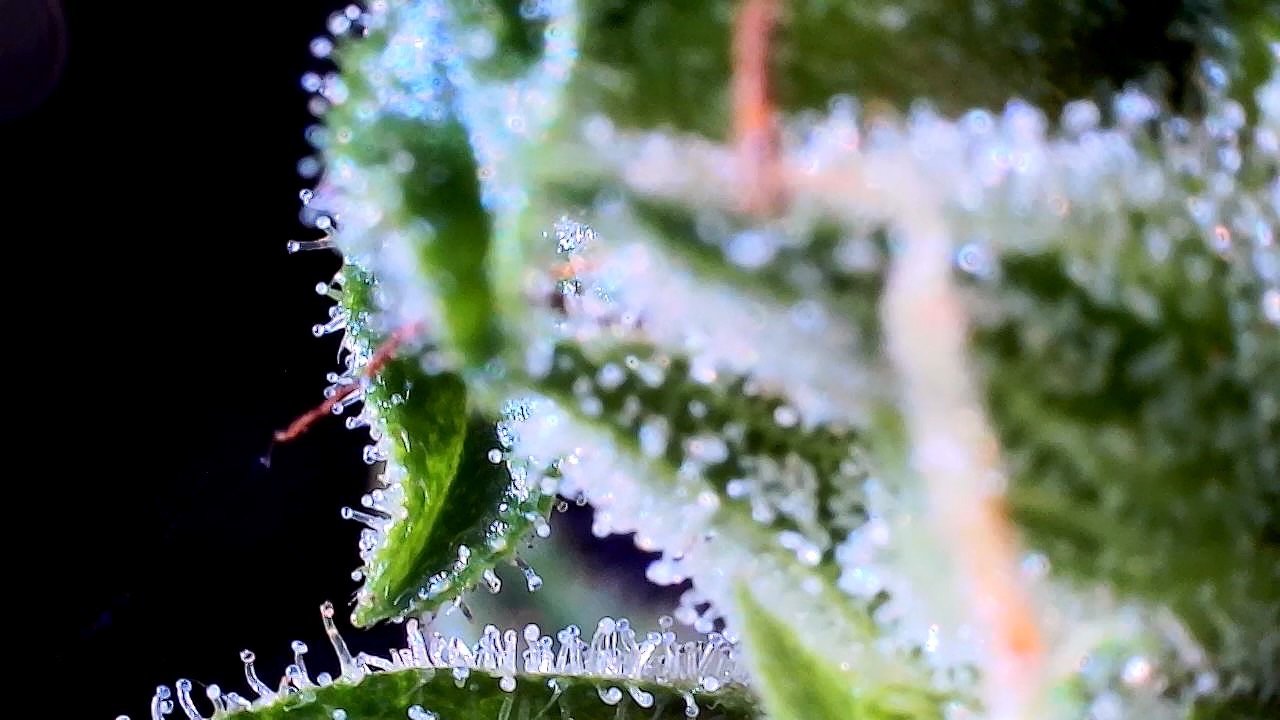
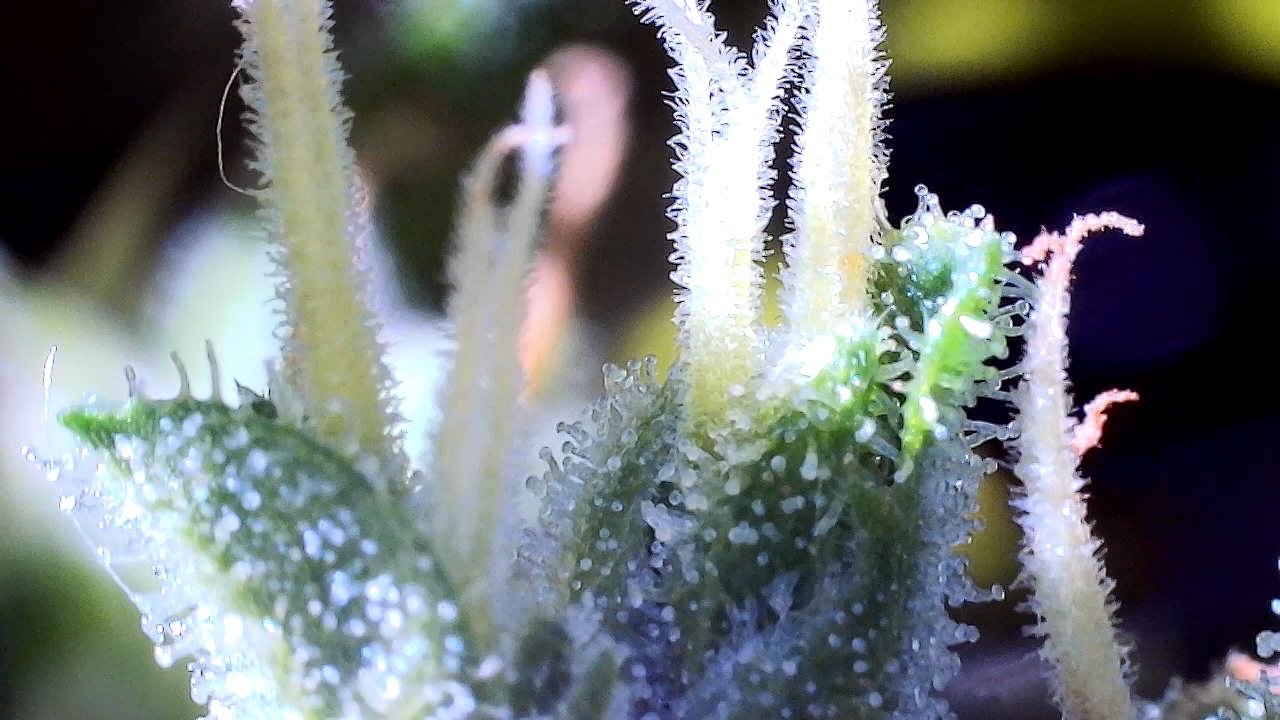
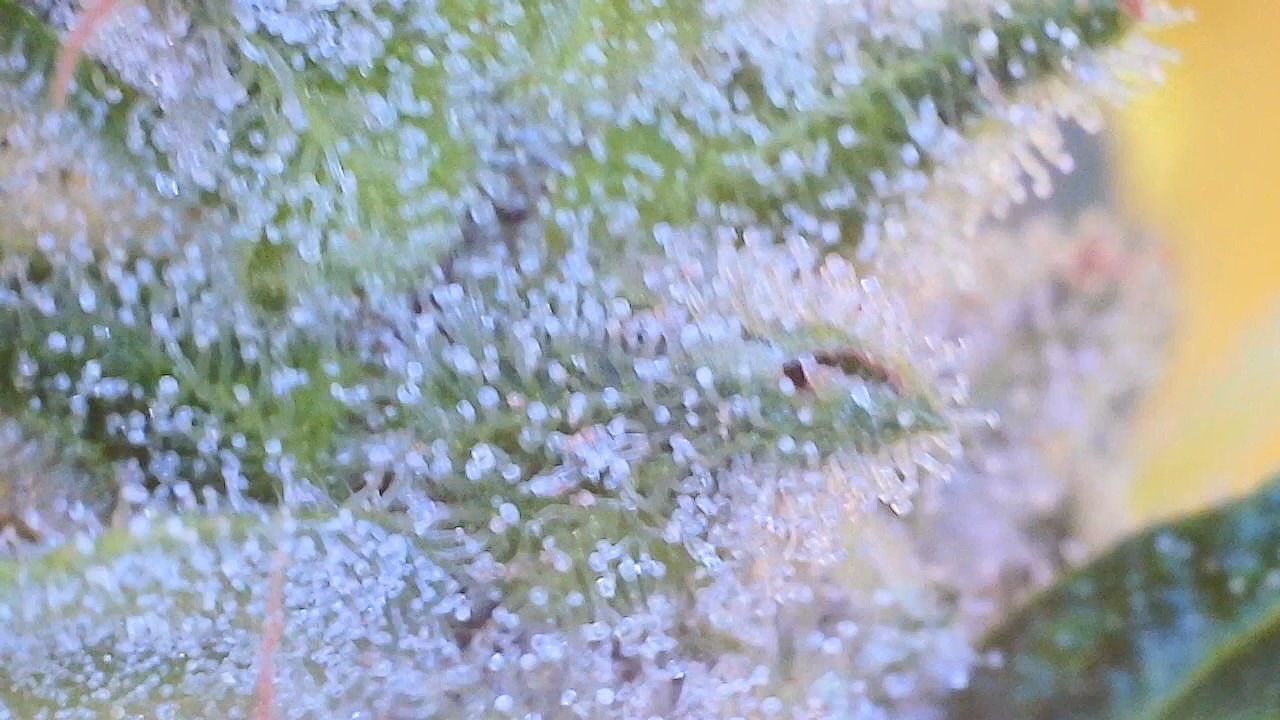
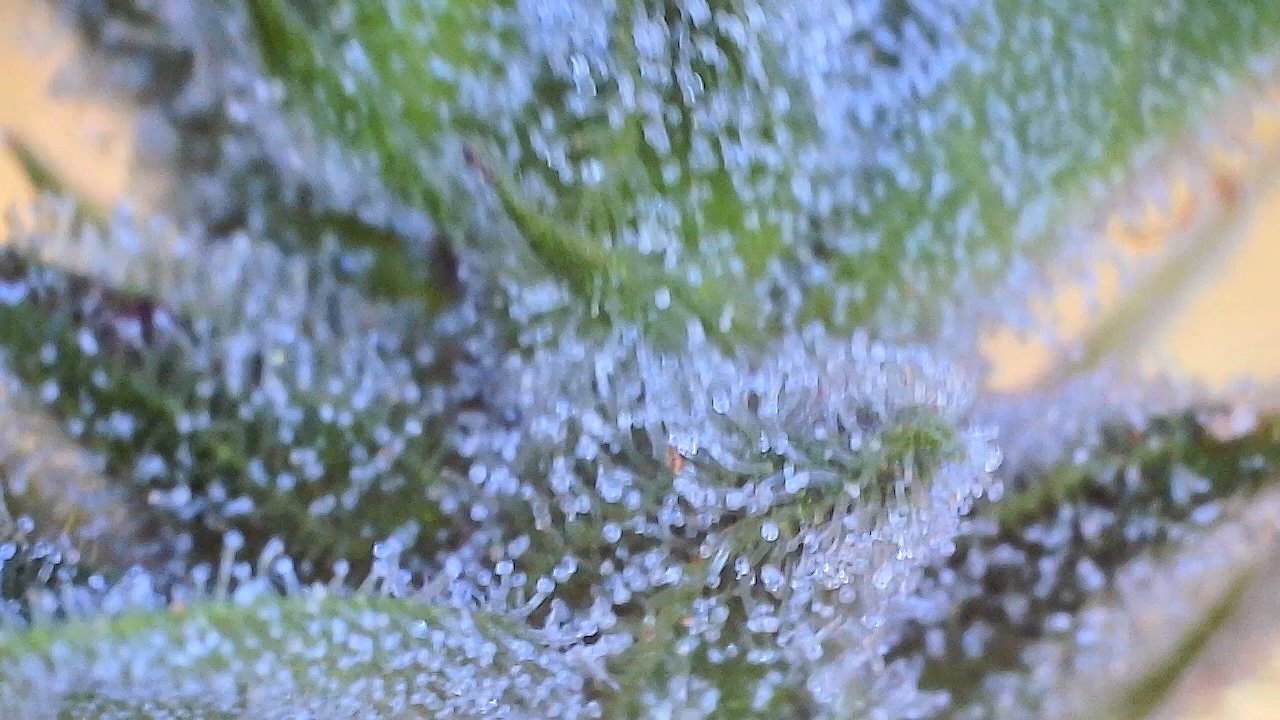
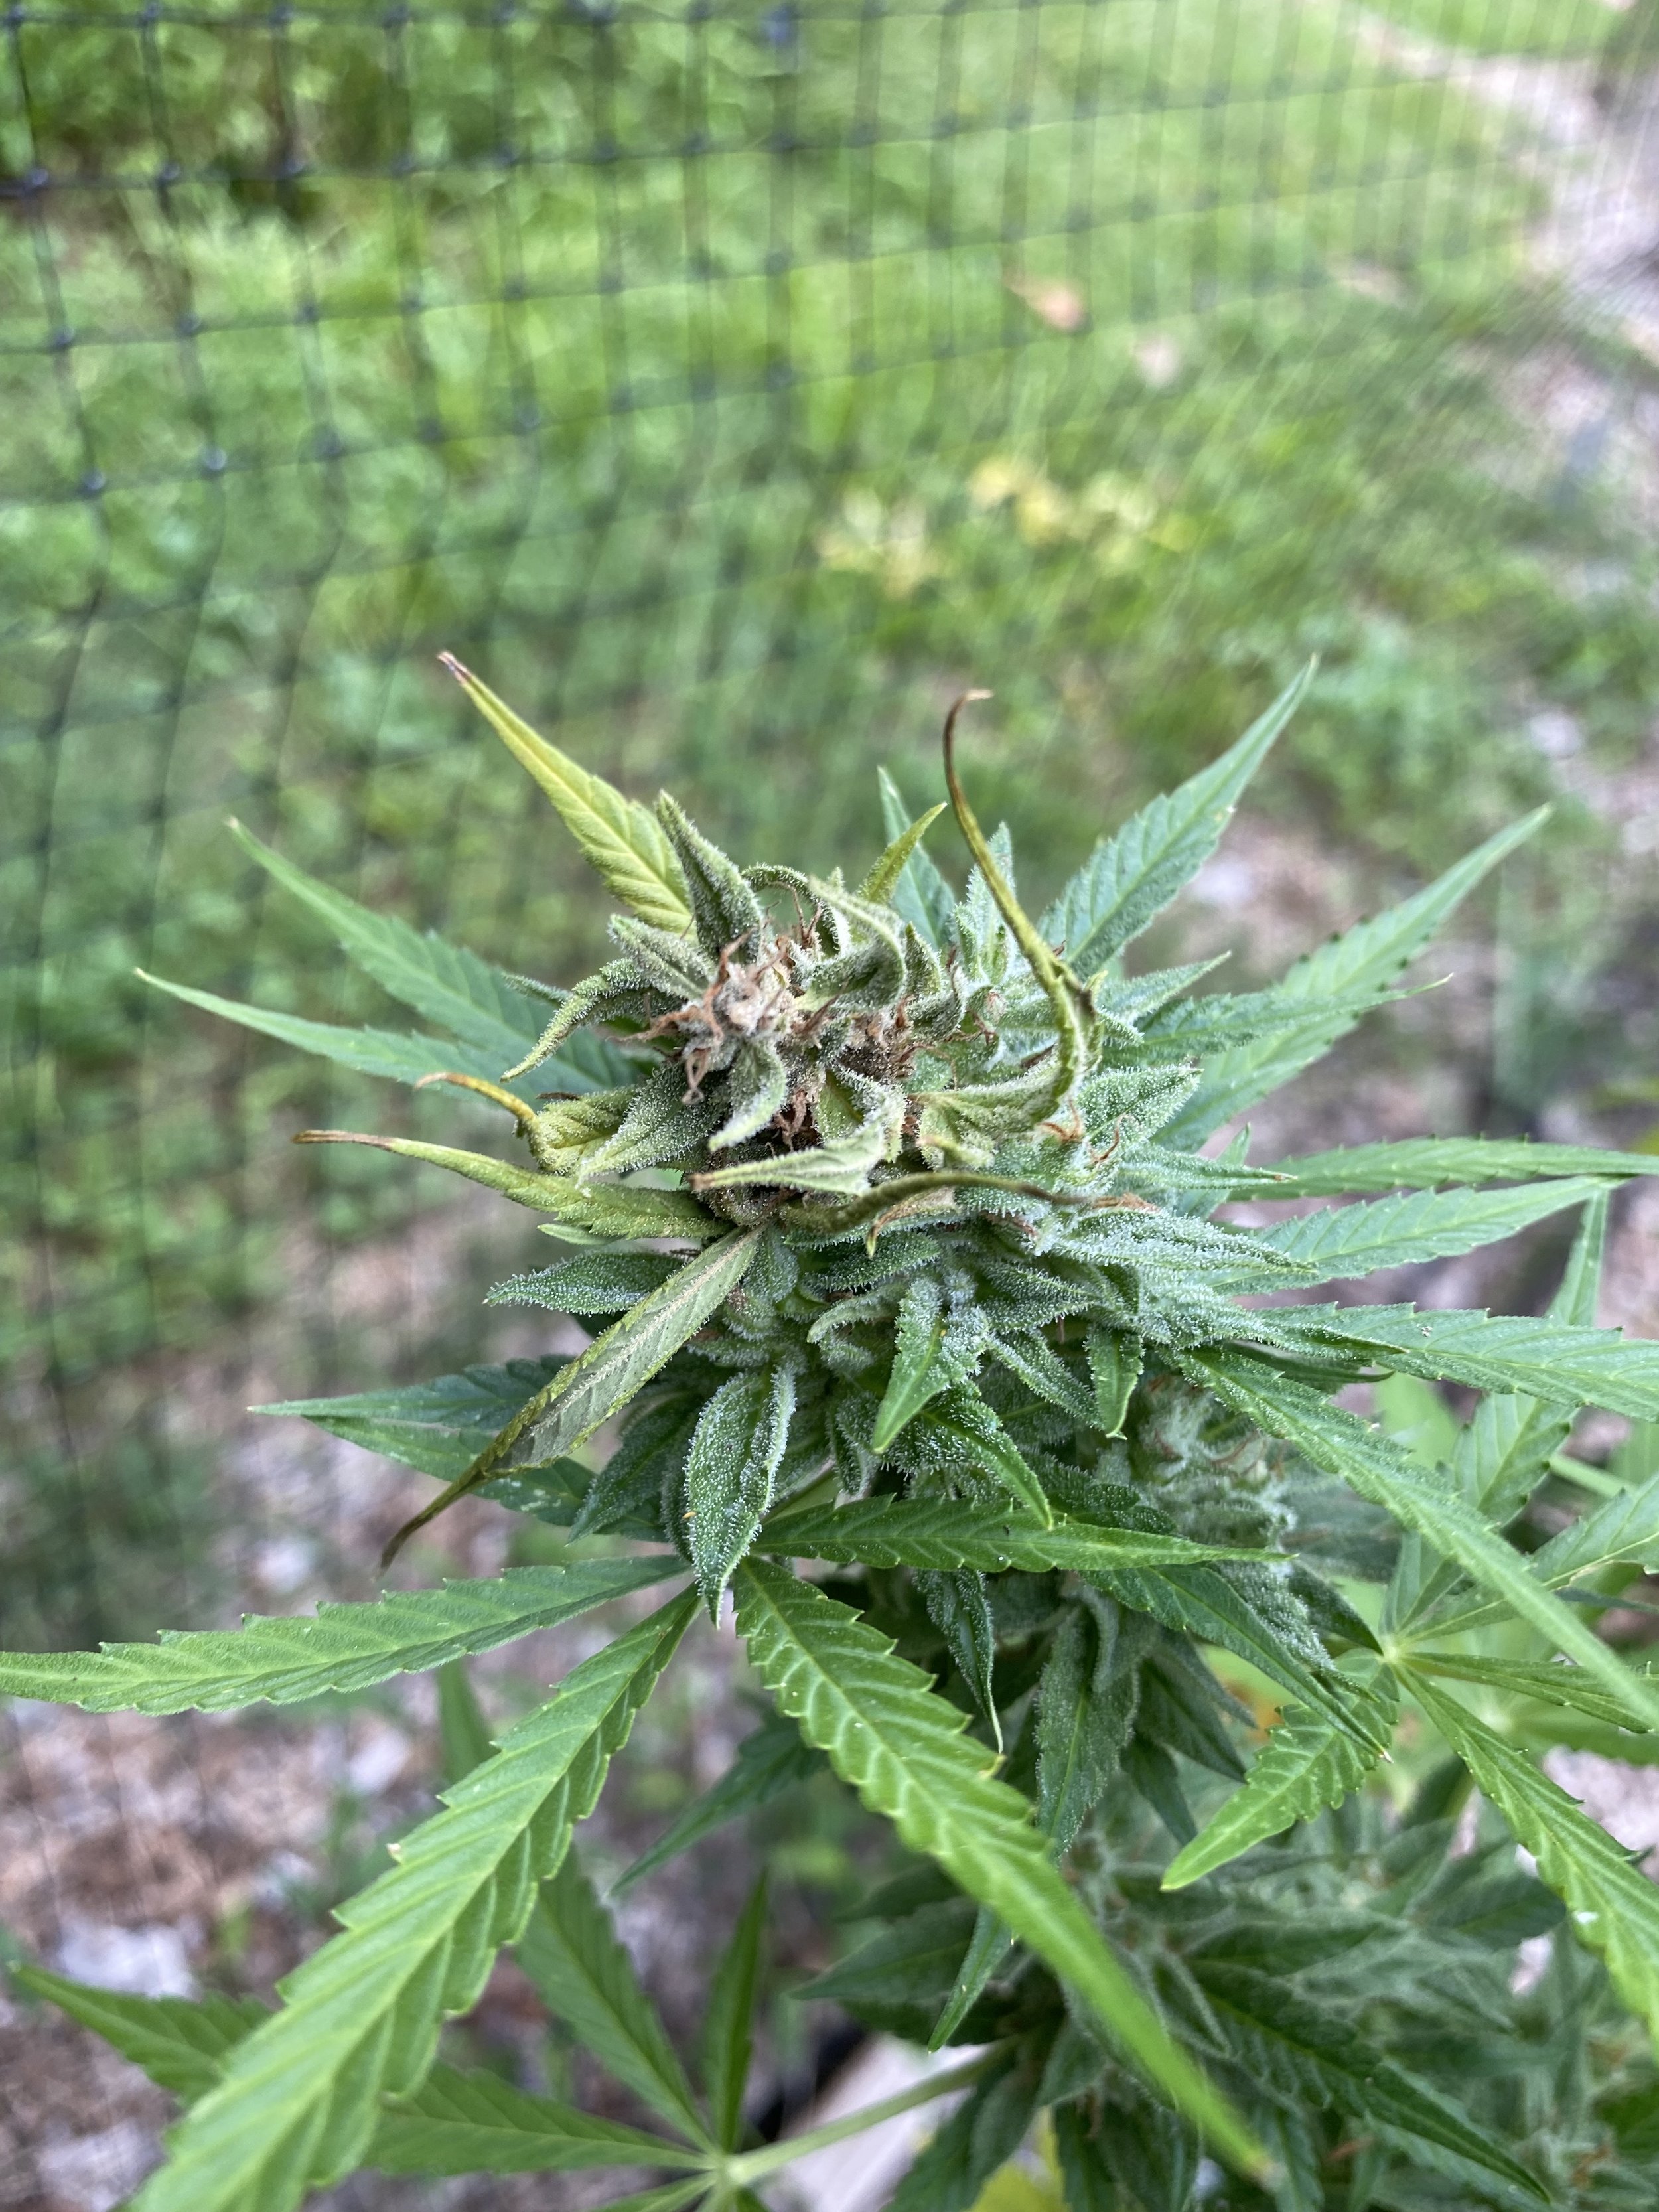
STEP 2: ANALYZE THE TRICHOMES
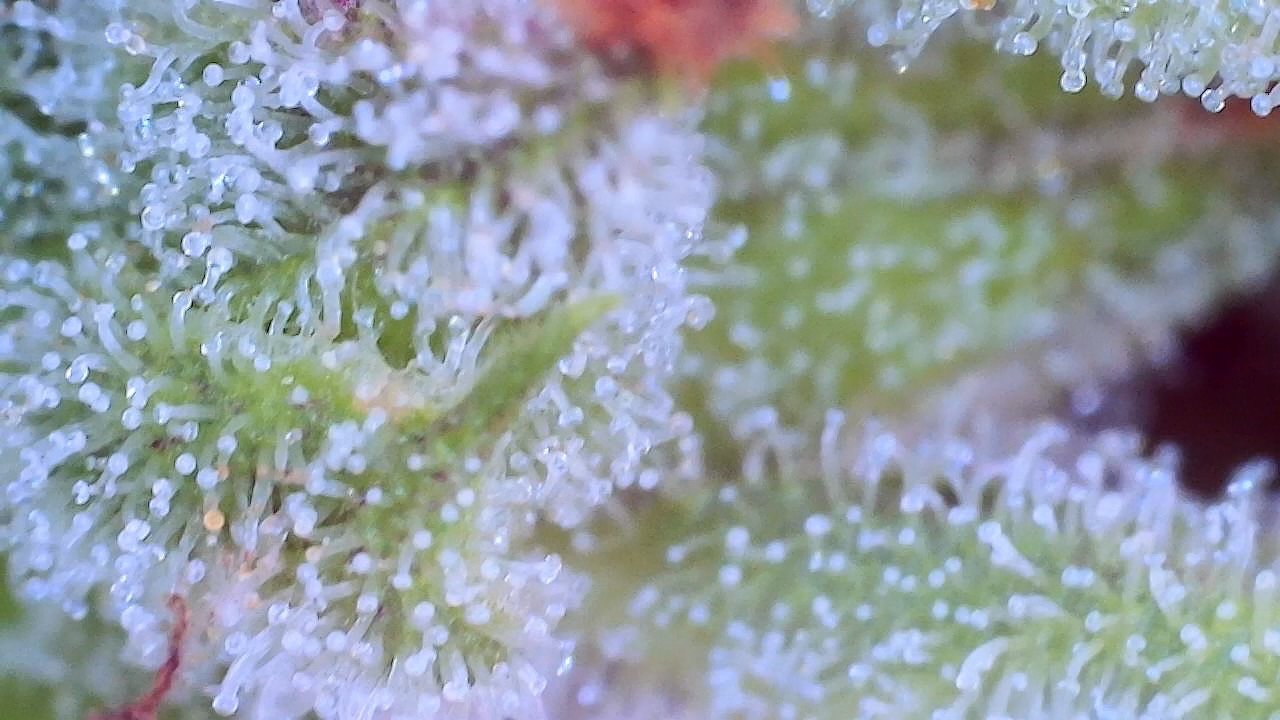
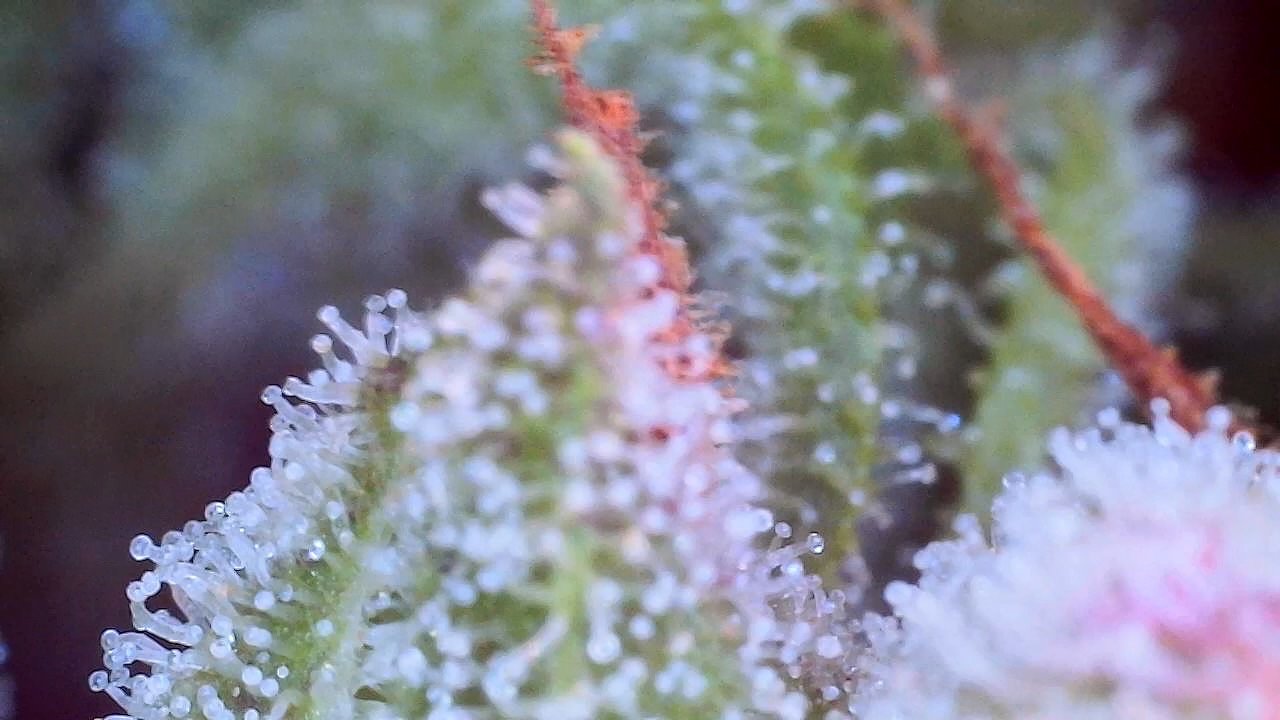
Some people use a jeweler’s loupe or even a magnifying glass. I recommend a wireless microscope that connects to your phone so you can see the trichomes go from initially clear…to cloudy…and finally they turn amber. We can view the trichomes as a symbol of “ripeness,” with clear being “underripe,” cloudy being the ripe sweet spot, and amber being a sign of the degradation or “over-ripening” process.
Clear trichomes are not yet potent enough.
Cloudy trichomes are the “just right” version with a solid terpene profile that produces a more energetic high.
Amber trichomes produce more of a sedentary, body “couch lock” effect, with a decent terpene profile.
Growers typically look for trichomes with an 80/20 mix of cloudy/amber trichomes as the sweet spot: the plant is ready for harvest.
The entire point of the extended process detailed below — of properly trimming, drying, and curing the cannabis — is essentially intended to preserve the plant’s trichomes.
One general rule is that you want to handle or touch the actual buds as little as possible, to avoid messing with all those important trichomes. Throughout this process, and as often as possible, try to handle the stem or stalk of the plant rather than touching the buds themselves.
A few more caveats:
UV light and other factors have a large effect on trichome production and maturation, so you may find that buds toward the top of your plant that get more light end up maturing faster than buds toward the bottom that receive more shade. For this reason, I recommend harvesting in stages (see below) rather than chopping the entire plant at once: you can grab the ripe stuff toward the top while giving the lower stuff more time to mature.
I’ve heard that autoflower trichomes don’t always go from clear-cloudy-amber as consistently as photoperiod strains, so it’s even more of a judgment call.
Step 3: THE DARK PERIOD
There’s plenty of debate about this and some claim it’s malarkey, but many growers recommend placing your plants into total darkness for 48-72 hours just before harvesting.
As with other methods to intentionally stress a plant to increase production (i.e., tomatoes), the idea that this dark period “scares” the plant into realizing its days are numbered, and it will draw as much energy as possible into the calyxes to increase chances of reproduction/survival and ultimately boost the tetrahydrocannabinol (THC) content and other cannabinoid content of your buds.
I’ve done it both ways and don’t have any great insights here, but here’s a slightly more scientific review from GrowWeedEasy.
When I go this route, I put the plant in a small powder room in our basement. I remove the lightbulb, turn on the bathroom fan, and place another small fan in there softly blowing on the buds to help with moisture, humidity and smell. And I towel the door like a college freshman.

WEEK 10-14: METHODS OF HARVESTING, DRYING AND TRIMMING
Once you’ve decided your plant is ready for harvest, you have a few more decisions to make. There’s no “right” answer on any of these, it’s more about your individual preferences or factors—what works best for you. You’ll want to decide…
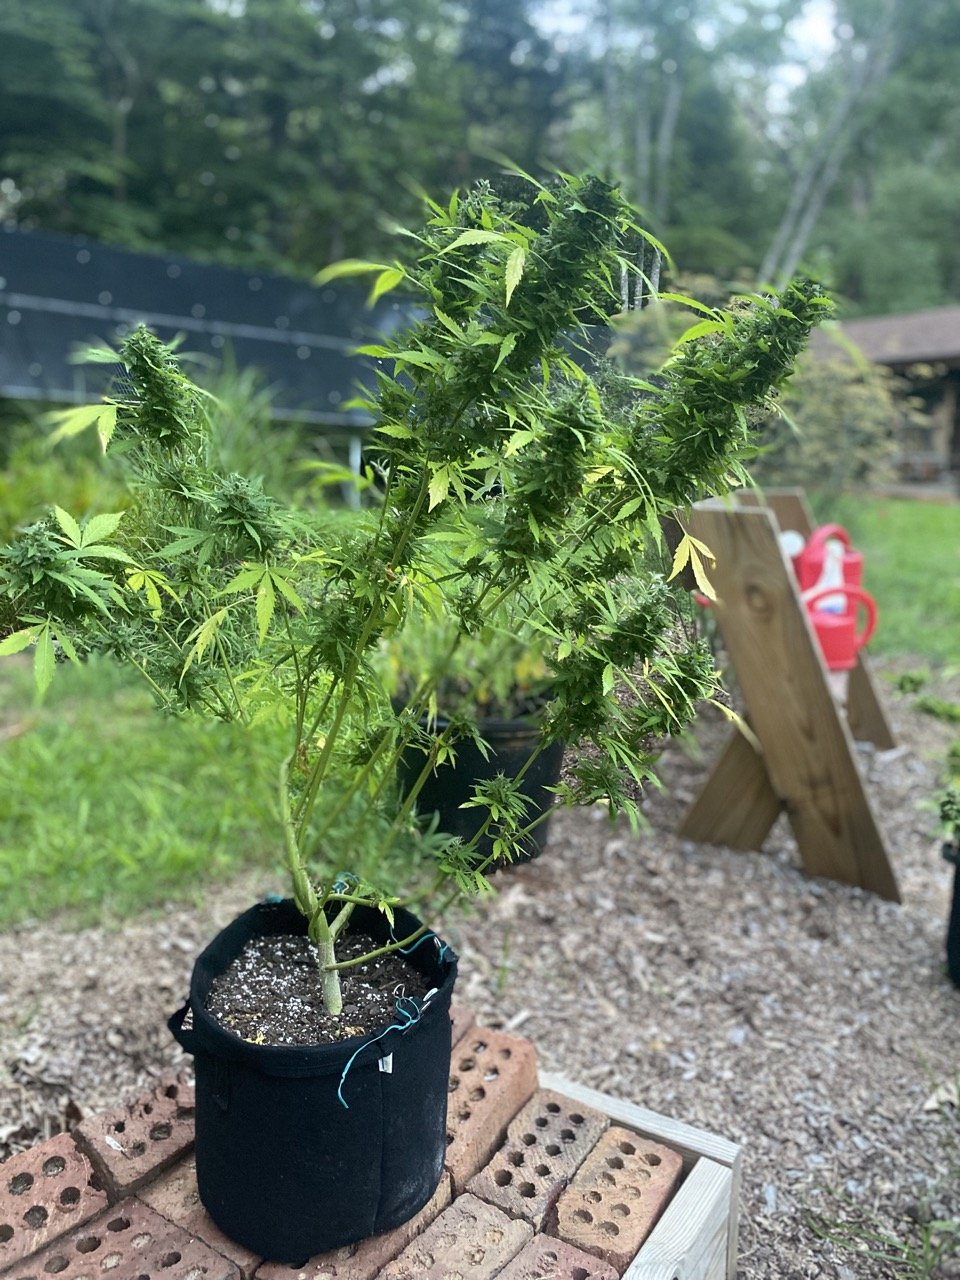
Question 1: Full vs. Partial Harvest
Full Harvest: If your autoflower plant is on the smaller side, and/or if all the buds/trichomes seem to be relatively consistent in their ripeness…you probably want to harvest the entire plant at once.
Use your gardening shears and simply cut the main stalk close to the soil.
Partial Harvest: If your plant is larger and/or it seems like certain parts are more mature than others, and/or if you’d rather process your plant in stages due to the amount of time or space you have…you may want to do a partial harvest.
Use shears to cut stems from (likely) the top half of your plant, or whatever looks most mature.
Question 2: Hang dry vs. rack dry
Once you’ve chopped your plant (or part of it), you can’t just consume it as is. It’s still filled with moisture, and needs to slowly dry out for a while, typically over the course of 5-14 days in a dedicated drying room.
In all cases, a good drying space should be dark, cool (60-70° F), and dry (around 50-60% relative humidity), with constant airflow (an oscillating fan, for instance).
There are two main ways to dry your plant.
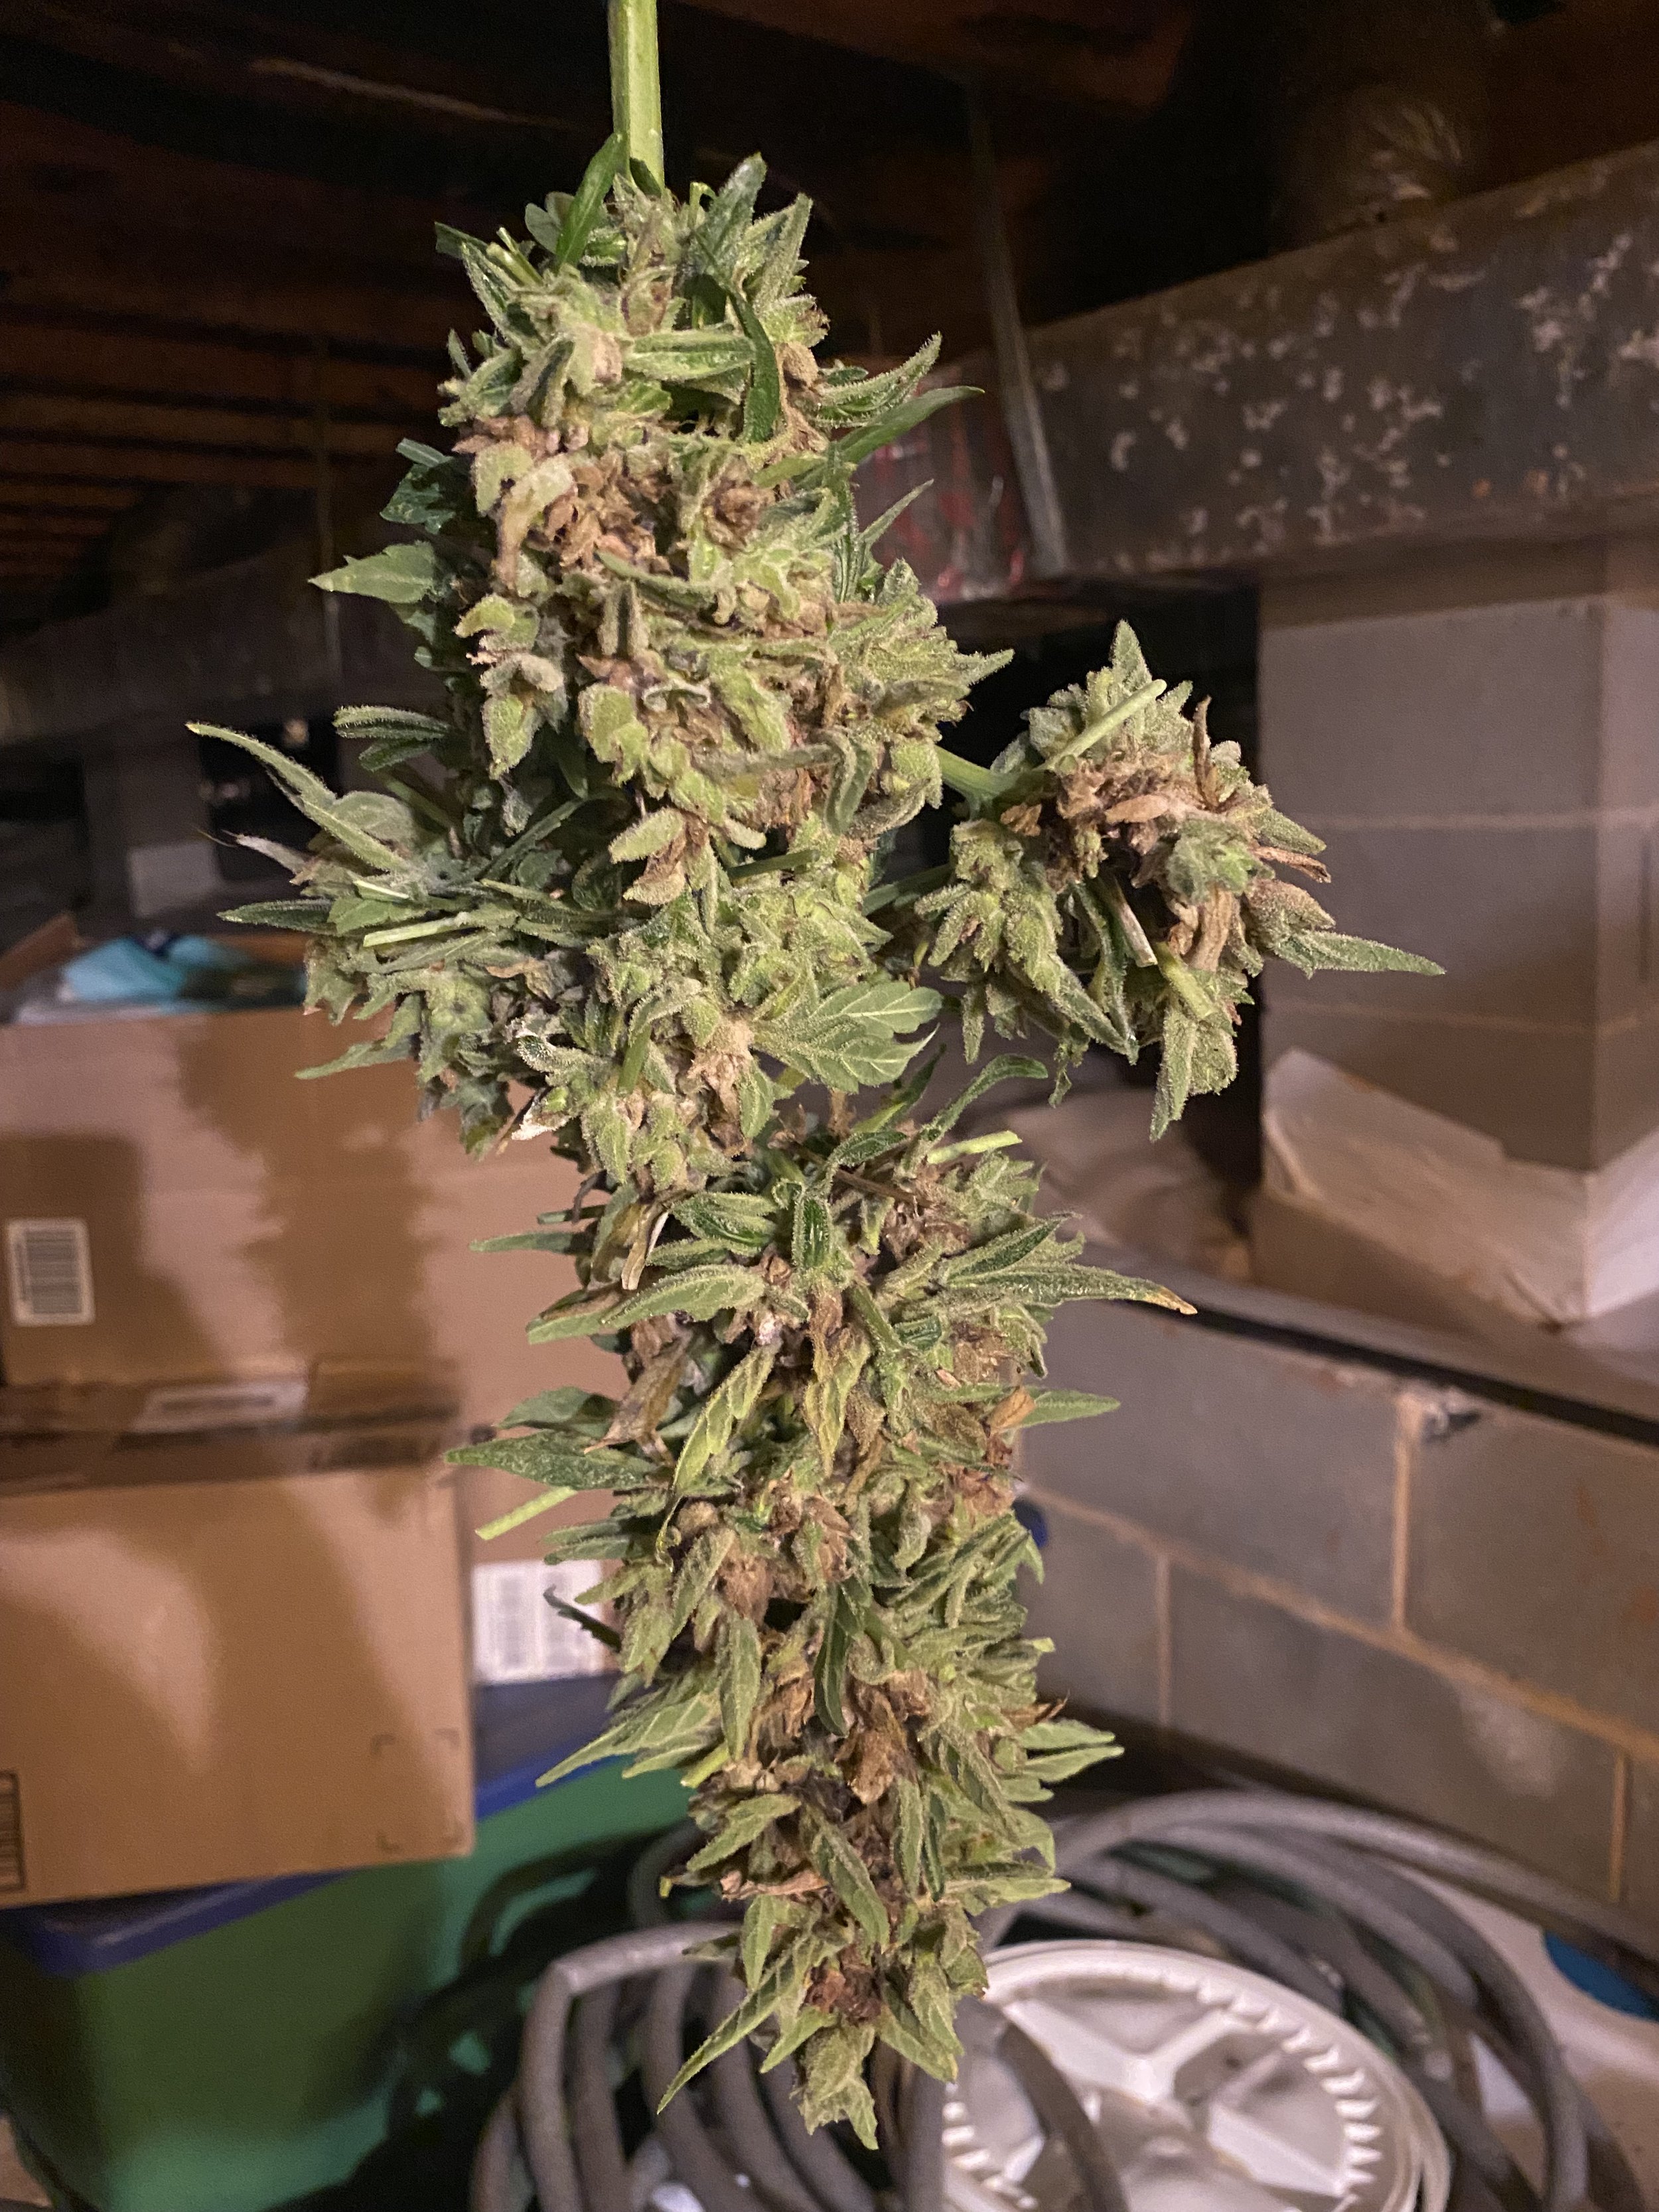
Hang Dry: Often the best choice when you’ve harvested your full plant at once, this involves hanging the plant upside down from a makeshift clothesline or hanger. This option is easier/quicker/cheaper to get going, but requires enough space to hang entire plants in a drying room.
My first attempt at growing, I tried this method, hanging the plants from a hanger in my basement with an oscillating fan blowing on them.
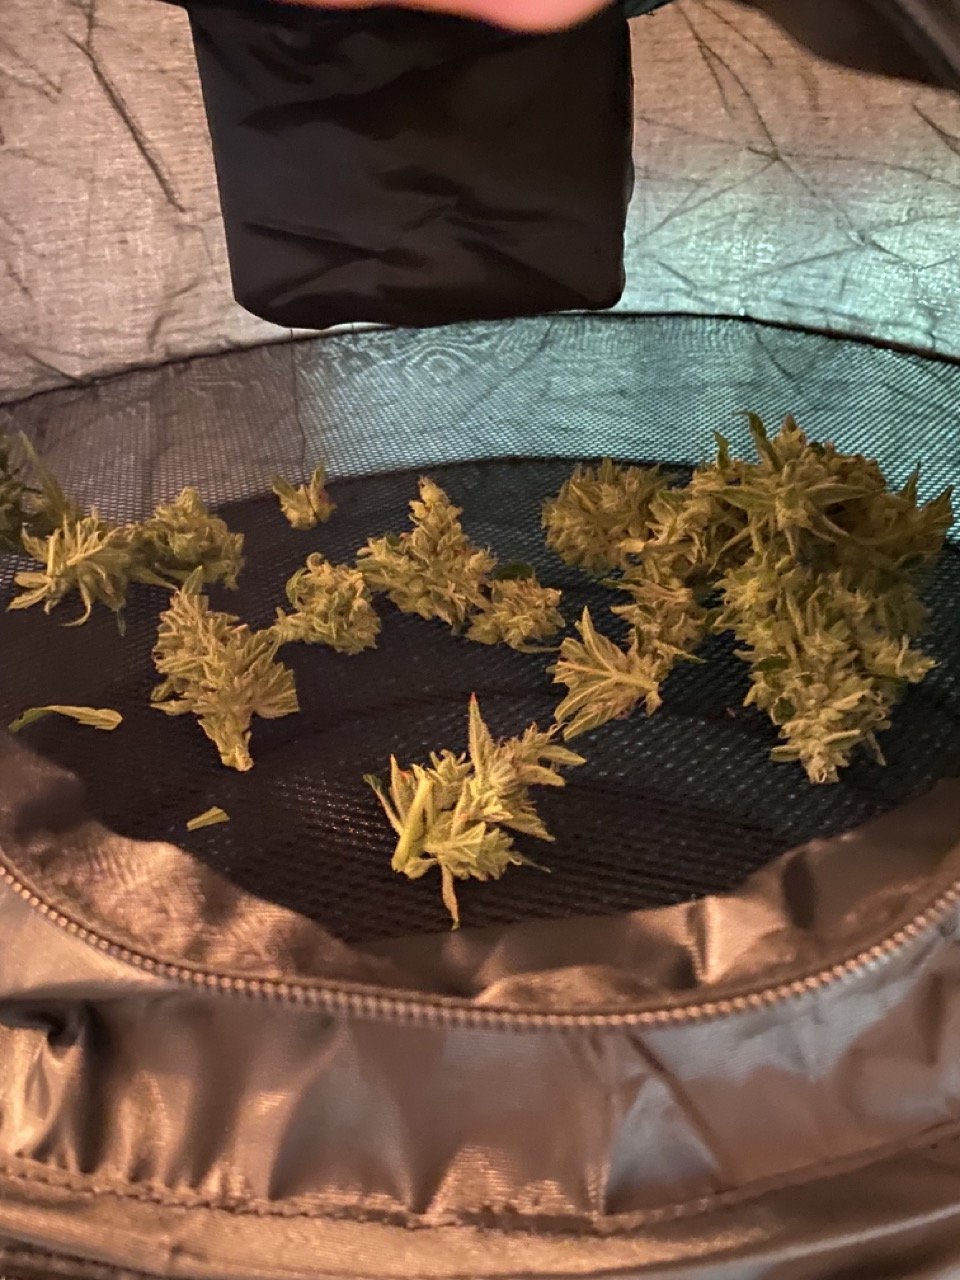
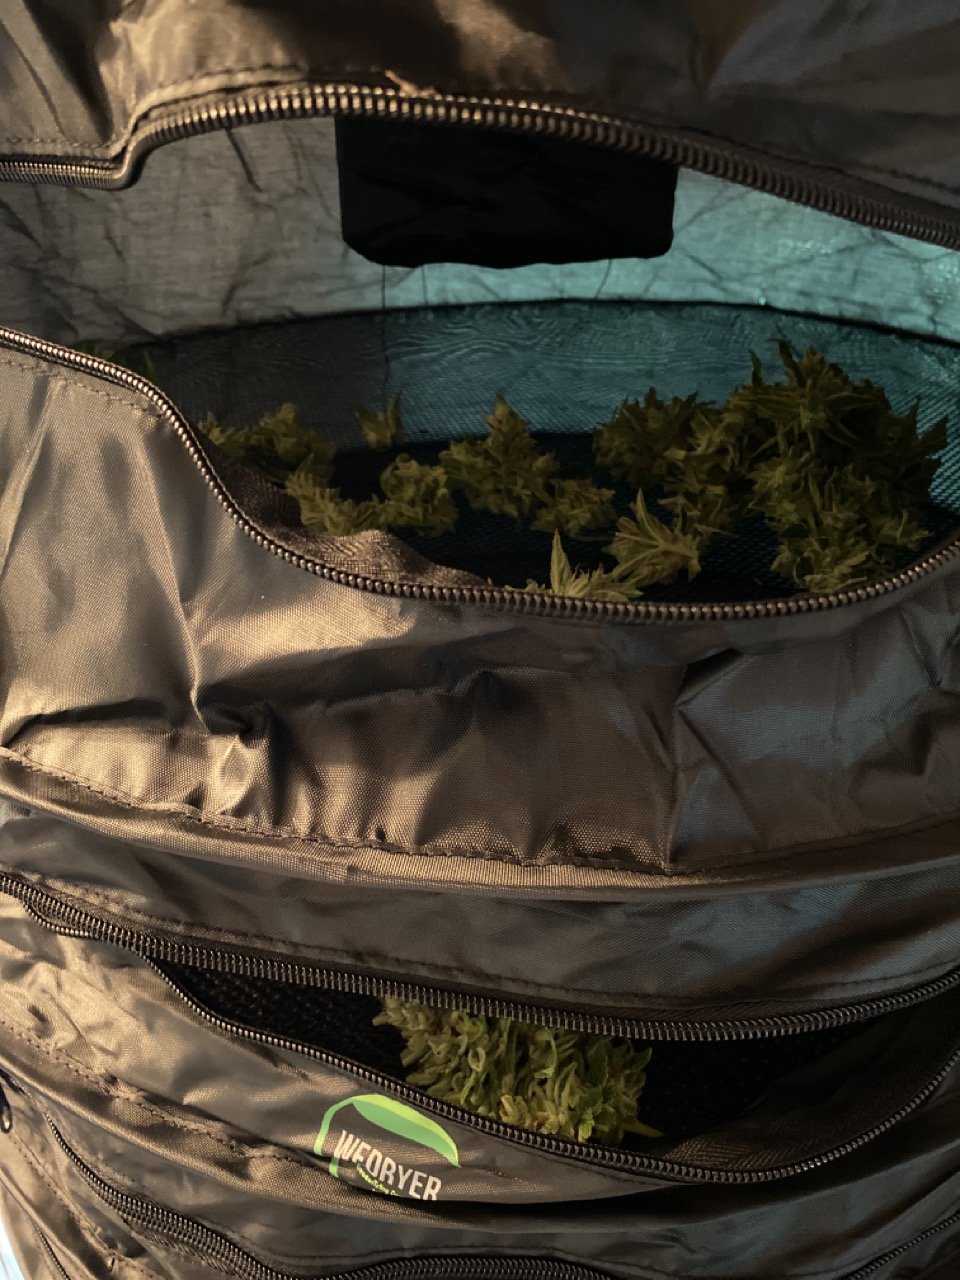
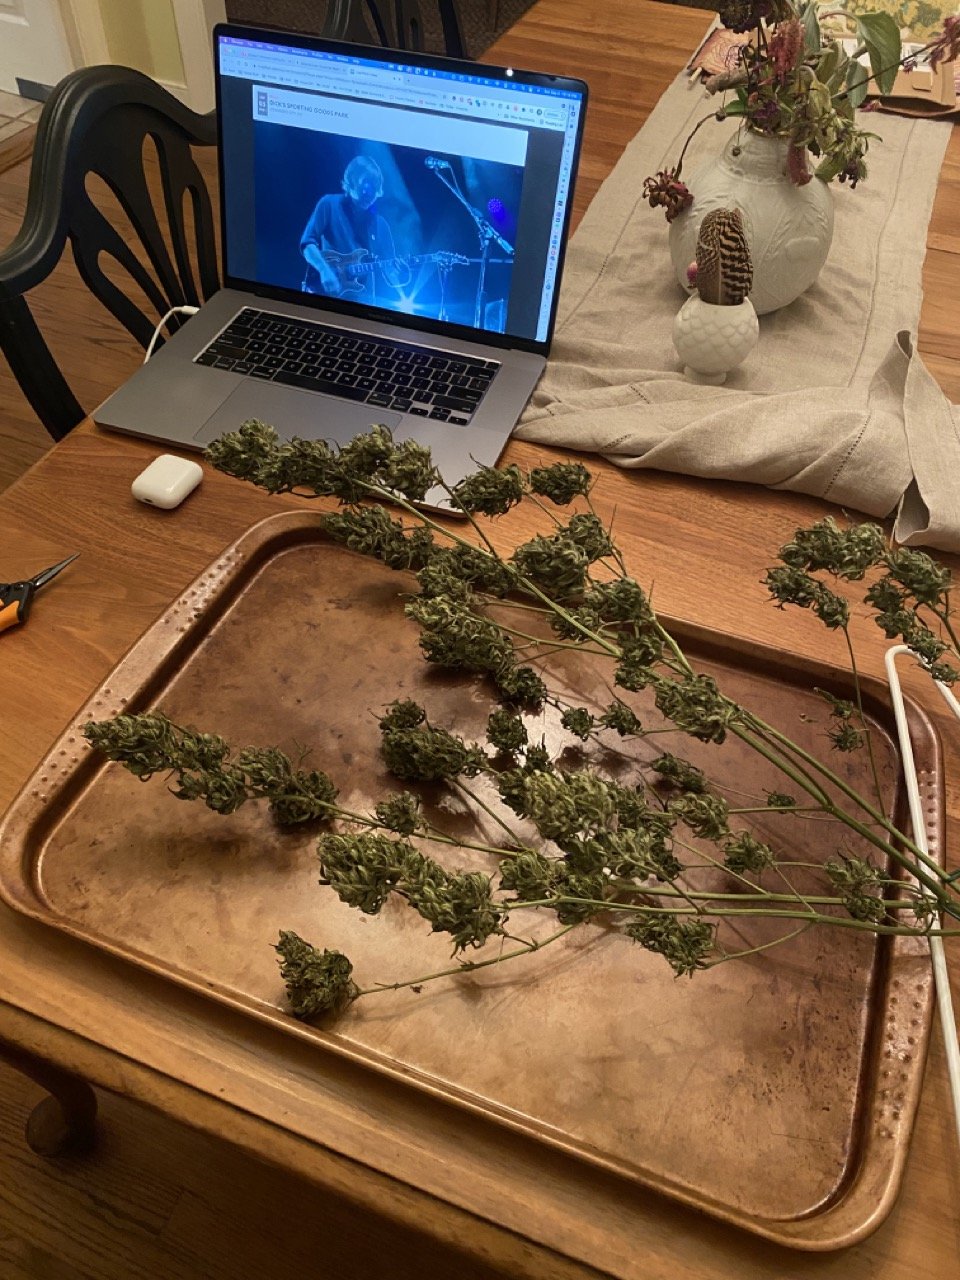
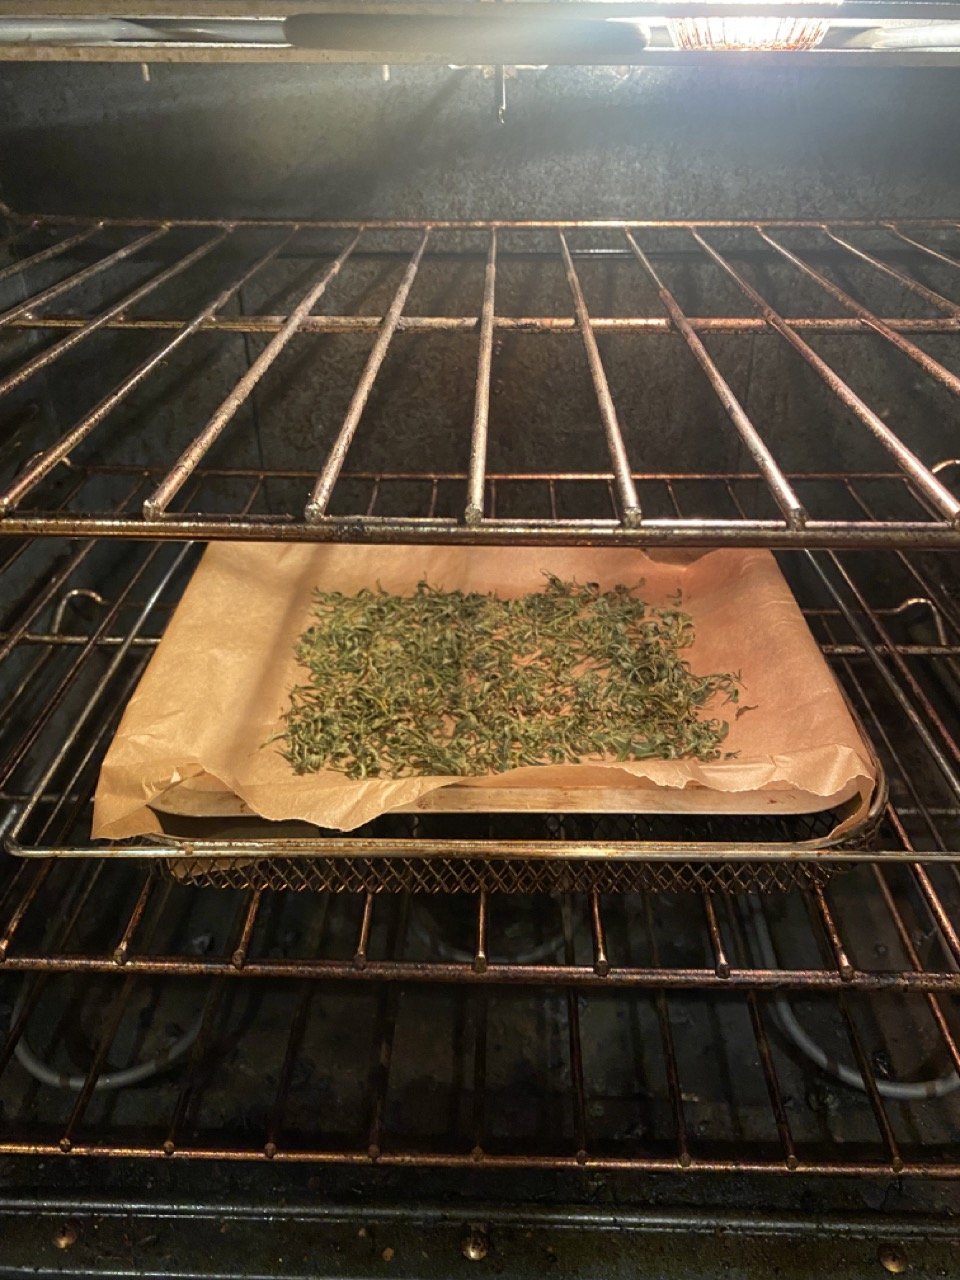
Rack Dry: Often a good choice for a partial harvest, this involves laying cut stems or buds on a flat drying rack or mesh. This option is a bit more labor intensive and typically requires a special drying rack, but is a good way to save space and it’s likely more discreet than it is to hang giant stalks out in the open.
I really like the WeDryer XL system. It looks like a large, collapsible laundry hamper, with six individual mesh racks that zipper shut. At the top of the hanging barrel is a fan for airflow and carbon block filter to minimize smell. I hang this guy in my outdoor studio where I can control the temperature.
One downside is that the buds can get smushed on one side, so it’s helpful to rotate them every couple days.
Finally, your choice of whether to Hang Dry vs. Rack Dry may impact how you choose to TRIM your buds…
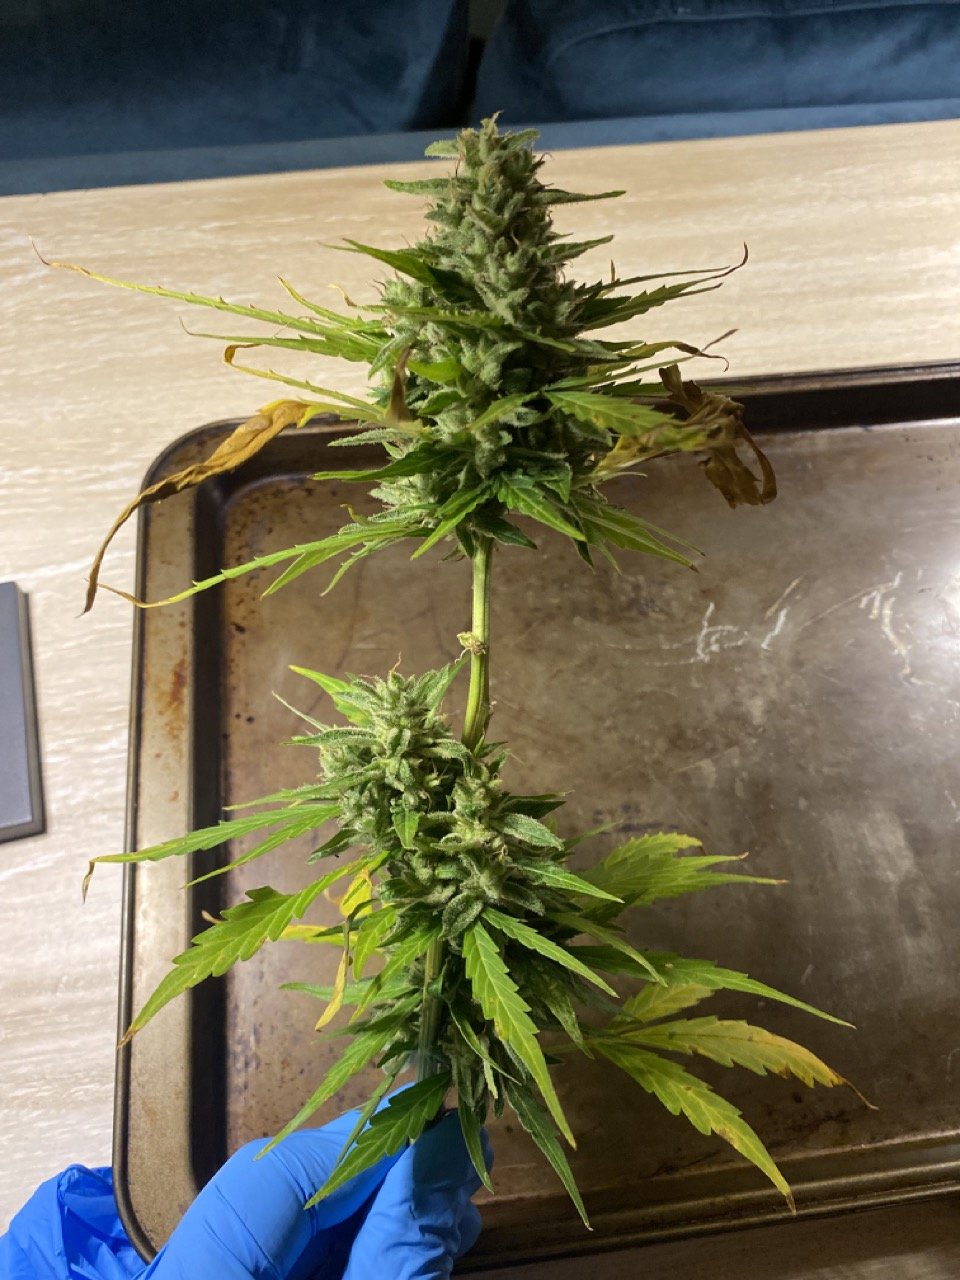
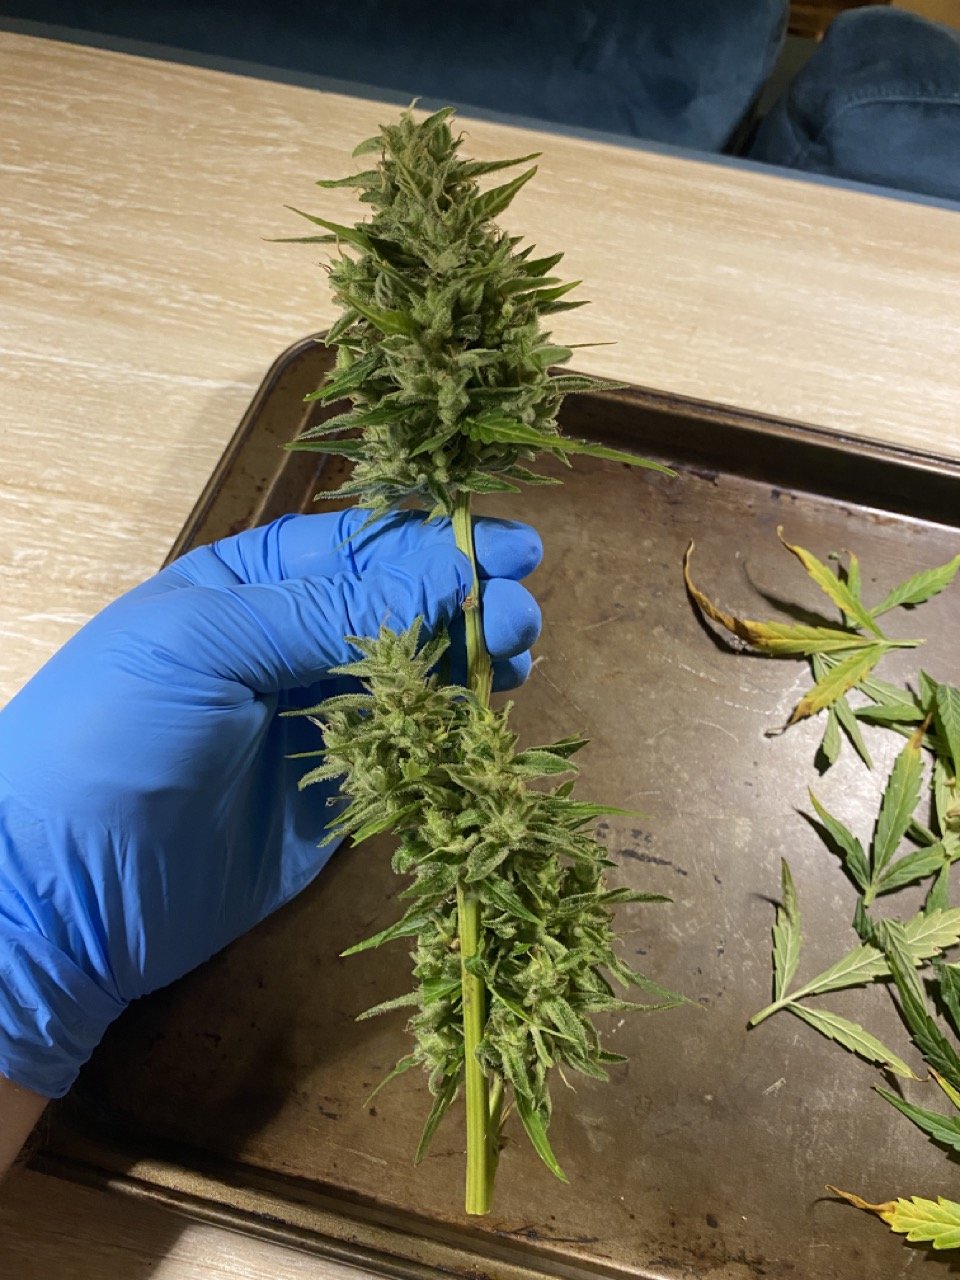
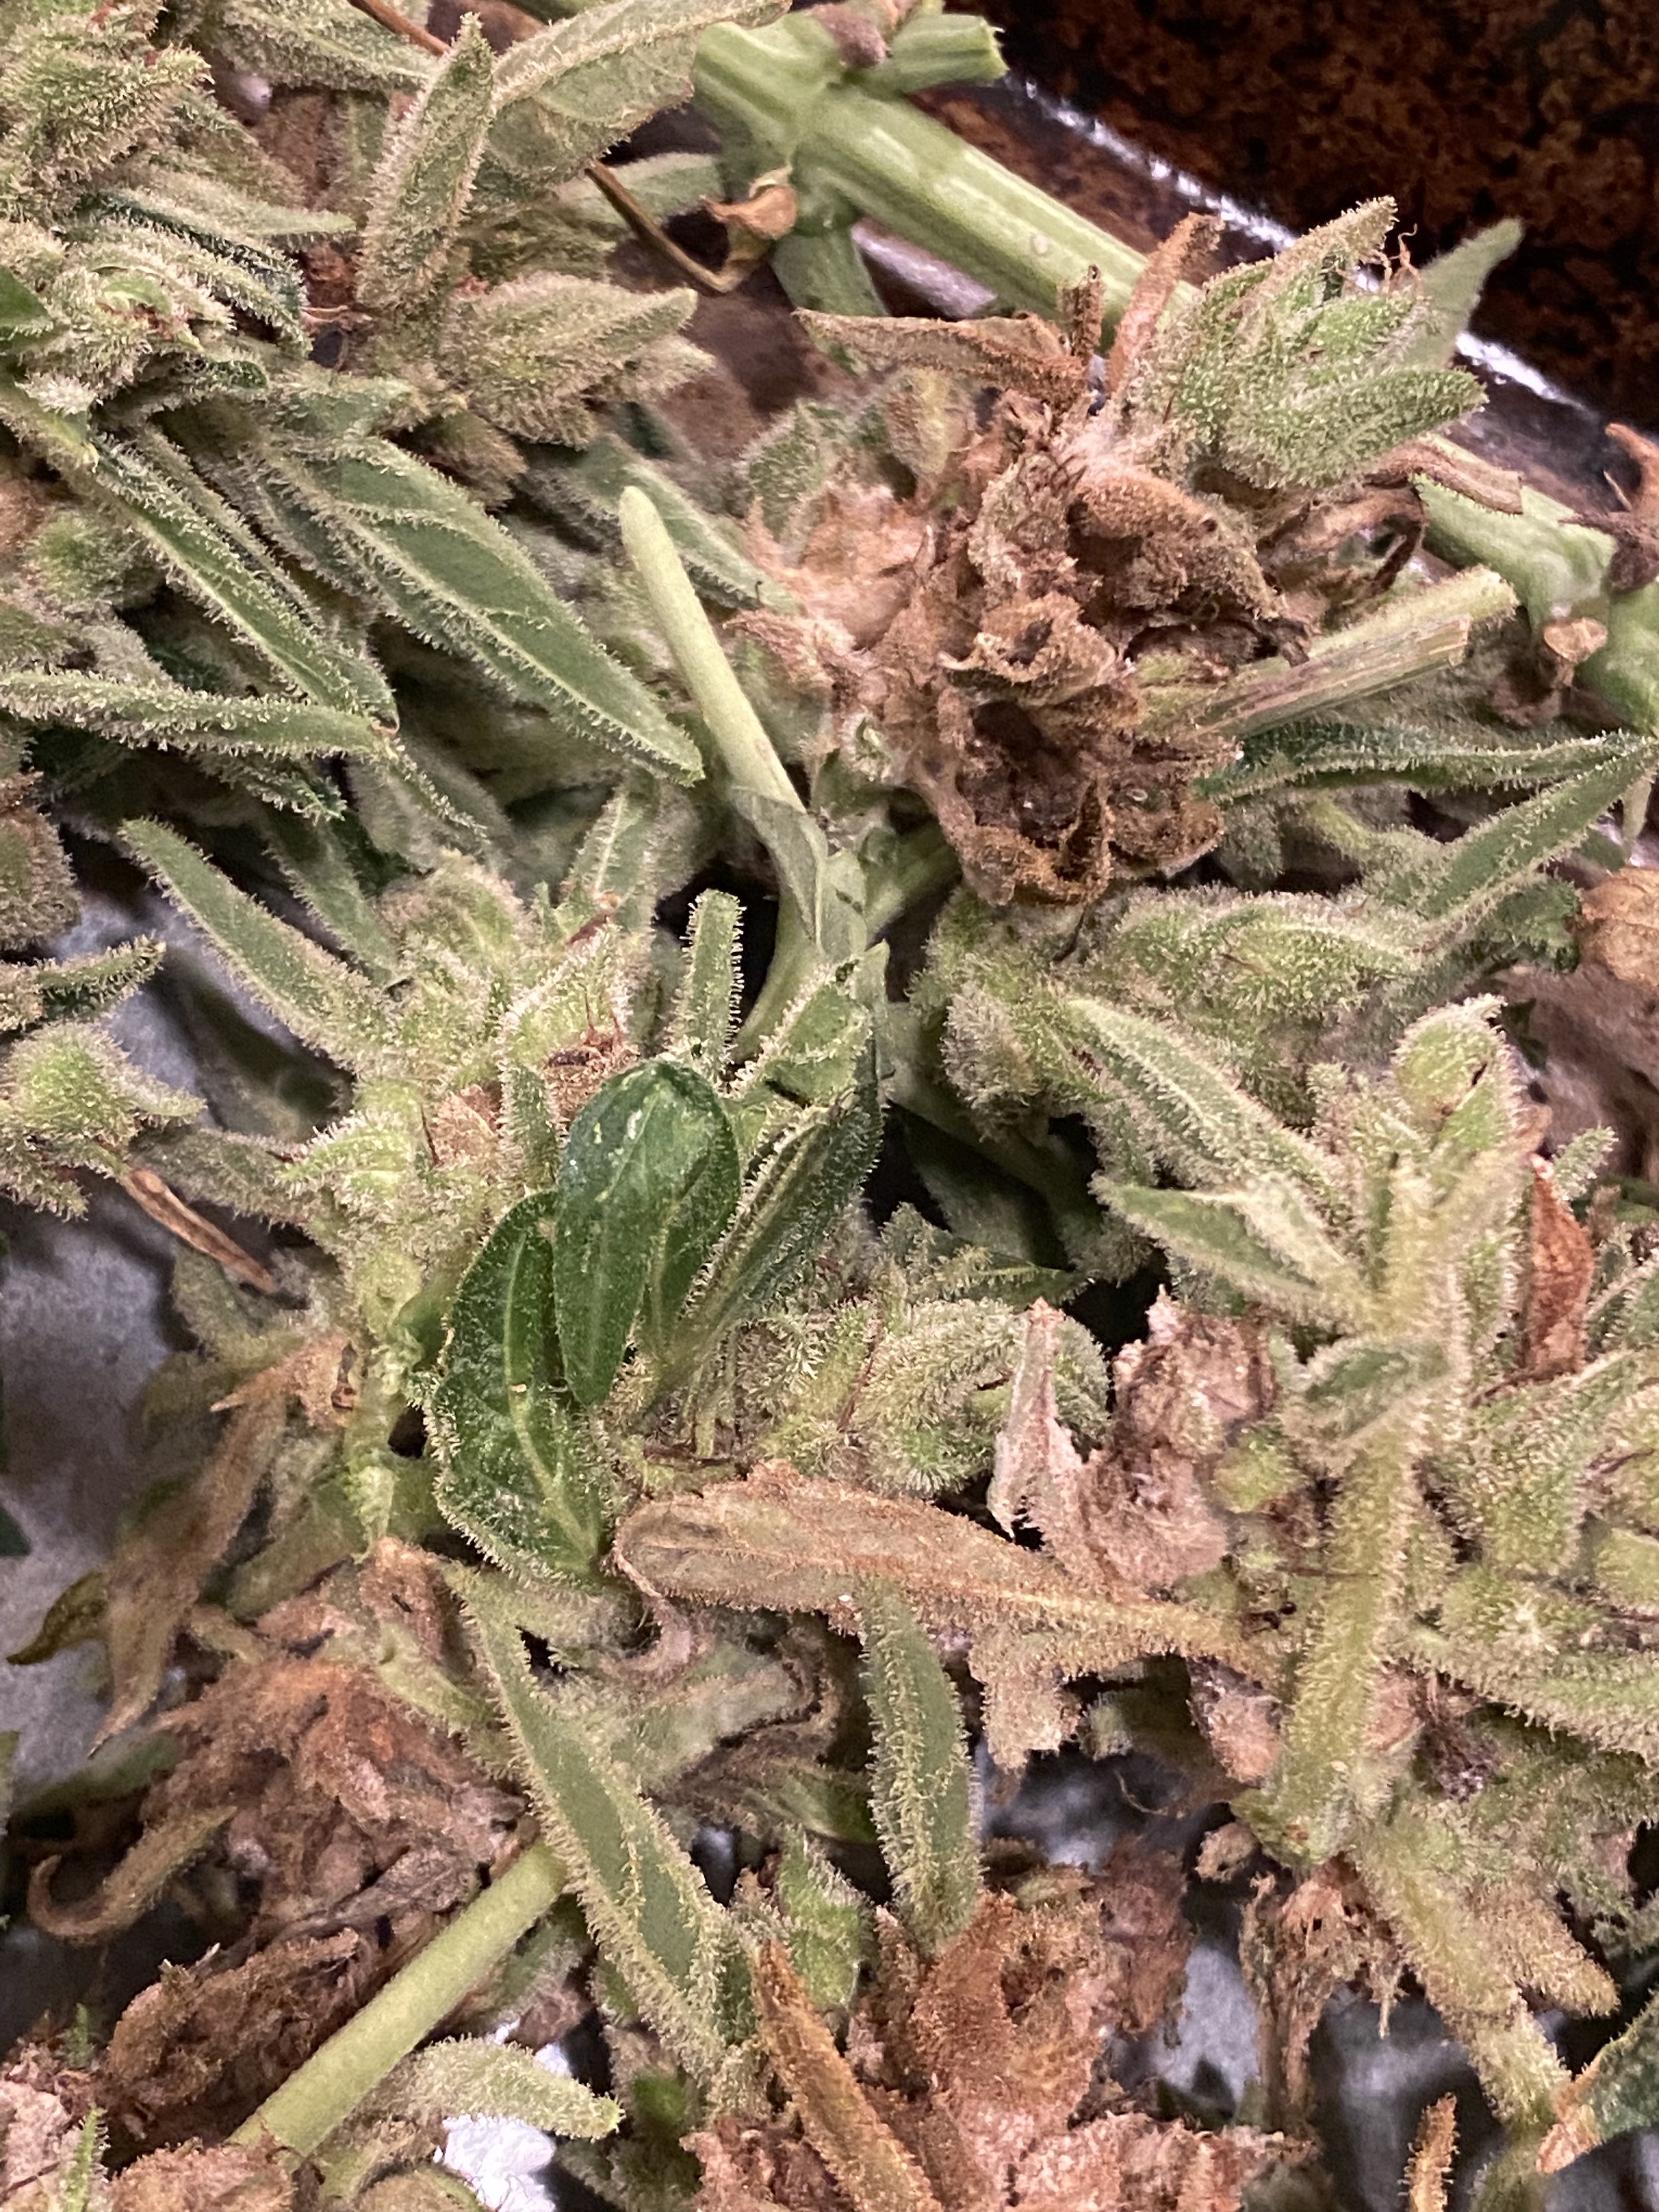
Question 3: Wet trim vs. dry trim
When you chop your plant, there’s still a good amount of moisture in the buds, stems/stalks, and leaves. There are different types of leaves on your plant—“fan leaves” vs. “sugar leaves”—that should be distinguished from each other and from the buds themselves.
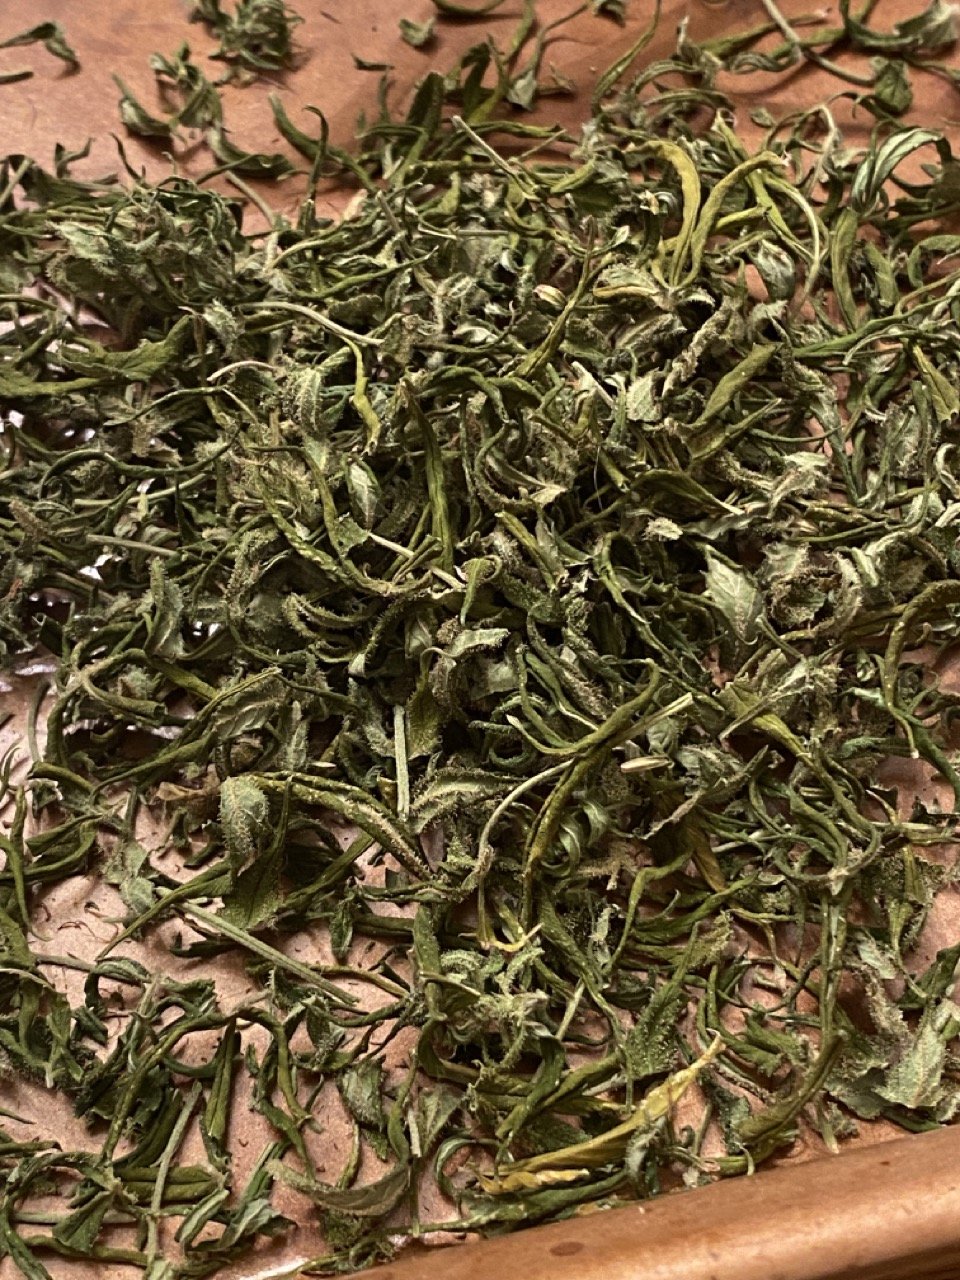
Fan leaves are the larger, iconic, 5-pronged leaves that you see on album covers. They contain no trichomes and are mostly useful for photosynthesis.
The aptly named sugar leaves are the ones that look more frosty (because they contain trichomes). Fan leaves will definitely be removed, as will some/most/all of the sugar leaves.
TRIMMING is about how you choose to process these excess leaves of your plant with scissors, and you can do this one of two ways:
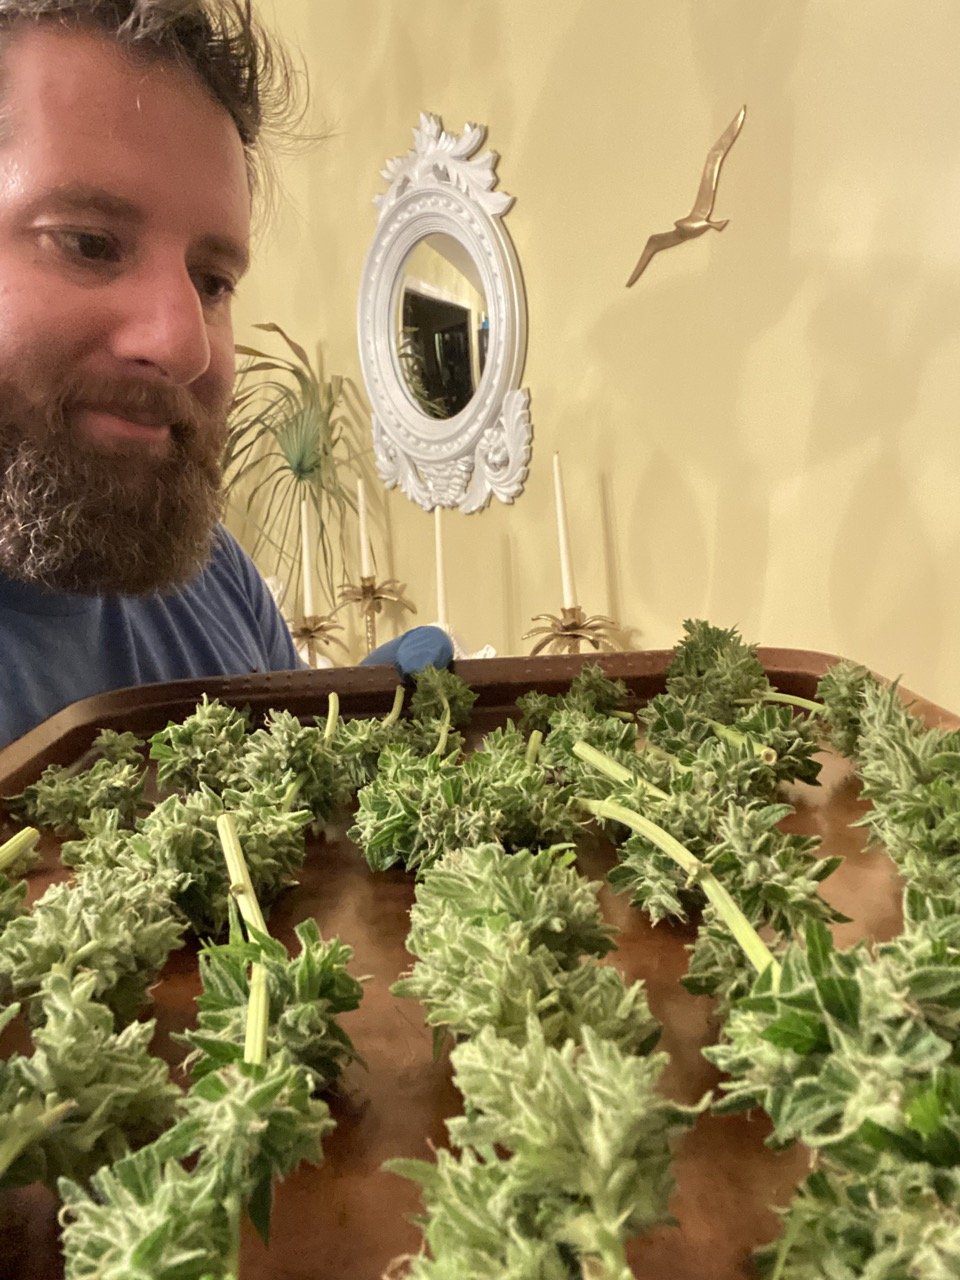
Wet Trim: This is when you trim the fan and sugar leaves just after chopping your plant, before drying. It’s easier, faster, and probably better for beginners (since it’s easier to know what to trim and what to keep at this stage). It takes less time for your buds to try and it’s also likely a better option if you choose to rack dry. This is my preferred option.
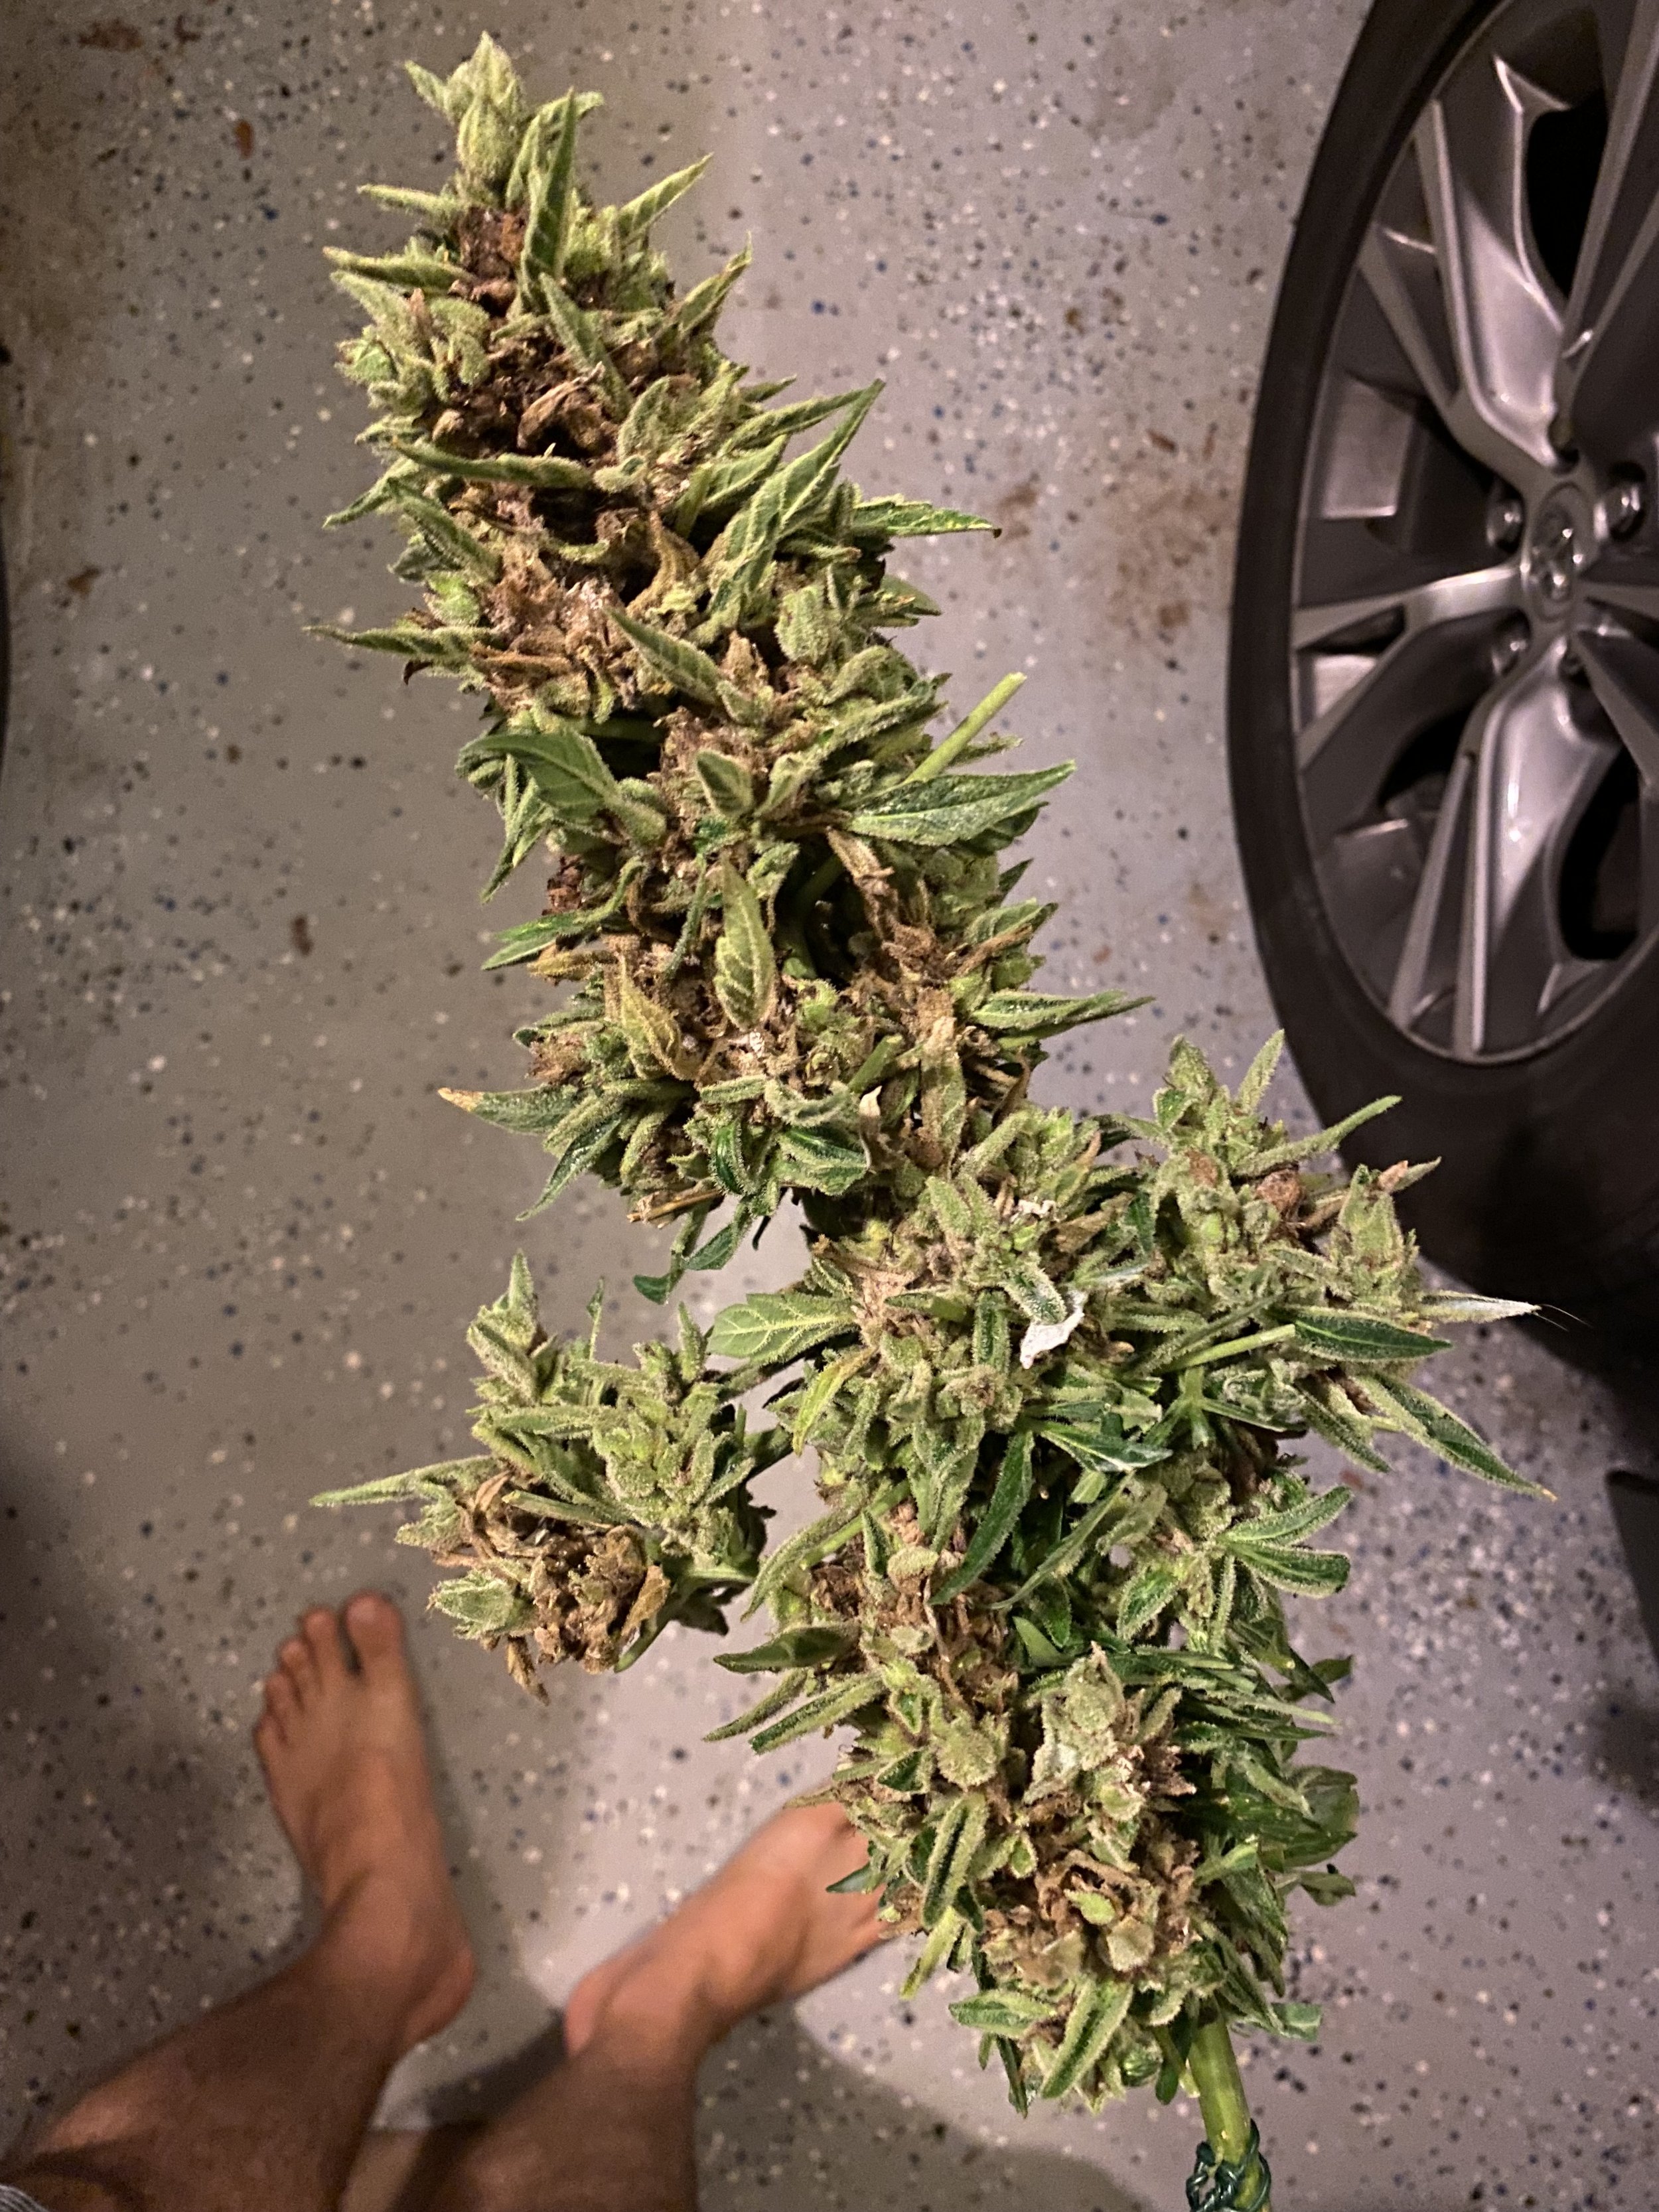
Dry Trim: This is when you trim the fan/sugar leaves after the plant is dry. The sugar leaves will have shriveled up and it’s a bit harder to distinguish them from the coveted buds and get your shears in there to remove them.
With both methods, wear nitrile gloves and handle the plants by the stalk/stem rather than grabbing the buds.
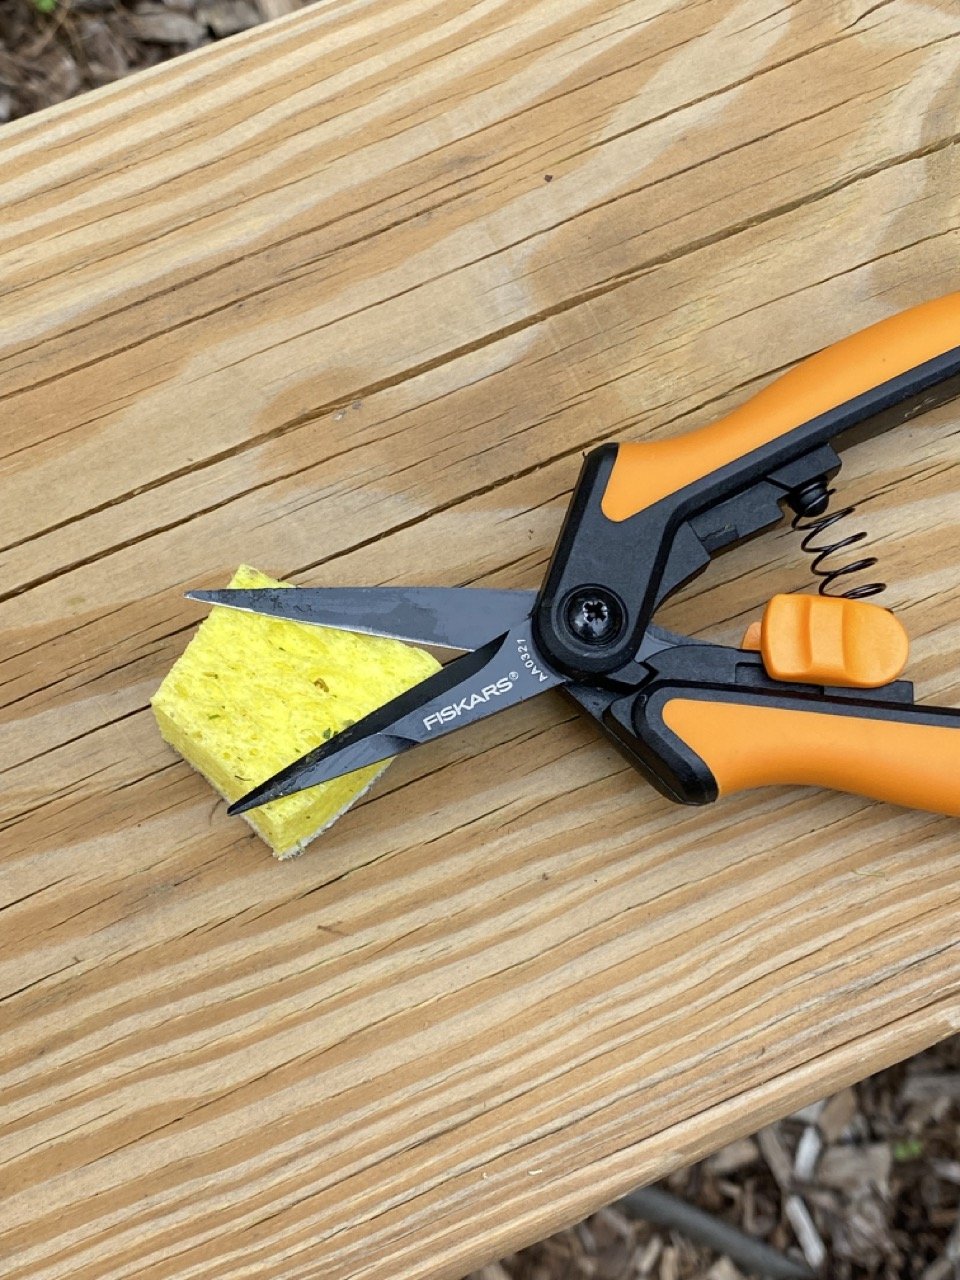
Have 70% isopropyl alcohol on hand (squirted into a sponge or paper towel) to regularly clean your gardening shears or they’ll start to get really sticky. This alcohol is also important to sanitize shears if they encounter any moldy portions of the plant.
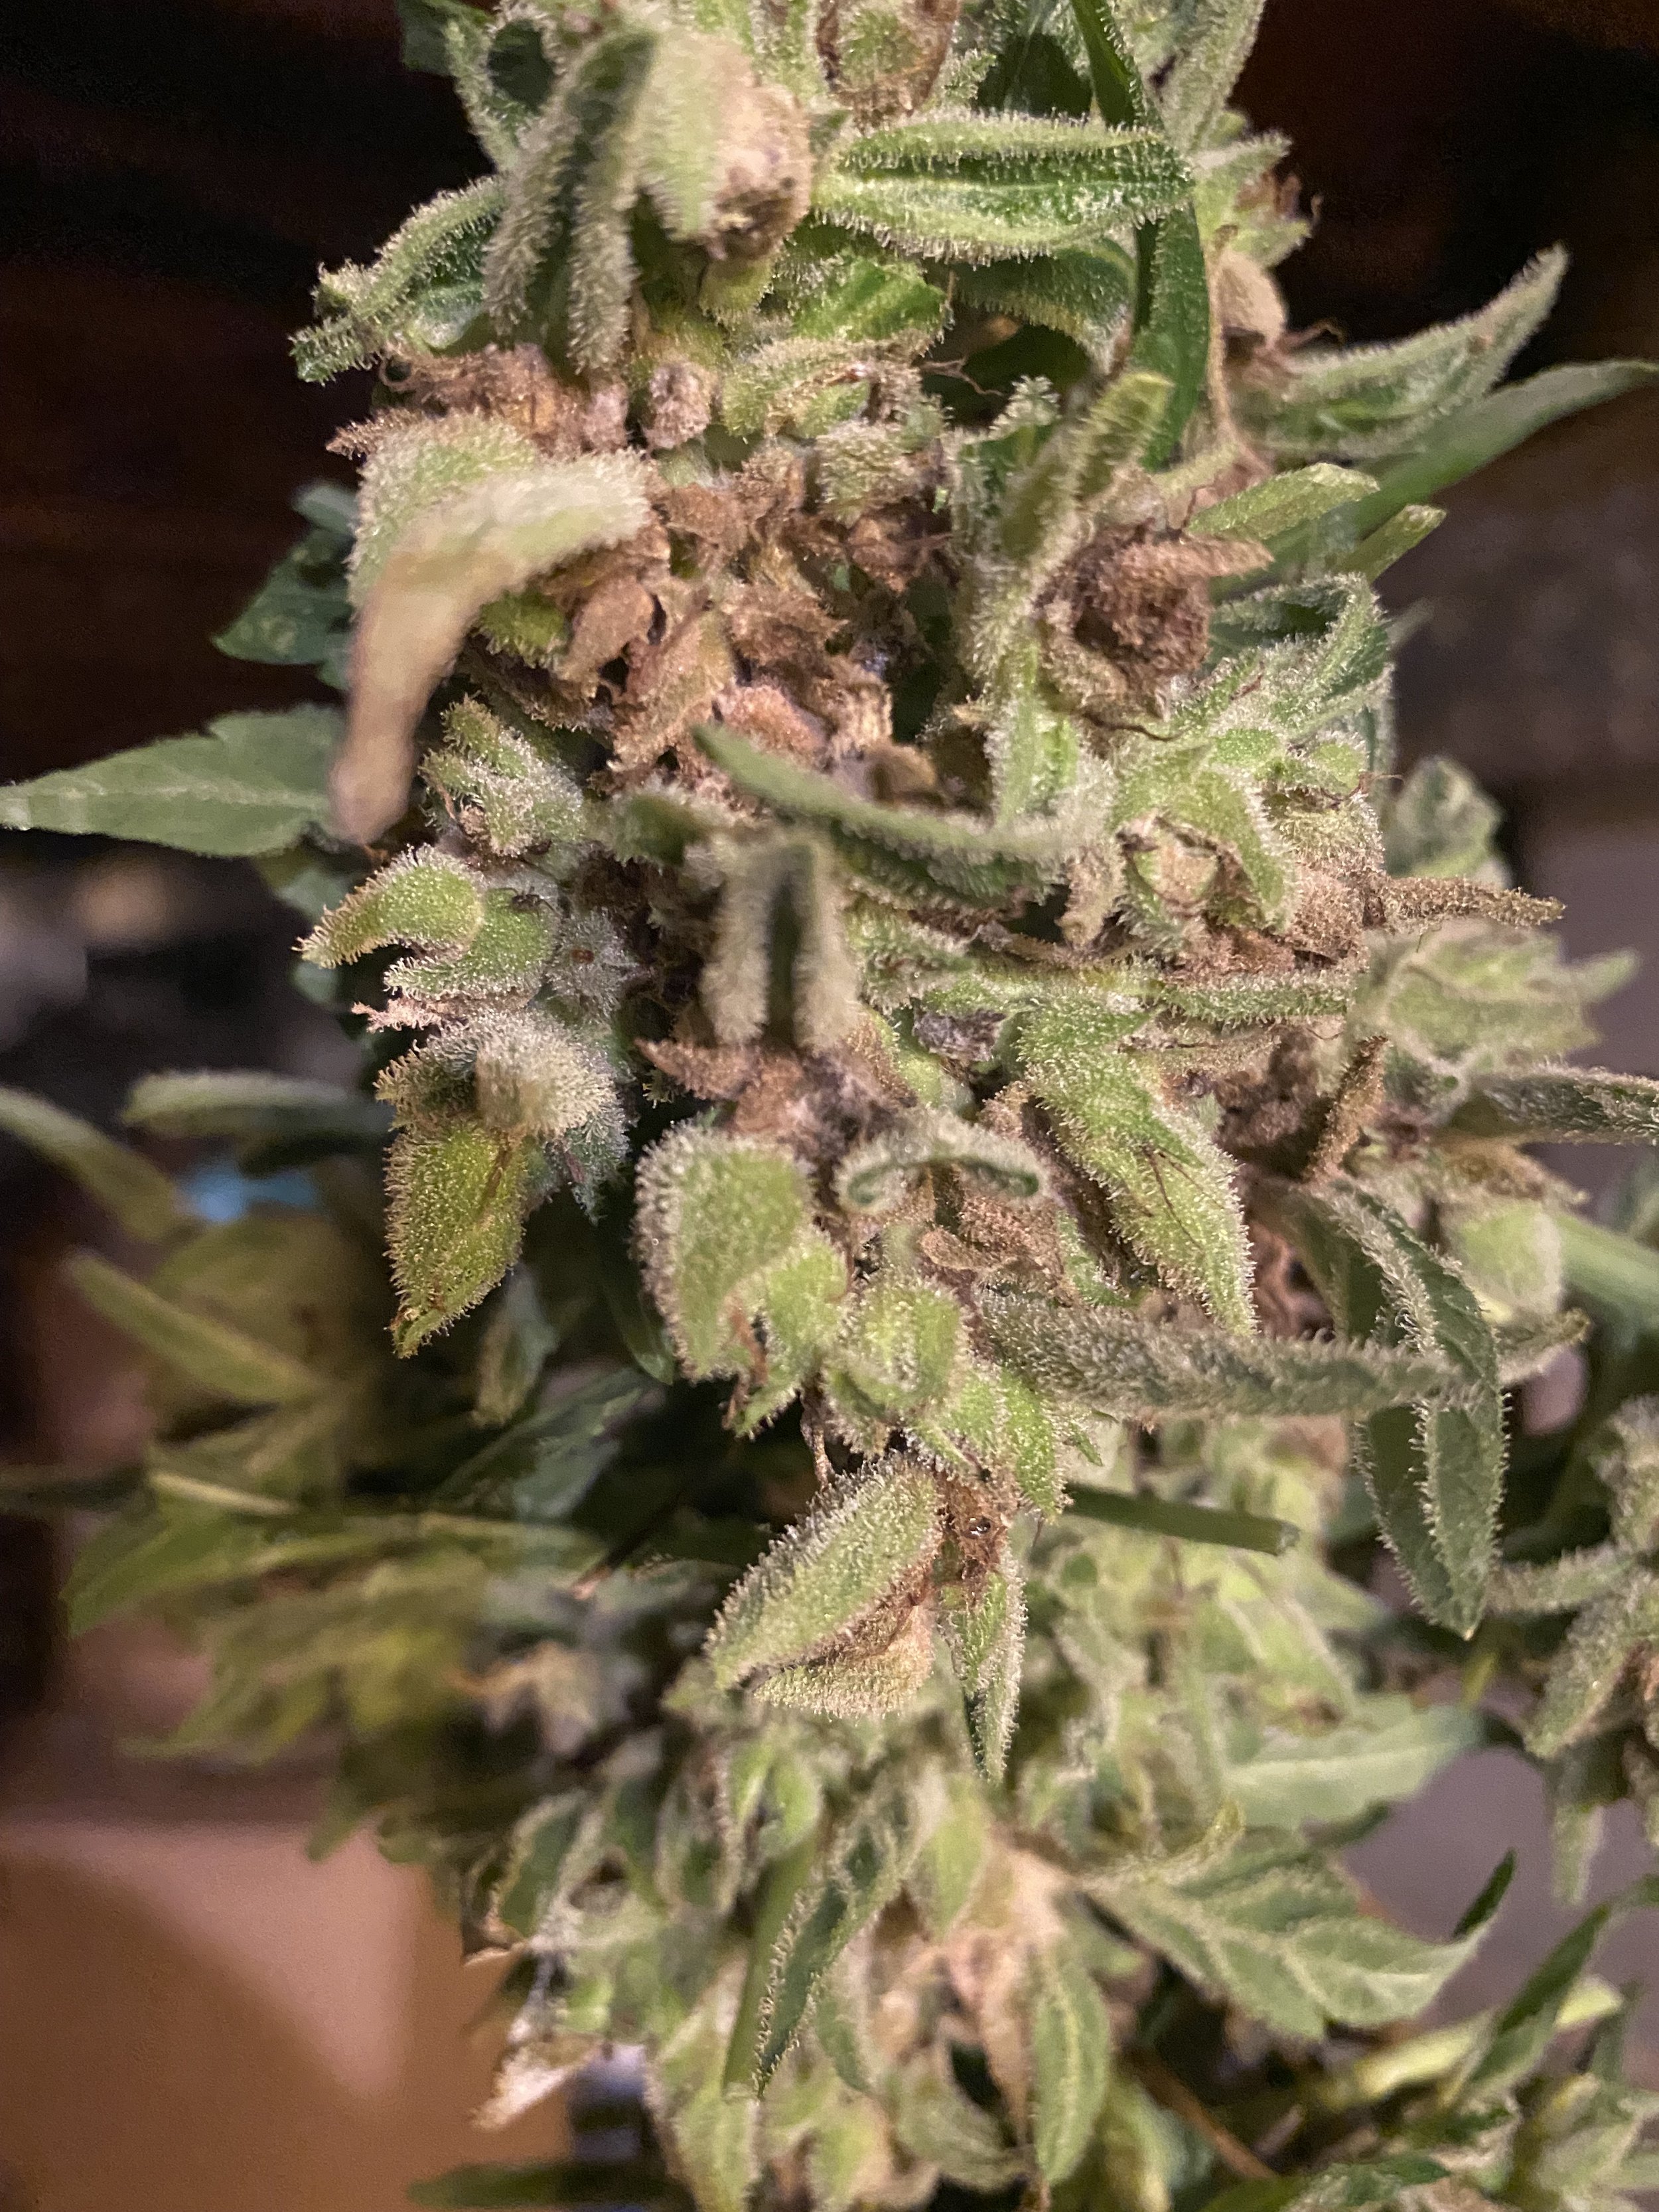
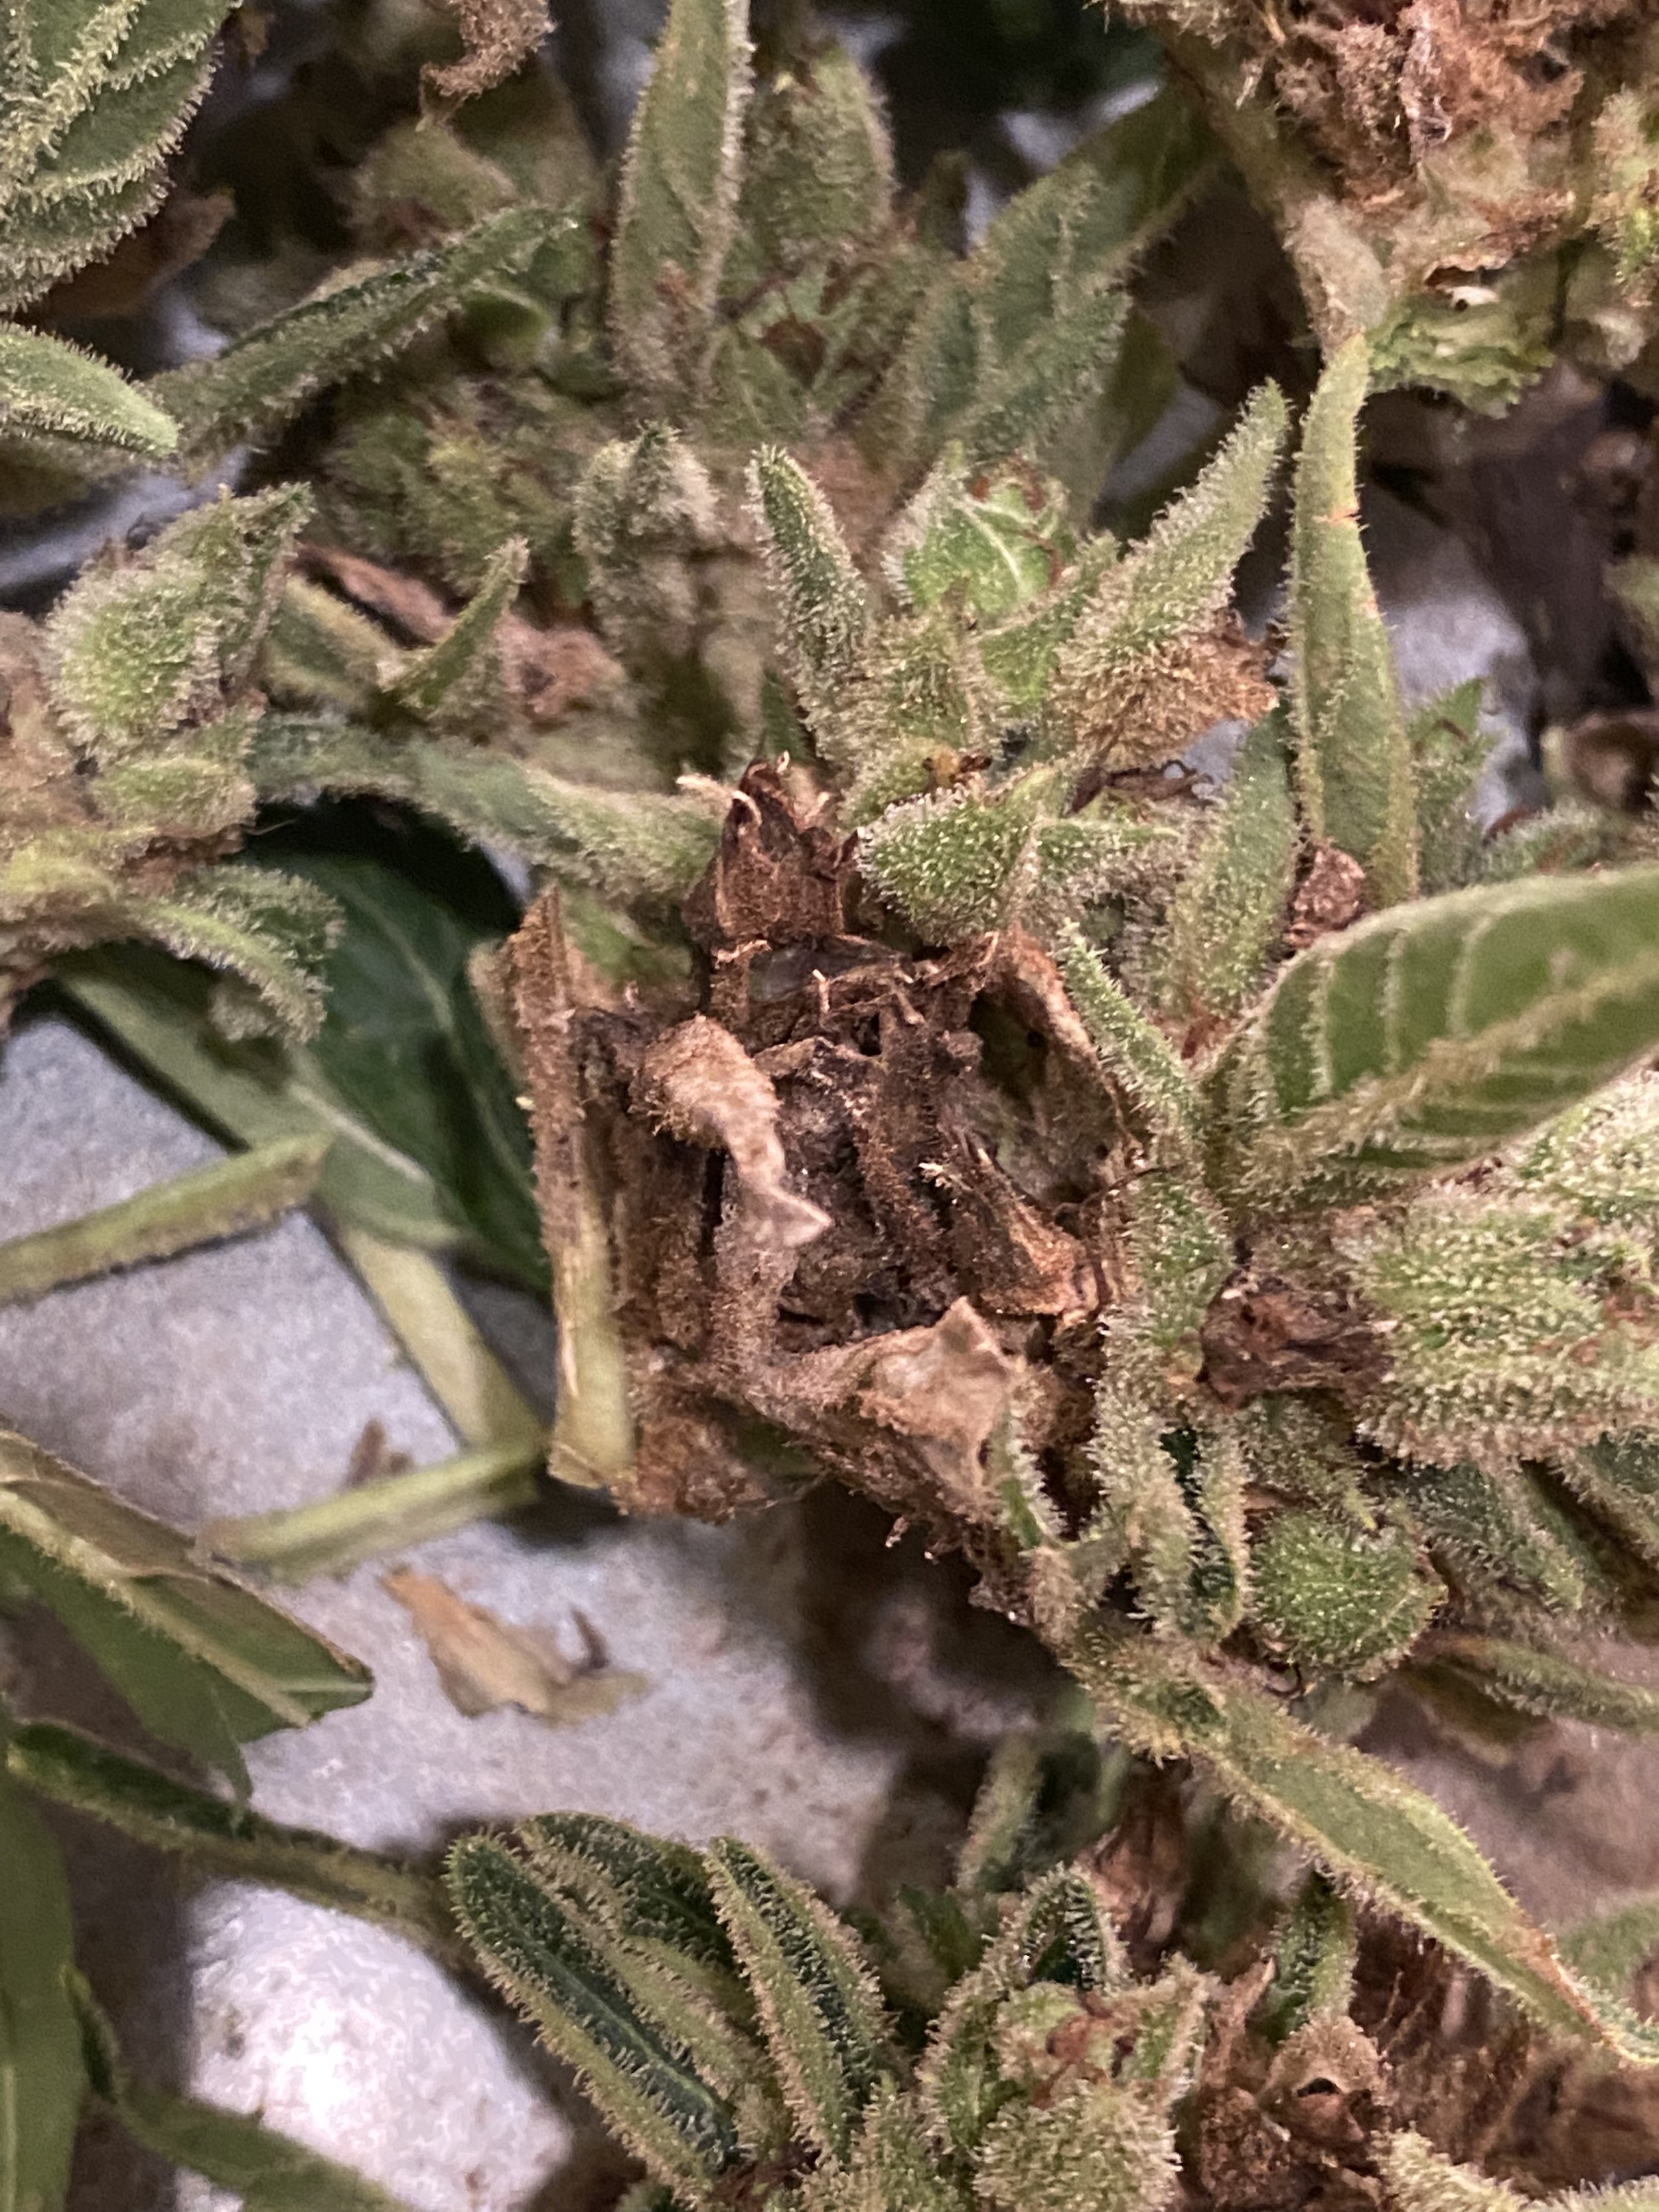
Mold and Bud Rot
I mentioned this in previous installments, but you’ll want to keep a close eye out for gray/brown mold—botrytis, also known as bud rot—during this harvest/drying/trimming phase. Because botrytis develops from the inside out, it’s often hard to spot this until you start the trimming process. But if you didn’t catch it early enough, this can really ruin your day.
I was so happy initially, chopping my first plant, all my hubris in displaying this single massive bud…only to look closer and spot the brown bud rot on the interior of the plant. As I started trimming it, I realized the mold had taken over the entire thing. It’s not at all safe to consume buds that have bud rot, so I ultimately had to throw this entire plant away.
But I learned an important lesson.
From now on, I use the low-stress training (LST) method so create more space and airflow in my plants, helping them form multiple colas instead of one big bud that can hold moisture and develop mold. Even still, I now examine my plants every day before harvest, and if I spot a little section of bud rot I amputate that bud immediately so it won’t spread.
BEWARE BUD ROT!


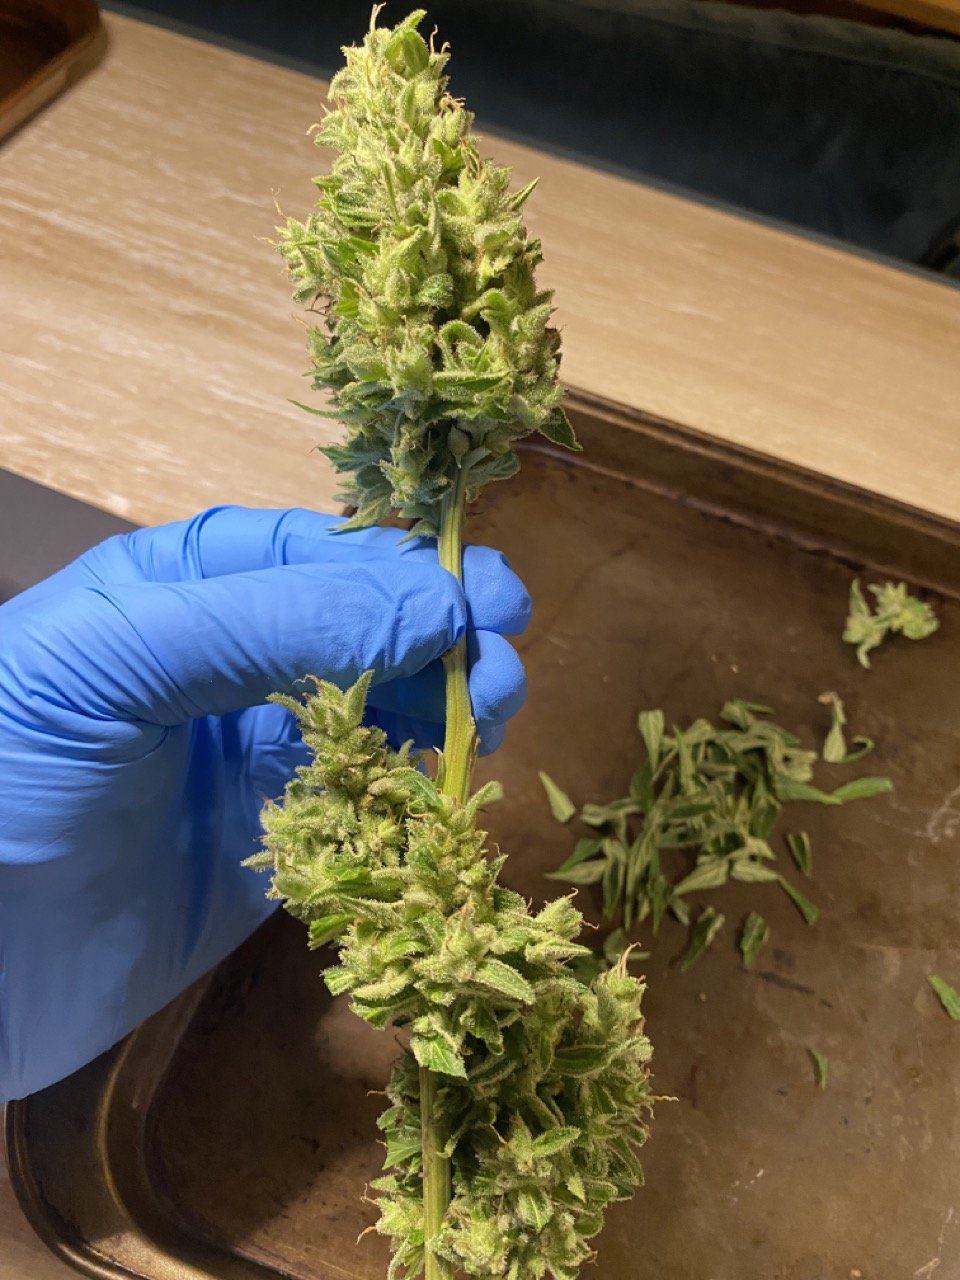
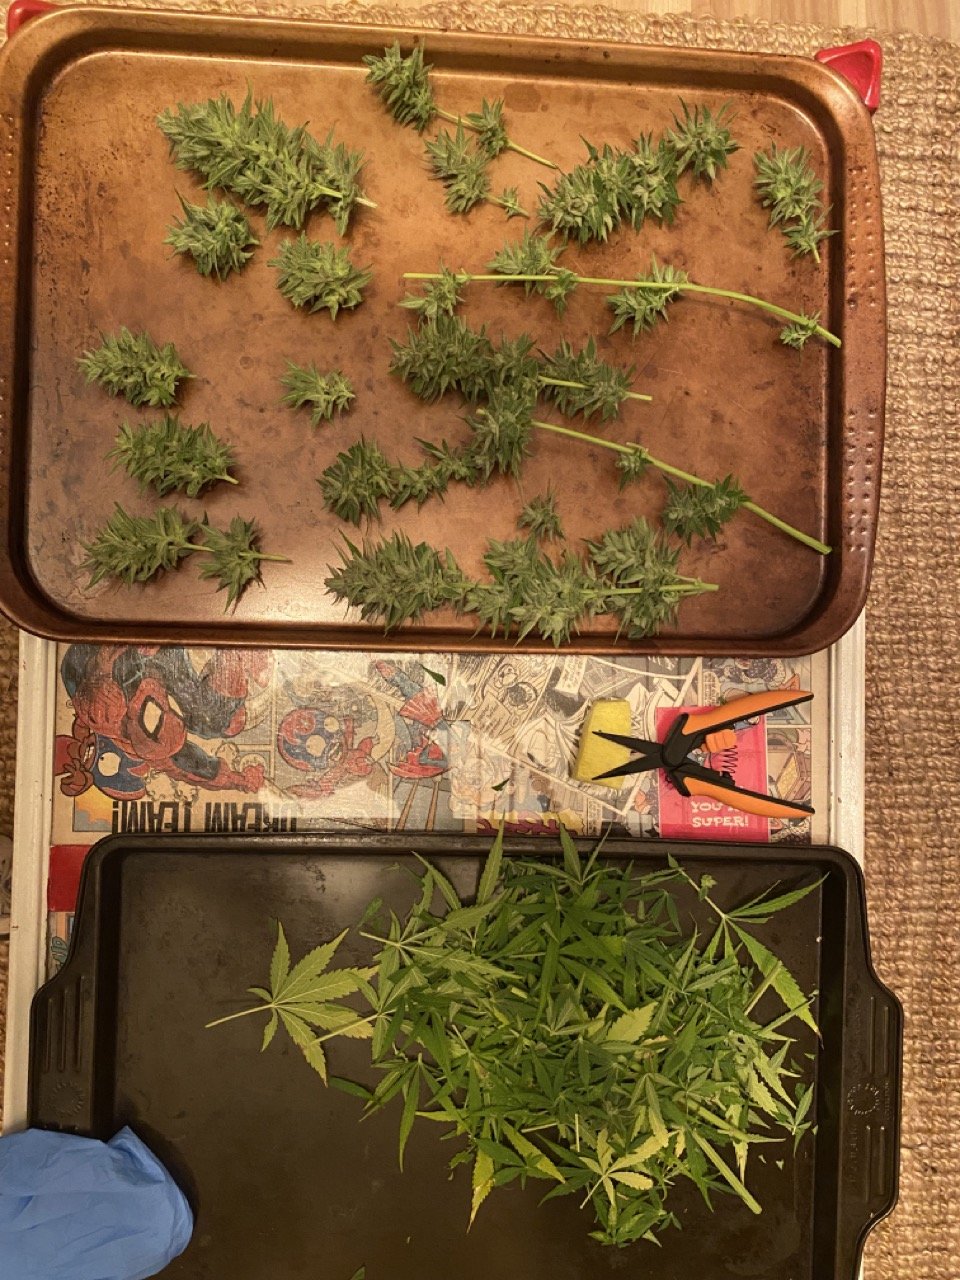
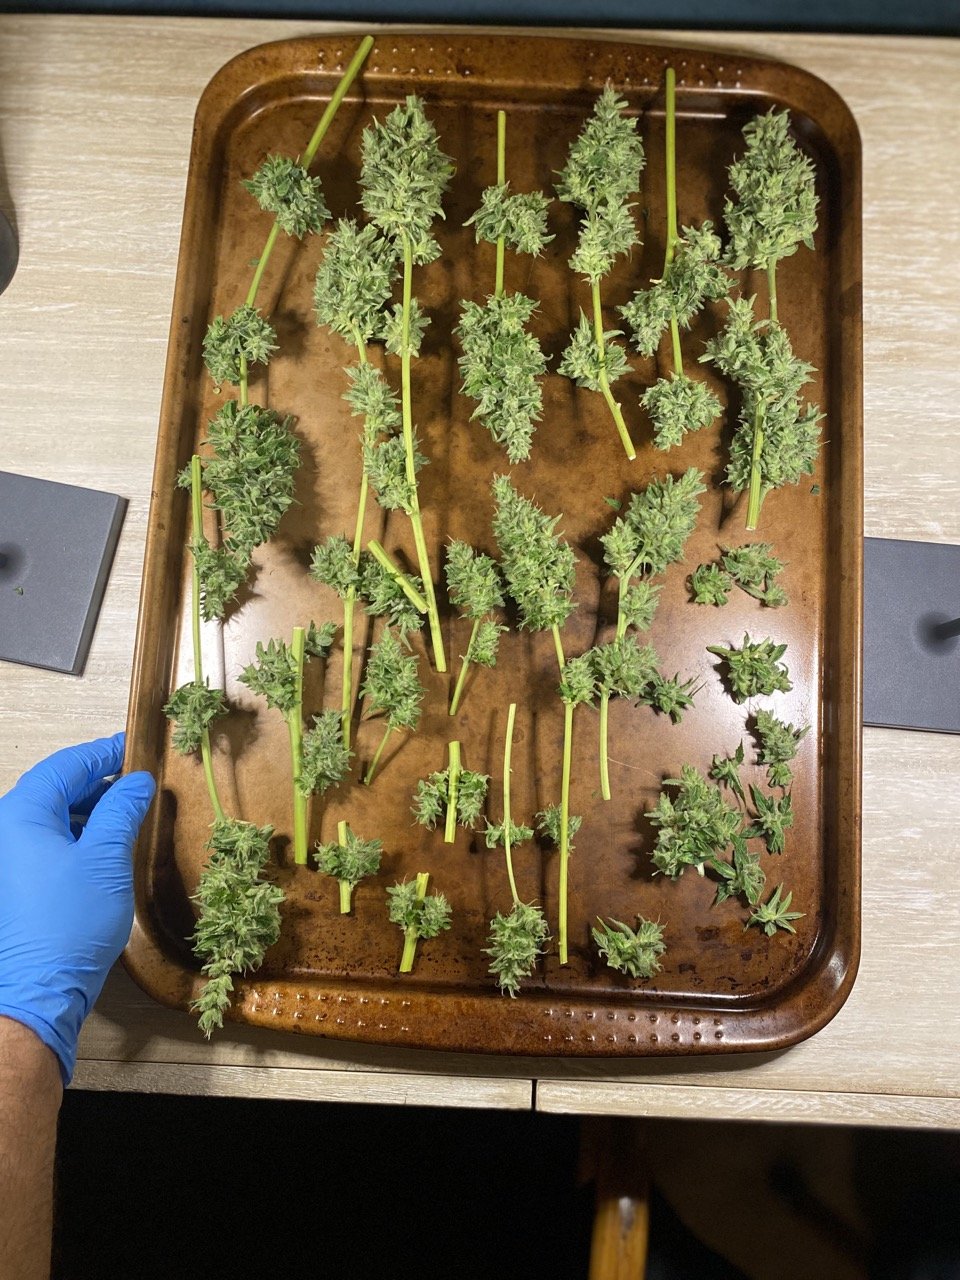


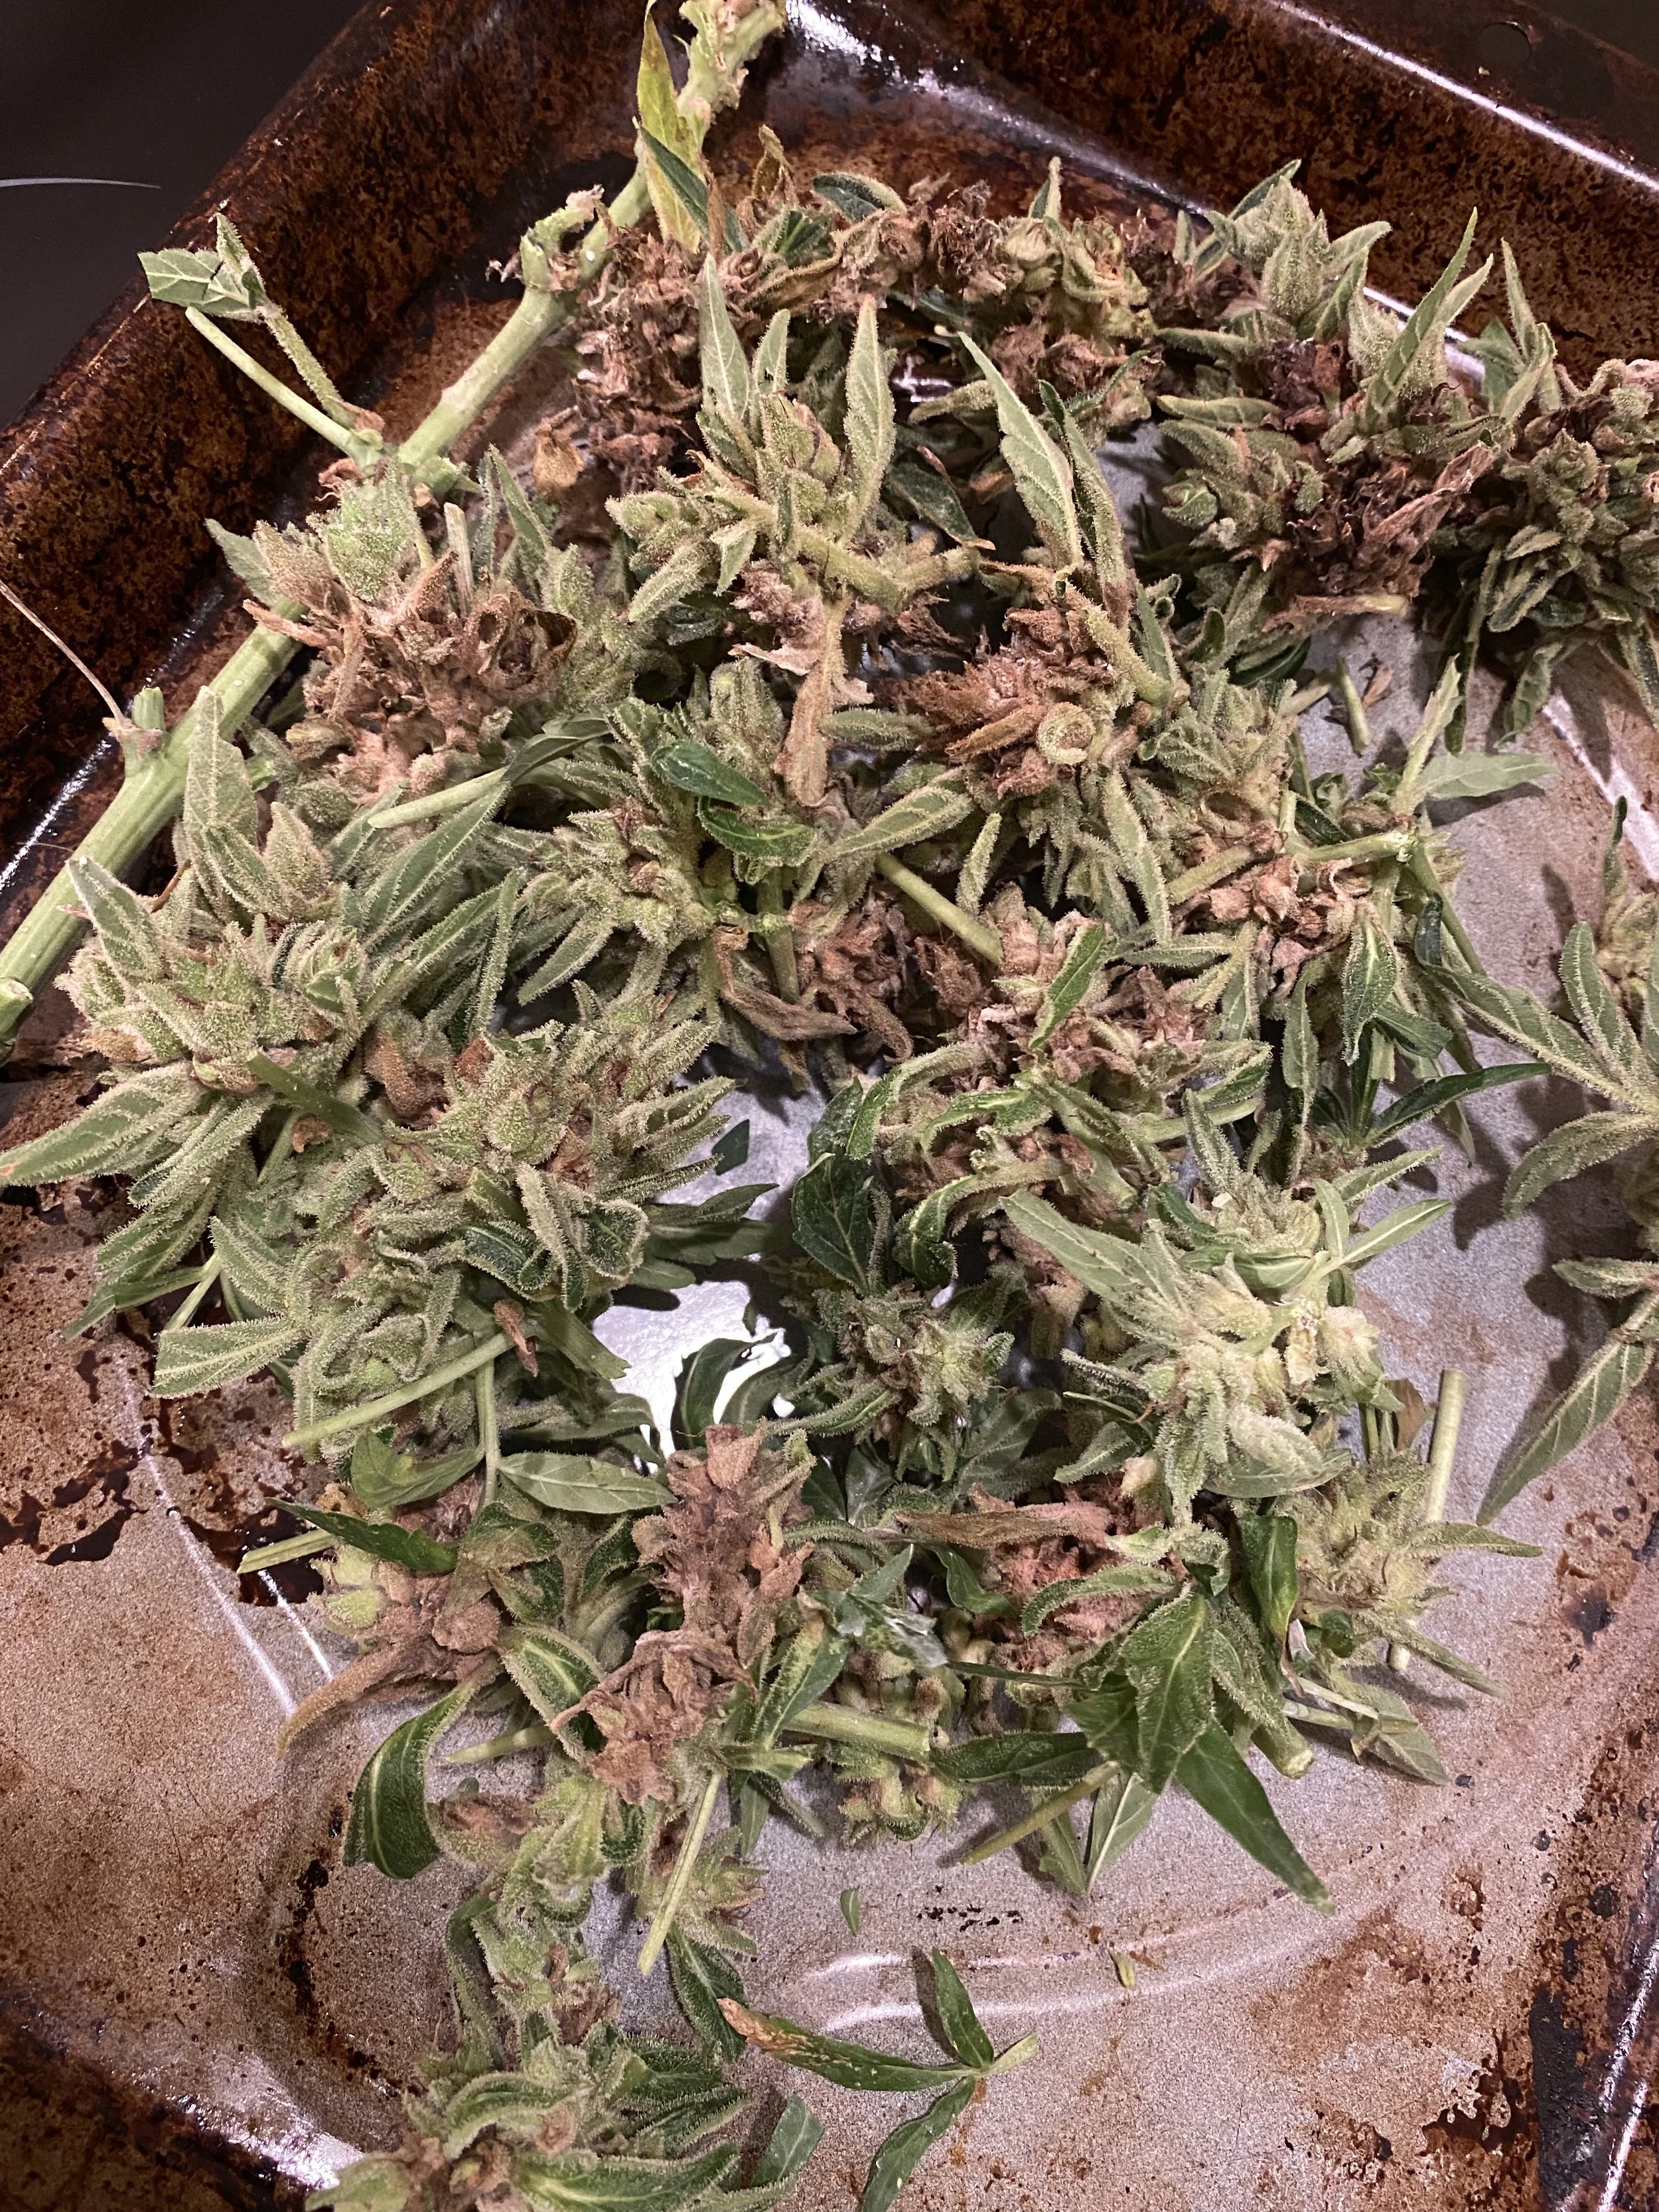
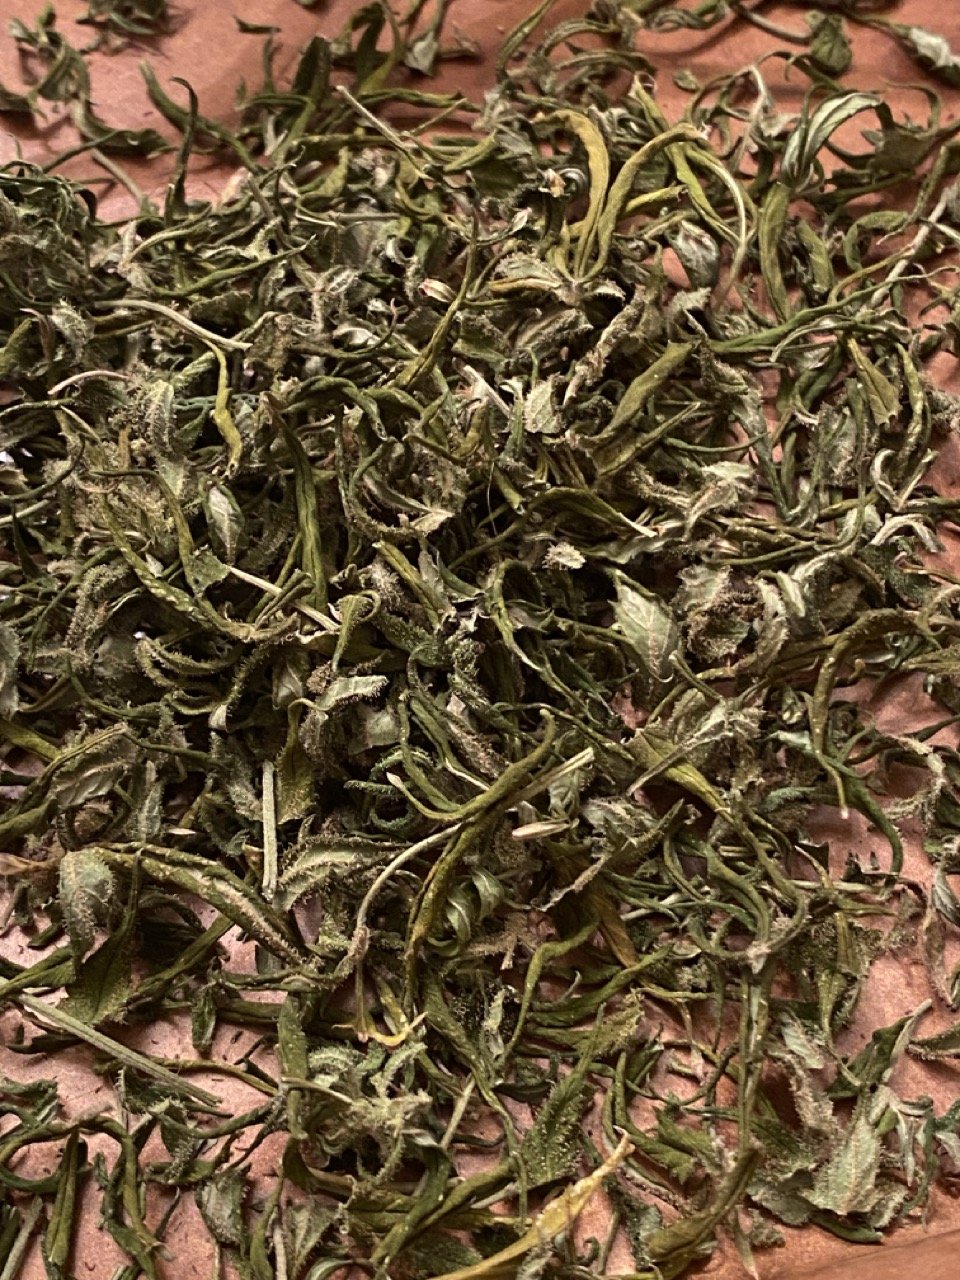
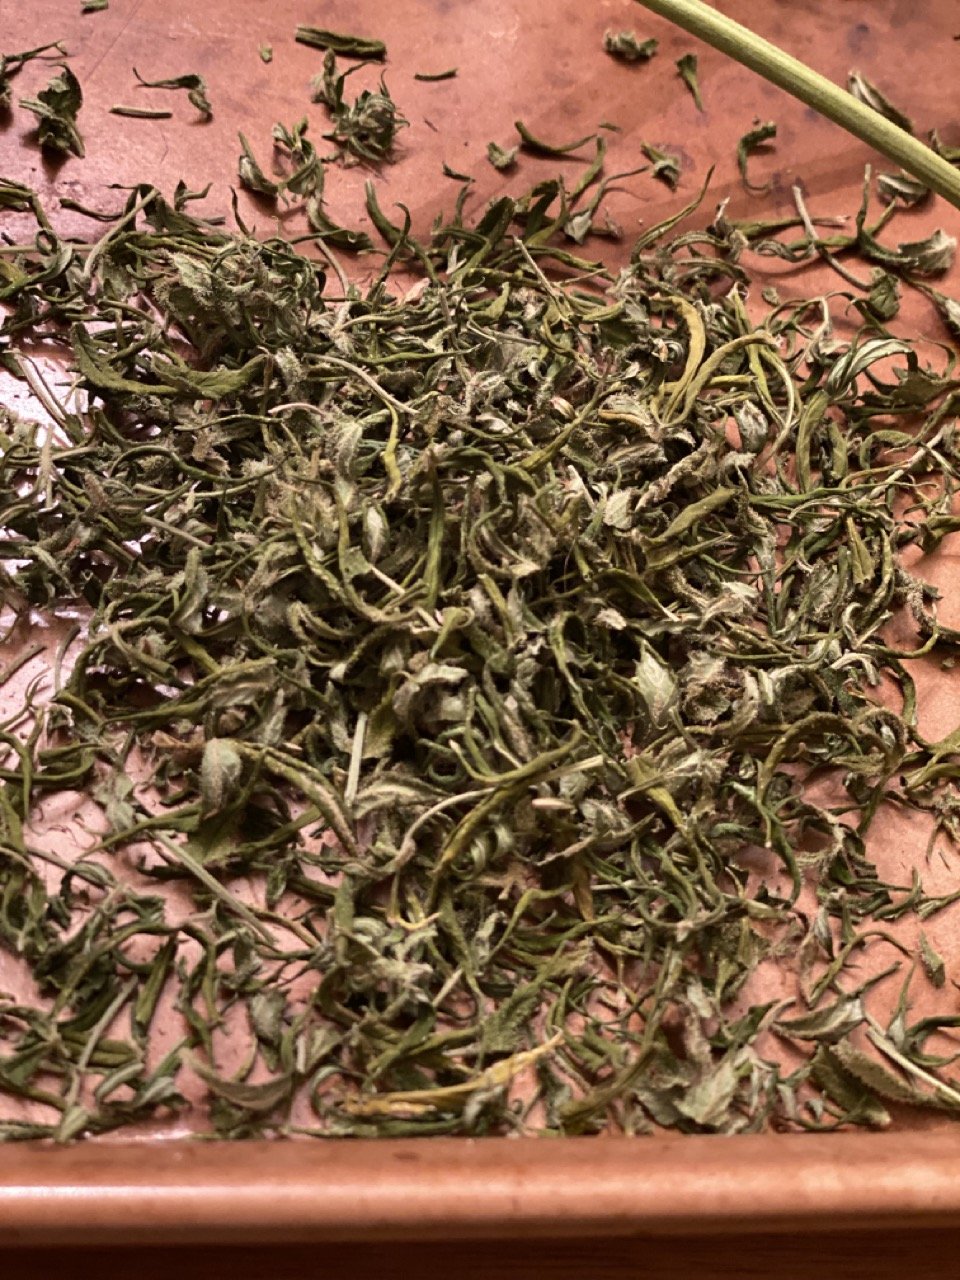
SAMPLE TRIMMING SESSIONS
Here’s an example of a Wet Trim…
…and a Dry Trim…
Final Weeks: Curing Stage
So now that we’ve got nicely dried and trimmed buds…it’s still not quite time to consume.
The final stage is CURING your cannabis.
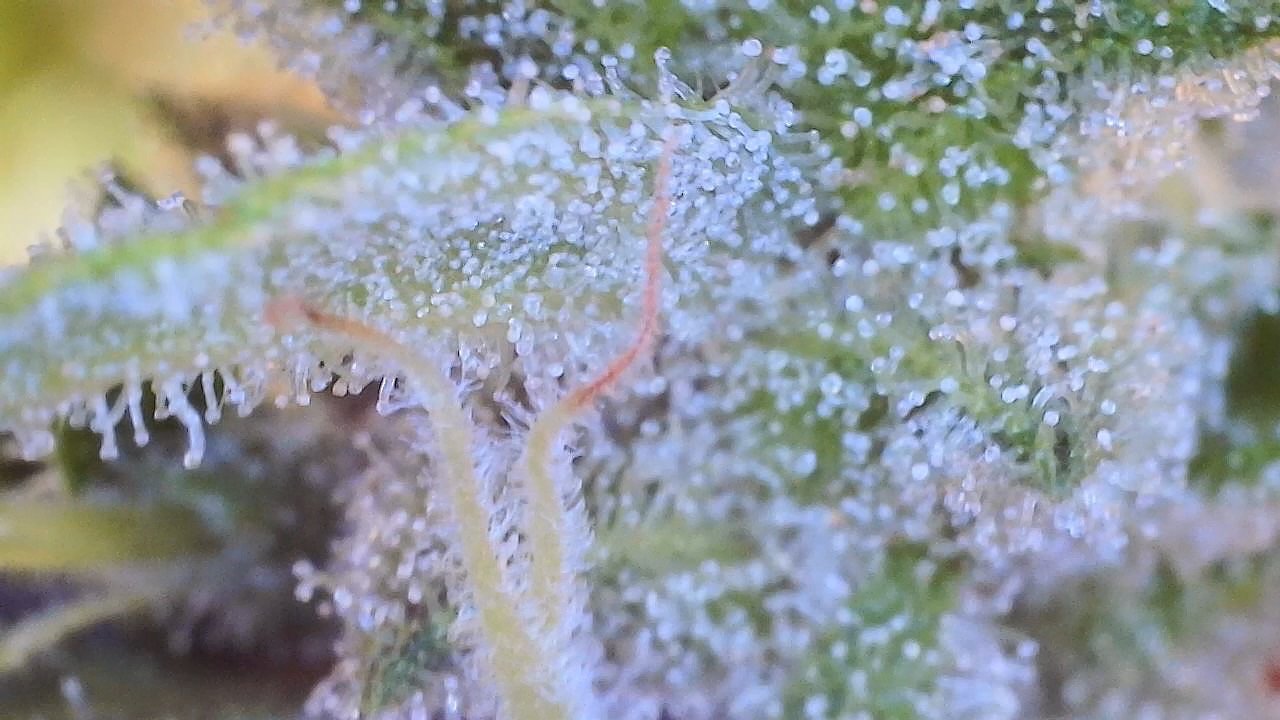
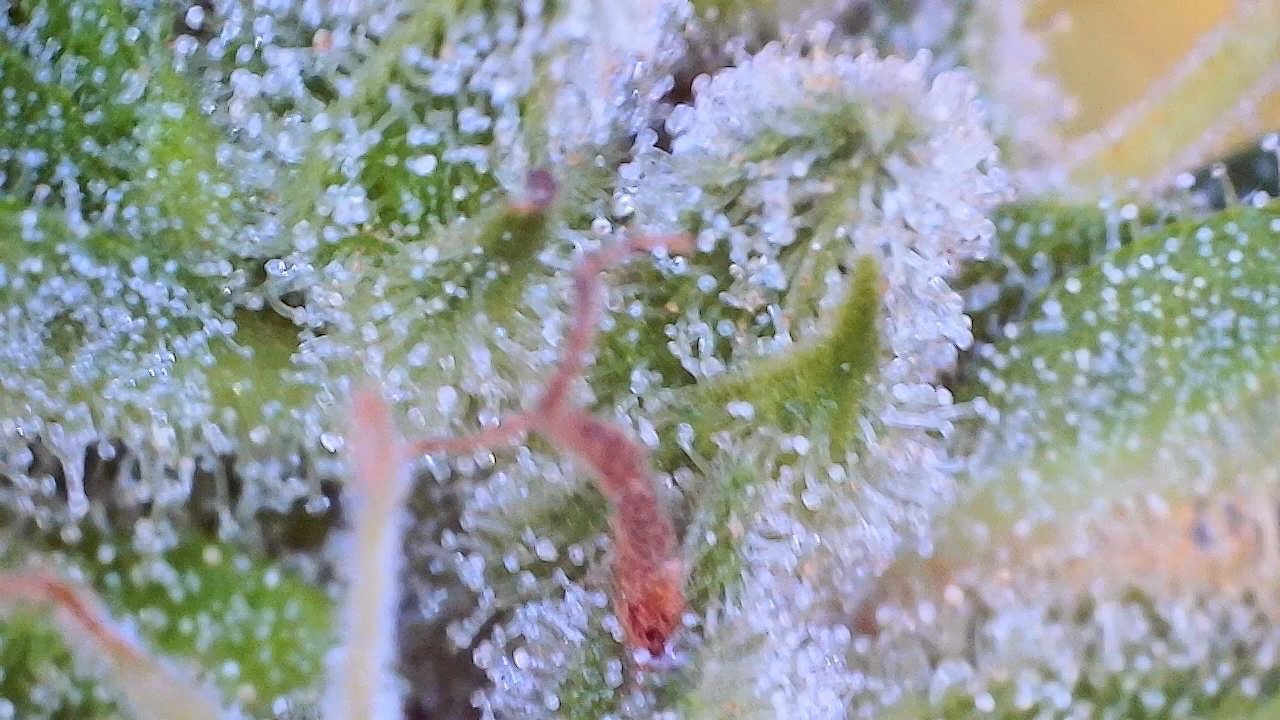
The weed is ready to cure once it’s dry enough that the buds easily separate from their stems. If you pull a bud from the stalk and a little fibrous hair comes along with it (see photo), it’s not quite ready for curing.
The point of curing is to prevent mold, preserve SOME of the moisture, and enhance the flavor and aroma of the finished product, preparing it for longer-term storage. The remaining chlorophyll in the plant will break down, so that when you enjoy it at a later date it’s smooth and tastes the way it’s supposed to taste (based on the specific strain), rather than tasting like grass clippings.
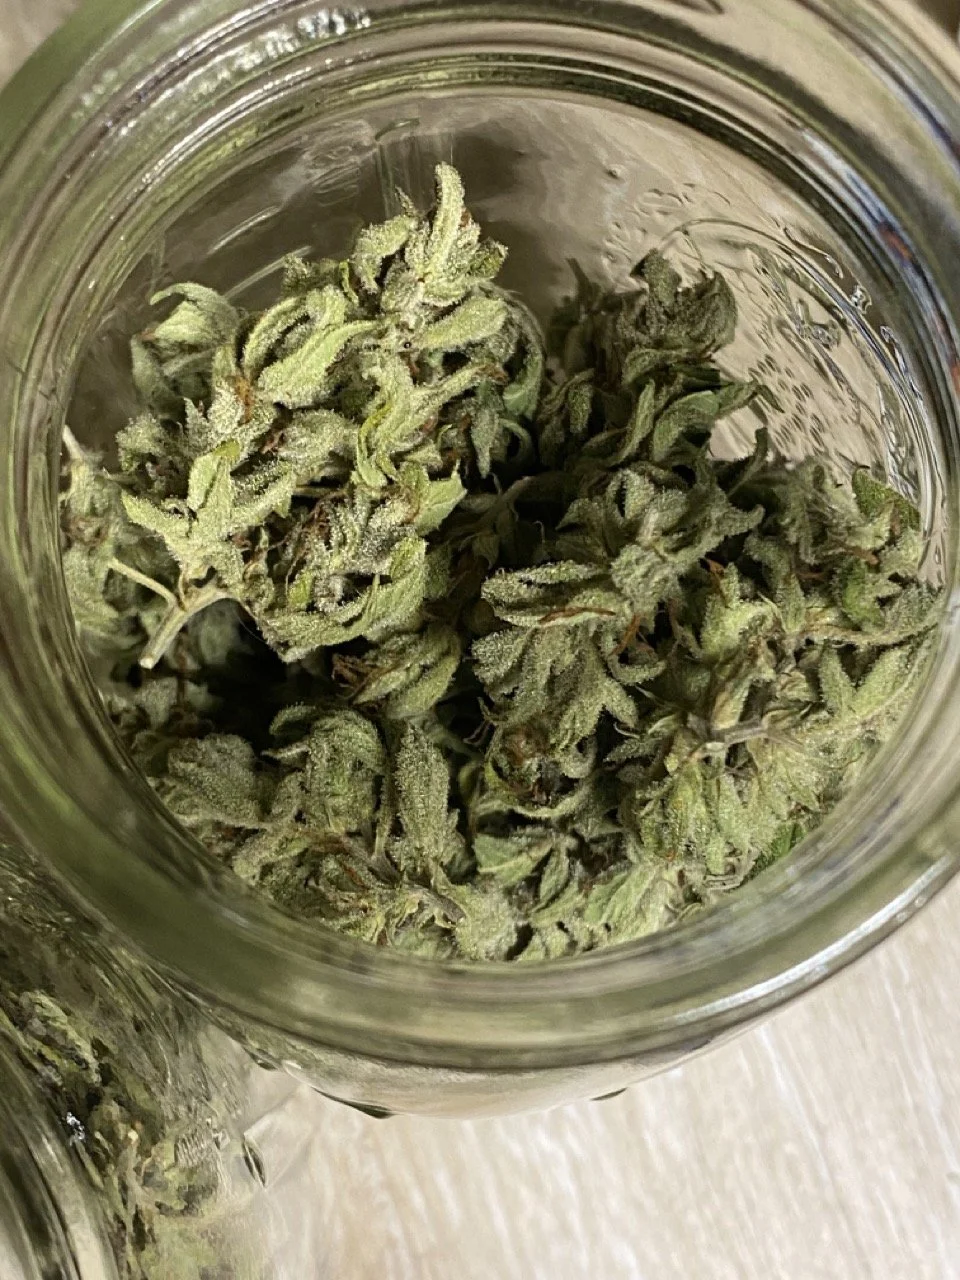
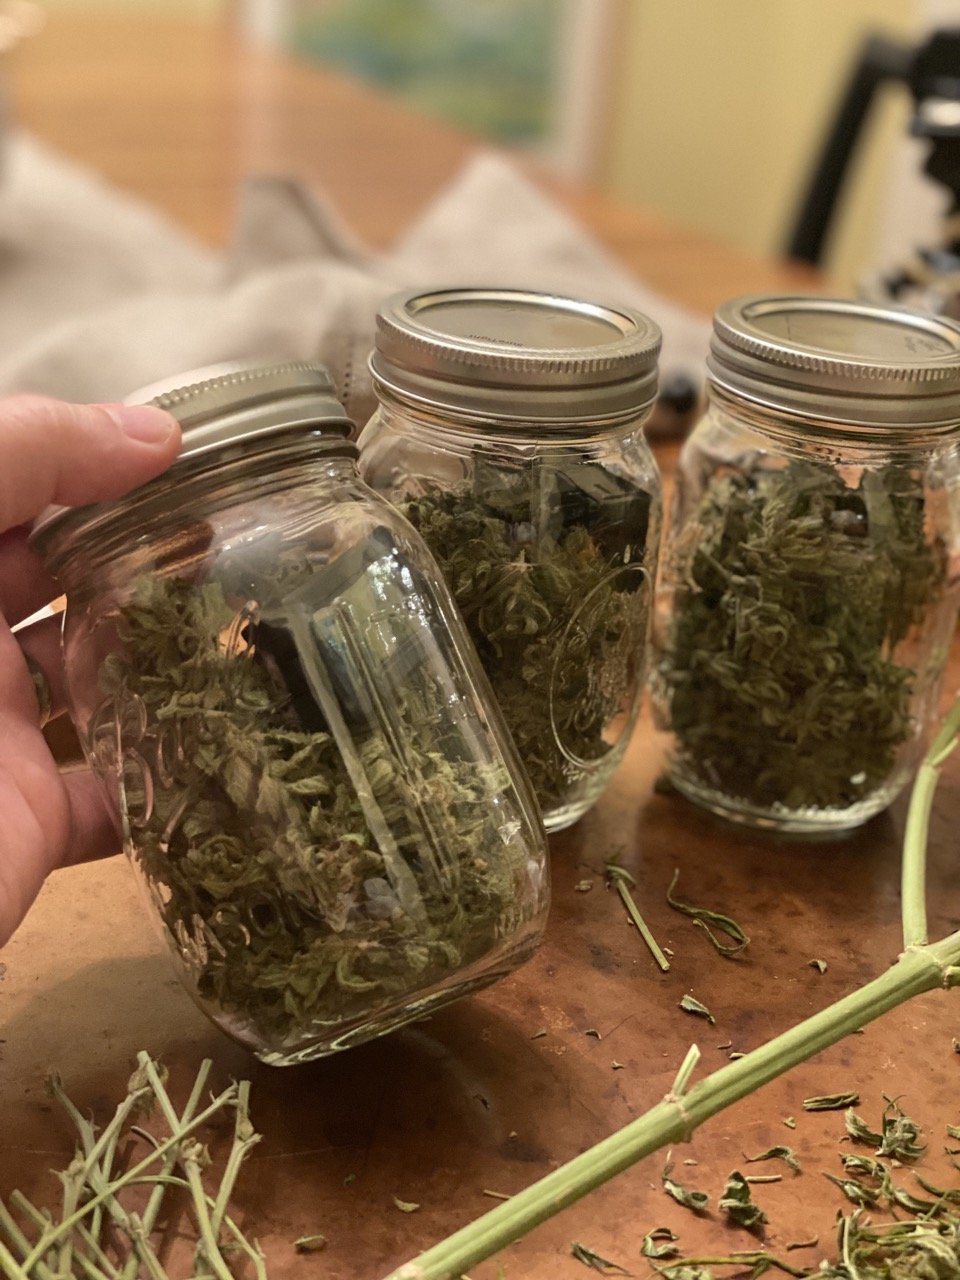
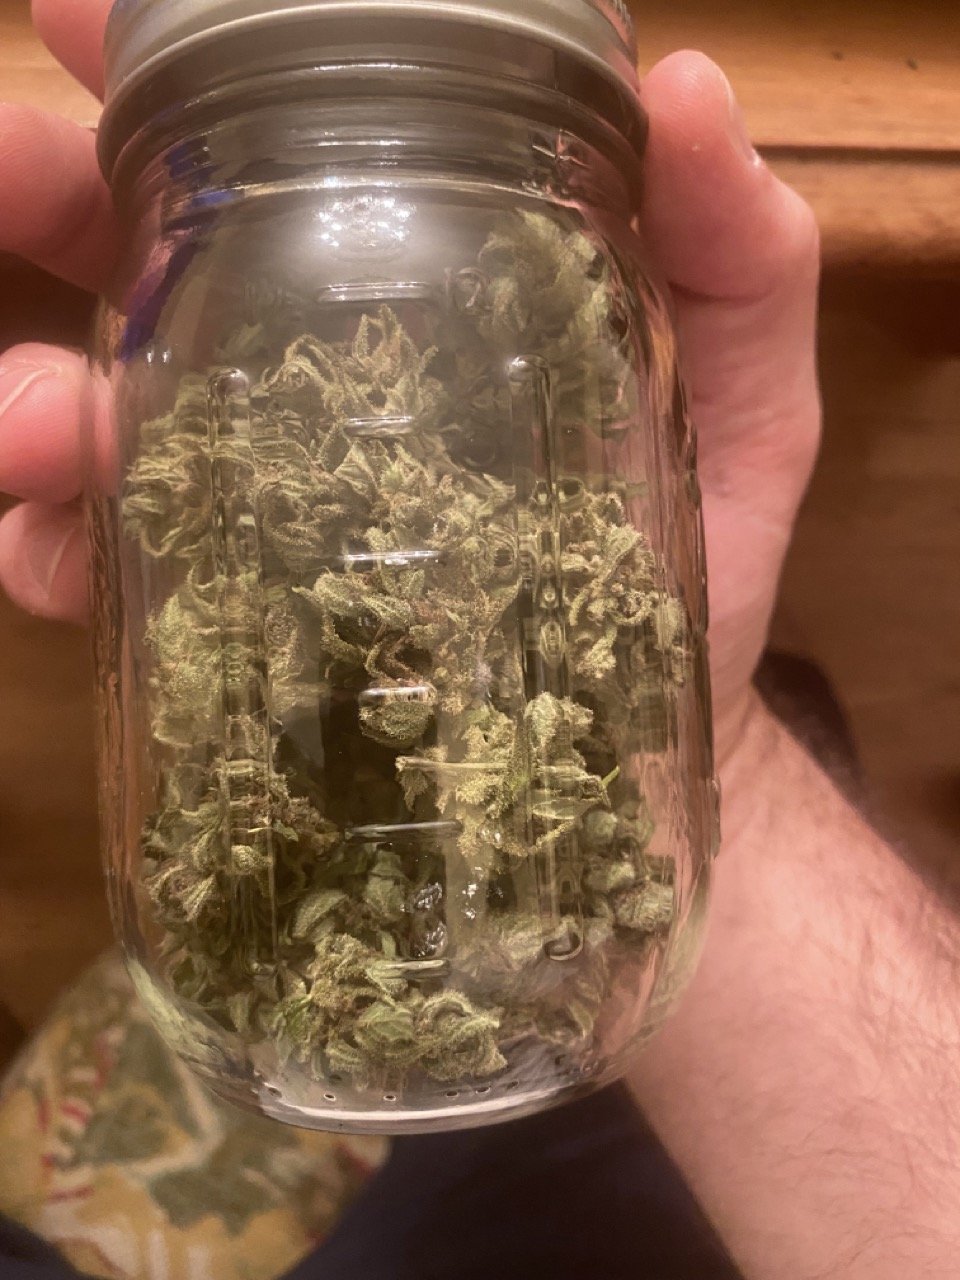
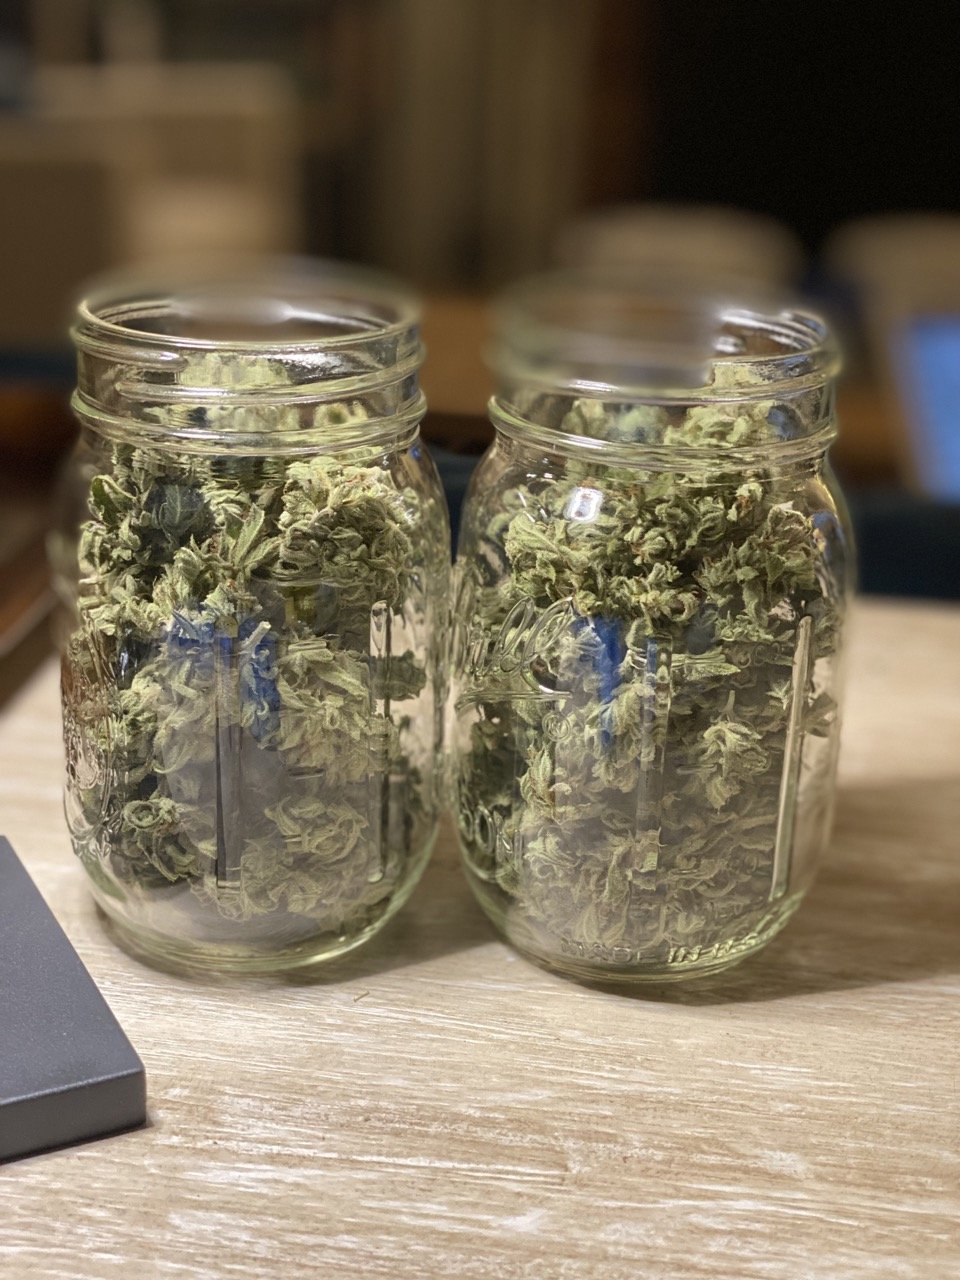
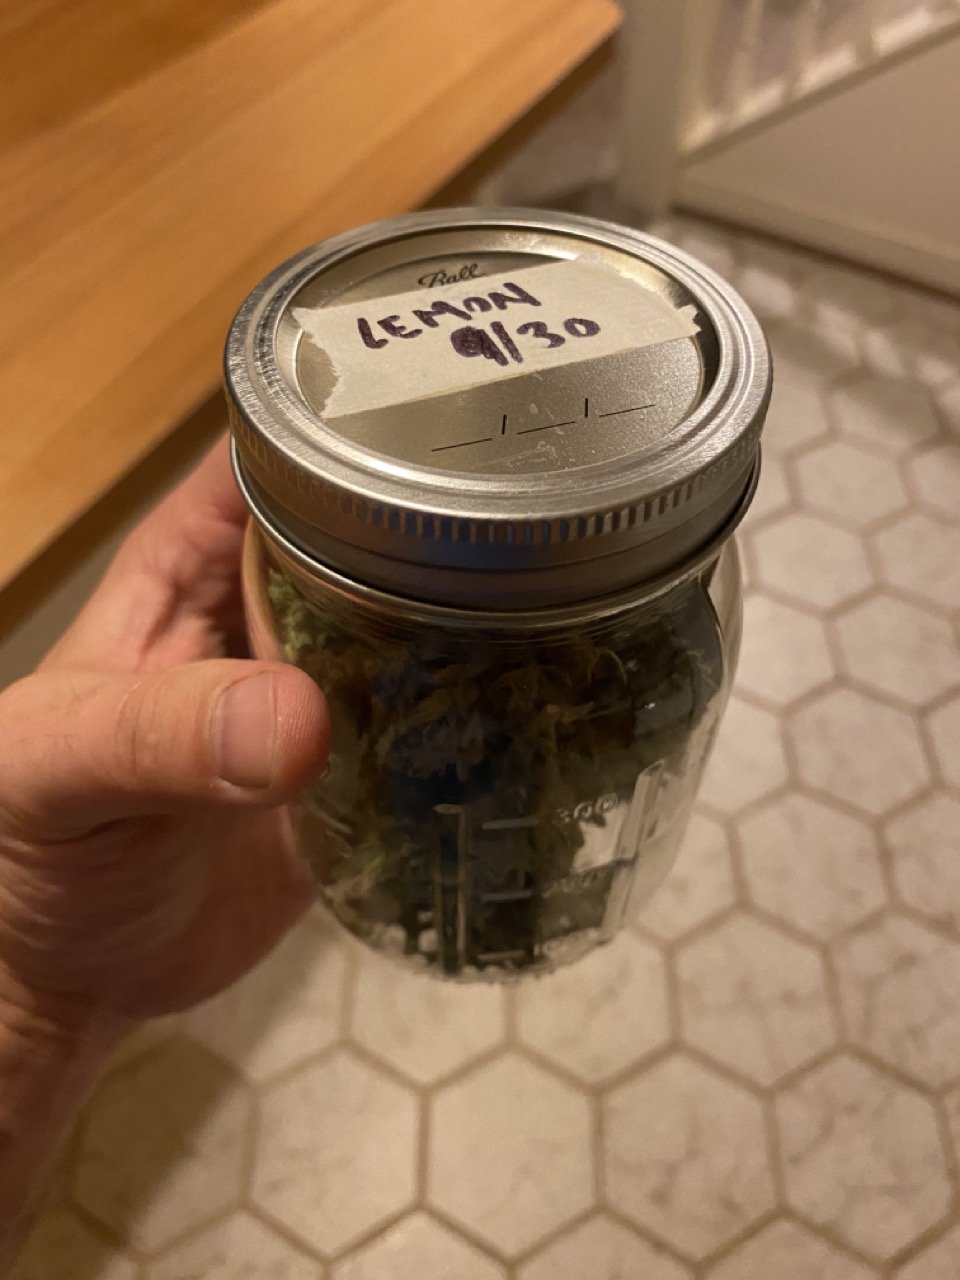
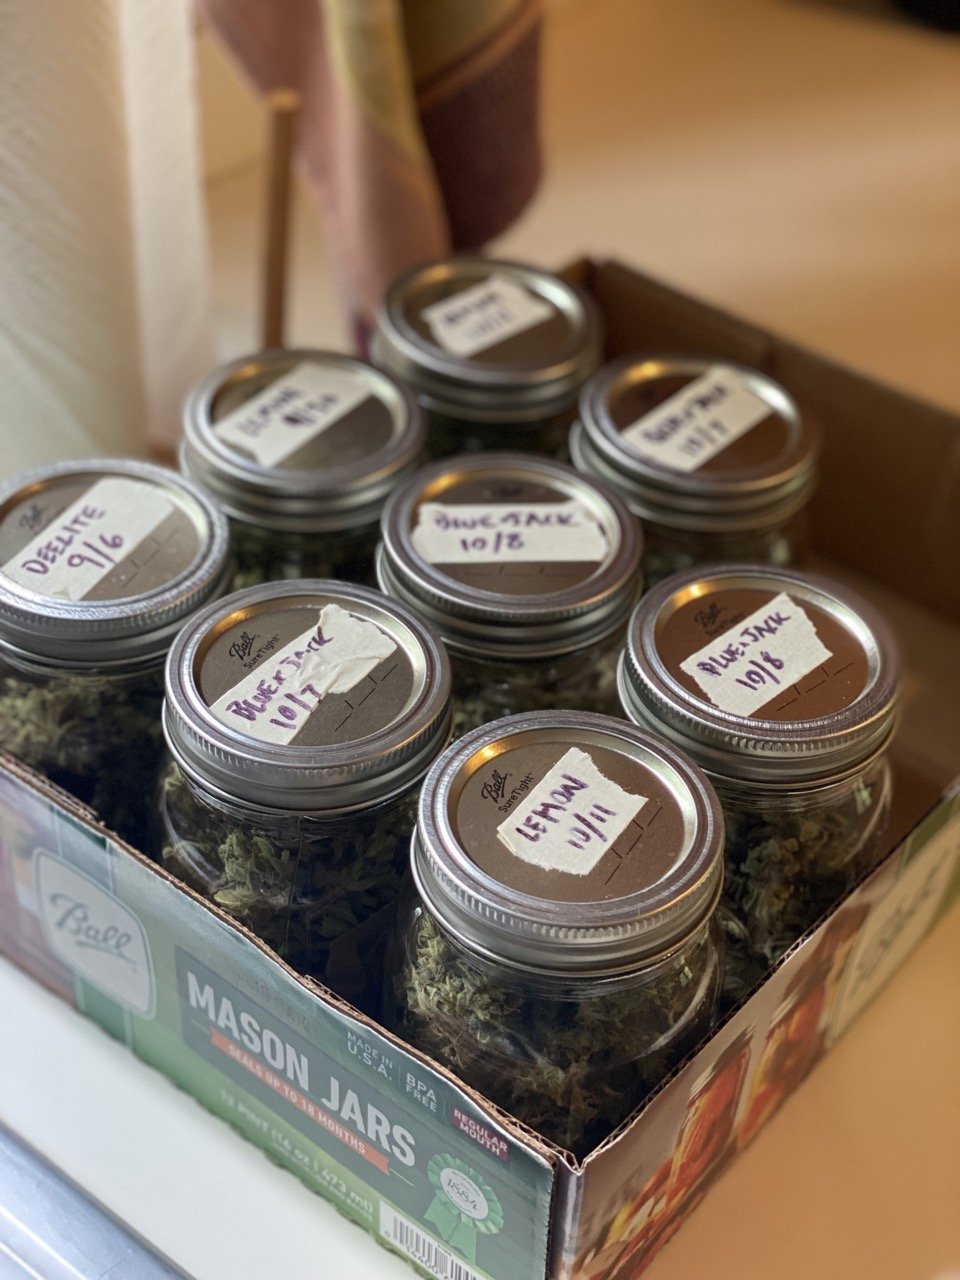
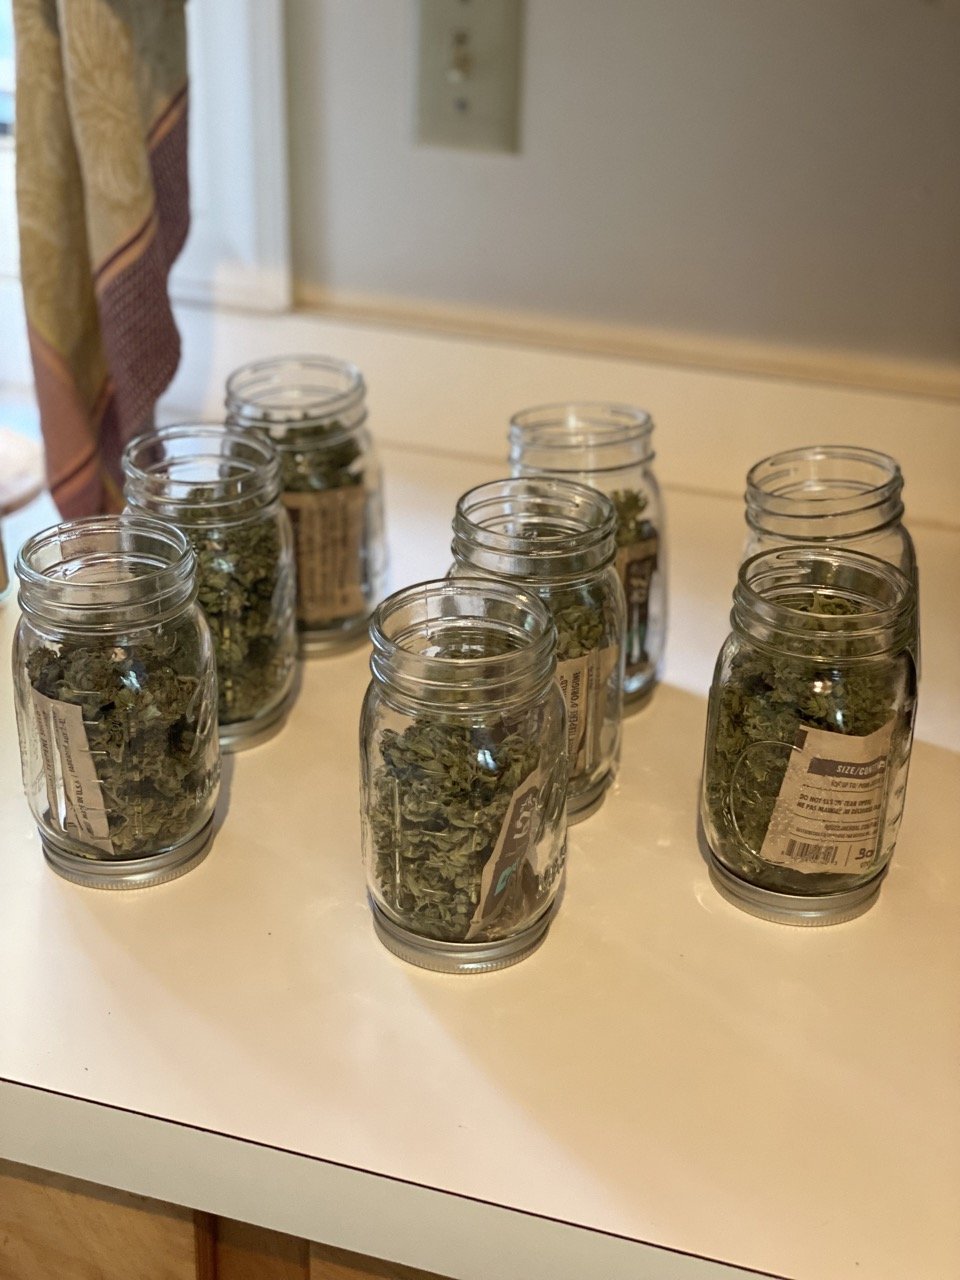
Containers
For this stage you’ll want to use airtight glass jars, like 16 oz. or 32 oz. mason jars. Drop dried and trimmed buds into the jar, filling it to about an inch below the top. Don’t press or pack the buds in there, make sure you have some space and air.
Be sure to label each jar with the appropriate strain and the date at which the curing began, so you can keep everything straight if you have multiple strains and rounds of harvest.
Moisture Control
To control and monitor the moisture in each jar, you may want to add two things into each jar:
A mini hygrometer, like this. It will tell you the relative water humidity and temperature inside each jar. Remember, humidity is an important metric to track.
A humidity pack, like this. These two-way packets are magic, and will add or remove relative humidity (RH) as needed. I got a 10-pack of these Boveda 62% RH packs, and put one in each jar.
Burping Your Jars
Throughout the first week of curing, open each jar for a few minutes before resealing to allow some air exchange. This is called “burping” your jars.
It should smell sweet, a little like candy, when you first open your jars. If it smells acrid, like ammonia, that means that mold is beginning to develop in there. Leave the lids off for a full day and then resume your burping routine as before.
After week one of curing, you can start burping every other day and then every few days instead of every day. Continue burping occasionally for about 2-4 weeks, and sometime around this stage you can finally…
TRY IT!
You’ve worked hard to get to this stage, so sit back and enjoy the fruits of your labor in whatever ways you choose to partake. If all has gone to plan, you should have an aromatic, flavorful, potent product that’s truly farm-to-table and free of any impurities.
Congratulations, because you also likely know a lot more about general gardening than you did previously! Growing cannabis compelled me to learn much more about things like soil mix/quality, pH, low-stress training, growing nutrients (NPK), and various natural and biological processes. It’s made me a better vegetable gardener. I’ve gained a new, marketable skill. I’m saving money and able to self-sufficiently grow a product that’s often in demand and has myriad health benefits. And I’ve enjoyed passing along the information and learnings, much as one might pass a big ole fatty.
BONUS: USING Cannabis SUGAR LEAVES
While you’re trimming, you may be removing those frosty “sugar leaves” to leave behind a more aesthetically pleasing bud. These sugar leaves do have trichomes and other psychoactive components, however, so while you’re welcome to just trash them, you can also save them and use them in vaporizers or to make edibles or cannabis tea leaves.
Here are some recipes for making cannabutter and other edibles.
You can also simply cook up the leaves according to a process called decarbolyxation, saving these leaves to make cannabis tea in the future.
Enjoy!!


Harvesting Cannabis: FAQs
What Should Cannabis Look Like When Harvesting?
Around harvest time, cannabis should have cloudy-looking trichomes with sometimes a slight amber look to them (but not too much). This will indicate that your buds are at their peak potency.
What is the Best Cannabis Harvest Method?
Typically, this depends on your level of maturity. Some growers will let certain parts continue grow after they trim the bigger buds off. From then, hang drying your plants with a rack is a standard process known for producing potent buds ready for the bowl.
Should I HanG My Whole Cannabis Plant to Dry?
Hanging your whole plant is usually a good method — espeically if you are doing a full harvest and not only cutting off the biggest buds first. This wil also help you preserve flavors and potency. Keep your plants in a dark & well-ventilated room for about 5-14 days.
Where Do You Cut Cannabis For Harvest?
If you intend on harvesting the full plant, cut the main stem right above the soil. Otherwise, cut a predominant branch with bigger buds — letting the other ones continue to grow and mature.
Should I Let My Plants Dry Out Before Harvest?
Yes, cutting back on watering in the last few days can even potentially help the harvesting process, as well as use up all the remaining nutrients and contribute to a smooth transition into the harvest cycle.