How to Boost Autoflower Yields: A Practical Grower's Guide to Rewarding Harvests
You've put in the time and effort, but your autoflower yields still miss the mark. Sound familiar? It's one of the most common frustrations among growers, and the good news is it's almost always fixable.
Modern autoflowering strains have come a long way, and today's genetics are capable of serious output indoors and out. With a few adjustments, better harvests are well within reach.
This guide covers ten practical steps to get bigger yields from your autoflowering plants.
But First, Why Are Autoflowering Yields So Different?
Autoflowering plants run on a fixed internal clock. Unlike photoperiod strains, they don't wait for a change in the light cycle to start flowering.
That short growth cycle is one of the biggest advantages I see with autos, but it’s also where they become most sensitive.
If something goes wrong early on, like transplant shock, overfeeding, or poor growing conditions, there isn’t much time for recovery. There’s no pause button. That’s why I always pay close attention to the first few weeks, because yield potential is basically locked in by what happens during that stage.
Autoflowers vs. Photoperiod Strains
Autoflowering crops tend to stay smaller than photoperiod plants, which naturally limits raw output. The latter can also be kept in veg indefinitely, building a substantial structure before flowering begins.
Autoflowering plants don't have that luxury. Vegging typically runs for 3-4 weeks before the flowering stage kicks in automatically. That said, the gap is closing fast.
Even first-time growers working with high-yielding autoflower seeds and the right setup can produce some excellent results. Let's get into it.
#1: Start With the Right Autoflowering Genetics
In my experience, no amount of technique can fully compensate for weak genetics. The ceiling on your autoflower yield is set the moment you choose your seeds, so I always start here before thinking about anything else.
I’ve found that today’s high-yielding autoflowering strains are specifically bred to deliver better structure, potency, and output than older generations. When I’m choosing seeds, I look for stable genetics, consistent grow reports, and proven performance rather than marketing claims alone.
Five of the Highest-Yielding Autoflower Strains
Jack Herer Autoflower
(15–20% THC | Flowering: 10–12 weeks from seed): A sativa-dominant hybrid with legendary genetics, Jack Herer Auto is beginner-friendly while delivering above average yields. Expect citrus and earthy flavors, with an energizing and creativity-boosting high.
Granddaddy Purple Autoflower
(20–30% THC | Flowering: 8–10 weeks from seed): An indica celebrity known for its ease of growth and visually striking purple buds. GDP Auto delivers heavy yields of resin-coated flowers with grape-berry flavors with deeply relaxing effects.
Triple XL Autoflower
(15–20% THC | Flowering: 8–10 weeks from seed): Built from Northern Lights #5, Big Bud, and Green Crack genetics, Triple XL lives up to its name. This skunky balanced hybrid is engineered for extremely XL yields from a compact, short plant.
Amnesia Autoflower
(20–30% THC | Flowering: 8–10 weeks from seed): A sativa classic delivering an energizing and mood-enhancing experience alongside above average yields. Amnesia Auto fills the grow space with sharp citrus and herbal aromas as flowering progresses.
Wedding Cheesecake Autoflower
(20–30% THC | Flowering: 8–10 weeks from seed): A decadent indica hybrid with Wedding Cake and Cheese genetics, offering unique creamy-sweet flavors, an effortless grow, and rewarding yields. Expect intensely euphoric and relaxing effects.
#2: Place Germinated Seeds Directly Into Their Final Containers
One of the most common mistakes I see with autoflowering plants is transplanting. It seems harmless, but for autos, it creates real problems.
With an auto's short life cycle, any stress that slows growth during those first few weeks costs you directly at harvest. There's no extended veg period to recover from a setback the way photoperiod strains can.
I use a reliable germination technique like the paper towel method, then move the germinated seeds straight into their final pots once the taproot shows.
PS. Make sure to give your new seedlings a warm, humid environment in those first days — 70–80% humidity keeps them from drying out before their roots establish. A simple dome over the pot does the job.
#3: Choose the Right Pot Size (and Type)
Speaking of pots, pot size directly affects how large your autoflowering plant can grow. Root development drives everything above the soil, so more root space means a bigger plant and more bud sites to fill.
For most autoflowering cannabis plants, I find a 3–5 gallon container hits the right balance.
Fabric pots take things a step further. Their porous sides expose roots to air, which naturally kills off circling roots and encourages the plant to grow a denser, more efficient root zone. Overwatering also becomes far less of a risk, since excess moisture evaporates through the fabric.
#4: Give Your Plants the Best Possible Light
Light is what cannabis plants convert into biomass. More usable light, delivered consistently, is the fastest route to bigger buds. Autoflowering plants don't need a light schedule change to trigger flowering. But they absolutely rely on light intensity and consistency throughout the entire grow cycle.
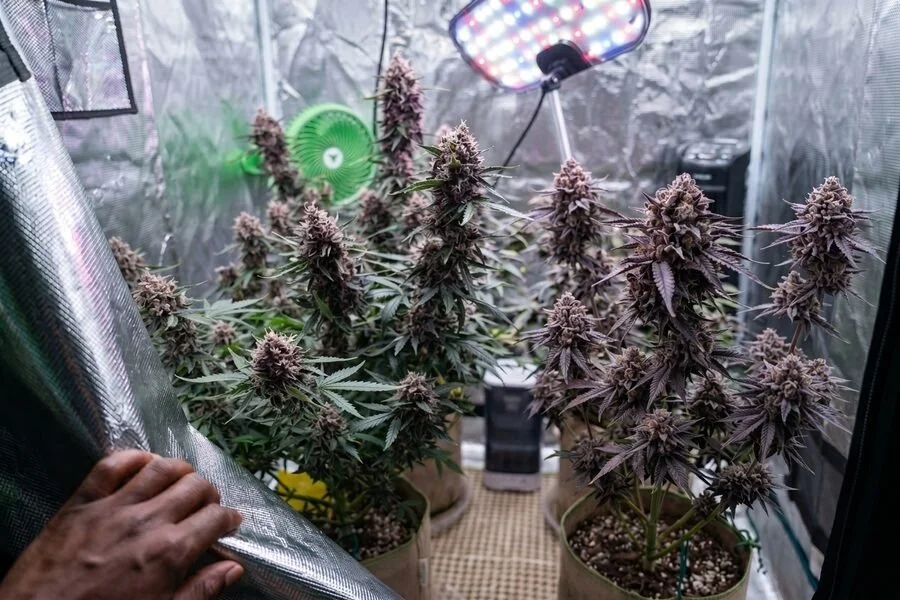
Indoor Lighting
An 18/6 schedule (18 hours on, 6 hours off) is the most widely used approach and works well for most high-yielding autoflower strains. Some growers push to 20/4 with genetics that handle it well.
But continuous 24-hour light is generally not recommended, as cannabis benefits from a dark rest period.
Modern LED grow lights offer the best combination of intensity, spectrum, and energy efficiency. I’ve found they also run cooler than HPS alternatives, which makes temperature management much easier, especially in smaller spaces. I always position grow lights according to the manufacturer's guidelines. Too close causes heat stress; too far reduces light intensity, which cuts into yield potential.
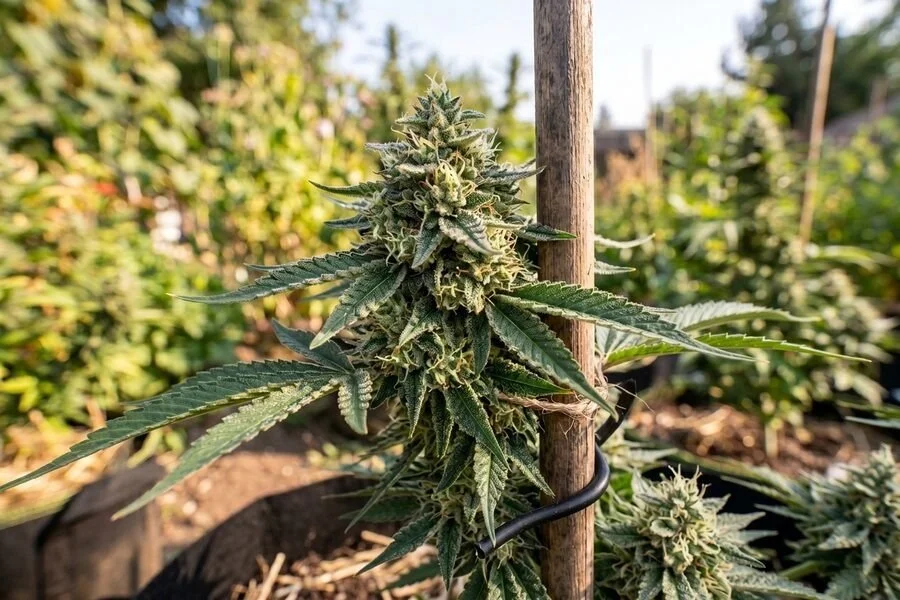
Outdoor Lighting
Natural sunlight is extremely powerful, and growers can run multiple harvests across a single grow season thanks to the short growth cycle of autoflowering strains.
A warm, sunny spot with good airflow is all you need to get better yields from your autoflower seeds. In shorter seasons, autos are a particularly smart choice since they finish before the weather turns.
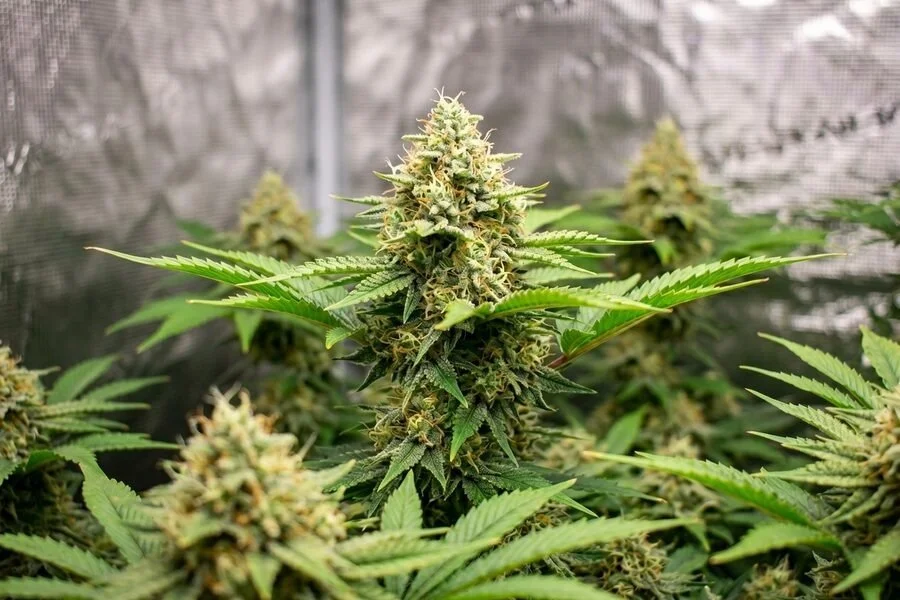
#5: Dial In Your Growing Environment
The environment your autoflowers grow in shapes almost every measurable outcome. Getting temperature, humidity, and airflow right from the start gives your plants the conditions they need to grow at their best and maximize yields.
Use the table below as a practical reference for optimal growing conditions across each stage:
| Growth Stage | Temperature (°F) | Humidity (RH%) | Light Schedule | Notes |
|---|---|---|---|---|
| Seedling | 68–77°F | 65–70% | 18/6 | Keep conditions stable; avoid drafts |
| Vegetative | 70–82°F | 50–60% | 18/6 or 20/4 | Strong airflow supports stem development |
| Flowering (early) | 68–80°F | 45–55% | 18/6 or 20/4 | Begin reducing humidity as buds form |
| Flowering (late) | 65–78°F | 40–50% | 18/6 or 20/4 | Lower humidity reduces mold risk on dense buds |
| Final 2 weeks | 62–75°F | 35–45% | 18/6 | Cooler temps can enhance color and resin |
Don't Forget About Airflow
Stale air allows humidity to build up around the canopy, creating conditions for mold (particularly during the flowering stage, when buds fatten). I use oscillating fans and a proper exhaust system to keep air moving and temperatures stable.
#6: Choose the Best Growing Medium
What your autoflowers grow in affects development speed, nutrient uptake, and resilience. A light, well-aerated medium gives roots the oxygen and drainage they need to thrive.
Good-Quality Soil
This is the most accessible option for all kinds of growers. A blend of standard potting soil with 20–30% perlite improves drainage and allows oxygen to reach the roots between waterings. Organic soil can also enhance terpene expression in your buds.
Coco Coir
This medium offers excellent aeration and drainage with a neutral starting pH. Coco suits growers who want precise control over feeding, though it requires a more consistent nutrient schedule than soil.
Hydroponics
With hydro setups, the roots feed directly from a nutrient-rich water solution, which can significantly accelerate growth and push yield potential higher than soil or coco. That being said, I’ve found hydro requires closer monitoring, but for experienced growers, it’s one of the most effective paths to outstanding yields.
Root Health and Mycorrhizae
Mycorrhizal fungi form a symbiotic relationship with root systems, extending their reach and improving water and nutrient absorption. Adding a mycorrhizal inoculant when planting is a low-effort upgrade that pays off across the entire grow cycle.
Root stimulators in the first two weeks of the grow cycle can also make a noticeable difference. These support root architecture early, which pays off directly when the plant enters the flowering stage and needs its roots firing on all cylinders.
#7: Adopt an Accurate Autoflowering Feeding Schedule
Autoflowering strains need fewer nutrients than photoperiod plants. Their shorter grow cycle means they simply can't process large volumes of nutes. That's why overfeeding is one of the most consistent causes of poor autoflower yields — triggering nutrient burn, slowed growth, and nutrient lockout.
I usually start at 25–50% of the manufacturer’s recommended dose and increase gradually. You can use the table below as a general nutrient reference by growth stage:
| Growth Stage | Key Nutrients | Focus | General Guidance |
|---|---|---|---|
| Seedling | None | Root establishment | Most high-quality soils have enough nutrients. |
| Vegetative | Nitrogen-heavy | Leaf and stem development | Start at 25% of recommended dose. |
| Early flower | Reduce nitrogen (N); raise phosphorus (P) & potassium (K) | Transition to flower development | Switch to bloom formula as buds start to form. |
| Peak flower | High P and K | Bud size and density | Monitor closely to avoid overfeeding. |
| Final 2 weeks | Flush with plain water | Healthy plants at harvest. | Flushing removes nutrient buildup for cleaner flavors. |
pH Management is Important Too
Even a well-balanced nutrient solution becomes unavailable if the pH is off. For soil, keep watering pH between 6.0 and 7.0 — with 6.3–6.8 being the sweet spot for most autoflowering strains. Coco and hydro setups require a tighter range of 5.5–6.2. Check runoff pH regularly to catch any drift early.
#8: Use Training Methods to Maximize Bud Sites
Training can meaningfully increase autoflower yields by improving how light reaches the canopy.
But it needs to be gentle.
Autoflowering plants have a fixed life cycle with no recovery buffer, so high-stress methods like topping, FIMming, and super cropping are best avoided.
A stunted plant going into the flowering stage will always underperform.
Low-Stress Training (LST)
LST is the most reliable approach I use for autoflowering plants. It involves gently bending branches and securing them horizontally with soft ties, garden wire, or bamboo stakes used as anchor points. This opens the canopy and exposes the lower bud sites to direct light.
I usually start LST around the third week, once the plant has enough branch structure to work with.
The goal is a flat, even canopy rather than a single central cola. More bud sites in direct light means more productive flowering across the whole plant, without adding meaningful stress to your autoflowering plants.
Sea of Green (SOG)
SOG involves growing multiple smaller plants in close proximity to maximize your grow light's footprint. More plants mean more bud sites, equating to more harvests. I believe this suits autoflowering strains particularly well, since they stay compact and move through their grow cycle fast.
For growers measuring success per square foot rather than per plant, SOG is hard to beat. Apply it to high-yielding autoflowering strains for the best results.
#9: Water Consistently and Correctly
Both overwatering and underwatering reduce autoflower yields. Remember, autoflowering plants have smaller root systems than photoperiod plants. Water uptake is slower, so waterlogged soil is a higher risk.
The simplest guide: let the top inch of soil dry out before watering again.
When I lift the pot, I measure by weight — a light pot needs water, a heavy one doesn't. Water thoroughly each time and let it drain fully. This encourages roots to reach deeper into the medium.
If tap water quality is a concern, reverse osmosis water gives your plants clean, mineral-free hydration.
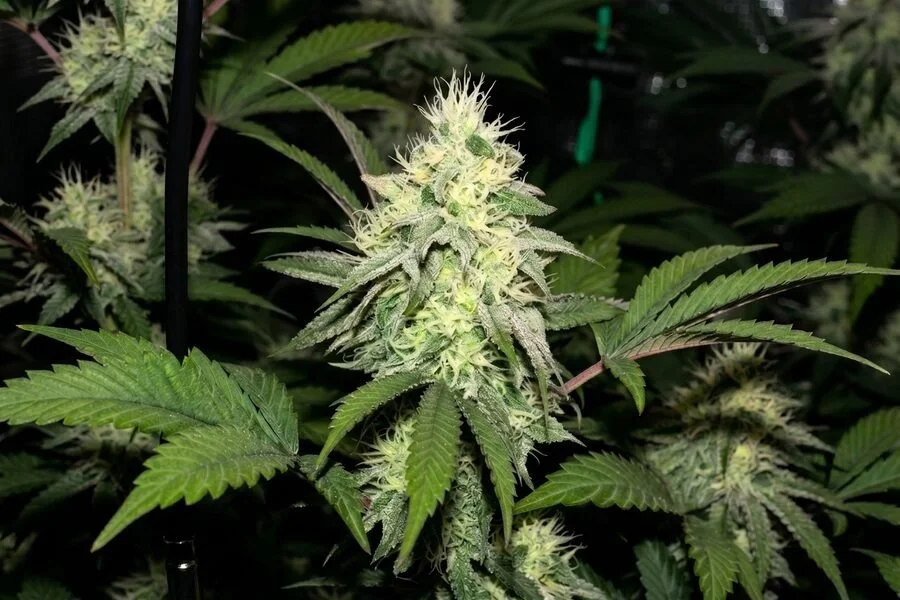
#10: Harvest at the Right Time
Pulling my harvest too early is one of the most common reasons I see autoflower yields disappoint in weight and in quality. Buds that haven't finished developing are less dense, less potent, and lighter than they should be.
Here's how to know it's harvest time:
Inspect your buds. Use a jeweler's loupe or small digital microscope to check those trichomes (and remove the guesswork).
Check trichome color. Clear means they're not ready, while milky white signals peak THC. Amber indicates that other cannabinoids are increasing, and the effects will be more calming and body-focused.
Watch the pistils. The fine hairs on your buds darken and curl inward as flowers mature. When 70–90% have changed color, you're close.
Use both signals together. Pistils tell you when to start looking. Trichomes tell you when to cut.
Heavy Harvests Await
Getting the biggest yields from my autoflowers comes down to stacking the right conditions. Strong genetics, the right pot, consistent light, a stable environment, and a measured approach to feeding — these aren't complicated individually. But together, they make a significant difference.
When I apply these steps from seed to harvest, the improvement in my autoflower yields tend to be immediately noticeable.
Ready to get started?
Browse our complete range of high-yielding autoflower seeds and find your next favorite runner.
FAQs About Autoflowering Yields
Have a question on your mind about autoflowering yields? Here are some quick-fire answers.
What is the Average Yield for Autoflowering Cannabis Plants?
Average autoflowering yields vary depending on genetics, environment, and experience. Most autoflowering plants produce between 1 and 5 ounces per plant, though well-optimized grows can easily push beyond that. Starting with high-yielding autoflower seeds gives you the best foundation.
How Much Yield Can I Expect From Outdoors vs. Indoor Autoflowering Plants?
Autoflowering plants typically produce 1–5 ounces per plant, with LST pushing higher outputs, but final results will always vary depending on climate, lighting, feeding, plant health, and strain selection.
Do Bigger Pots Always Mean Bigger Autoflower Yields?
Generally, yes. Bigger pots support greater root development, which allows for a larger plant size and more bud sites. For most autoflowering cannabis plants, a 3-5 gallon pot is a solid starting point.
Can You Top Autoflowering Cannabis Strains?
Topping autoflowering strains is generally not recommended. The fixed life cycle leaves little room to recover from the stress, and a stunted plant going into the flowering stage will always underperform. Low-stress training achieves similar canopy improvements without the recovery cost.
How Many Harvests Can I Get From Autoflowers in a Grow Season?
Most autoflowering cannabis strains finish in 8–10 weeks from seed, so indoor growers can typically achieve 4-6 harvests per year. Outdoor growers in warmer climates with longer summers can fit 2-3 harvests into a single grow season. In shorter seasons, 1-2 harvests are more realistic.