Whole House Water Filtration Systems
I love our neighborhood, but our water quality is garbage. It can look yellow, taste and smell weird, and sometimes turns our laundry a lovely shade of poop. While the information below won’t solve the massive, systemic water crises we’ve seen in places like Flint, Michigan, and Jackson, Mississippi, here are the basics on how to install whole house water filtration systems to improve your water’s look, taste, smell, and imperceptible contaminants.
TL;DR: We ended up forgoing the expensive water softener option and instead upgraded our single-stage whole-house water filter to a custom five-stage whole-house water filter system (which includes this spin-down sediment water filter, this 3-stage heavy metals water filtration system, and a final single-stage water filter) suggested by our neighbor Tolu. This system has all but fixed our issues for a fraction of the price. Here’s how.
This post may contain an affiliate code or link that is no additional cost to you, and I may earn a small commission when a purchase is made.
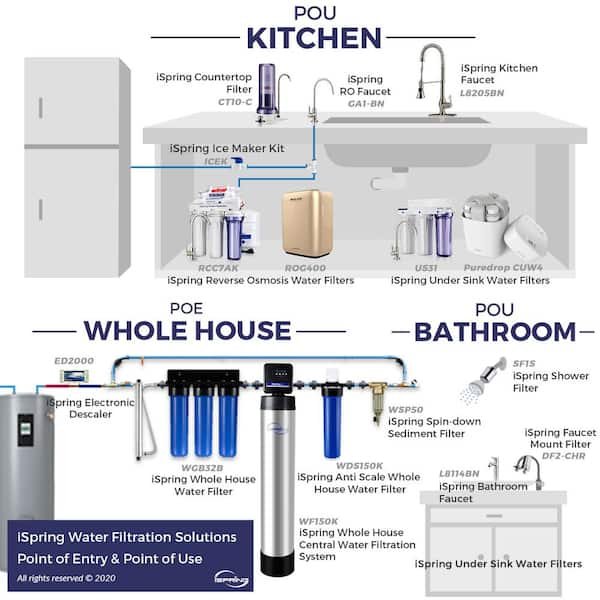
Filtration: Whole-House vs. Under-Sink
Fairly self-explanatory, but a whole-house water filtration system differs from an under-sink or point-of-use (POU) water filter system in a few ways:
A whole-house water filtration system treats the water just as it enters your home, so every sink, shower/bathtub, and appliance receives the treated water. This option is best if you have systemic water issues like we do.
An under-sink or POU water filtration system treats the home’s water only at one location. This option might be best if you have minor water issues and only want to filter water for drinking/cooking in your kitchen, for instance.
NOTE: These options are different from a water softener system, which we’ll discuss later.

Where does your Home’s water come from?
There’s city/municipal water and there’s private/well water.
With city water, it’s controlled and treated by your local municipality, so ideally this means it’s readily available, regularly tested/maintained, and may have added nutrients like fluoride.
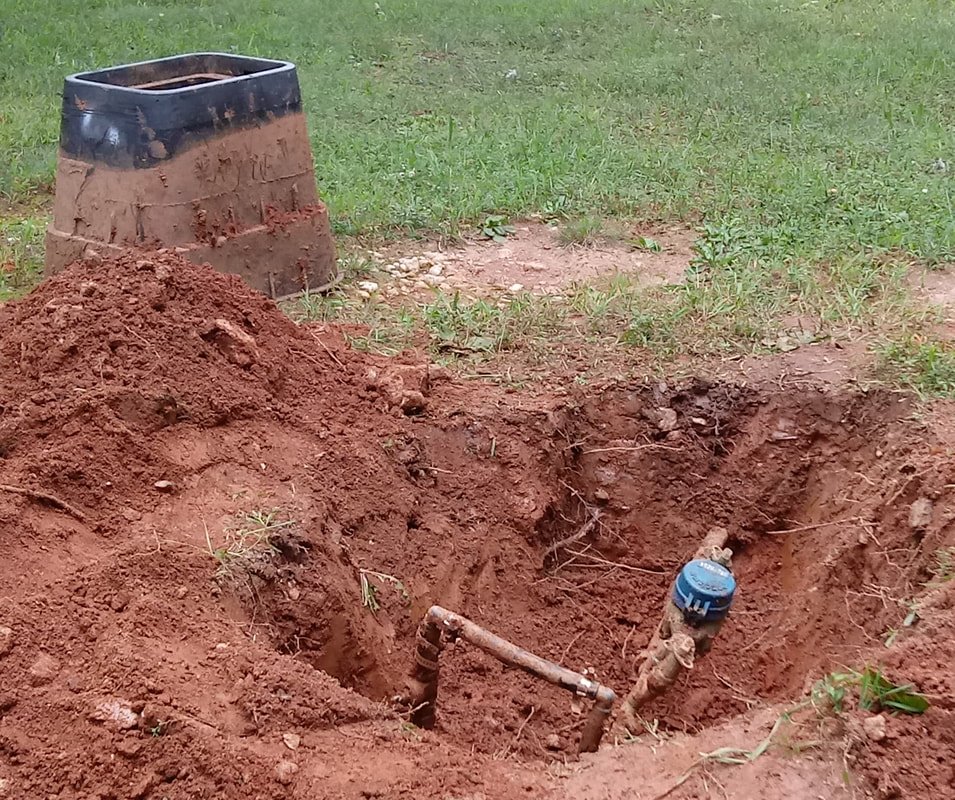
We’re on a community well, which in our case means our home’s water is supplied by a private neighborhood system of 6 wells and 2 water tanks serving about 170 homes.
Well water is replenished from underground aquifers, so it’s typically treated with less chemicals (a pro) but it’s a bit more variable (a con), and is naturally more mineral-rich than surface water (a pro and a con). It also needs to be maintained by a homeowners association or private company rather than the municipal government, and relies on an electrical pump that could be compromised by a power outage (ours is on a generator, but with a long enough power outage and lack of access to fuel, the water could shut off, a major con).
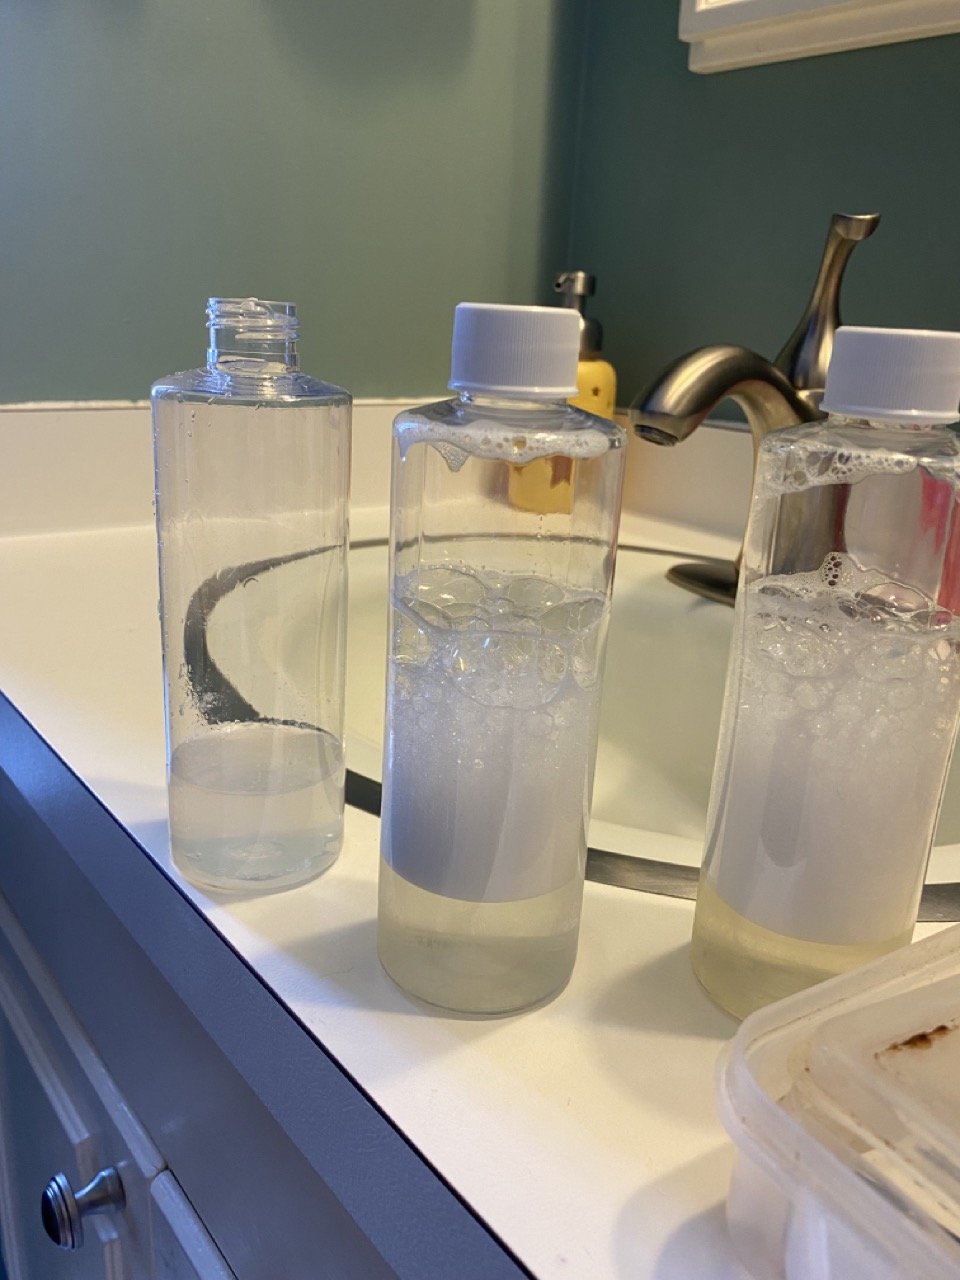
Especially during the pandemic—with everyone using bathrooms and kitchens at home instead of the office or gym or restaurants—our system got especially stressed. Our neighborhood was using 40-50% more water each day than usual, forcing the wells to pull that much more water out of the ground, and run longer, without allowing the time for ground water around the wells to recharge. The result was that the wells pulled more sediment up with the water, making it that lovely shade of yellow-brown and even more mineral-rich than usual.
HOW TO FIX WATER ISSUES
Whether dealing with city or well water, part of the solution is to simply use less water and put less stress on the system—showers instead of baths, turning off the water while brushing teeth, all of the things they tell you in PSAs. But the other solution is filtration, and this is something that most of my neighbors handle individually, house-by-house.
When I asked our HOA why we couldn’t simply treat the water at the source, they said, “Centralized water treatment is not not an option for our current distribution system. We have a one-pipe well system. If we wanted central filtration then we would have to pipe the water from wells located all over the community to a central plant and then back out to the homes. The plant itself would be an additional cost and have to be built with DEQ restrictions on disposal of backwash. It is a nonstarter.”
I don’t understand most of that, but I’m pretty clear on what “nonstarter” means.
So…here’s how we filter our water inside our home.


Our Starting Point: Single-stage whole house filtration
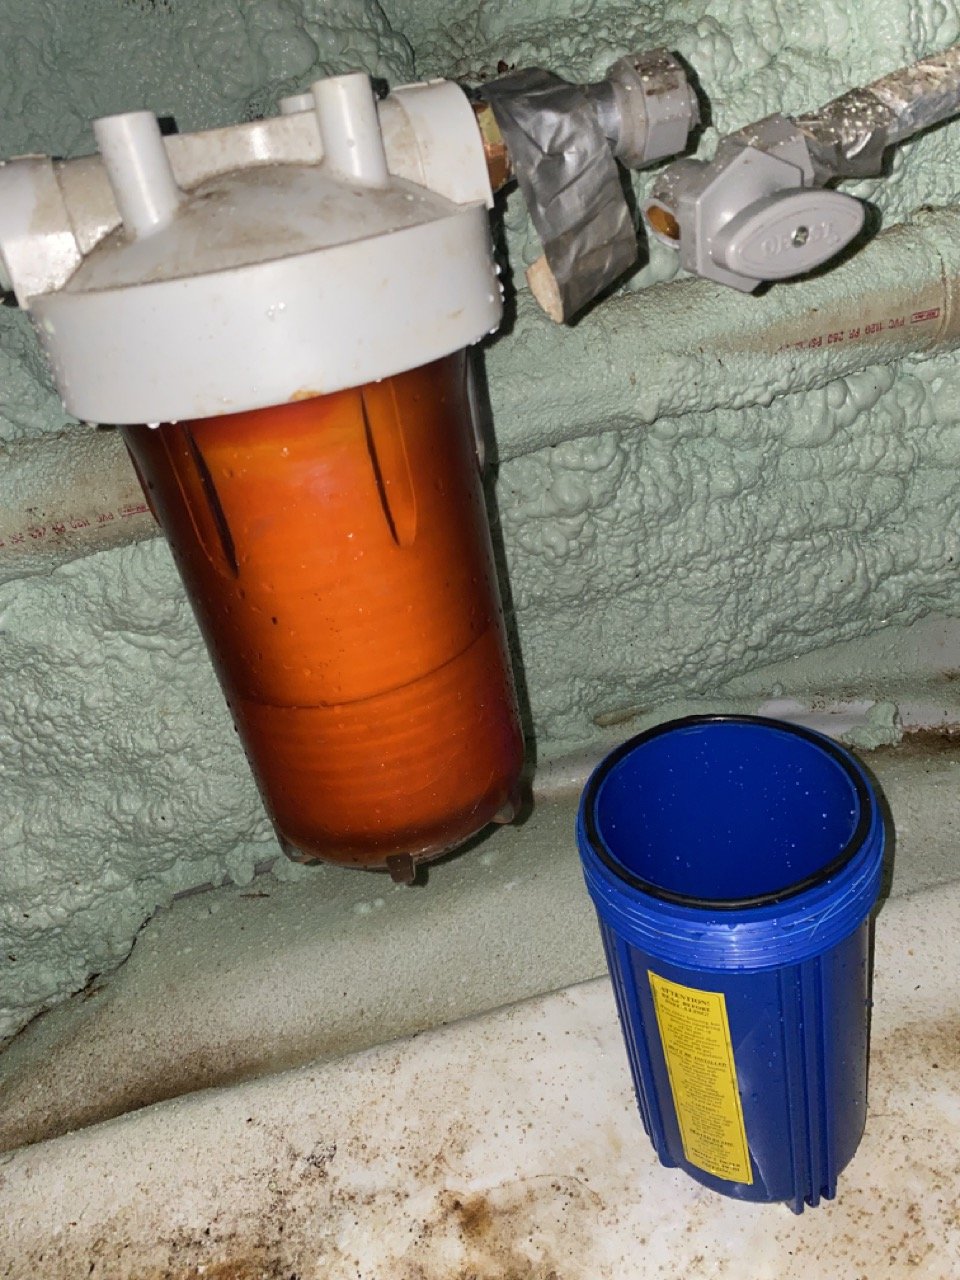
When we moved into Thunderbird Disco, our home had a single-stage whole house filtration system. It consists of a large plastic housing that contains a single 10-in x 4.5-in replaceable water filter designed to remove sediment, rust, dirt, and other large impurities.
PROS
It was here already!
It was relatively cheap to maintain, changing out the $30-40 filters every few months.
CONS
It was located in an extremely inconvenient area of our crawlspace, so it was a pain in the ass to replace the filters (more of an issue with installation than the filtration system itself, but…).
While a new filter would make the water clearer for a couple months, it didn’t do much for the taste or the laundry.
Most of the 10 x 4.5-in sediment or carbon filters designed for these systems only filter down to 25 microns, though you can find sediment filters that go down to 5 microns or lower and fit in this single-stage housing.
The Breaking Point
I’ve replaced the filter cartridge on this a million times, but at some point I tried to replace the plastic housing (the old one had been stained orange from sediment, as you can see) and when I turned the main water line back on, the aging plastic valve cracked in half and sent water spewing everywhere until I got it turned off. Time to switch things up.
Measuring Contaminants: Microns and PPM
A micron is a unit of measurement you’ll often see when dealing with water filtration. 1 micron is one-millionth of a meter or 0.00004 inches. For scale, a human hair is about 70 microns. Microns are an important measurement when trying to filter out sediment, rust, dirt and other particles found in water.
But then there’s the stuff you can’t see. With well water from underground aquifers, the water will flow through soil and over rocks, picking up various minerals as it goes, including calcium, iron, magnesium, copper (just to name a few), as well as pesticides and herbicides that have seeped into the ground over time.
All of this is measured as total dissolved solids (TDS) measured in parts per million (ppm). It totally depends on the contaminants present and some mineral content is beneficial for humans and plants/gardens, but the maximum amount of TDS generally deemed safe for drinking water is 500 ppm.
Even a much smaller level of certain minerals can lead to “hard water” which will have a detrimental effect on taste and smell, not to mention appliances, cooking and laundry, introducing scale and other mineral buildup. Hard water also requires more soap/detergent.
You can measure TDS with a handheld TDS meter, or get a professional analysis.
DIAGNOSING BY SIGHT: IRON + MANGANESE
We have a pool, and are no strangers to hosting a pool party. But our pool is nice and clean and in the summer we kept noticing that light-colored clothing and especially the edges of our swimsuits were getting stained brown.
At first we worried that we were just dirty, disgusting people. But given the placement of the stains, we did some sleuthing and discovered that sunscreen—specifically a chemical called avobenzone found in most spray sunscreens—oxidizes with iron minerals found in water and turns clothing that lovely orange color.
This discovery helped us understand that our water had high iron content (Fe).
Separately, we noticed that the inside of all our toilet tanks has this black flaky film, and some Google-fu informed us that this is due to high manganese content (Mn).
Now, to confirm these suspicions…
DIAGNOSING PROFESSIONALLY: Water Softener systems and Water ANALYSIS
We started asking around and a lot of our neighbors had installed Kinetico water softener systems to deal with a variety of water issues.
Water softener systems remove water “hardness” (dissolved minerals) through a process called ion exchange. Hardness ions like calcium, magnesium, limestone and iron are exchanged for softer sodium ions, and then salt is added periodically to regenerate the process.
PROS
Non-electric
Can more fully remove dissolved solids
Soap/detergent lasts longer
You get a silky/oily feeling on your hair/skin, if you’re into that sort of thing
CONS
MUCH more expensive up front
Requires much more space for large tanks
Need to replenish with large quantities of salt once or twice per year (~five 40-lb bags of salt, at around $8 apiece).
Requires a separate under-sink reverse osmosis system to remove additional impurities
You get a silky/oily feeling on your hair/skin, if you’re NOT into that sort of thing
We signed up for a free water analysis from our local Kinetico provider, and here’s what his analysis found present in our drinking water:
Hardness = 9 (Very Hard)
pH Value = 7.1 (Normal)
TDS = 127 (Present)
Chlorine = Not Present
Iron: 2.2 ppm (High: Fe stains at levels of 0.3 ppm and above)
Manganese: 0.3 ppm (High: Mn stains at levels of 0.05 and above)
Sediment = Present (High)
Our technician assured us that the systems he had in mind could filter out heavy metals, sediment, and improve the softness of our water. Personally, neither Kate nor I particularly liked the oily feeling that soft water left (it felt like we could never get the soap off).
More importantly…the two systems he quoted us were $4000+ and $6000+ respectively (AFTER applying $1500+ in freebies and discounts), and this was just too rich for our blood.
SO…we went a different route.


Multi-Stage filtration
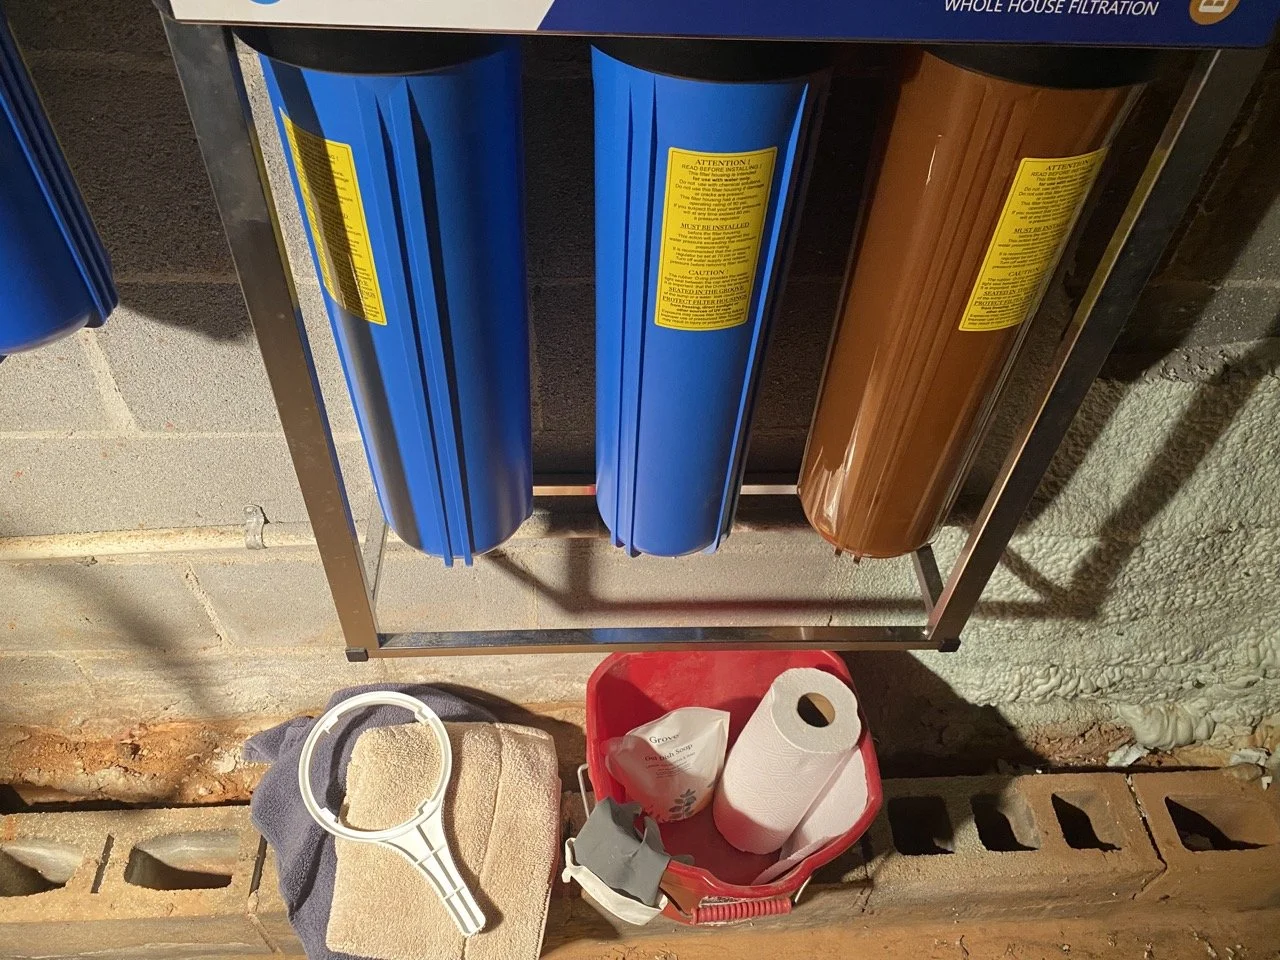
Somewhere in between the budget single-stage filter and the excalibur water softener system is a multi-stage filter setup. I knew that our next-door neighbor Tolu Odumosu—a brilliant engineer with deep knowledge and a willingness to experiment with all kinds of electrical, audio/video, and water systems—had created his own custom setup. Since we have the same water I figured if it’s working for him it might work for us. I made a few additional modifications, but here’s what I ended up with. I’ll also include the prices minus the discounts I got using the Capital One Shopping plug-in, which I highly recommend:
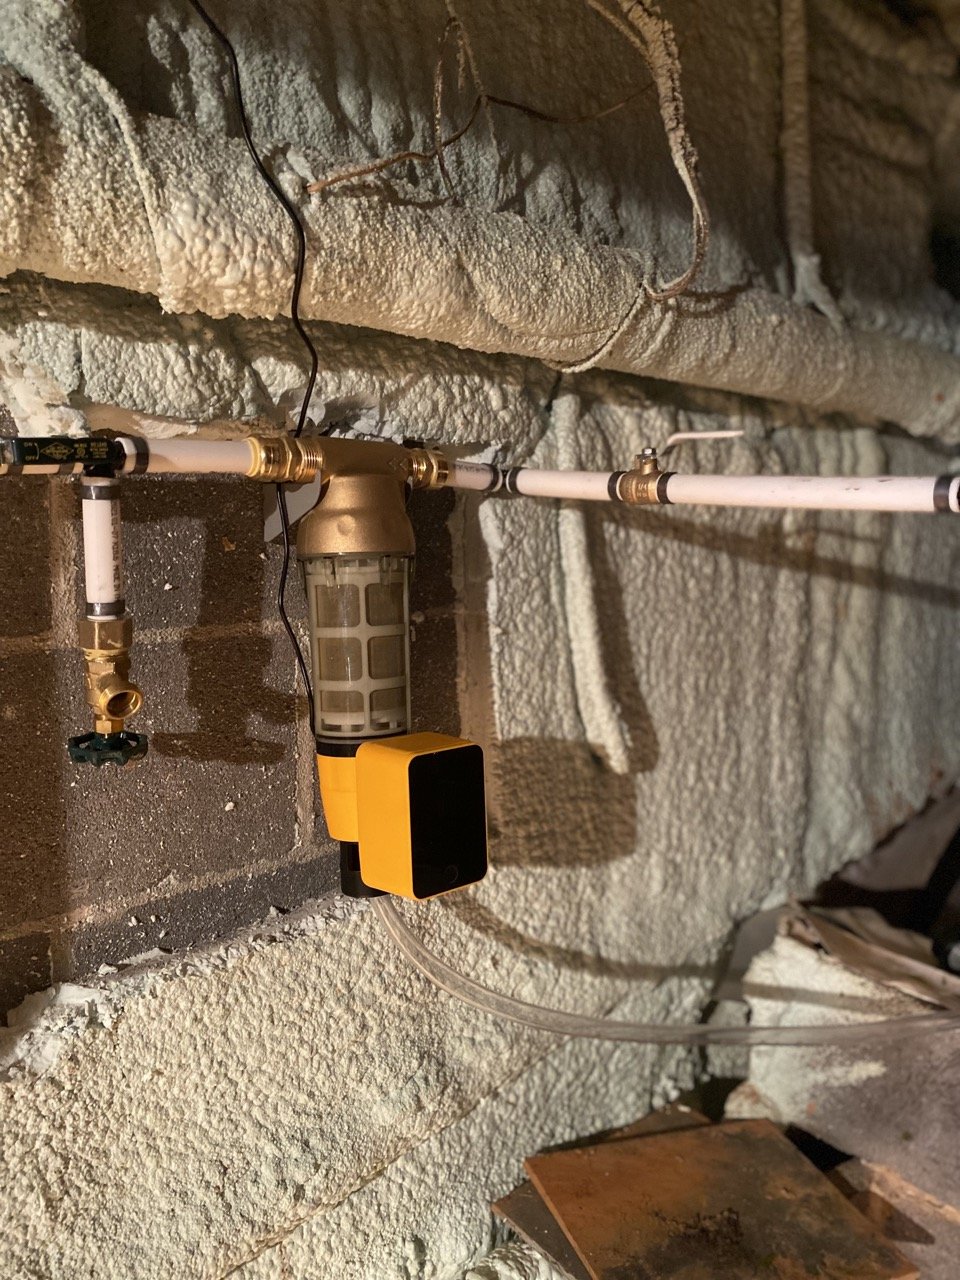
STAGE 1: iSpring Reusable Spin-down Sediment Water Filter, Auto Flushing Module (Lowe’s / Amaz0n)
This first step removes sediment and some of the largest particles before it gets to the replaceable filters. There’s a flushable/washable/reusable 100-micron mesh filter and you can preset it to automatically clean/flush on whatever schedule you choose. This stage will need to drain outside or directly into a sump pump, so we installed this part of our system closest to our sump pump.
Cost: $218 (minus $76 in Capital One reward discounts) = $142
STAGE 2-4: Express Water Heavy Metals 3-Stage Filtration System (Lowe’s / Amazon)
After we remove the largest pieces of sediment, the water passes through a 3-stage filter system: going from right to left…
The sediment (SED) filter cartridge removes sediment, dirt, rust and sand down to 5 microns.
The kinetic degradation fluxion (KDF) cartridge removes heavy metals including Iron, Manganese, Lead, Nickel, Cadmium, Sulfur, Hydrogen Sulfide, Chromium, Mercury, Chlorine, Chloramine, Copper, Aluminum, and more.
Finally, the activated carbon block (ACB) filter captures chlorine, pesticides, pharmaceutical runoff, and other chemicals, improving smell and taste.
Tolu picks his own filters for each stage. I did some research and found this system with this filter set to be the most economical, plus I like that the first stage has a clear housing so you can see the state of the sediment filter.
Cost: $449 (minus $14 in Capital One Rewards) = $435
Additional Filter Sets: $153
STAGE 5: 10-in Whole House Filter Housing with 0.5-Micron Filter Cartridge
For the final stage, the water passes through a typical whole-house filter like what we started with, except I’m using a 0.45-micron combination ACB/sediment filter to polish off the water and remove the smallest impurities.
Cost: $35 for the housing + $48 for the filter.
Budget option: Buy 1-micron sediment filters in bulk (20-pack) and pay less than $7 per filter.
INSTALLATION AND OTHER FEATURES
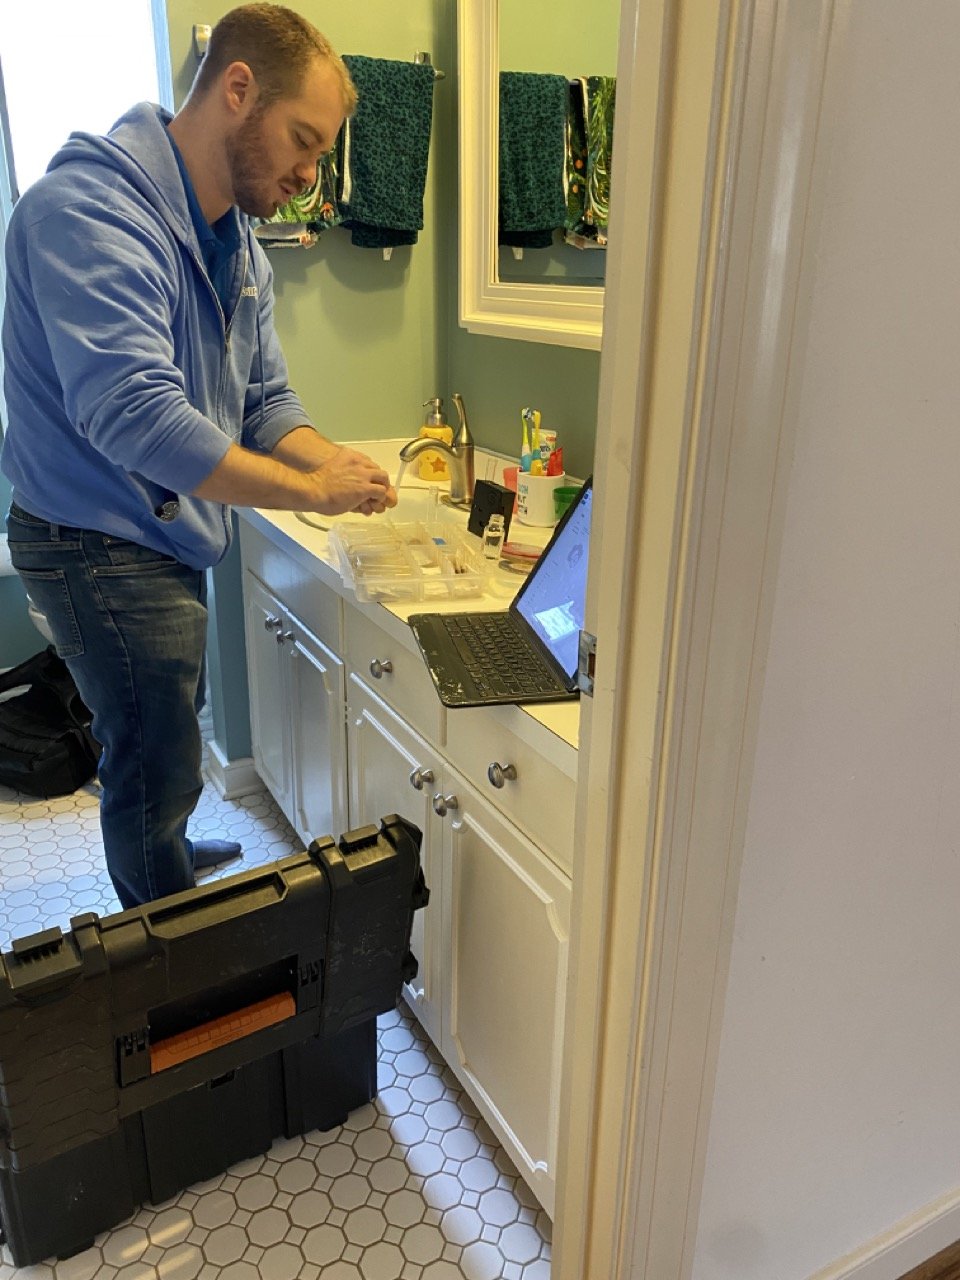
I was thinking of attempting the installation myself, but given how I almost flooded our basement when replacing the original housing, and some of the modifications I wanted to make, I opted for professional installation.
Moved the entire water filtration setup from the highly inconvenient crawl area to a more accessible spot where it’d be easy to monitor and change out the filters.
Added a spigot at the start of the system: our HOA periodically announces that they’re “flushing the lines” and whenever this happens it kicks up a ton of sediment and they recommend running your faucet for a while until the water is clear again. Rather than putting all of this sediment through our filters and faucets, the spigot at the front allows us to hook up a hose and discharge all the cruddy water outside before it goes through our system.
Added another spigot at the end of the system: after installing new filters, you have to run the water for a while to discharge some of the carbon particles in the ACB filters, so a spigot here again allows us to hook up a hose and discharge outside rather than having all of that clog up the faucets. Plus, we can manage the whole process from the basement rather than having to run upstairs.
NOTE: the spigot/hose at the end of our system also allows us to fill/refill our long-term water storage tanks directly in the basement where they live, rather than lugging them up and down stairs.
We also added two shut-off valves, at the start and end of the system, for better control
NOTE: There are plenty of other modifications you can add/delete based on what’s in your water. Tolu’s system starts with an Eddy Electronic Water Descaler on the input pipe, for instance, and he says result has been none to minimal scale deposits over the last two years. I haven’t installed one of these yet, but so far haven’t found it to be necessary.
Professional Installation Cost: $576
TOTAL COST (incl. installation and replacement filters): $1236


Water Filtration System Final Test
Six months after installation—and after cleaning the filter housings and replacing the filters—I had our local Kinetico provider do a followup water analysis, and here’s what he found:
Hardness = 8 (down slightly from 9)
pH Value = 7.3 (Normal)
Iron: 0.4 ppm (down substantially from 2.2 ppm, feels like a major improvement)
Manganese: 0.3 ppm (same as before)
Sediment = Low (down substantially from before)
He still recommended a water softener (he’s obviously got a vested interest, so I take the a above analysis with a grain of salt), but even he was surprised to see how much Iron and sediment is actually being removed. A chlorine drip and/or oxidation may improve the manganese issue, but it’s low enough that we can live with it.
Long story short
If you’re a stickler for soft water and zero heavy metals, a $6000 softener may be the way to go. If you want a “close enough” stop-gap solution for around $1200, a custom multi-stage system like this one geared to your specific water issues may do the trick.