How to Build Raised Garden Beds
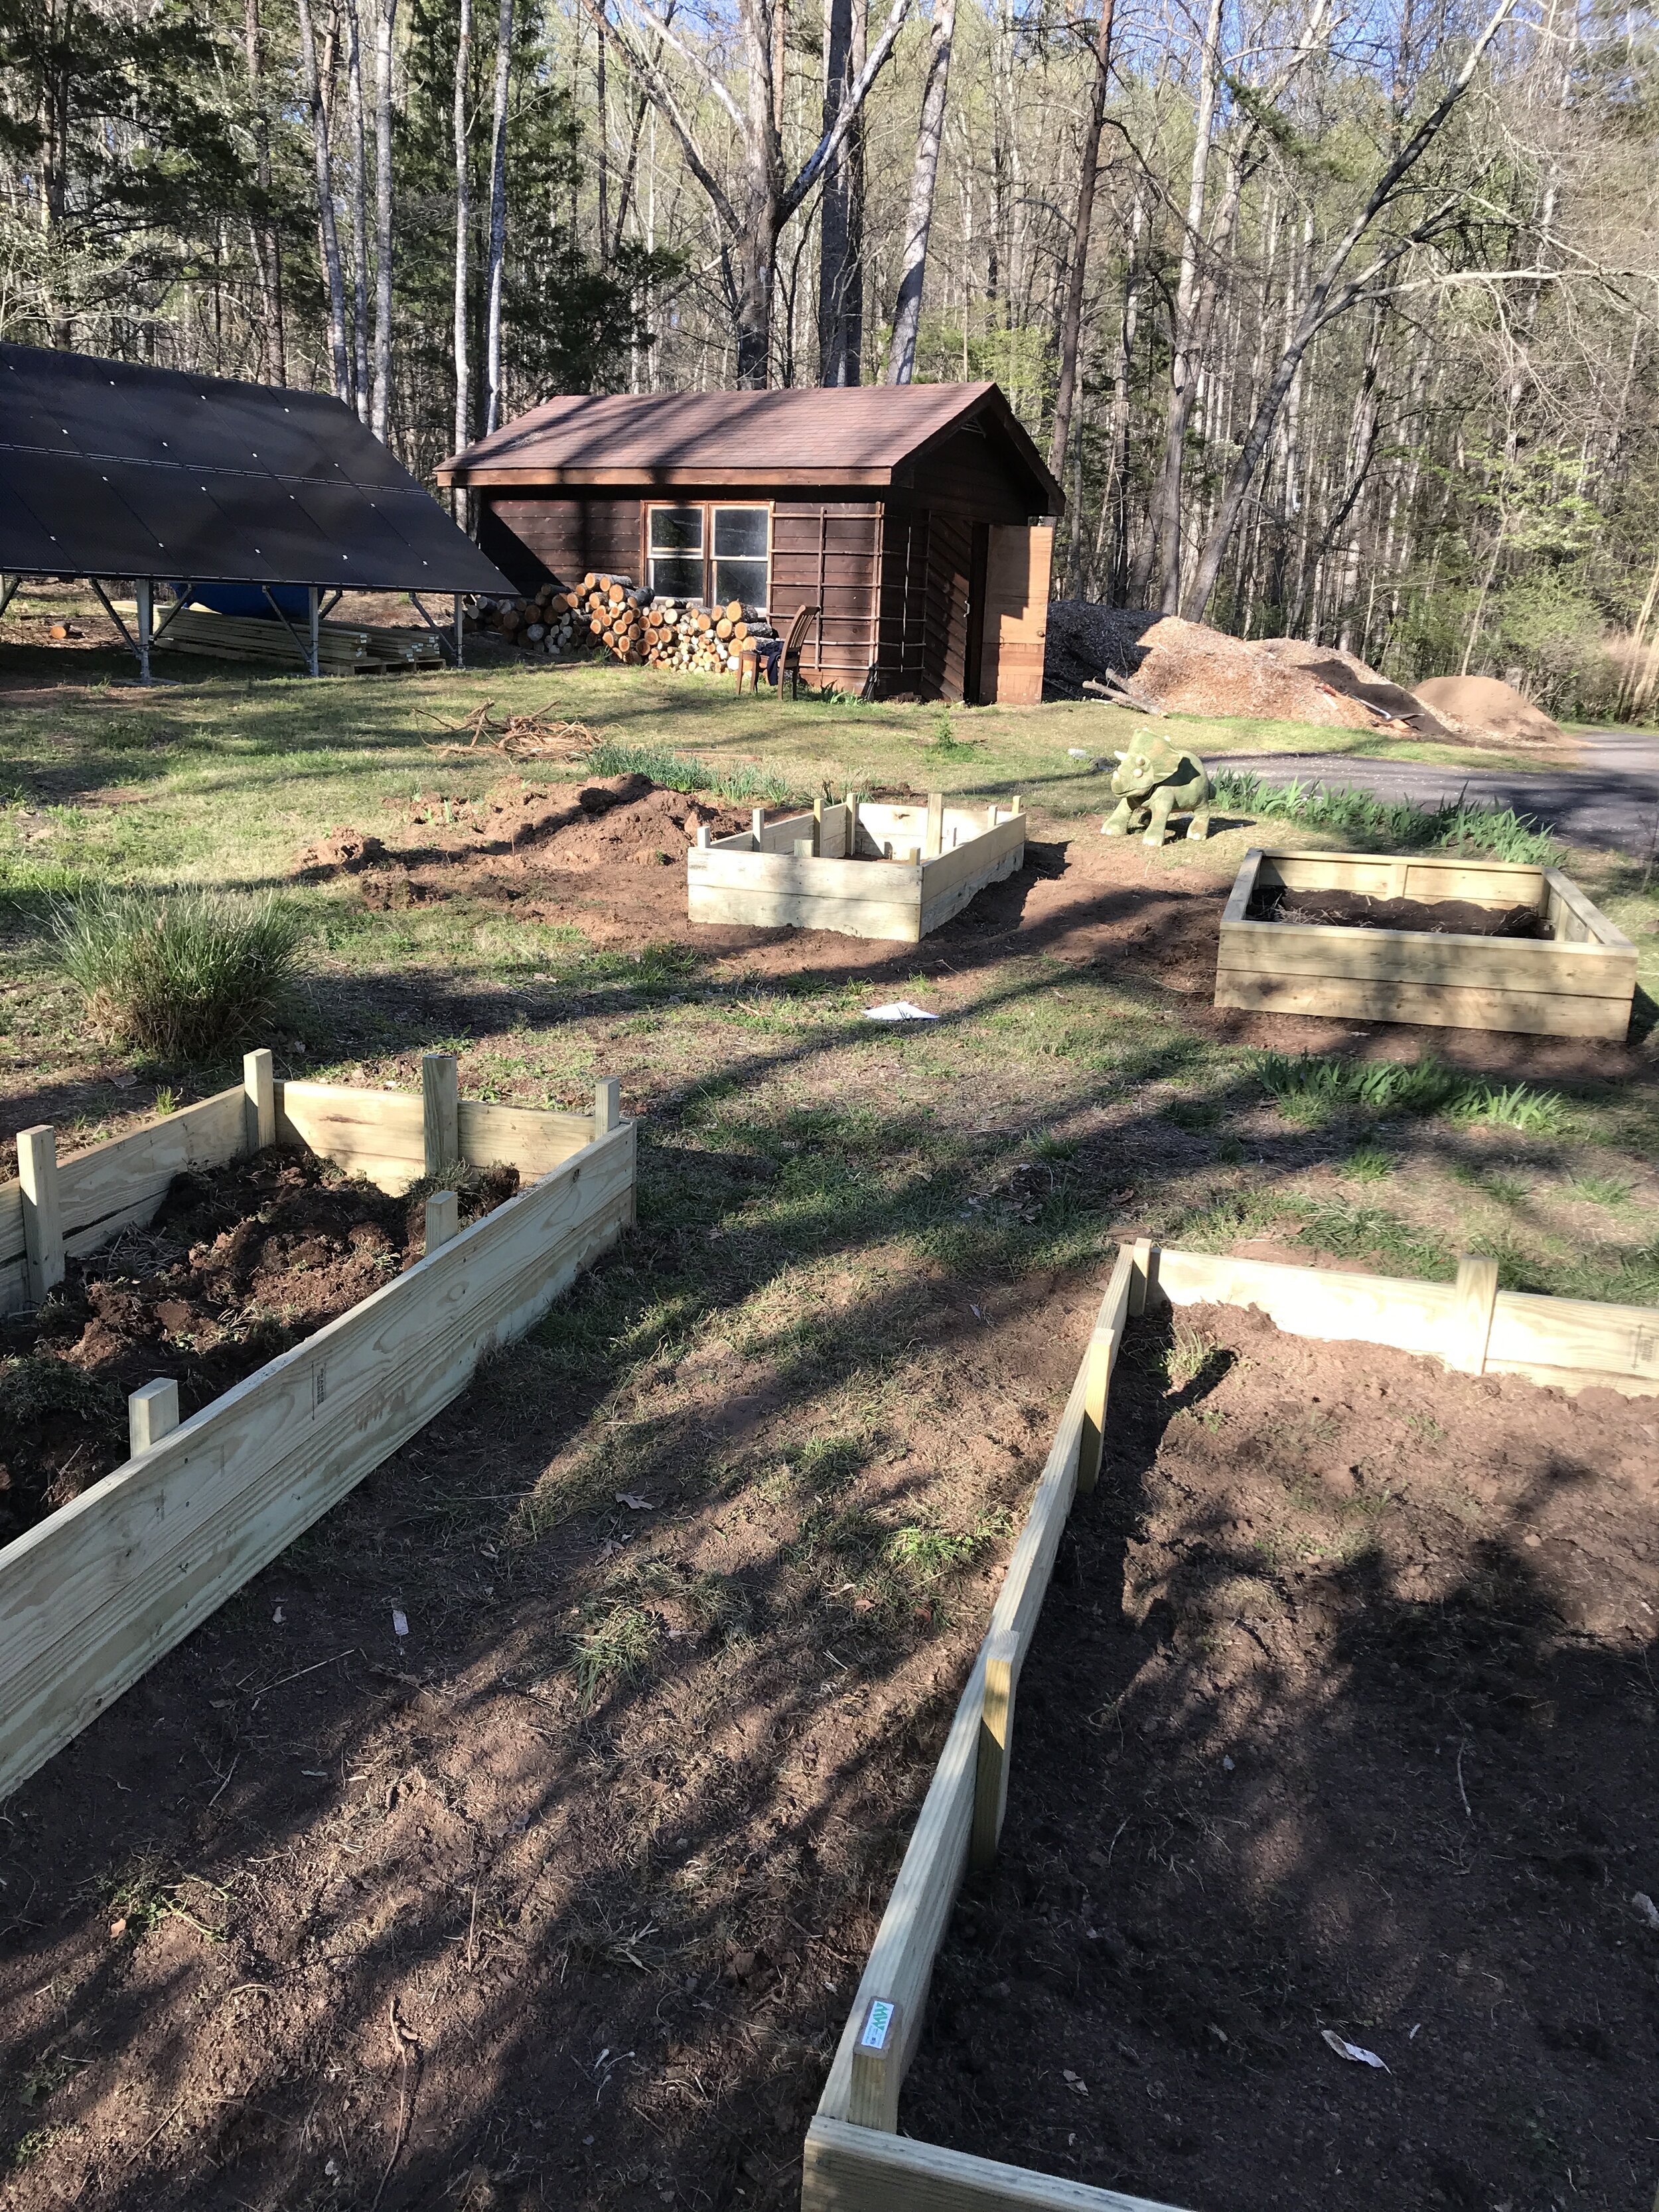
BEFORE & AFTER
WHY SHOULD I Build RAISED Garden BEDS?
I think the short version is that you don’t have to. If you don’t want to take the time/expense to learn how to build raised garden beds and then construct these glorified boxes and fill them with dirt, then don’t. From the experts I talked to, you can often do just fine planting directly in the ground. Or you can buy a prefab version like these Vego modular metal raised garden bed kits or these EarthEasy cedar beds. But we ended up building our own raised garden beds and are very happy about it, for these reasons.
This post may contain affiliate codes or links that are no additional cost to you, and I may earn a small commission when a purchase is made.

SOIL QUALITY
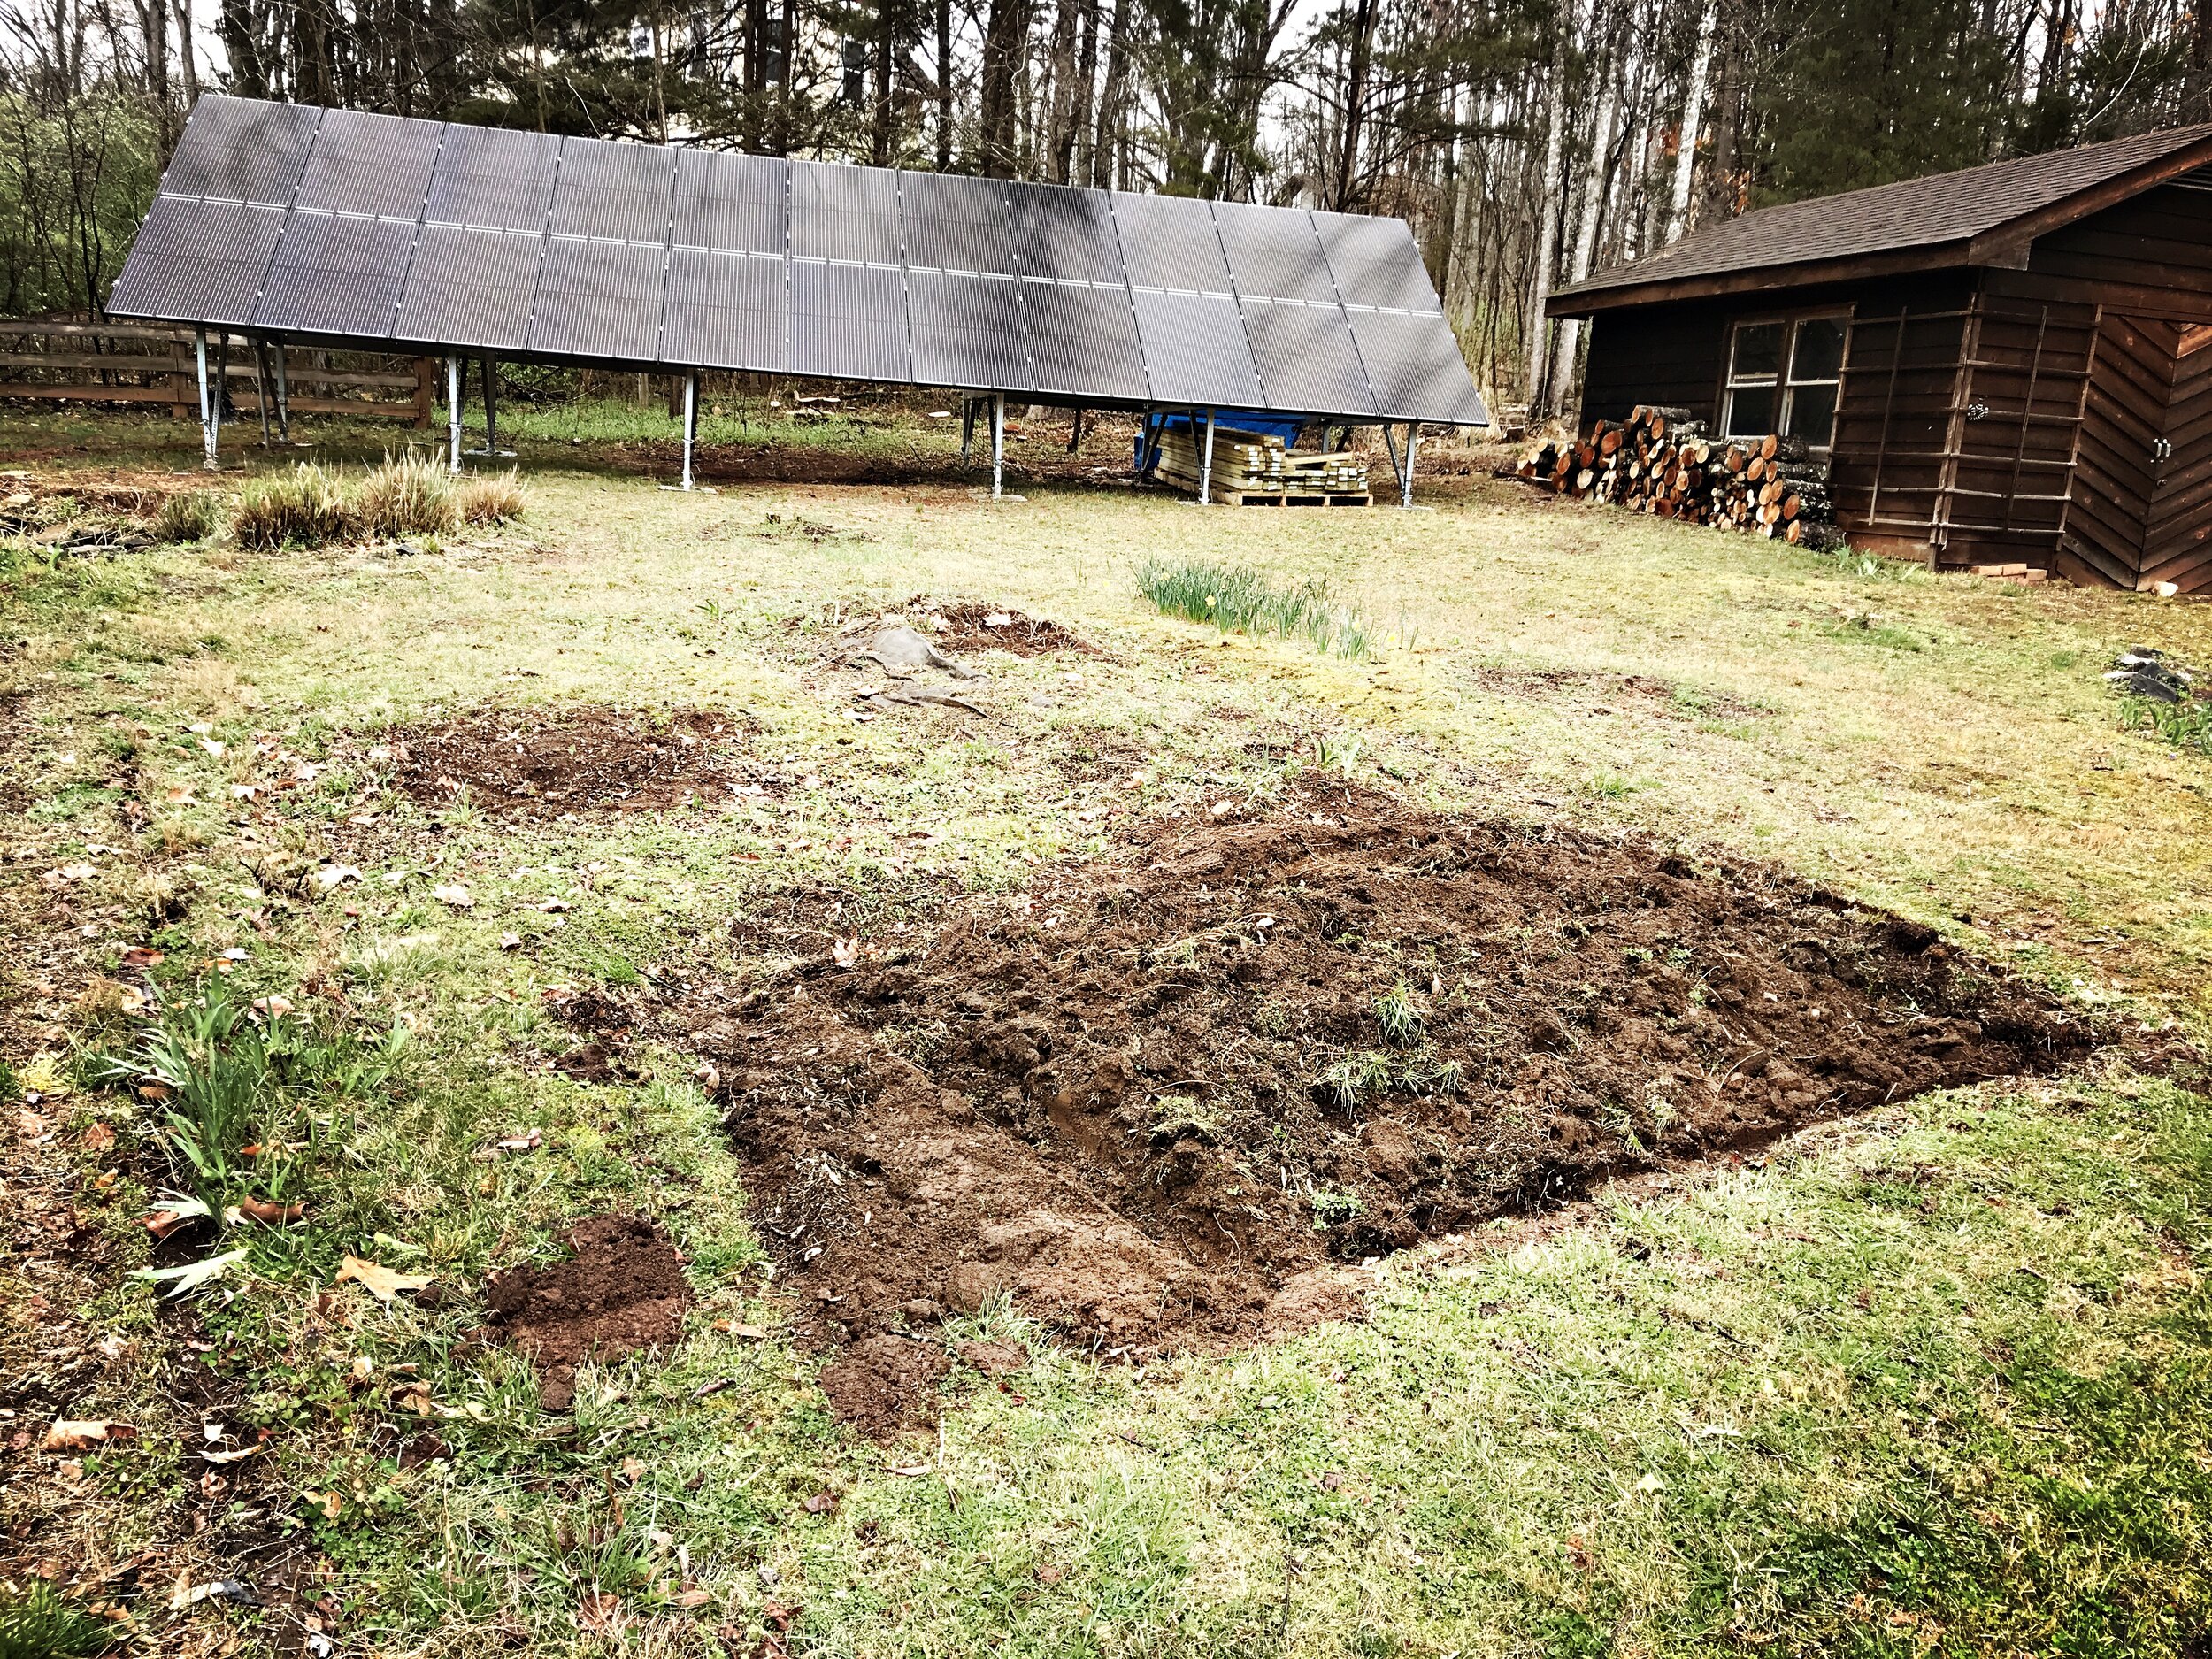
We have this Virginia red clay earth (see below) that’s not great for planting, and with raised beds you can create your own mix of quality topsoil and compost. We also chose to build overtop some spots previously mulched with wood chips. You can see those spots had a layer of better, darker soil.
DRAINAGE
We get some gulley-washer rains and our north field especially is downhill from the neighbors and can get soaked. With raised beds the drainage is much better. And faster draining helps the soil get warmer in the early spring and late fall, extending your growing season.
COMFORT
I don’t love bending. Raised beds bring the plants up a couple feet and make it much easier to weed and harvest without stooping the whole time. With the plan below, you also get a little 2 x 4 lip around the whole bed which serves as a sturdy bench to sit on.
AESTHETICS
We like the way they look. Our garden spot had previously been an overgrown mess and with raised beds you can more easily create pathways and keep the weeds from encroaching on the garden beds.
YIELD
I’m told you can plant more in raised beds and that the roots grow deeper, ultimately leading to greater harvests.
THE PROJECT ITSELF
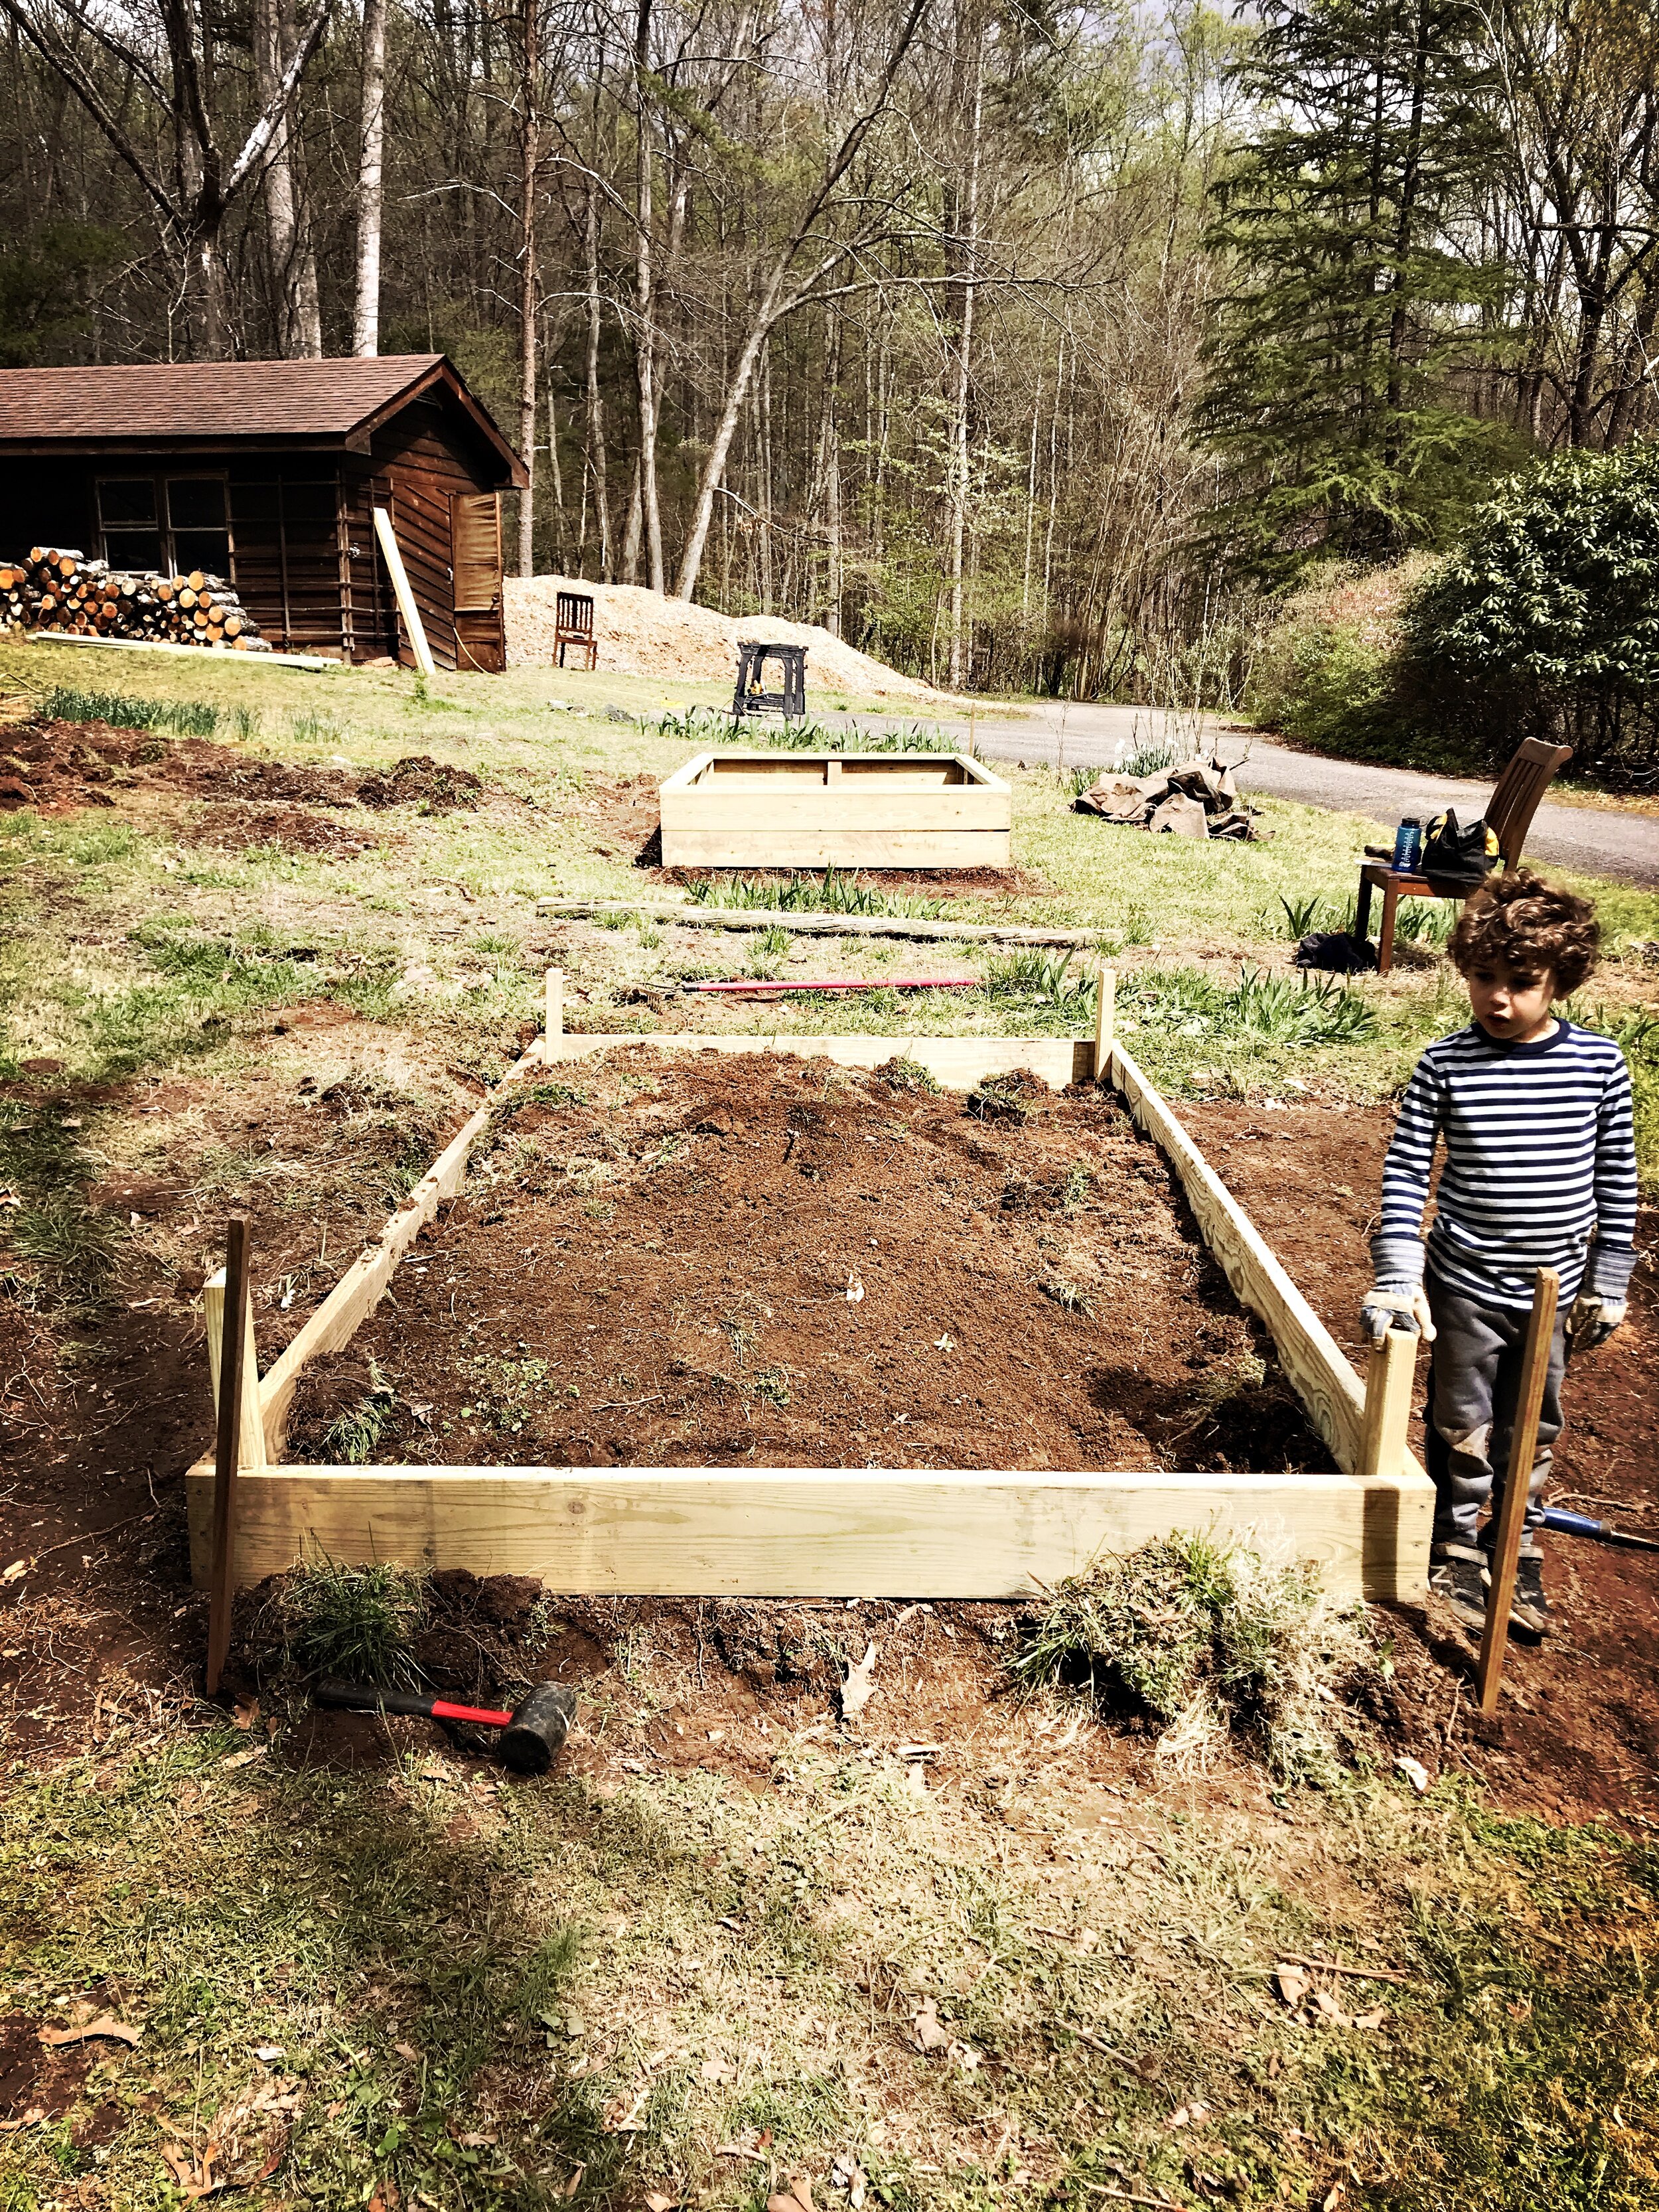
We started building these right at the start of Covid-19 quarantine, and we wanted a building project to occupying our kids and focusing them on a family activity. Jack loved every minute of helping, and it was frankly helpful for Kate and I too, giving us a clear focus and some order in those anxious early weeks of social distancing.
NOTE: As with most projects on this site, we don’t know this stuff offhand, I’m learning by asking advice and checking out websites, books and YouTube videos. Special thanks to the book 40 Projects for Building Your Backyard Homestead by David Toht, where I found really useful plans for building these raised garden beds. I highly recommend picking up a copy from your local independent bookstore.


TOOLS You Need
Twine
MATERIALS (for each 4' x 10' x 16" raised bed)
(2) - 2"x8"x8' lumber
Budget option: pressure-treated, ground contact lumber (very rot-resistant and copper-based treatments (like ACQ) are safe for food crops and cost-effective)
Luxury/organic option: 2” x 8” Western red cedar (natural oils make it rot-resistant without chemicals. The "gold standard" for food safety and aesthetics, but very pricey)
(4) - 2x8x10'
(4) 2x4x12'
GETTING THE STUFF
On the last day I *went shopping* before quarantining in mid-March, my impulse buy was a bunch of lumber. I remember thinking it might be the last day I'd be allowed out of my house for a while. I called our local hardware store/lumber yard and asked if they were still open.
“Today we are, but who knows if we will be tomorrow,” they said, which in hindsight was both true and an excellent piece of salesmanship.
I did some quick math (that I messed up) to figure out the right materials for six 6' x 10' raised beds (messed this up too…six beds was too many beds, and I learned later that 4' should be the maximum width for raised beds because it's a pain in the ass to reach into the middle of a 6-footer). It took four trips back and forth from the outdoor lumber yard (zero contact) with wood sticking out the back of my Highlander (which looked ridiculous). If you don’t have access to a truck, consider building shorter beds (maybe 6 or 8 feet) and, therefore, sourcing shorter lumber that might fit in your vehicle.
SHOULD I USE PRESSURE-TREATED WOOD?
Lots of controversy here. We used ground-contact, pressure-treated lumber (pressure-treating makes it more resistant to mold, pests and general outdoor wear and tear). If you don’t want chemicals, Scottsville, Virginia farmer Dan Goldstein from Waddle Om Farm recommends “using white oak or eastern red cedar, which can be sourced locally from salvaged logs and last longer than pressure treated pine and don’t contain the chemicals that are harmful to soil life.”
In our PT lumber the main chemical is Micronized Copper Azole (MCA) and this is much better than the older PT wood which used to have arsenic in it and was banned by the EPA. I've read studies (like here or here) that trace amounts of copper only leach a couple millimeters into the soil (so be sure to plant seeds a few inches from the edge) and copper is a nutrient humans readily process (we have copper in our water, so...). But yes, if you use PT it’s not “certified organic” which may or may not matter if you’re just looking to eat what you grow.
Also consider sealing your wood with a plant-based, food-safe wood sealer.
GRADING AND CUTTING LUMBER
New processes have helped standardize lumber (like this stuff), but if you’re buying from a lumber yard its likely that some of boards may be warped, bowed or twisted, and nearly all lumber will have a natural “crown” (see here for a great primer on lumber). You’ll want to visually inspect each board and understand that these slight imperfections will impact construction.
For that reason and many others, it’s not a great idea to cut all of your lumber at once and then try to piece it together. Do one step at a time, measure, cut, screw stuff together, and then measure again for the next piece you’re going to need.
I also learned the hard way that with dimensional lumber there’s a difference between the “nominal size” (the stated 2” x 8”) and actual size (most 2x8 is actually 1.5 x 7.25, for instance). At the same time, the length of dimensional lumber varies from board to board and is typically an inch or two longer than its stated length, so you’ll want to measure before just dropping boards into place. Here’s a handy site to see the difference between nominal and actual size.
BUILDING THE BED
Here are some YouTube videos that do a much better job of illustrating the step-by-step than the long-ass written description below.
This one is similar to the plan I worked with (except I used 2x4s for the vertical stakes in the corners and around the sides) and
This one is also useful, though shorter and a slightly different style.
And here are some timelapses of our process. If you’ve got the patience, the full step-by-step description is after the jump…
Step-by-Step instructions for BUILDING A RAISED GARDEN BED
(instructions are for a 4' (width) x 10' (length) x 16" (height) raised bed but you can adjust accordingly)
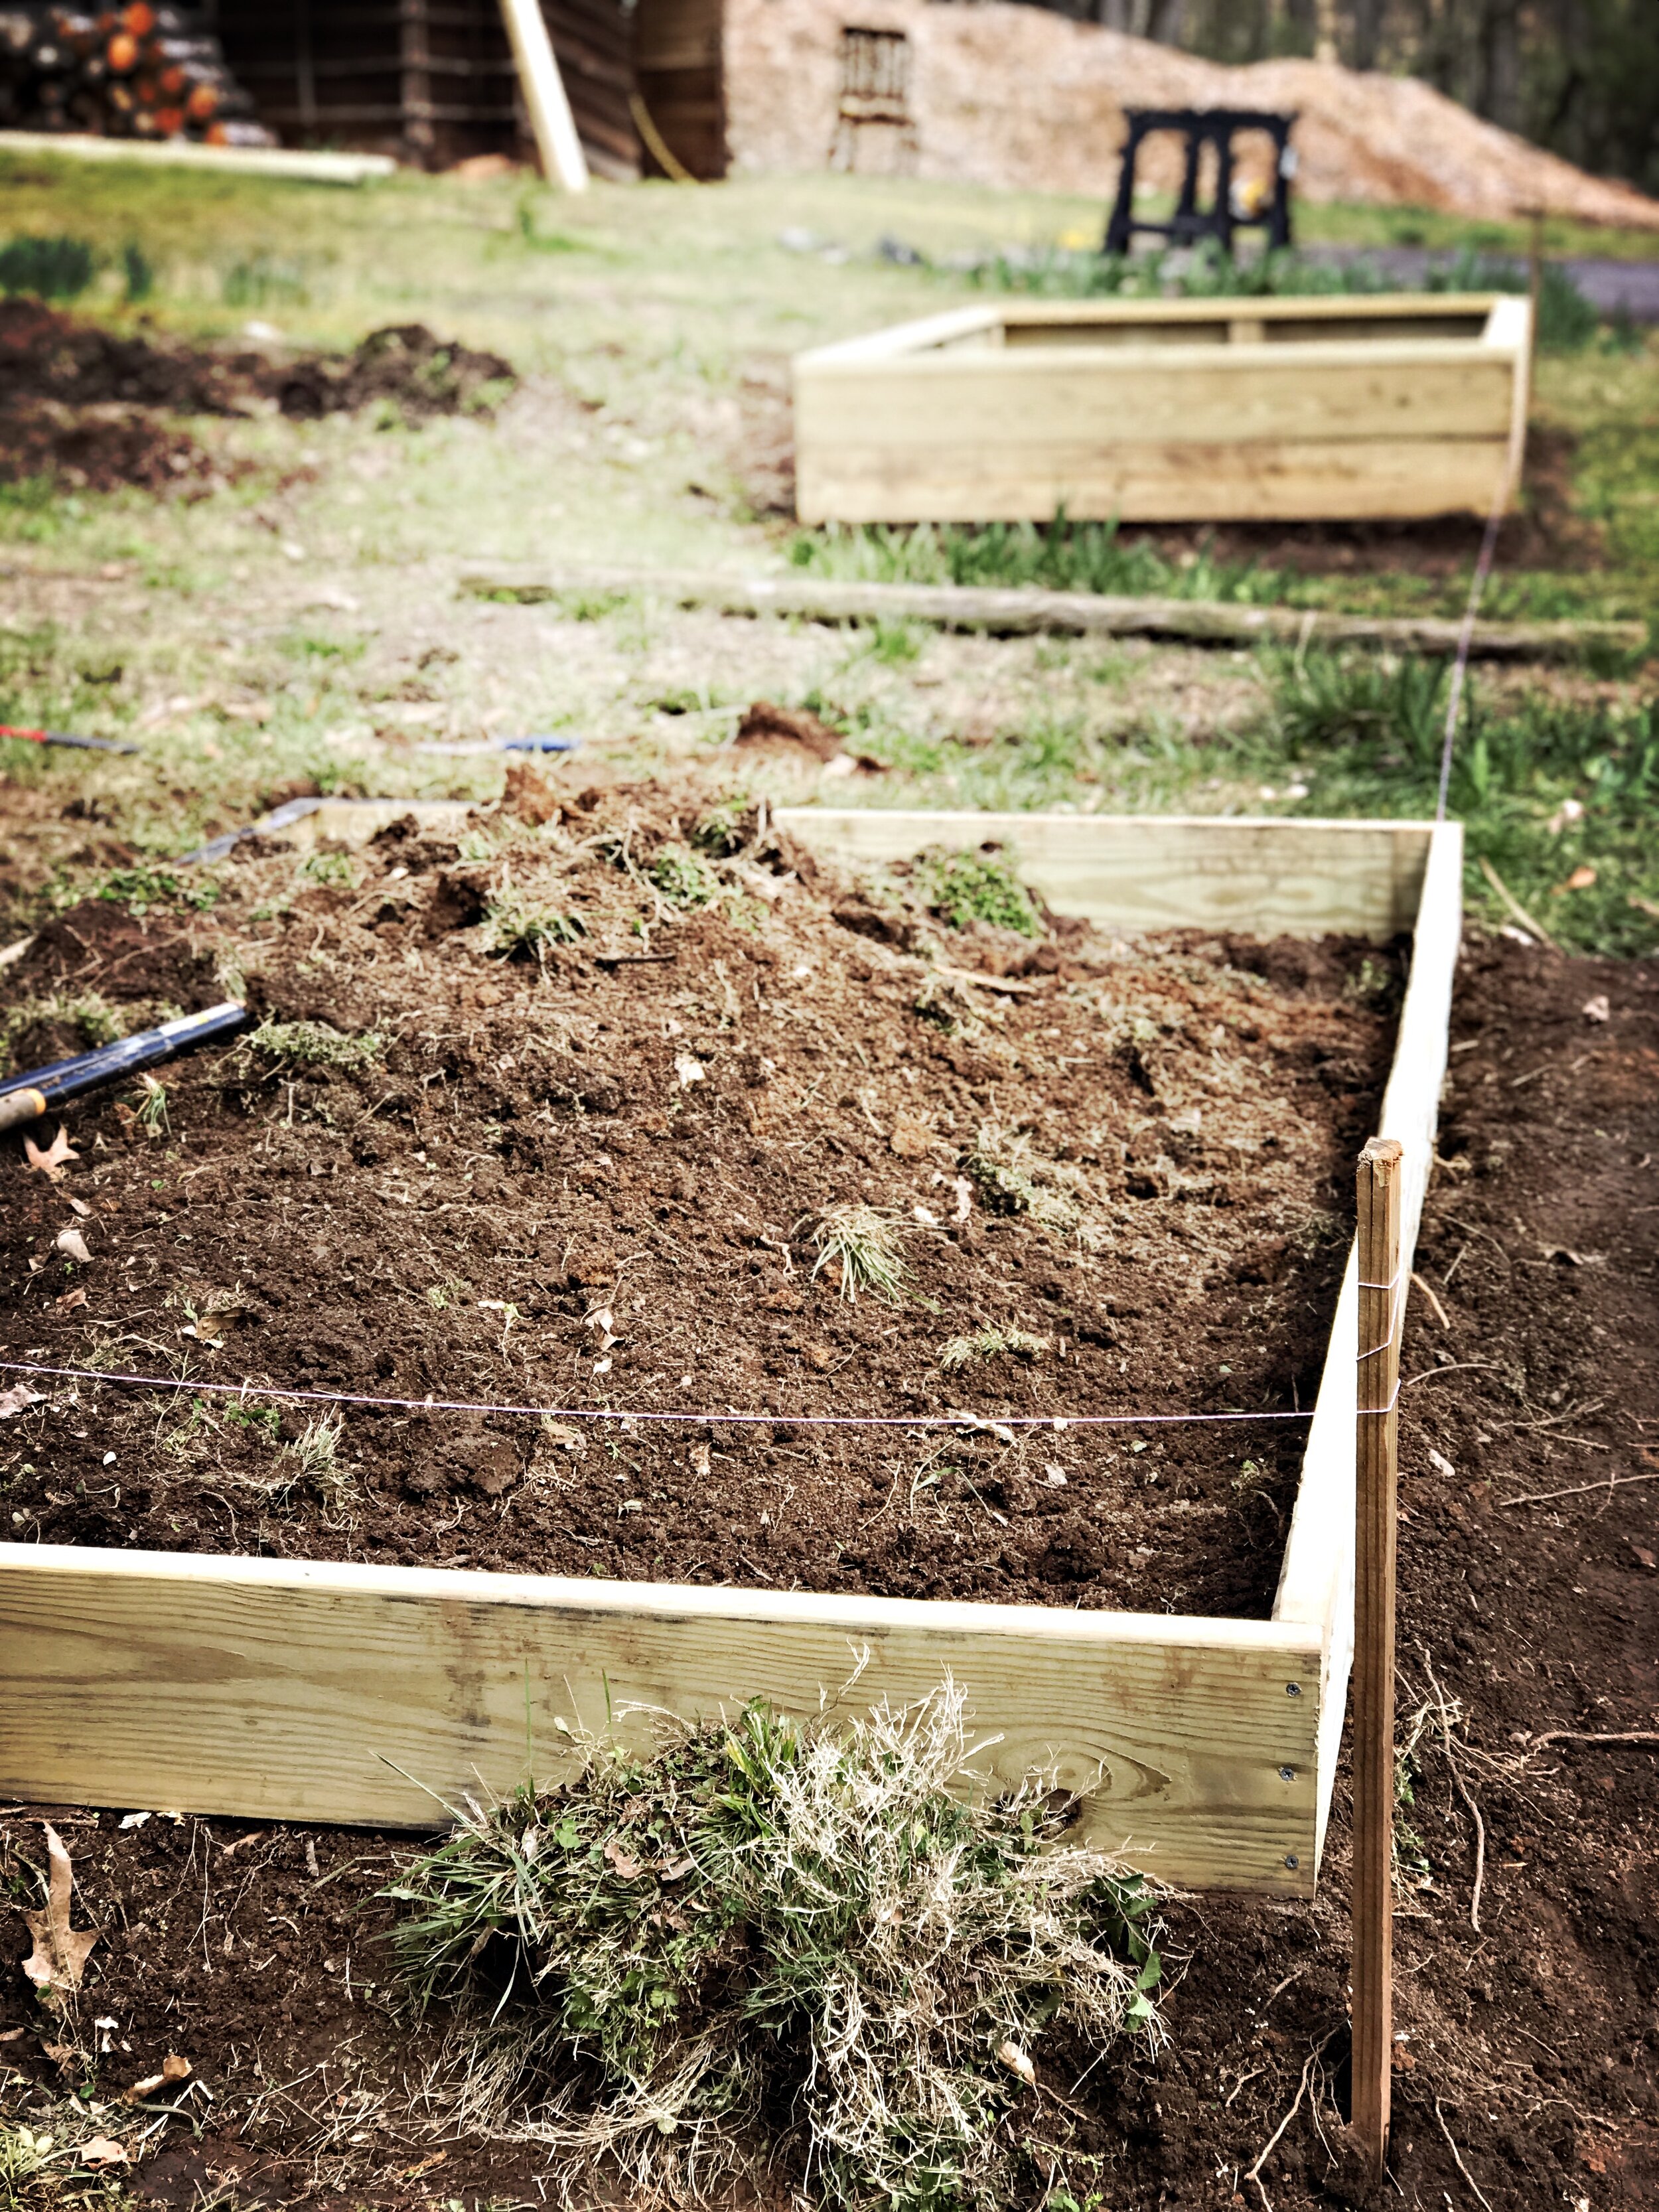
STEP 1: PREPARE YOUR SITE
After you select an area that gets great sunlight, use a shovel (there are lots of types of shovels; use a digging or trenching shovel with a sharp cutting edge to pierce the ground) to remove the top layer of grass/weeds. Remove any rocks or roots and use your shovel or a tiller to mix up any compacted soil underneath.
If your site is on a slight/intense slope, start on the side with lowest elevation and generally use your shovel to cut a very shallow trench for where you want to place your first 10’ board. Keep in mind that you’ll need to dig in deeper on the side with higher elevation in order for both sides to be level with each other.
Settling on the placement of this first board is important because it’ll determine where the other boards go, so consider your overall space and how the full bed will look once the other boards are in place. Use your level — you may need to dig into the ground a little deeper on one side or another.

Our garden site before adding solar panels and raised beds
STEP 2: CUT BOARDS TO LENGTH
Use your measuring tape and speed square to mark two 10’ boards to exactly 10’. Use your circular saw to trim any excess (here are some safety tips for using a circular saw).
Cut a 8’ board in half to make two 4’ lengths (the sides of your raised bed). Make sure you’re supporting each half well with sawhorses or other ground-supports.
Decide which side of the board you want facing out. Keep in mind that when you fill these beds with dirt they’ll tend to press outward, so if the board has a slight bow, it should be placed with the curve going inward instead of outward, and then the dirt will press it out even.
STEP 3: GET EVERYTHING LEVEL
For me, this was the hardest and most time-consuming step! Don’t skimp on it! If you don’t get the first course of boards level and generally square it’ll definitely throw off your second row of boards and the whole thing will be generally tilted.
So use your level and rubber mallet and shovel (a hand trowel is useful here) to get the first board level, removing dirt under one side or adding dirt under the other as needed. Once it’s level, try to secure it with some dirt on either side or clamps or heavy books or whatever you have to keep it upright and mostly in place.
STEP 4: FASTEN CORNERS
Line up the 10’ board at the lower elevation with one of the 4’ sides and and use your drill to make pilot holes in the corner, so that the wood won’t split when you drive in the screws.
Use your driver to screw in three 3-in deck screws. Repeat with the other 4’ side, making sure it’s level with itself and with the other boards.
Line up your other 10’ board and check your level again. Use your framing square to check whether the corners are in square. If not, use your mallet to knock the sides a bit until they basically line up with the framing square (probably won’t be perfect, especially if you a little bow in the wood).
Fasten the last two corners, and then check level and framing square one more time.

Leveling First Row and Fastening Corners
STEP 5: ADD CORNER STAKES
Take a 2 x 4 x 12’ and use your circular saw to cut into four small lengths, about 2’ apiece. (You’re going to drive these into the ground a few inches and then want them to stick up a little taller than your two rows of 2x8s (about 16”), so 2’ should do it, but make sure that’s long enough). You’re going to eventually cut off the tops to be flush with the top row of 2x8s.
Use a rubber mallet to hammer one of these 2x4x2’ stakes into the ground at one corner. Use your mallet to get your boards snug around this corner stake.
Drill pilot holes. Then attach the long 2x8 board to the 2x4 stake using 2.5-in screws.
With this first corner now anchored to the ground, use your framing square again to square up all the corners.
Repeat above with the other three corners, driving in your stakes and then attaching the 2x8 boards to the 2x4s. Keep using your level and square and maybe only drive one screw into each board at first, and then when everything is good to go drive your remaining screws.

Adding Corner 2x4 Stakes

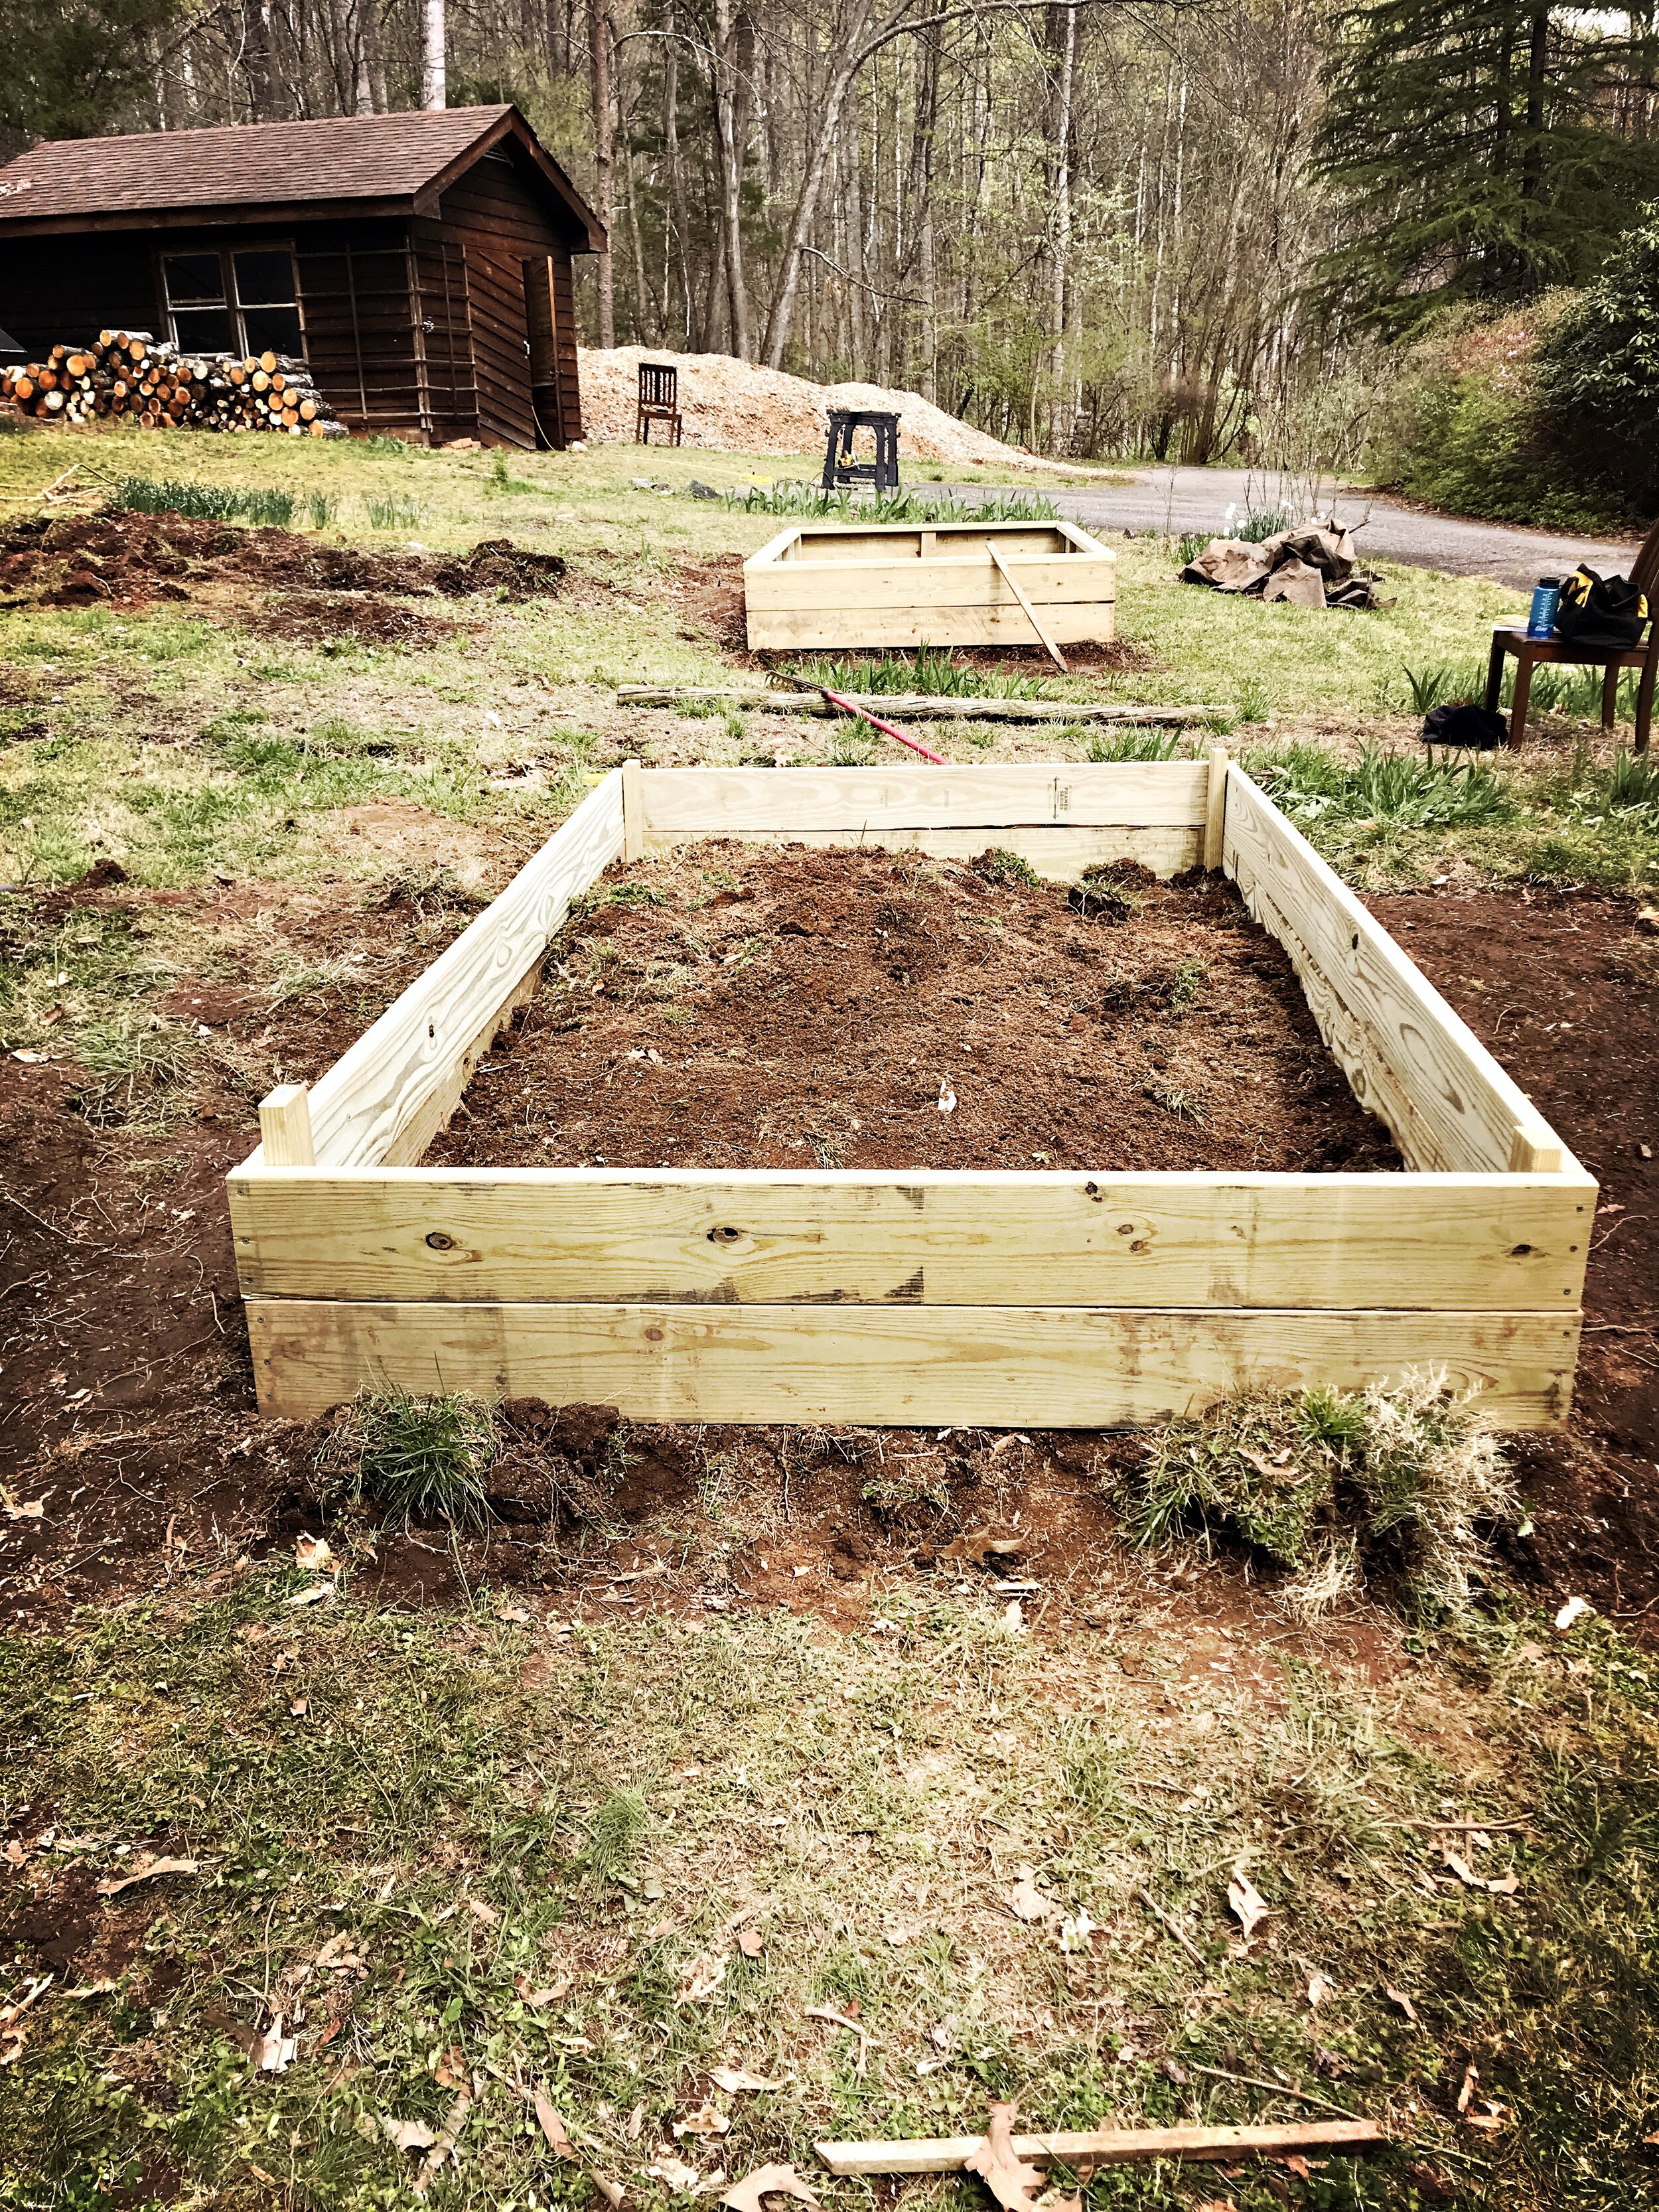
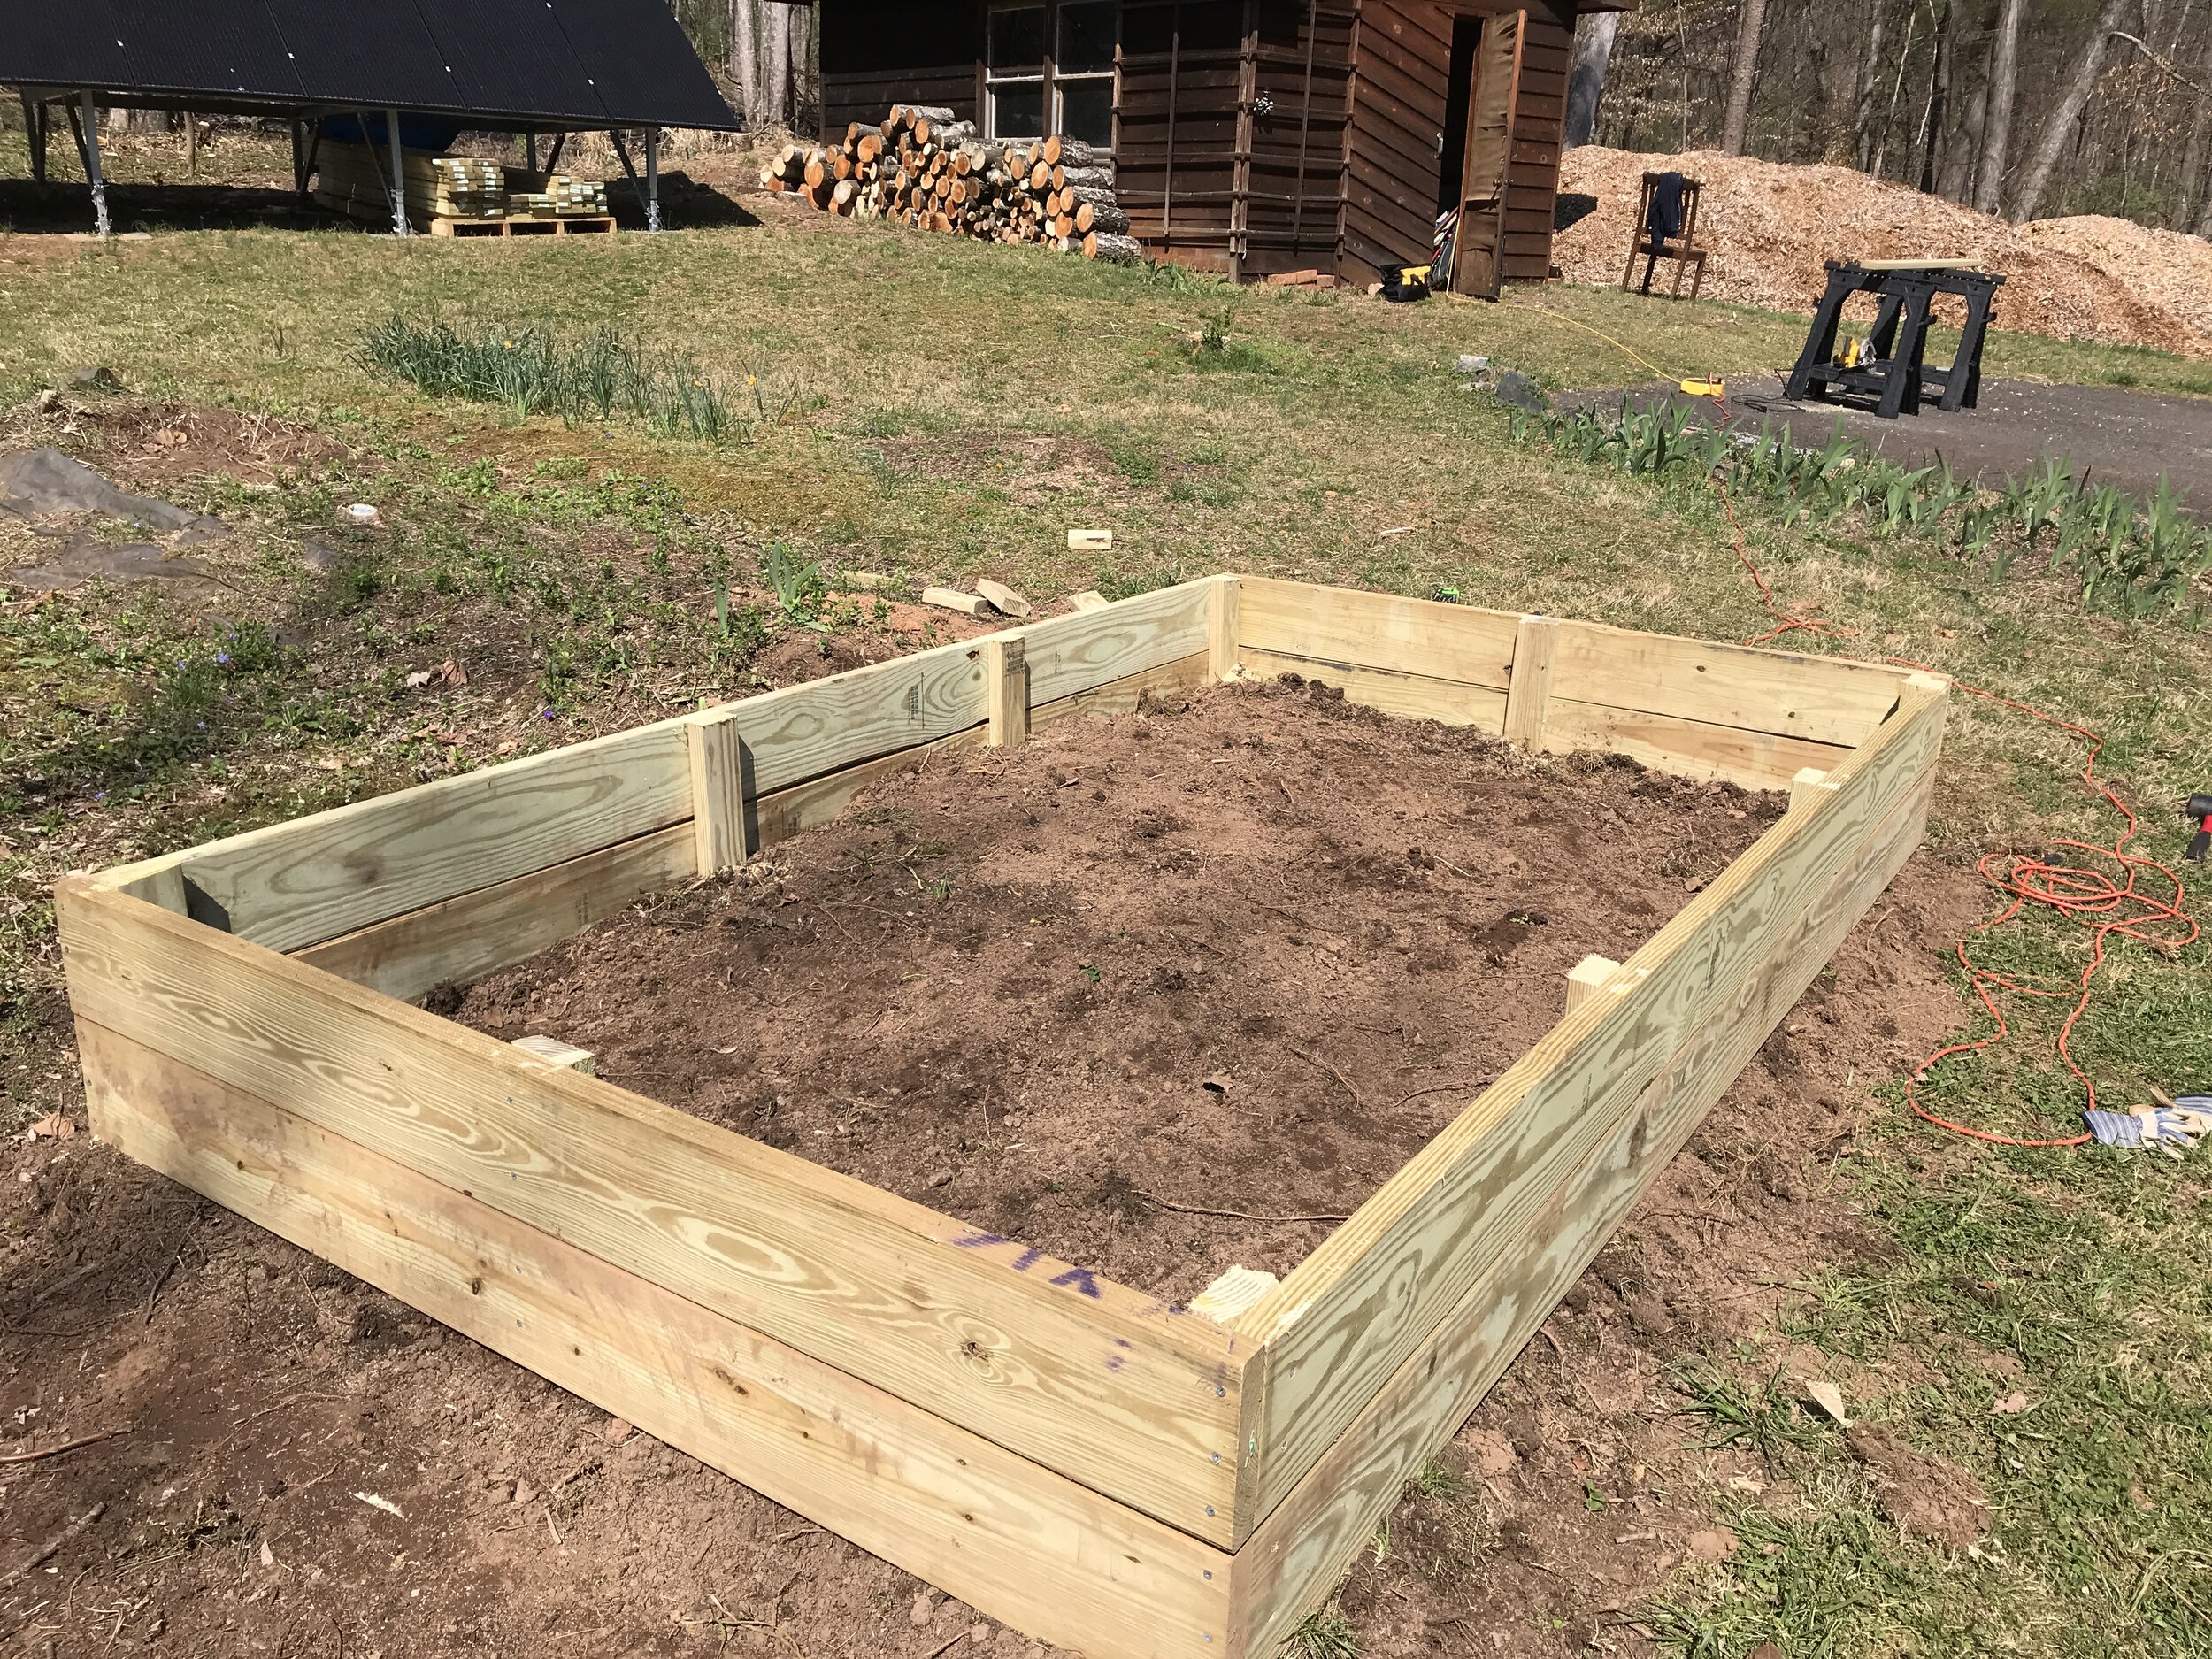
Add Second Row of Boards
STEP 6: ADD SECOND ROW OF BOARDS
Measure and cut your next course of 10’ and 4’ boards (one at a time to make sure you don’t need them to be an inch longer or shorter).
Line up and fasten each corner of the 2x8s. Then attach to each of the corner stake 2x4s.
STEP 7: CUT AND ADD MORE STAKES
Cut maybe four more 2x4x2’ stakes and position part way along on each of the long sides.
Hammer these into the ground then attach the 2x4s to the 2x8 boards using more 2.5-in screws.
These supports will help prevent the long boards from bowing when they’re filled with dirt and they also support the 2x4 lip
Add and Trim Side 2x4 Stakes
STEP 8: TRIM STAKES
Use a hand saw, circular saw or reciprocating saw (recommended) to trim the tops of the stakes flush with the top of the 2x8 boards.
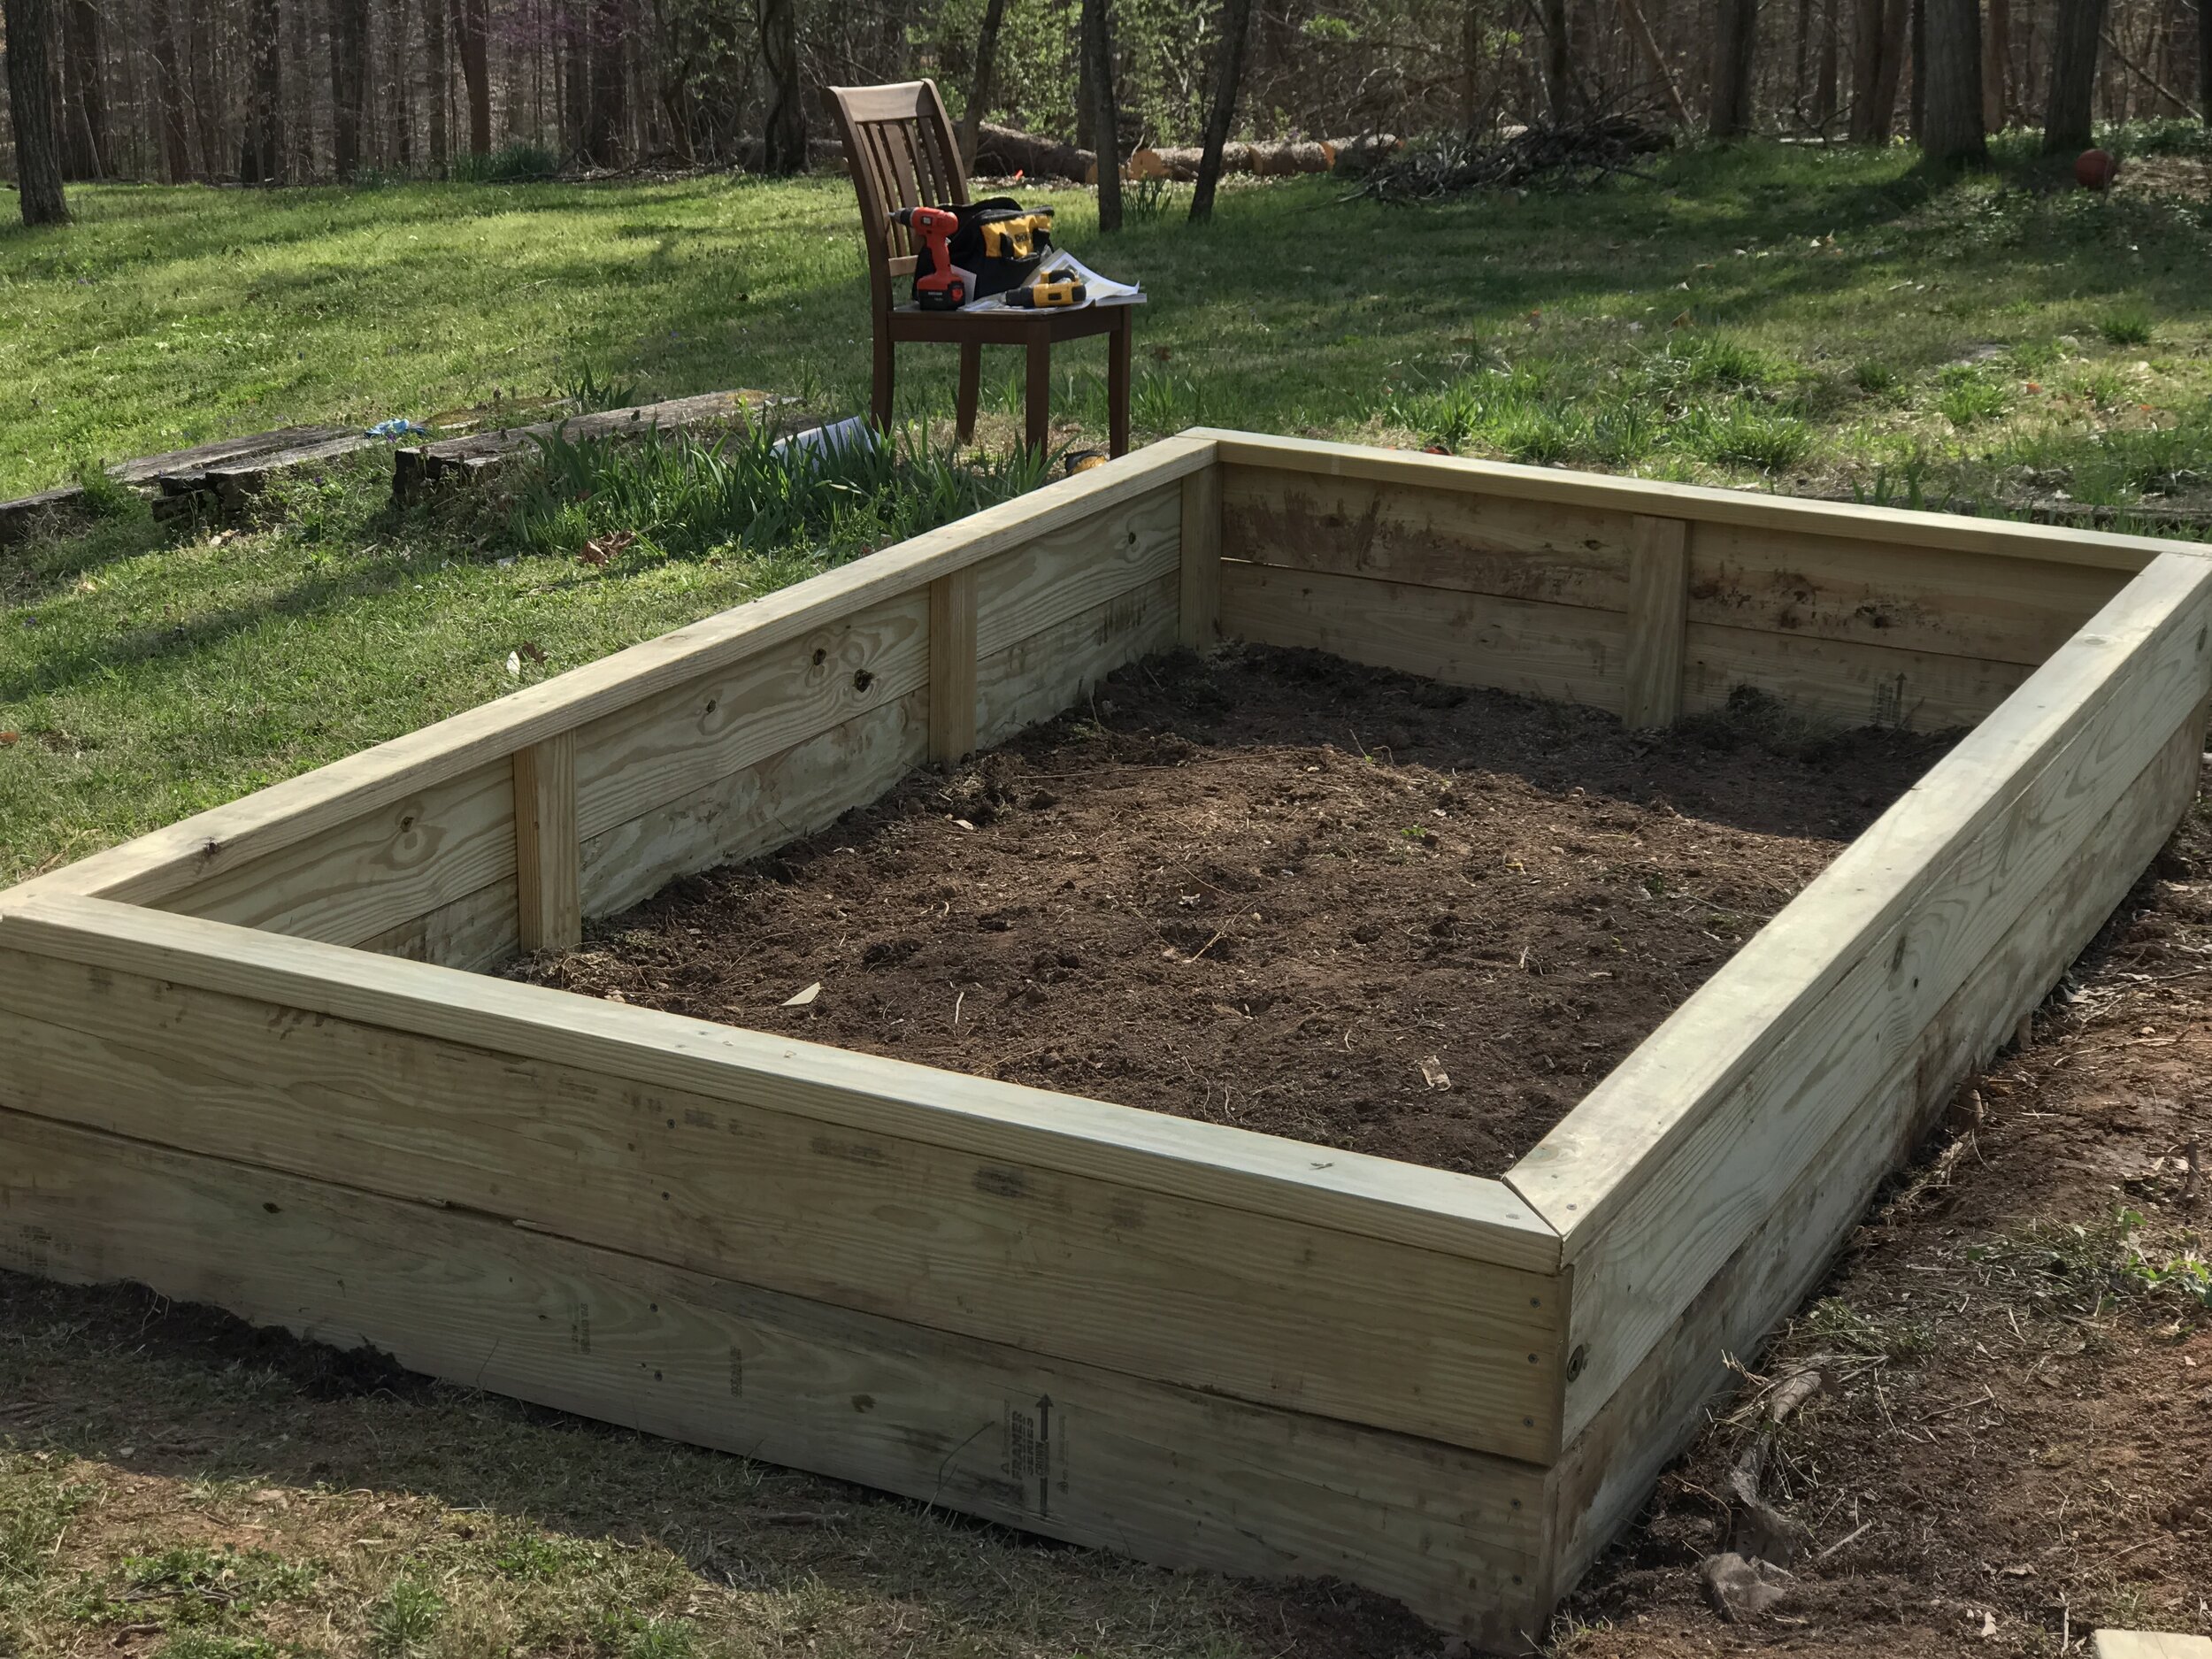
Add Lip
STEP 9: ADD THE LIP
Measure the actual length (at the top) of one side of your raised bed. Cut a 2x4 to this length.
Use your speed square to make 45-degree angle marks on the ends of this 2x4 length and then make these miter cuts with your circular saw.
Drill pilot holes and then fasten this first 2x4 cap to the sides and the tops of the stakes with 3-in screws.
Repeat for other three remaining lips, using a 3-in screw to fasten each miter joint.
Fasten each lip to the tops of the stakes underneath with 3-in screws
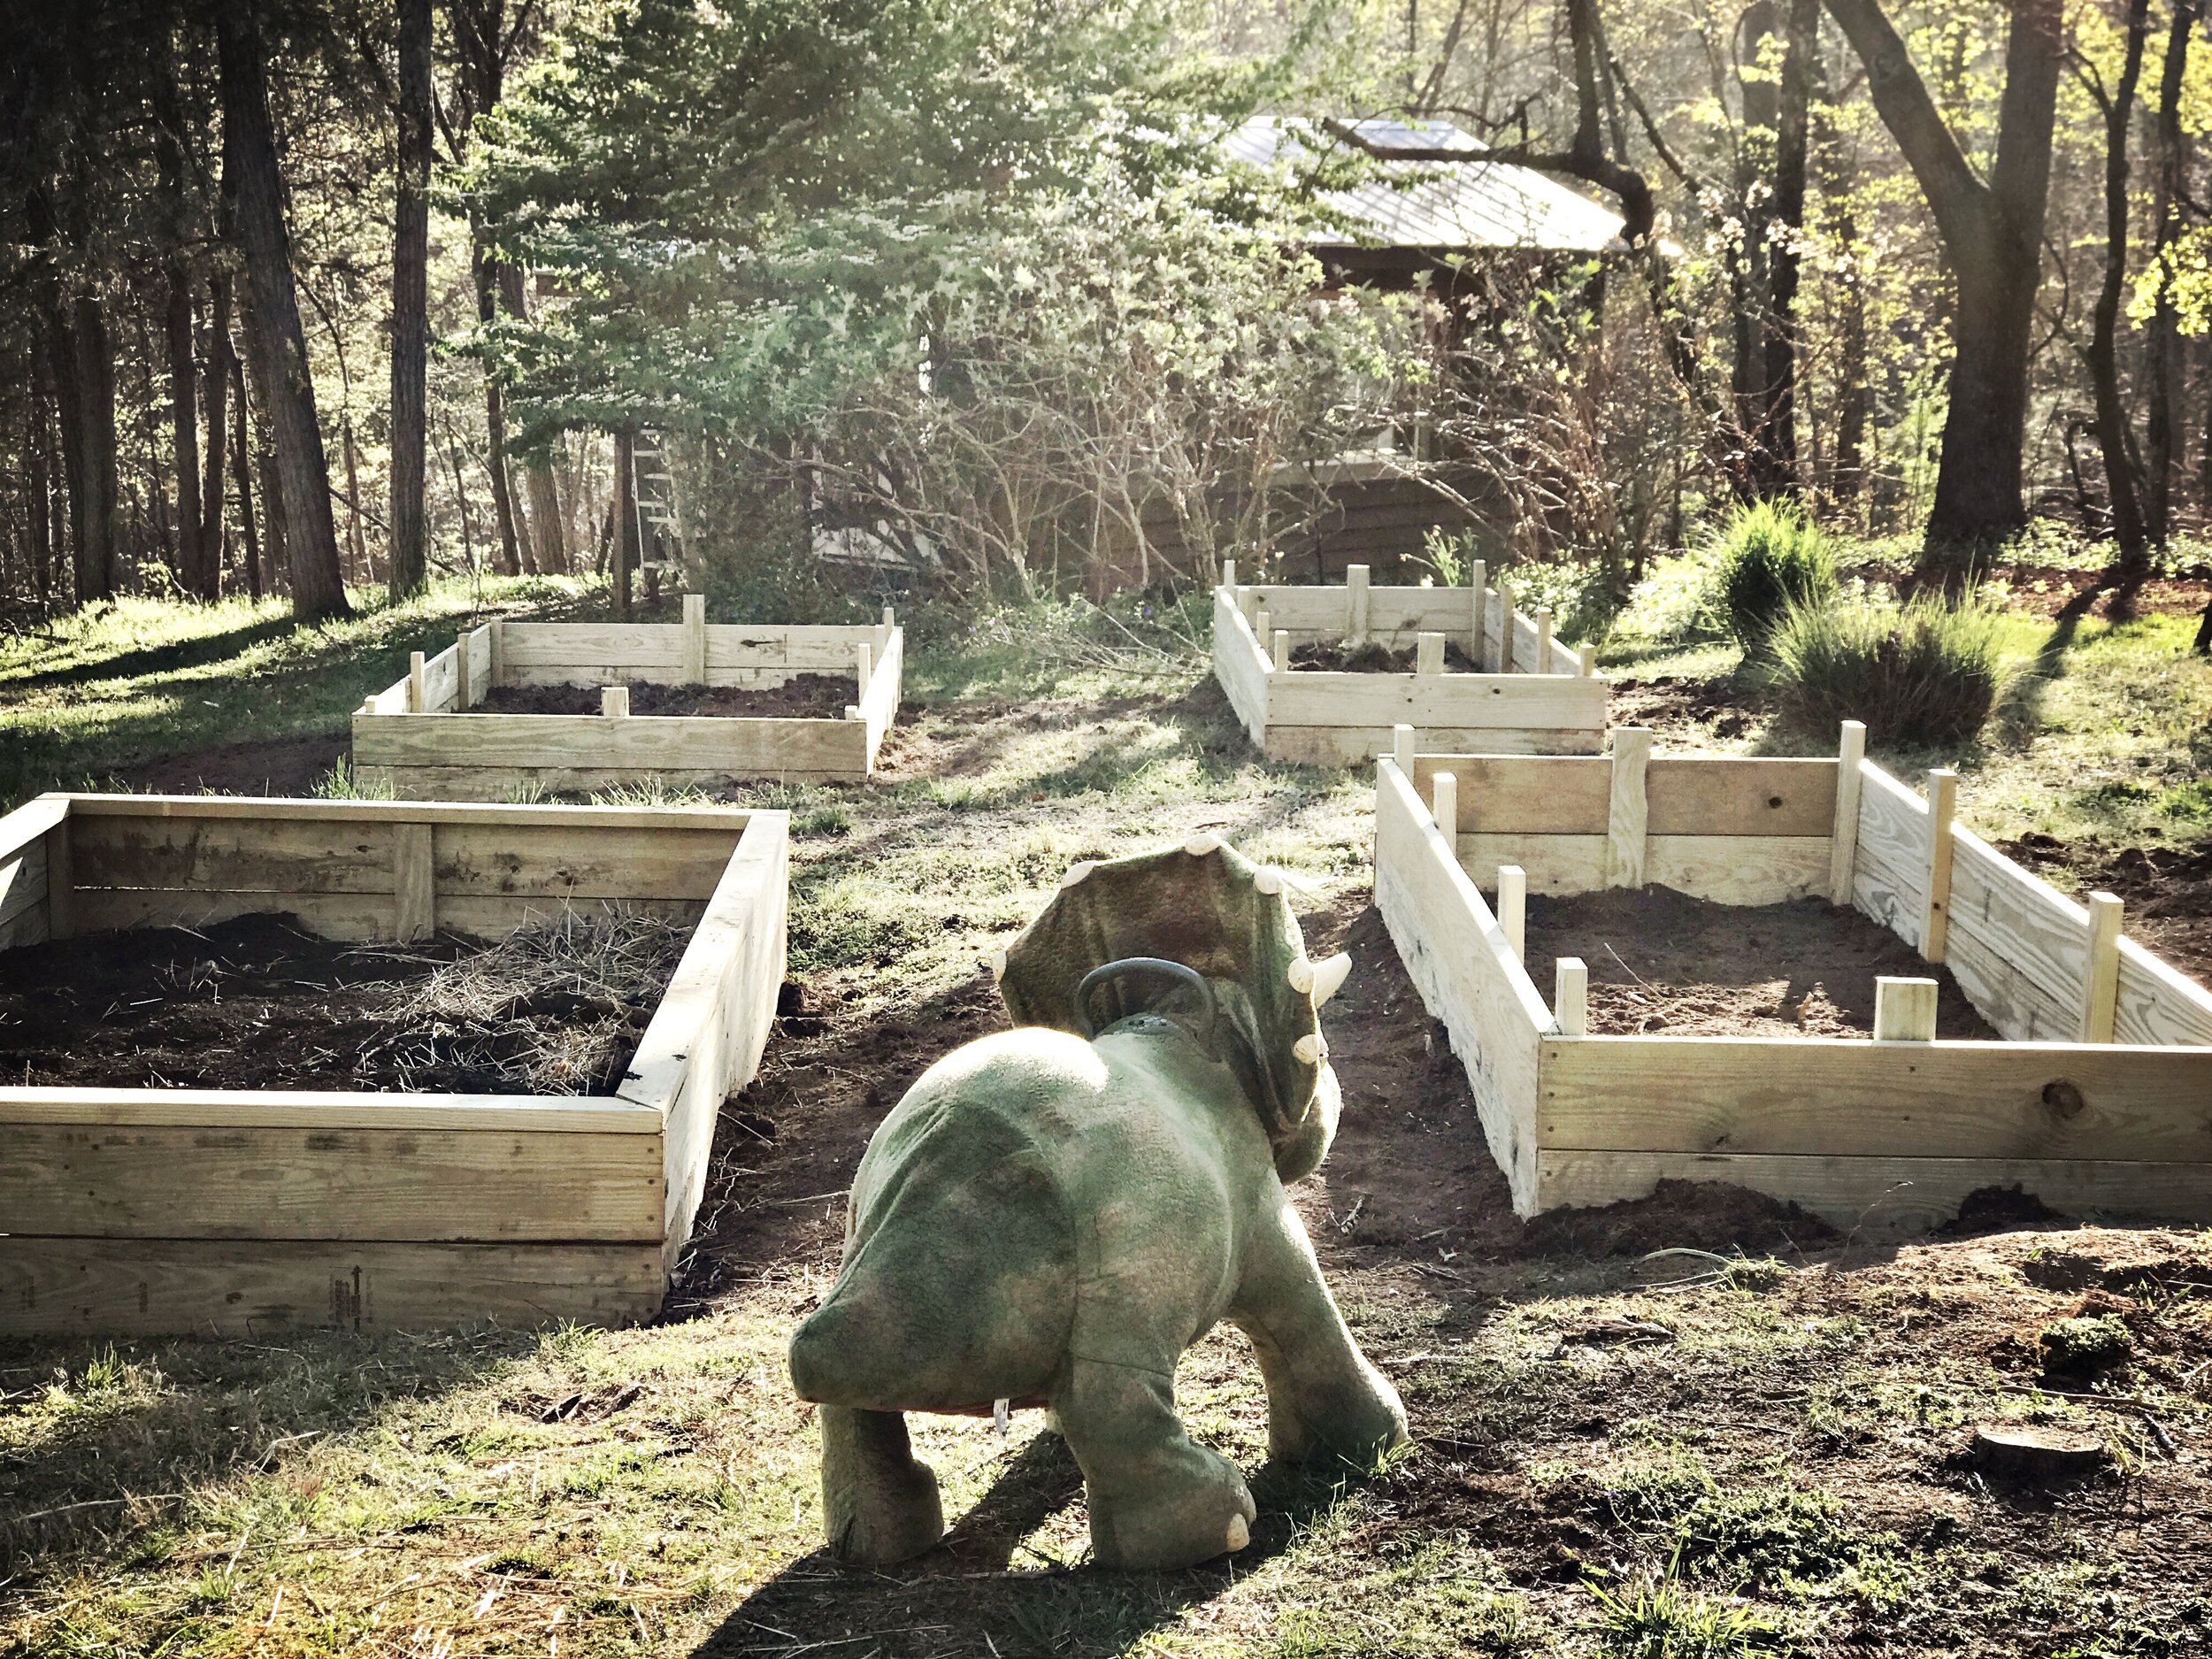
STEP 10: BUILD MORE BEDS
If you decide to build more beds, lightly tap a stake into the ground and stretch some string or twine to line up the edge of your finished bed with the placement of your new beds.
Finally, make sure you get a robotic triceratops to guard your garden.
—> READ THIS NEXT: “SOIL MIX AND HUGELKULTUR: FILLING RAISED BEDS”