How To Build a DIY Mud Kitchen Using Wood Pallets (The $15 Build)
Looking for a DIY mud kitchen made from pallets that’s safe, durable, and budget-friendly? Jack and I wanted to make something for Rose's 3rd birthday, and we settled on this wood pallet mud kitchen because the girl loves to cook. We built it for under $15 using salvaged materials.
In this guide, I’ll show you how to turn free wood pallets into a high-quality mud kitchen while prioritizing pallet safety (HT vs. MB markings). This isn't just a toy; it’s a project designed to build family skills and outdoor creativity. Watch the 8-minute masterclass below, then follow our step-by-step build plans.
We also followed a YouTube video from an Aussie DIYer named Uncle Knackers. Jack and I both find him to be very charming. Check out his YouTube channel here or see video at the bottom of this article.
This post may contain affiliate codes or links that are no additional cost to you, and I may earn a small commission when a purchase is made.
MATERIALS
(2) - Wood pallets (salvaged!)
Screws
Nails
Eyehooks
I had most of the tools, so my total budget was $15.38 for sandpaper and the nail punch set. The nail punch helps remove bits of nails from the pallets after you slice through them (see below). Pallets were free from our friends at Potter’s Craft Cider (ask around, many businesses have piles they're itching to give away).
Understanding Wood Pallet Markings
Note that some pallets are treated with toxic chemicals (an "MB" marking means methyl bromide) so look for an IPCC symbol or the letters "HT" (heat treated) which are safer to use. Here’s a good site to help decipher pallet markings, but if you don’t see any markings or stamps it may not be safe to use, especially for a craft project intended to be used by kids.
CONSTRUCTING A MUD KITCHEN
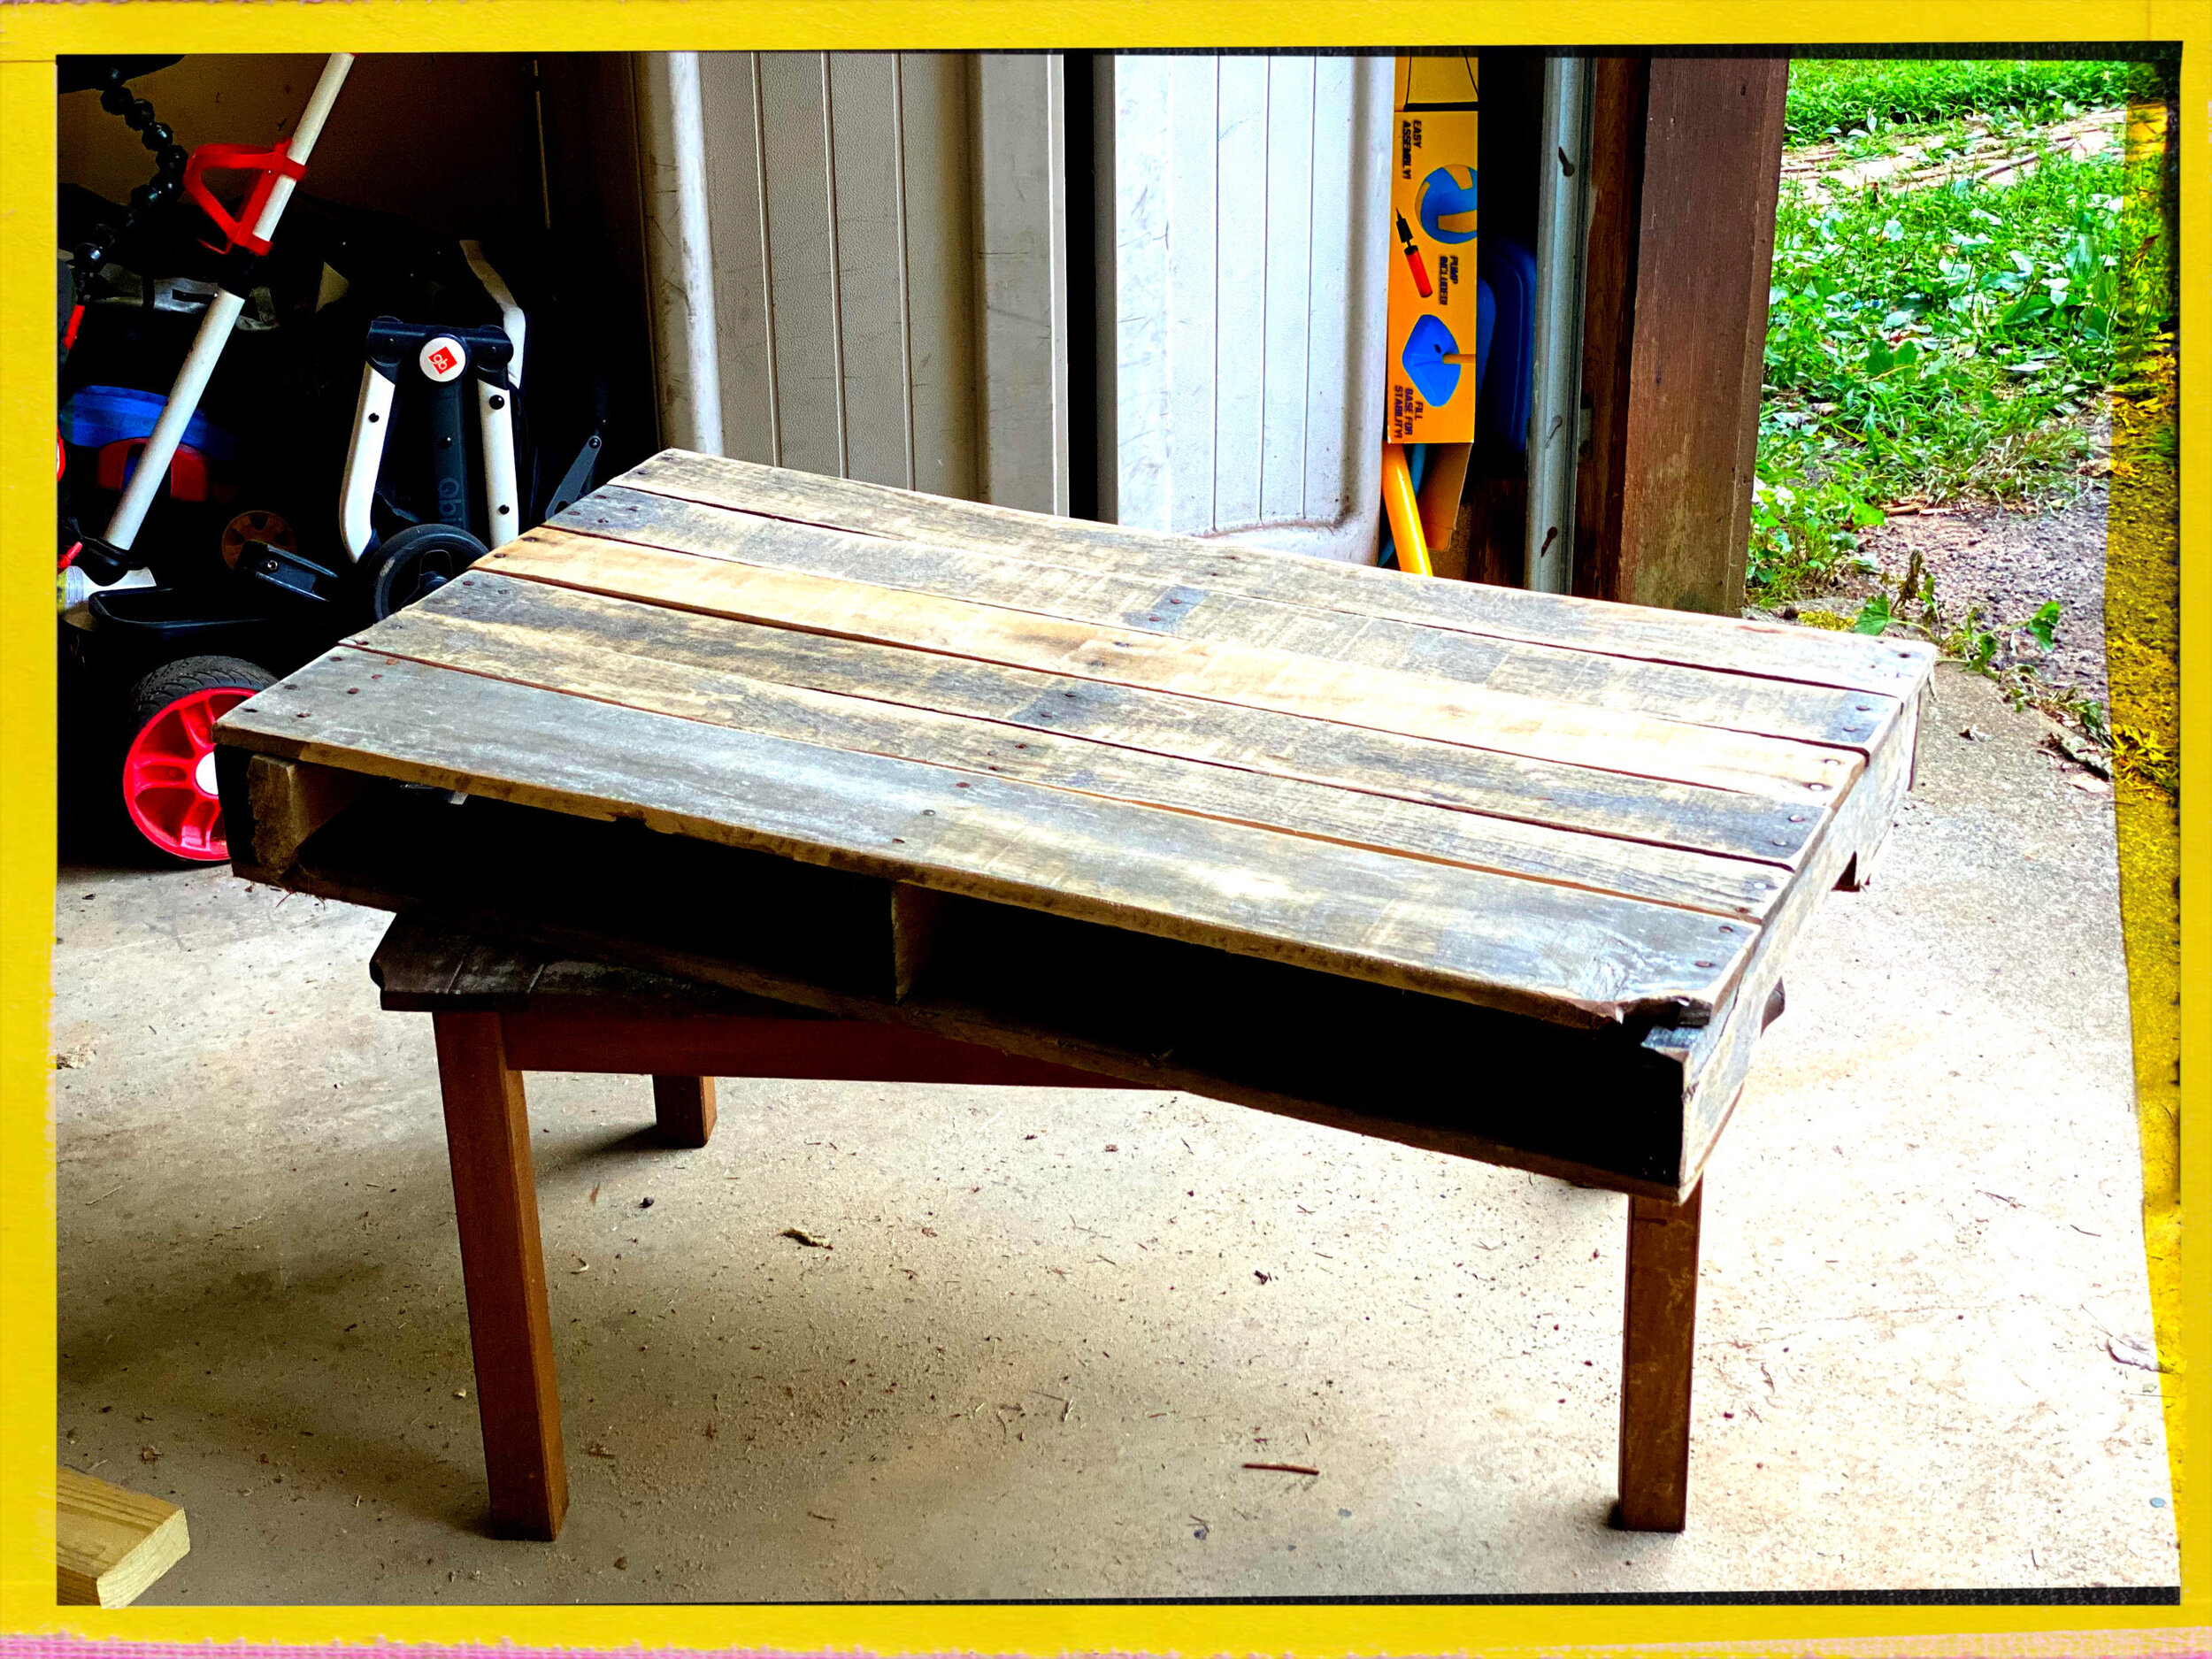
Step 1: Cut Pallets to Size
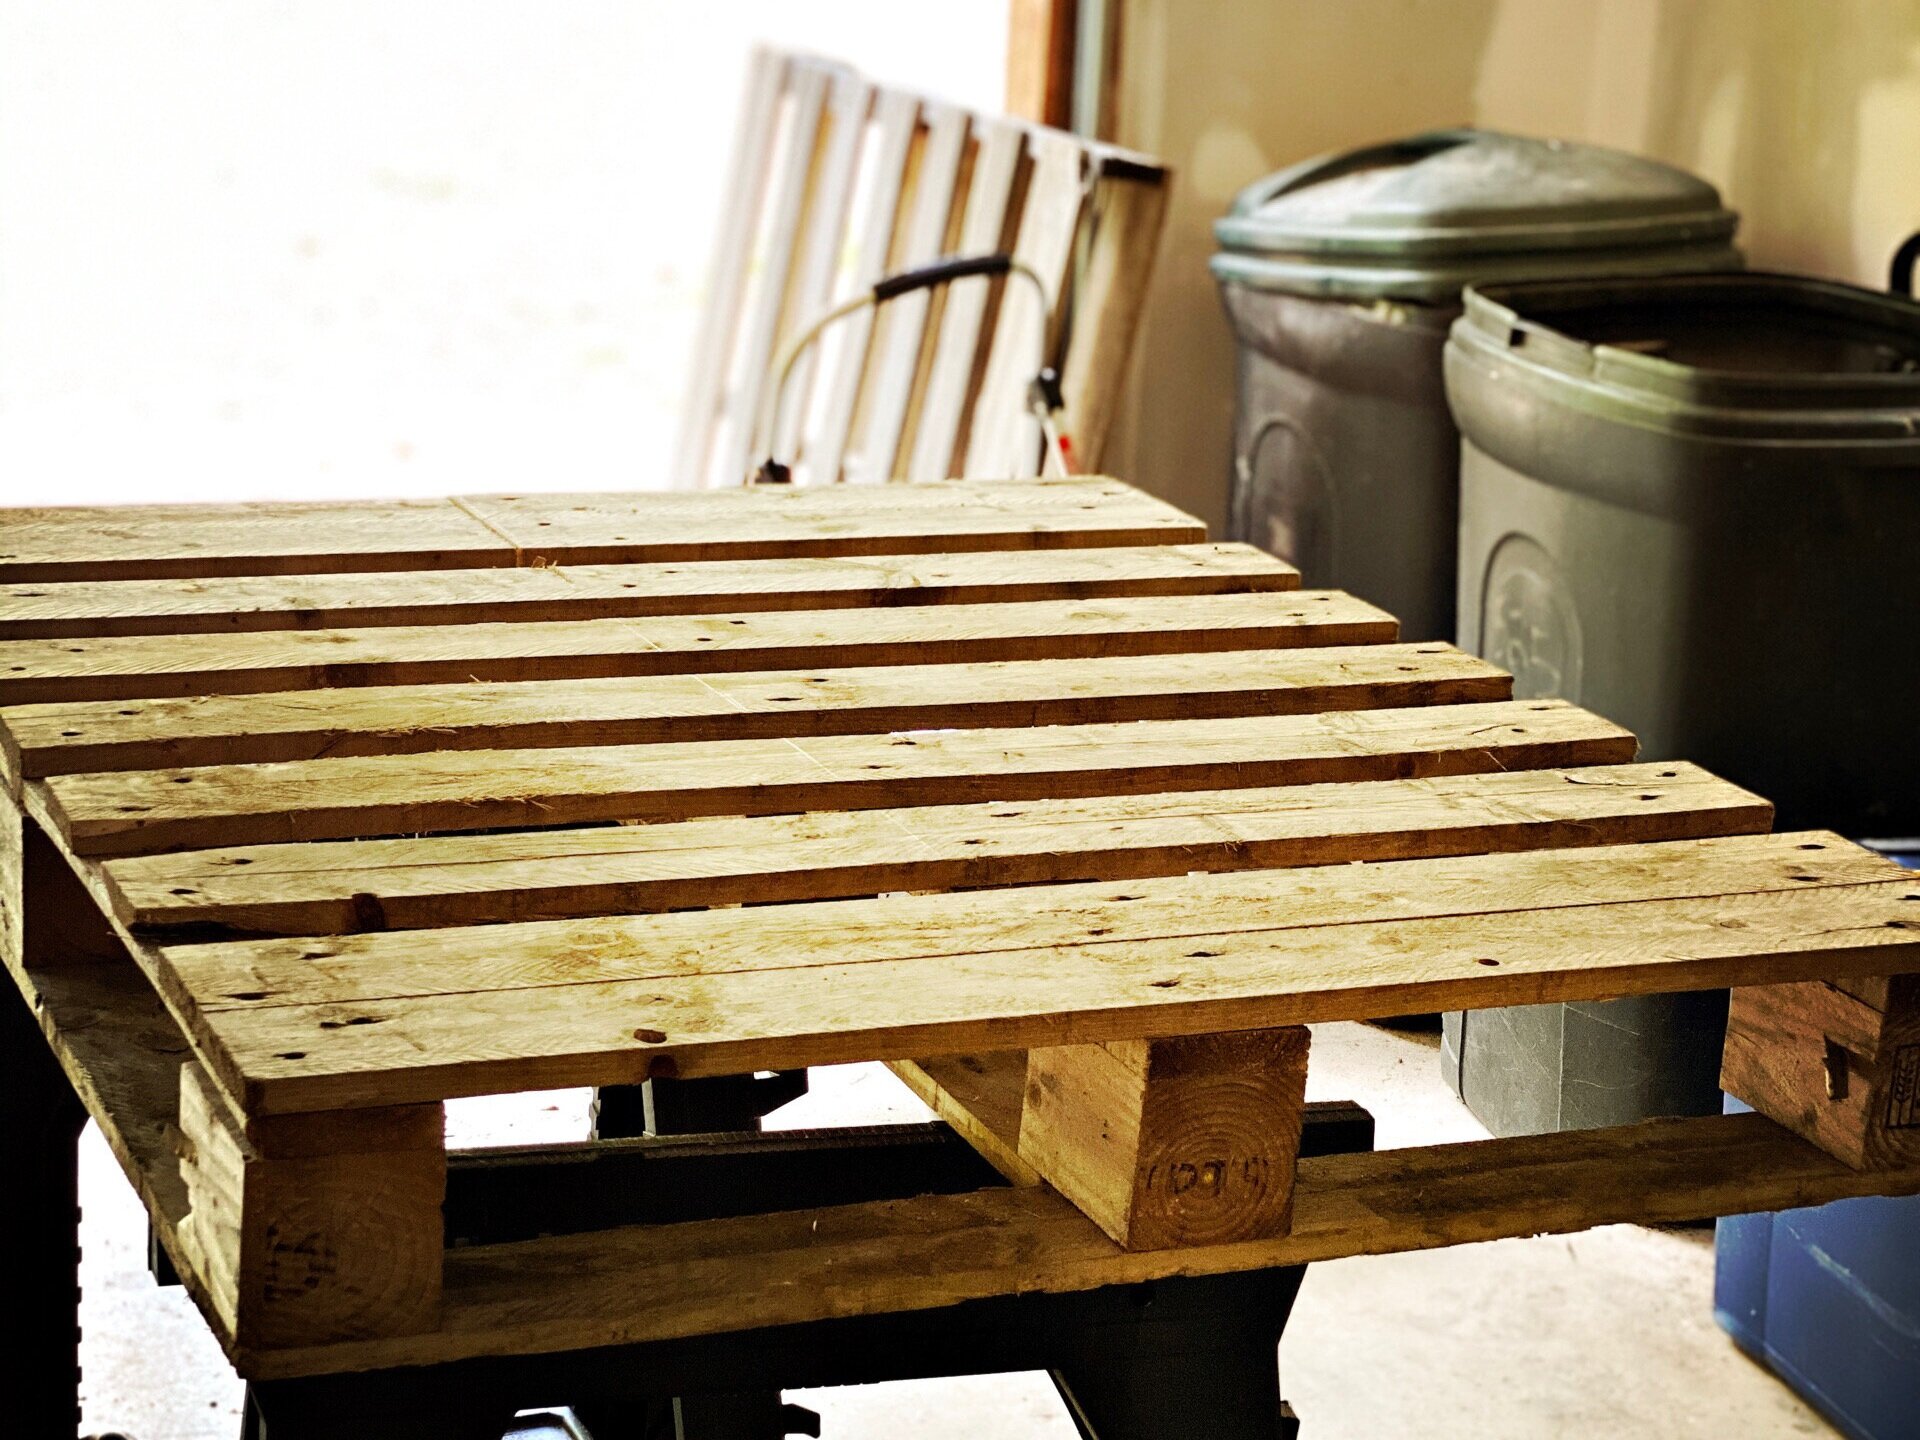
First, we cut one pallet in half widthwise (for the main surface) and the other lengthwise (for the lower shelf). I’m not going to provide precise measurements, because pallets aren’t all the same size and for this kind of project I think it’s fine to be imprecise and improvise a bit.
Check the video to see how we roughly did this, but the main thing is for the slats of the surface to be perpendicular to the slats of the lower shelf.
Step 2: Pull Apart Remaining Portions of Pallets
Uncle Knackers has another video on how to pull apart a pallet (“say that five times fast”). You can use a crowbar and a hammer to pry off individual slats, but when I tried this it quickly splintered the old wood, so instead I used his second “chisel crack” method—sliding a chisel into each gap and hammering it to make an opening wide enough for the reciprocating saw blade to cut through the nail.
Then, using a blade intended for both wood and metal, I sliced through the nails with the reciprocating saw, freeing individual slats.
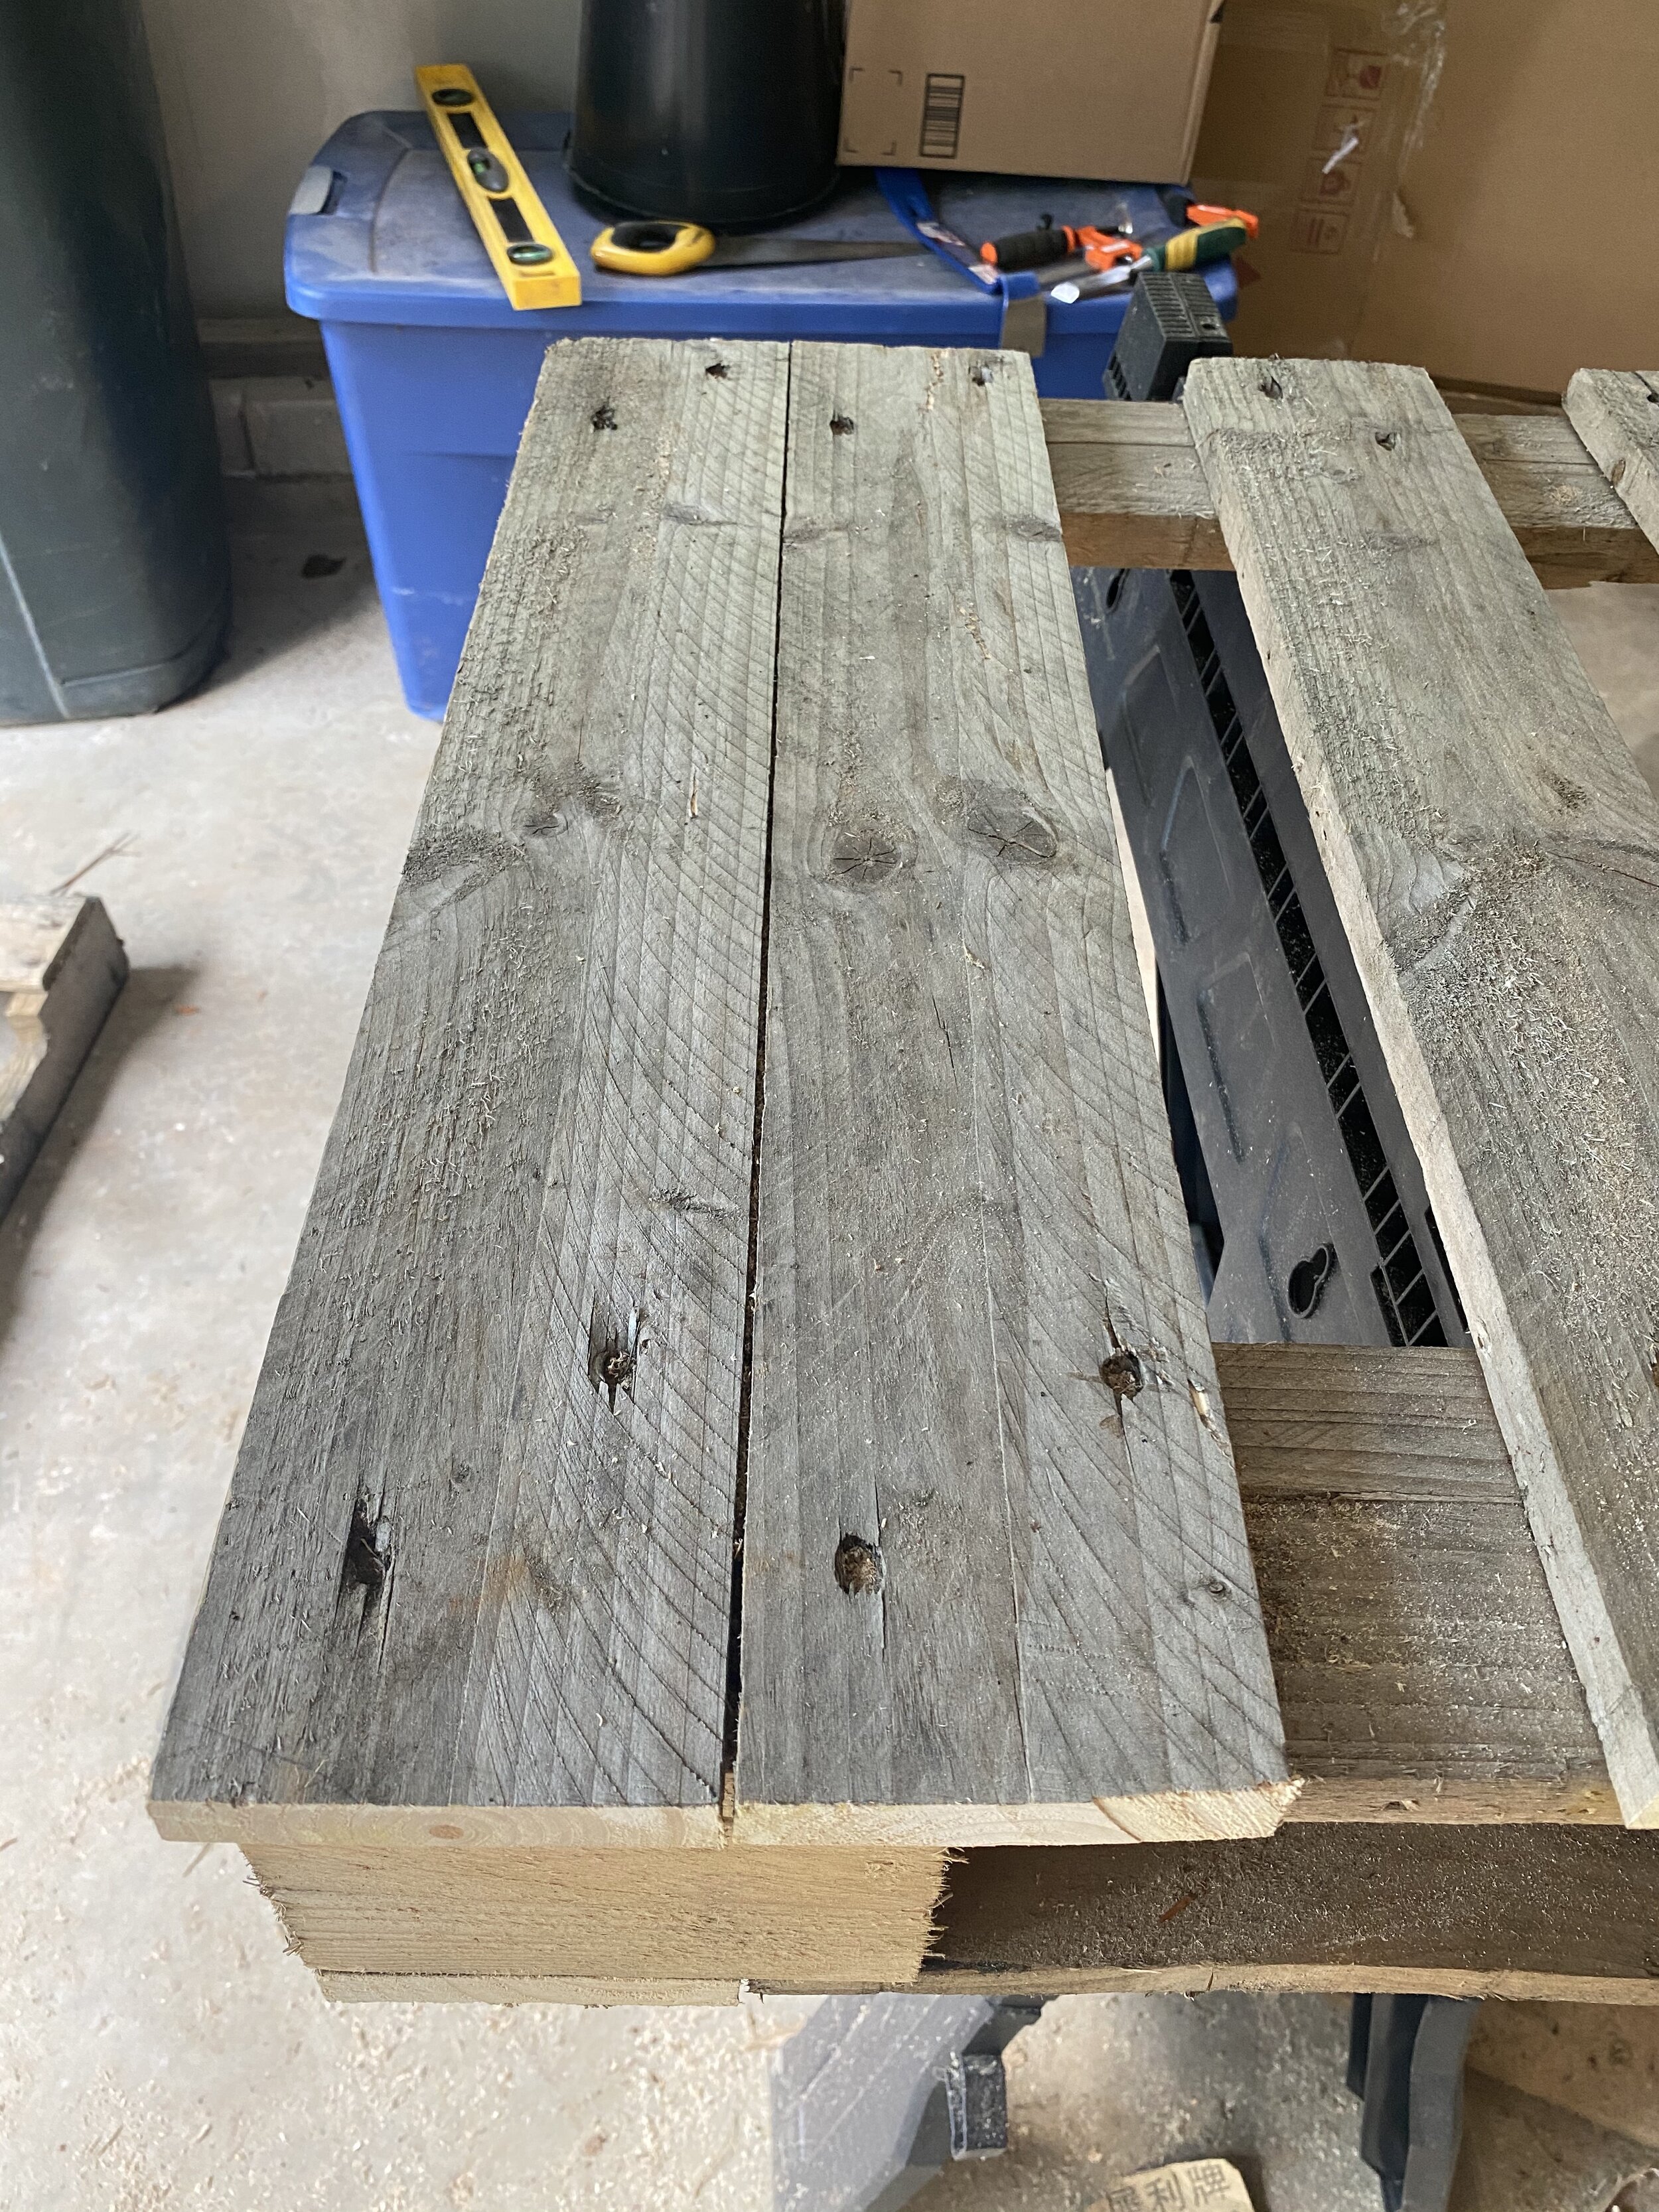
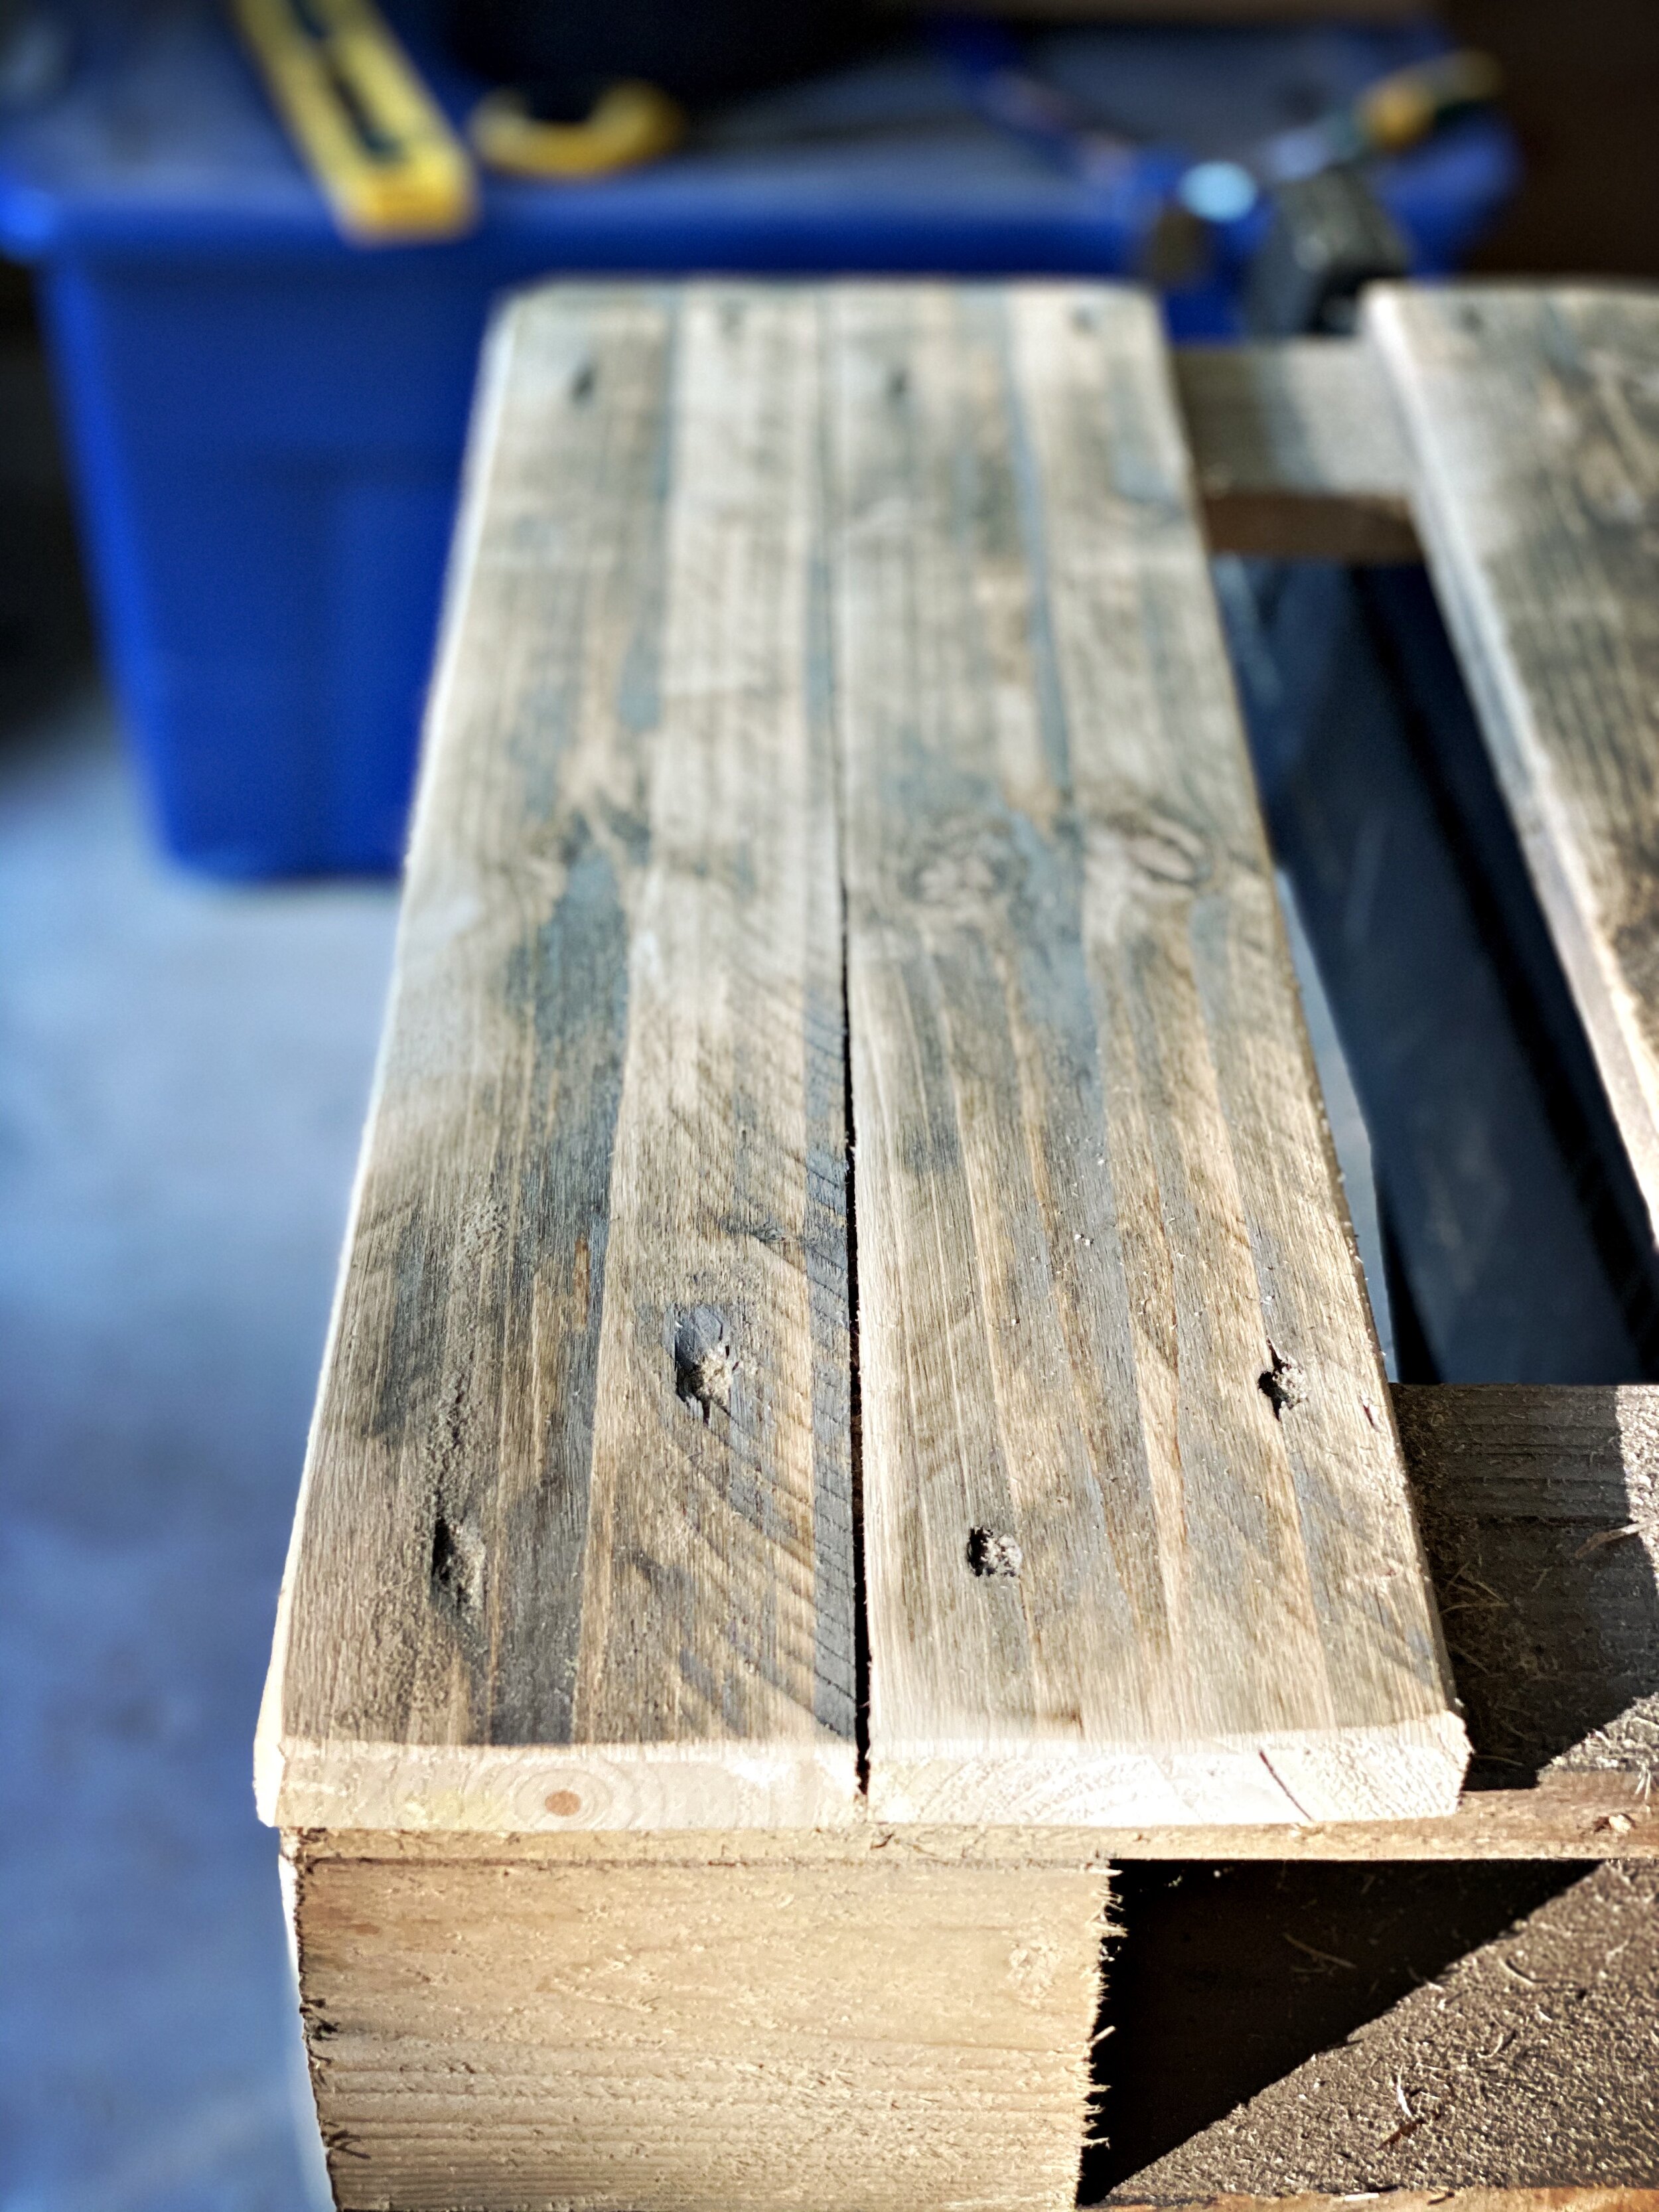
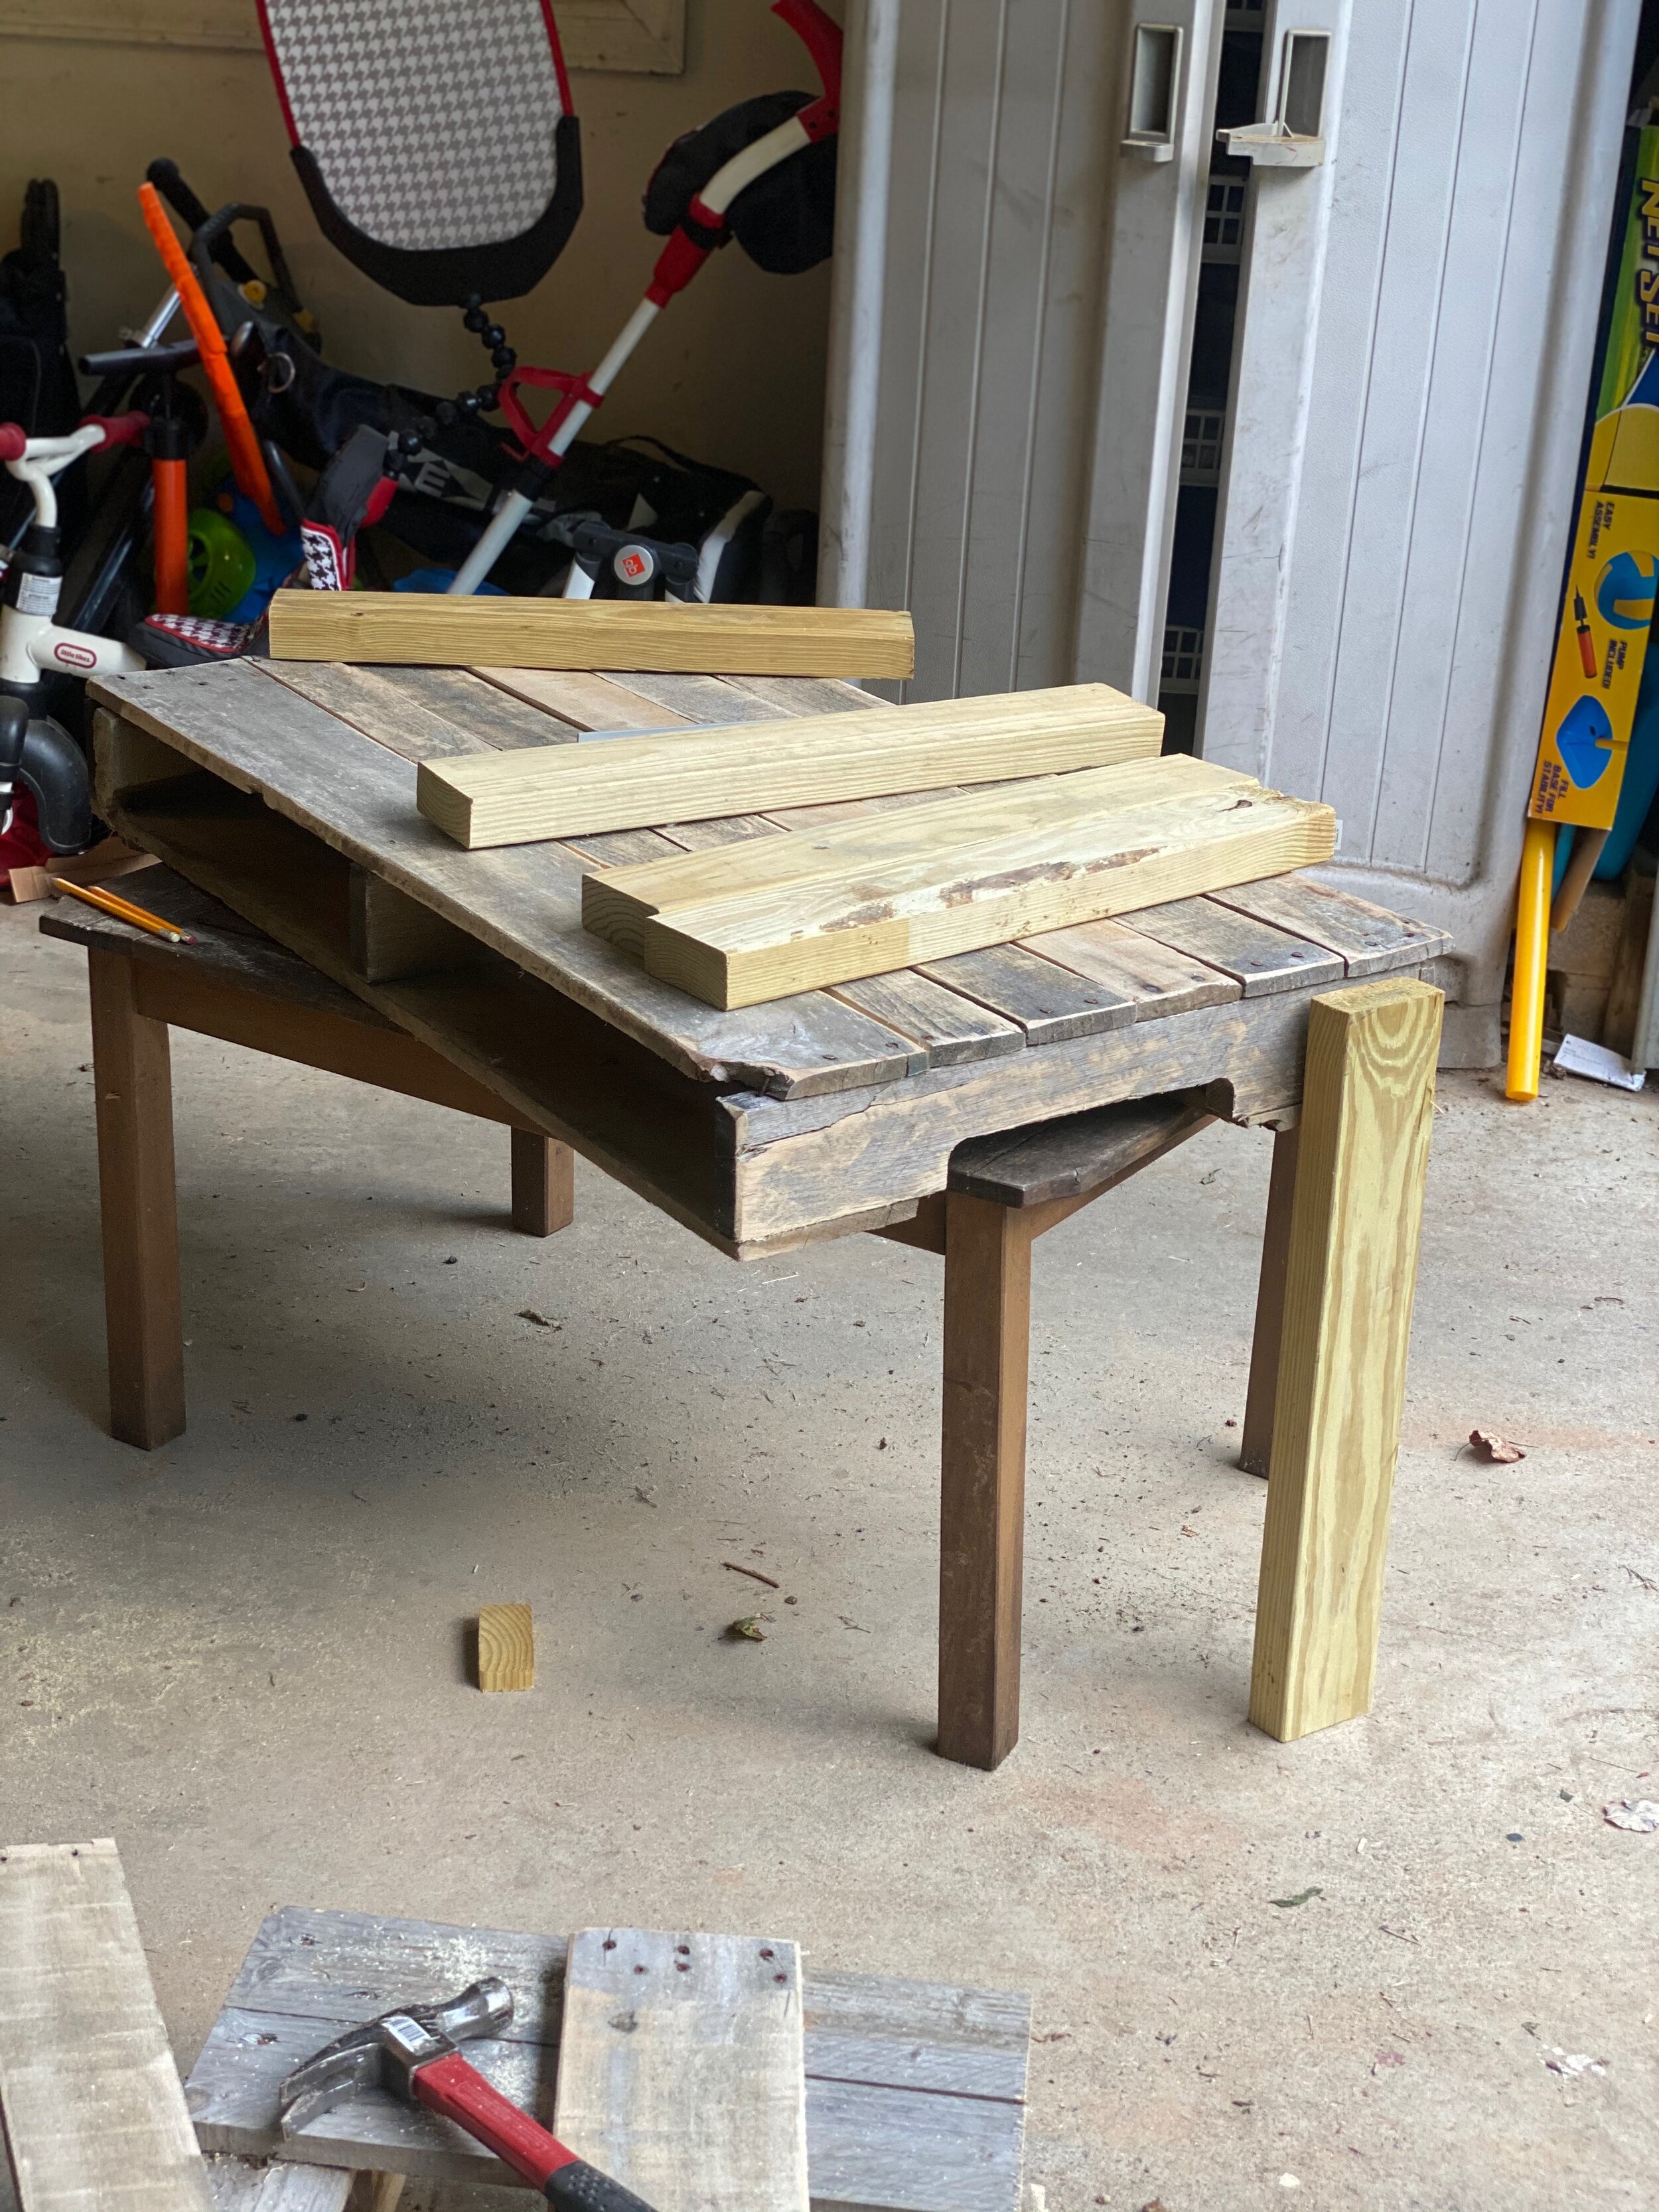
Step 3: Fill in Gaps and Sand Surface
We added slats from one pallet to the gaps in another, making a smooth counter surface. The slats are typically a little funky and irregular so we had to shave a bit off the edges to make them fit in the gaps, but with a little sanding and hammering we got them into place and fastened the slats with whatever nails I had laying around.
Sanding (use a belt and/or orbital sander) is the most important part of the project, but the pallets quickly go from splintery to smooth and gain a swell patina. Check out the before/after but especially with my daughter using this mud kitchen I wanted it to be as splinter-free as possible so don’t skimp on sanding.
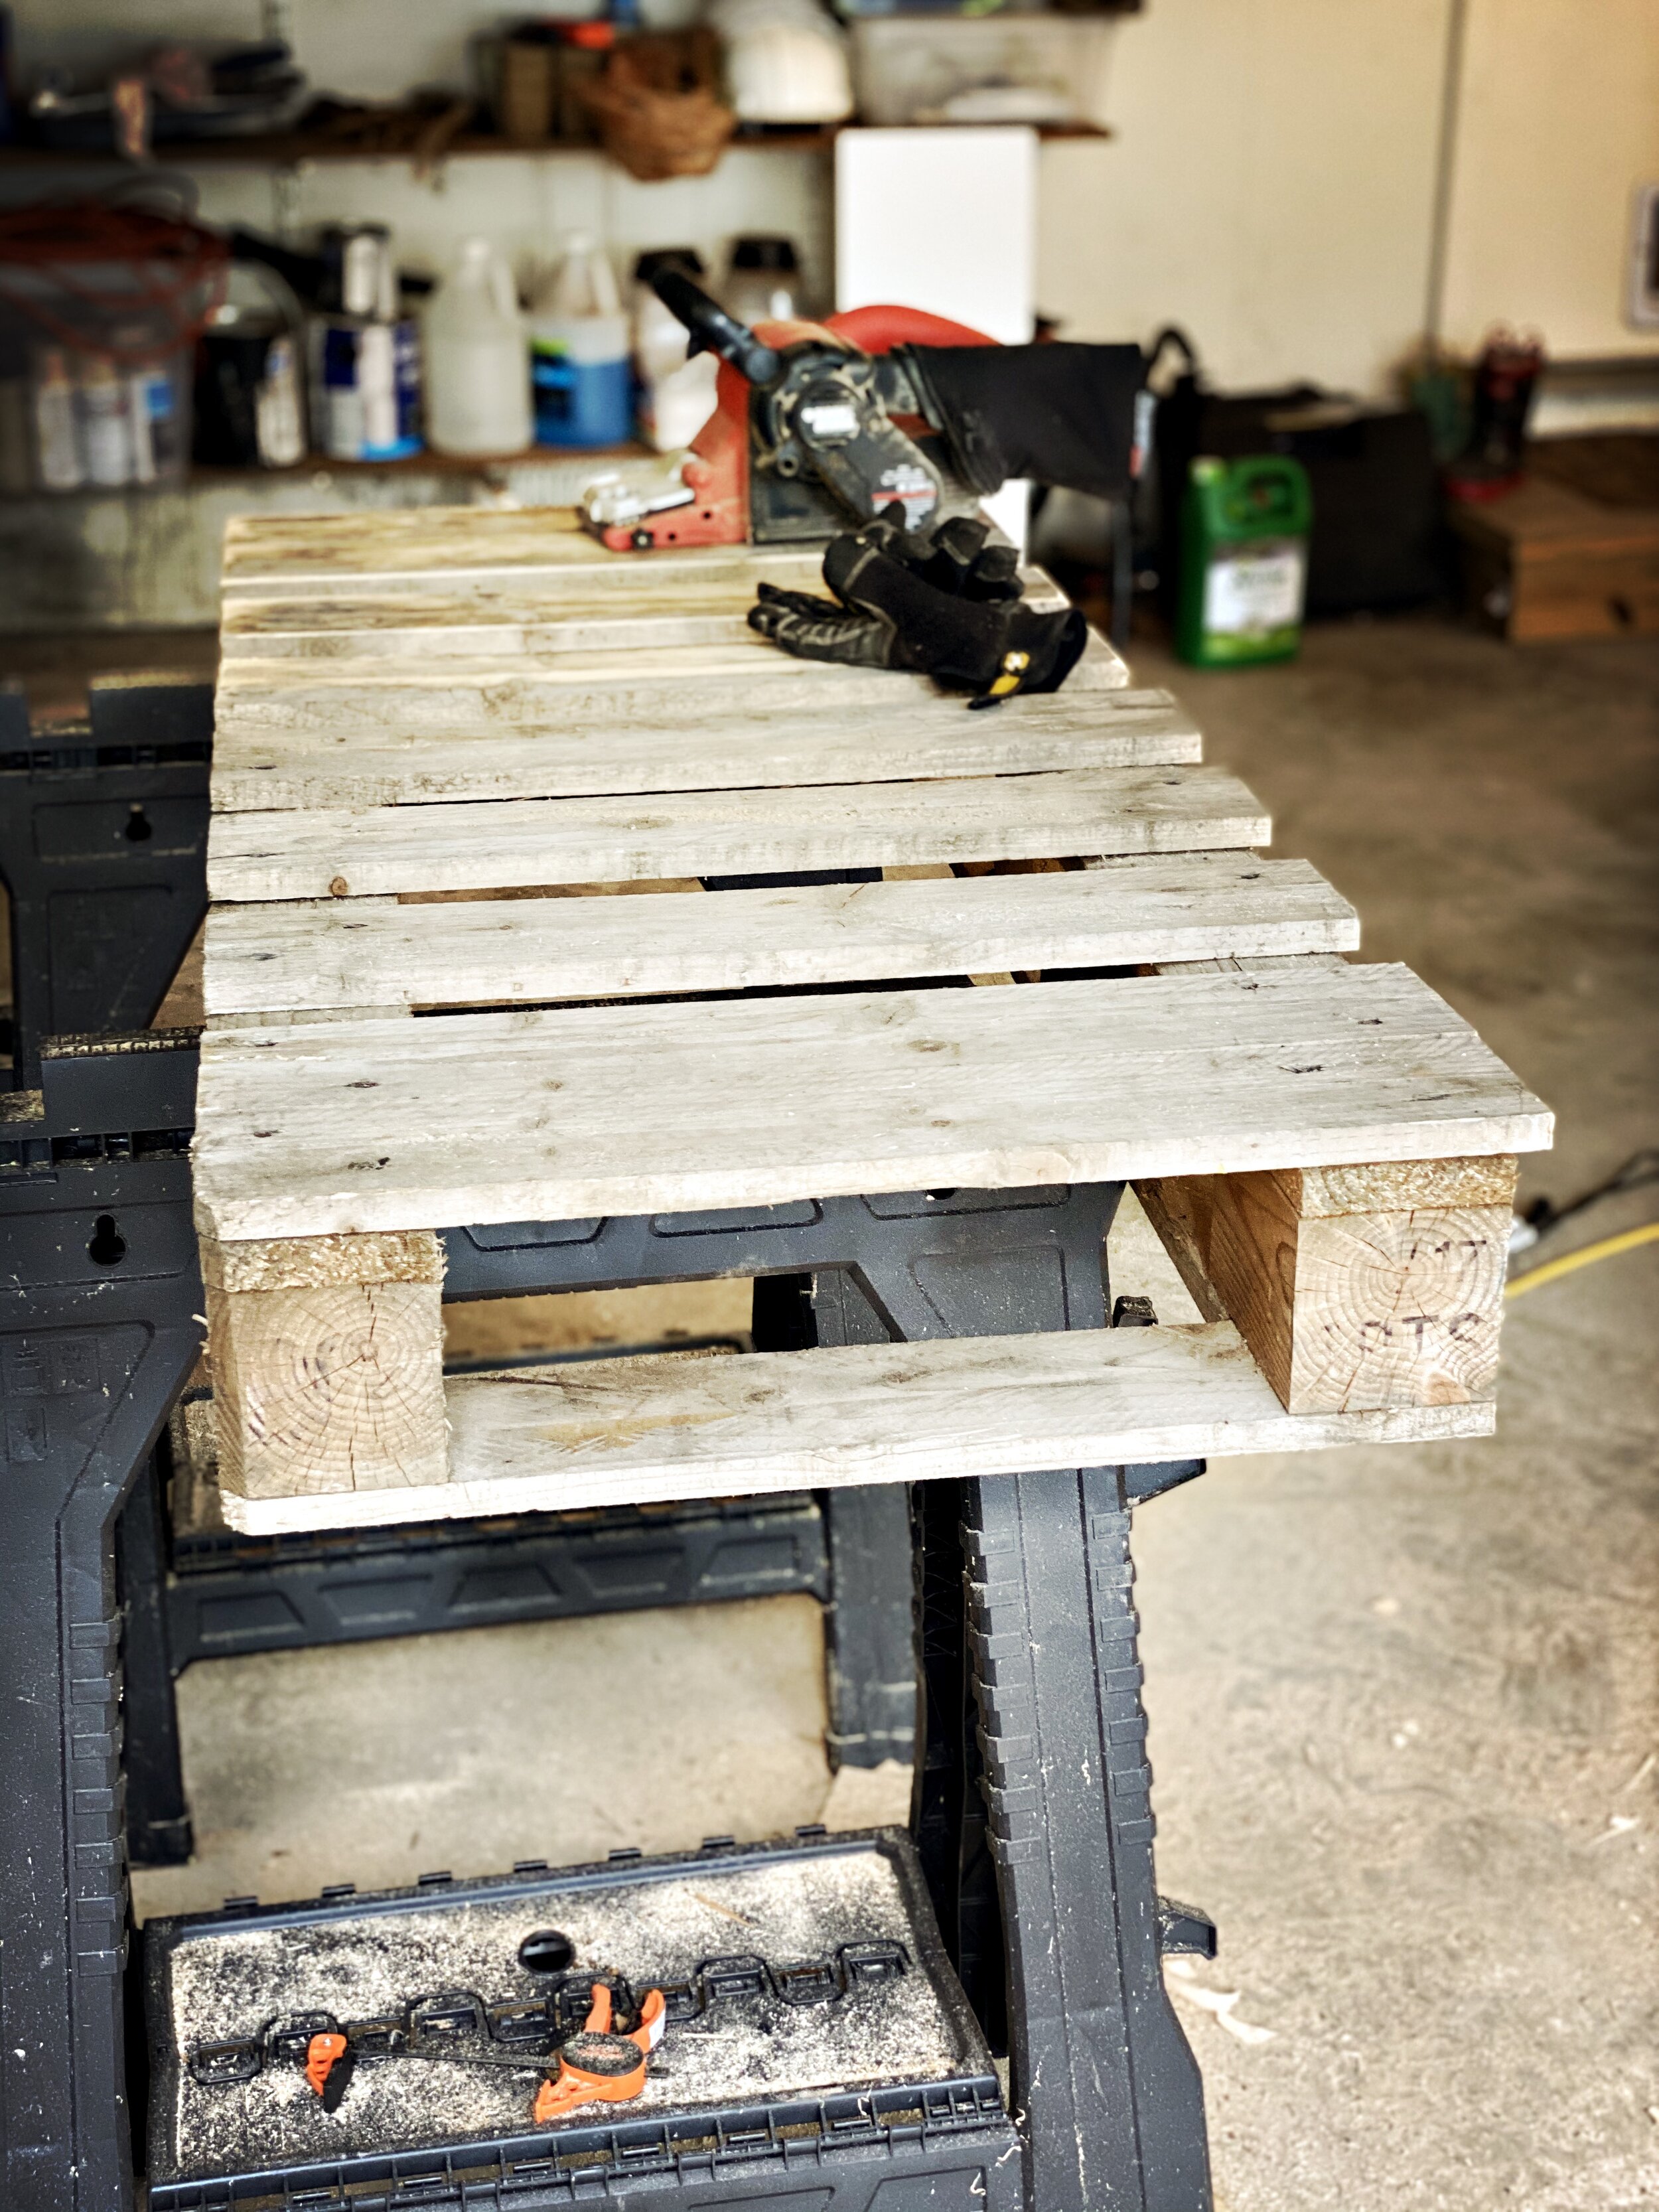
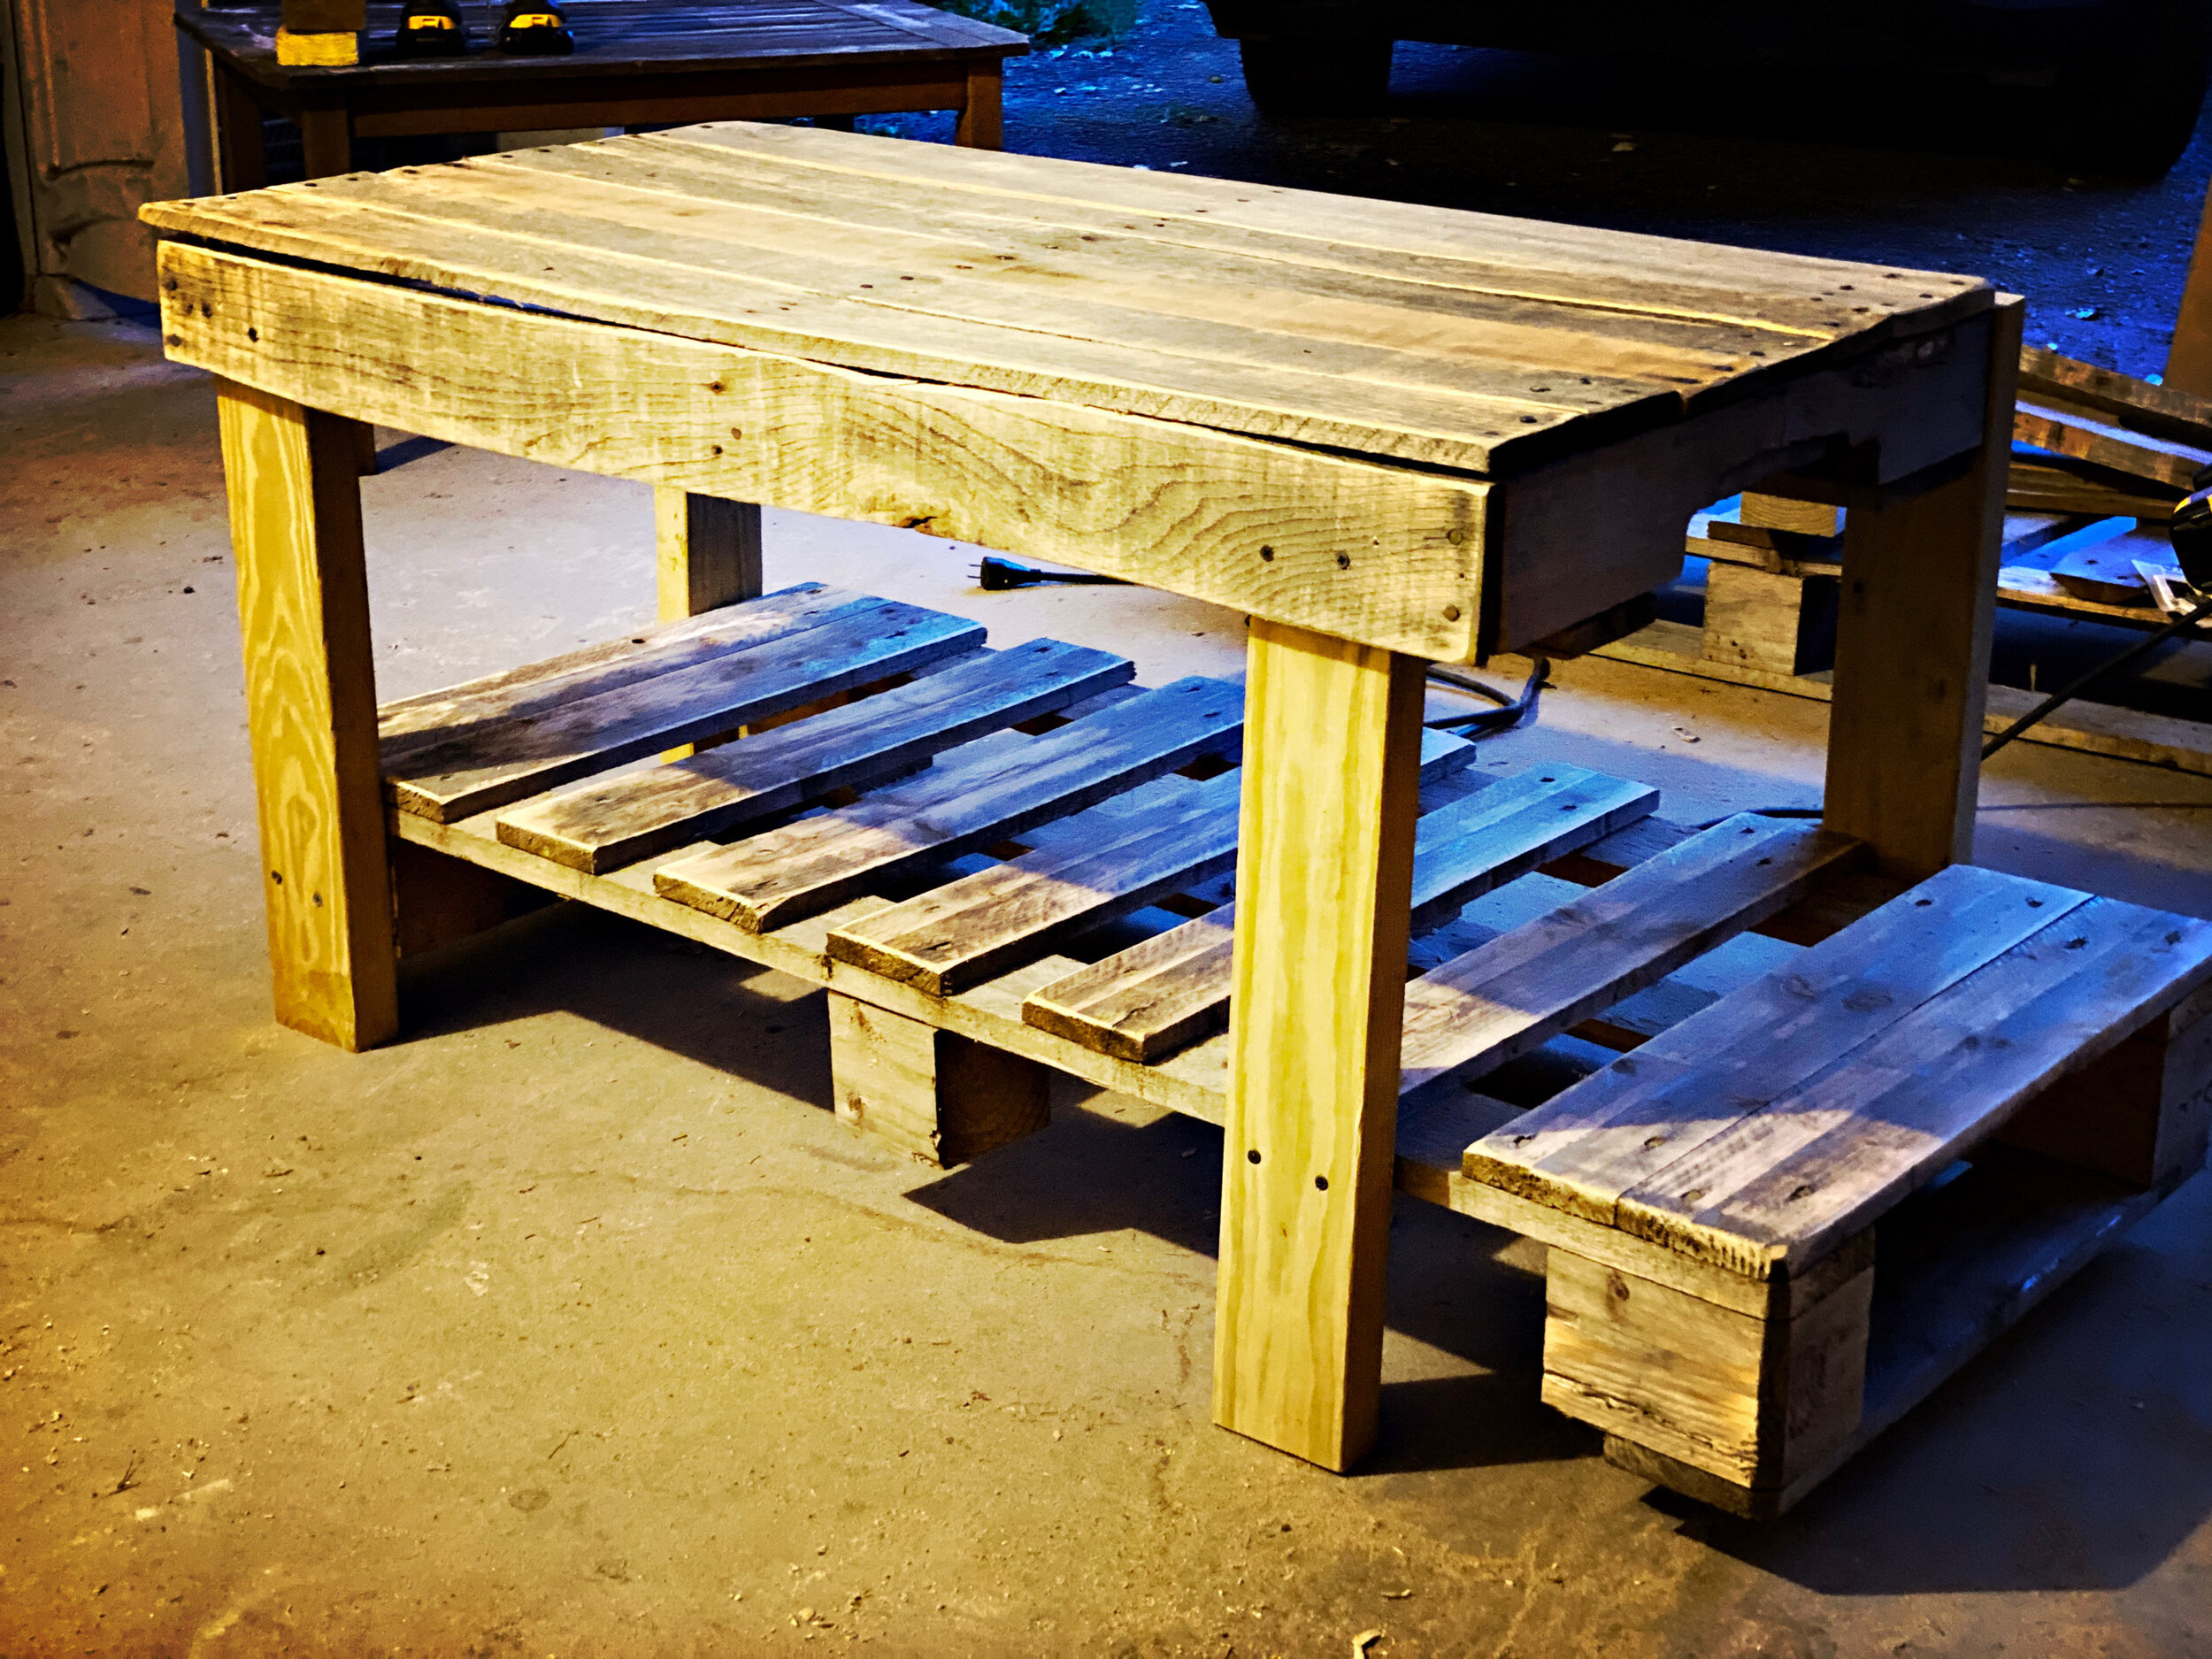
Step 4: Add the Legs
For a kid's mud kitchen, it's okay for it to look janky, so we didn't fuss over exact measurements. We propped the completed surface up on a low table and then added pressure treated 2x4s for the legs.
Step 5: Add the Lower Shelf
We then attached the lower shelf to these legs, raising it off the ground a few inches by placing some scrap wood beneath it to prop it up and position it. This was the most improvisatory step, and we had to get a little creative with how to fasten the legs to the surfaces, but again, it’s nice that this is a very forgiving project.
Step 6: Add Backsplash
We used the salvaged cross braces and two more slats for a backsplash. Tried to get it semi-level, but it actually might look better if you make the slats intentionally cockeyed.

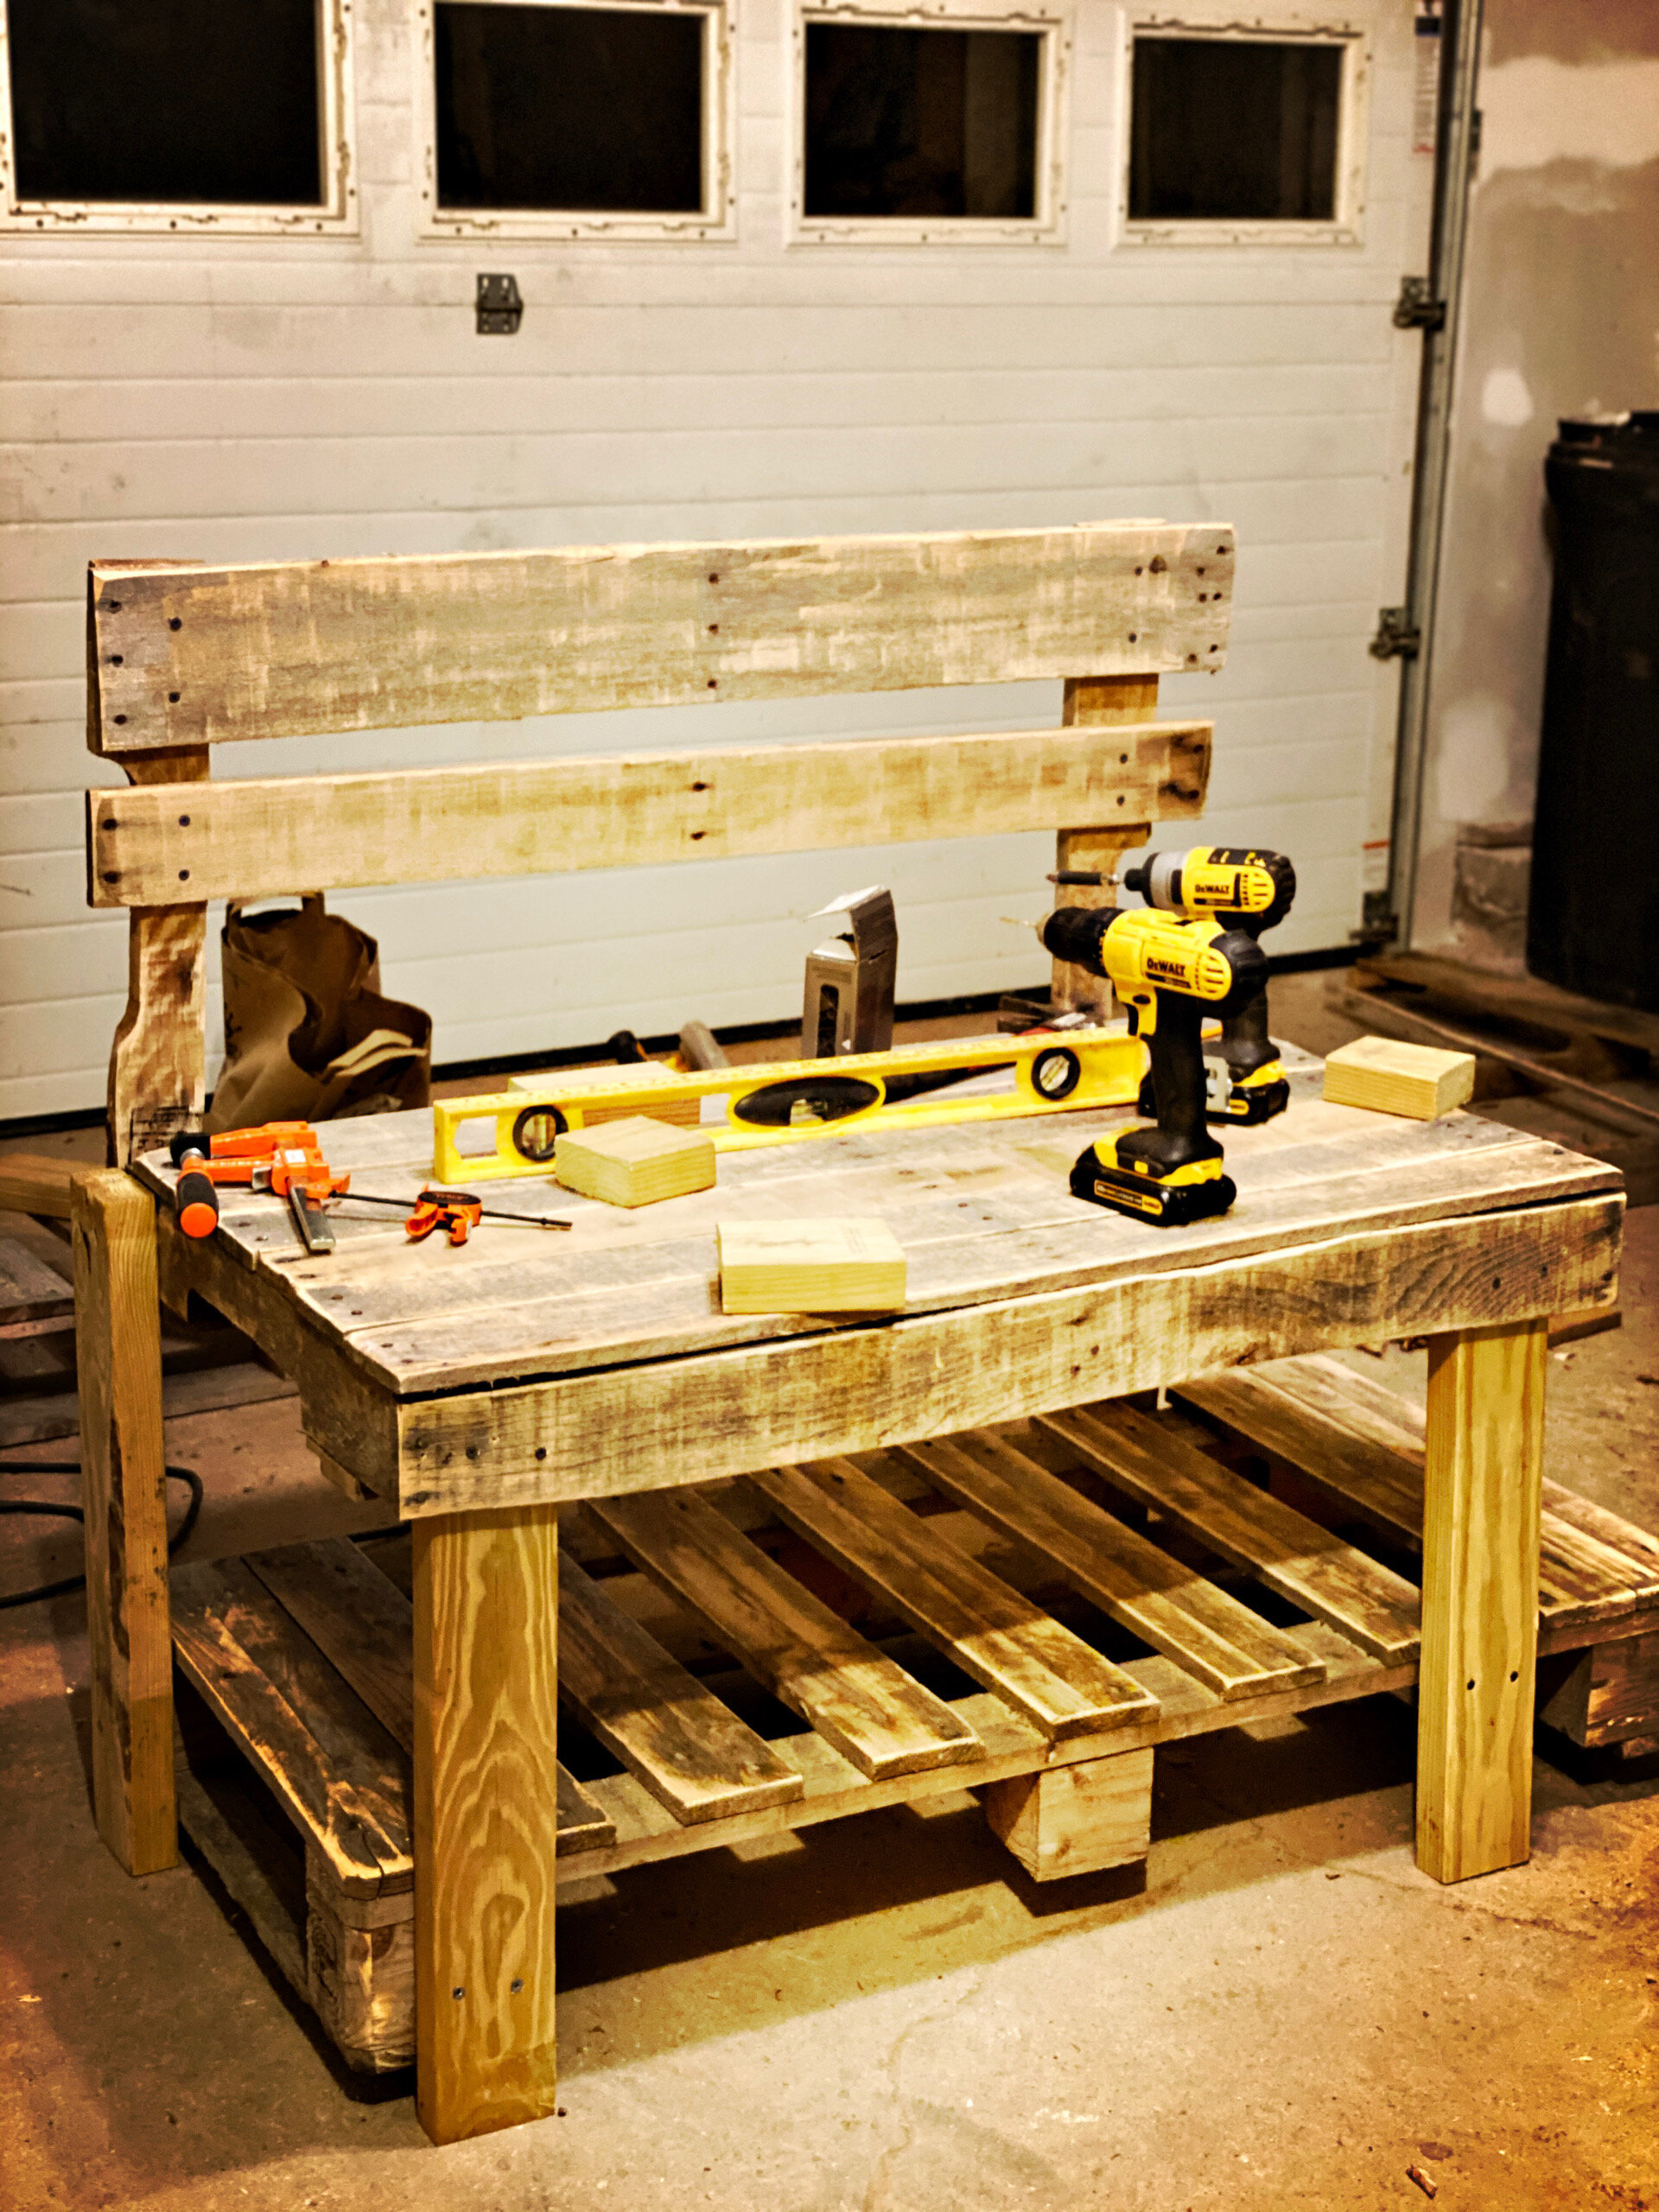
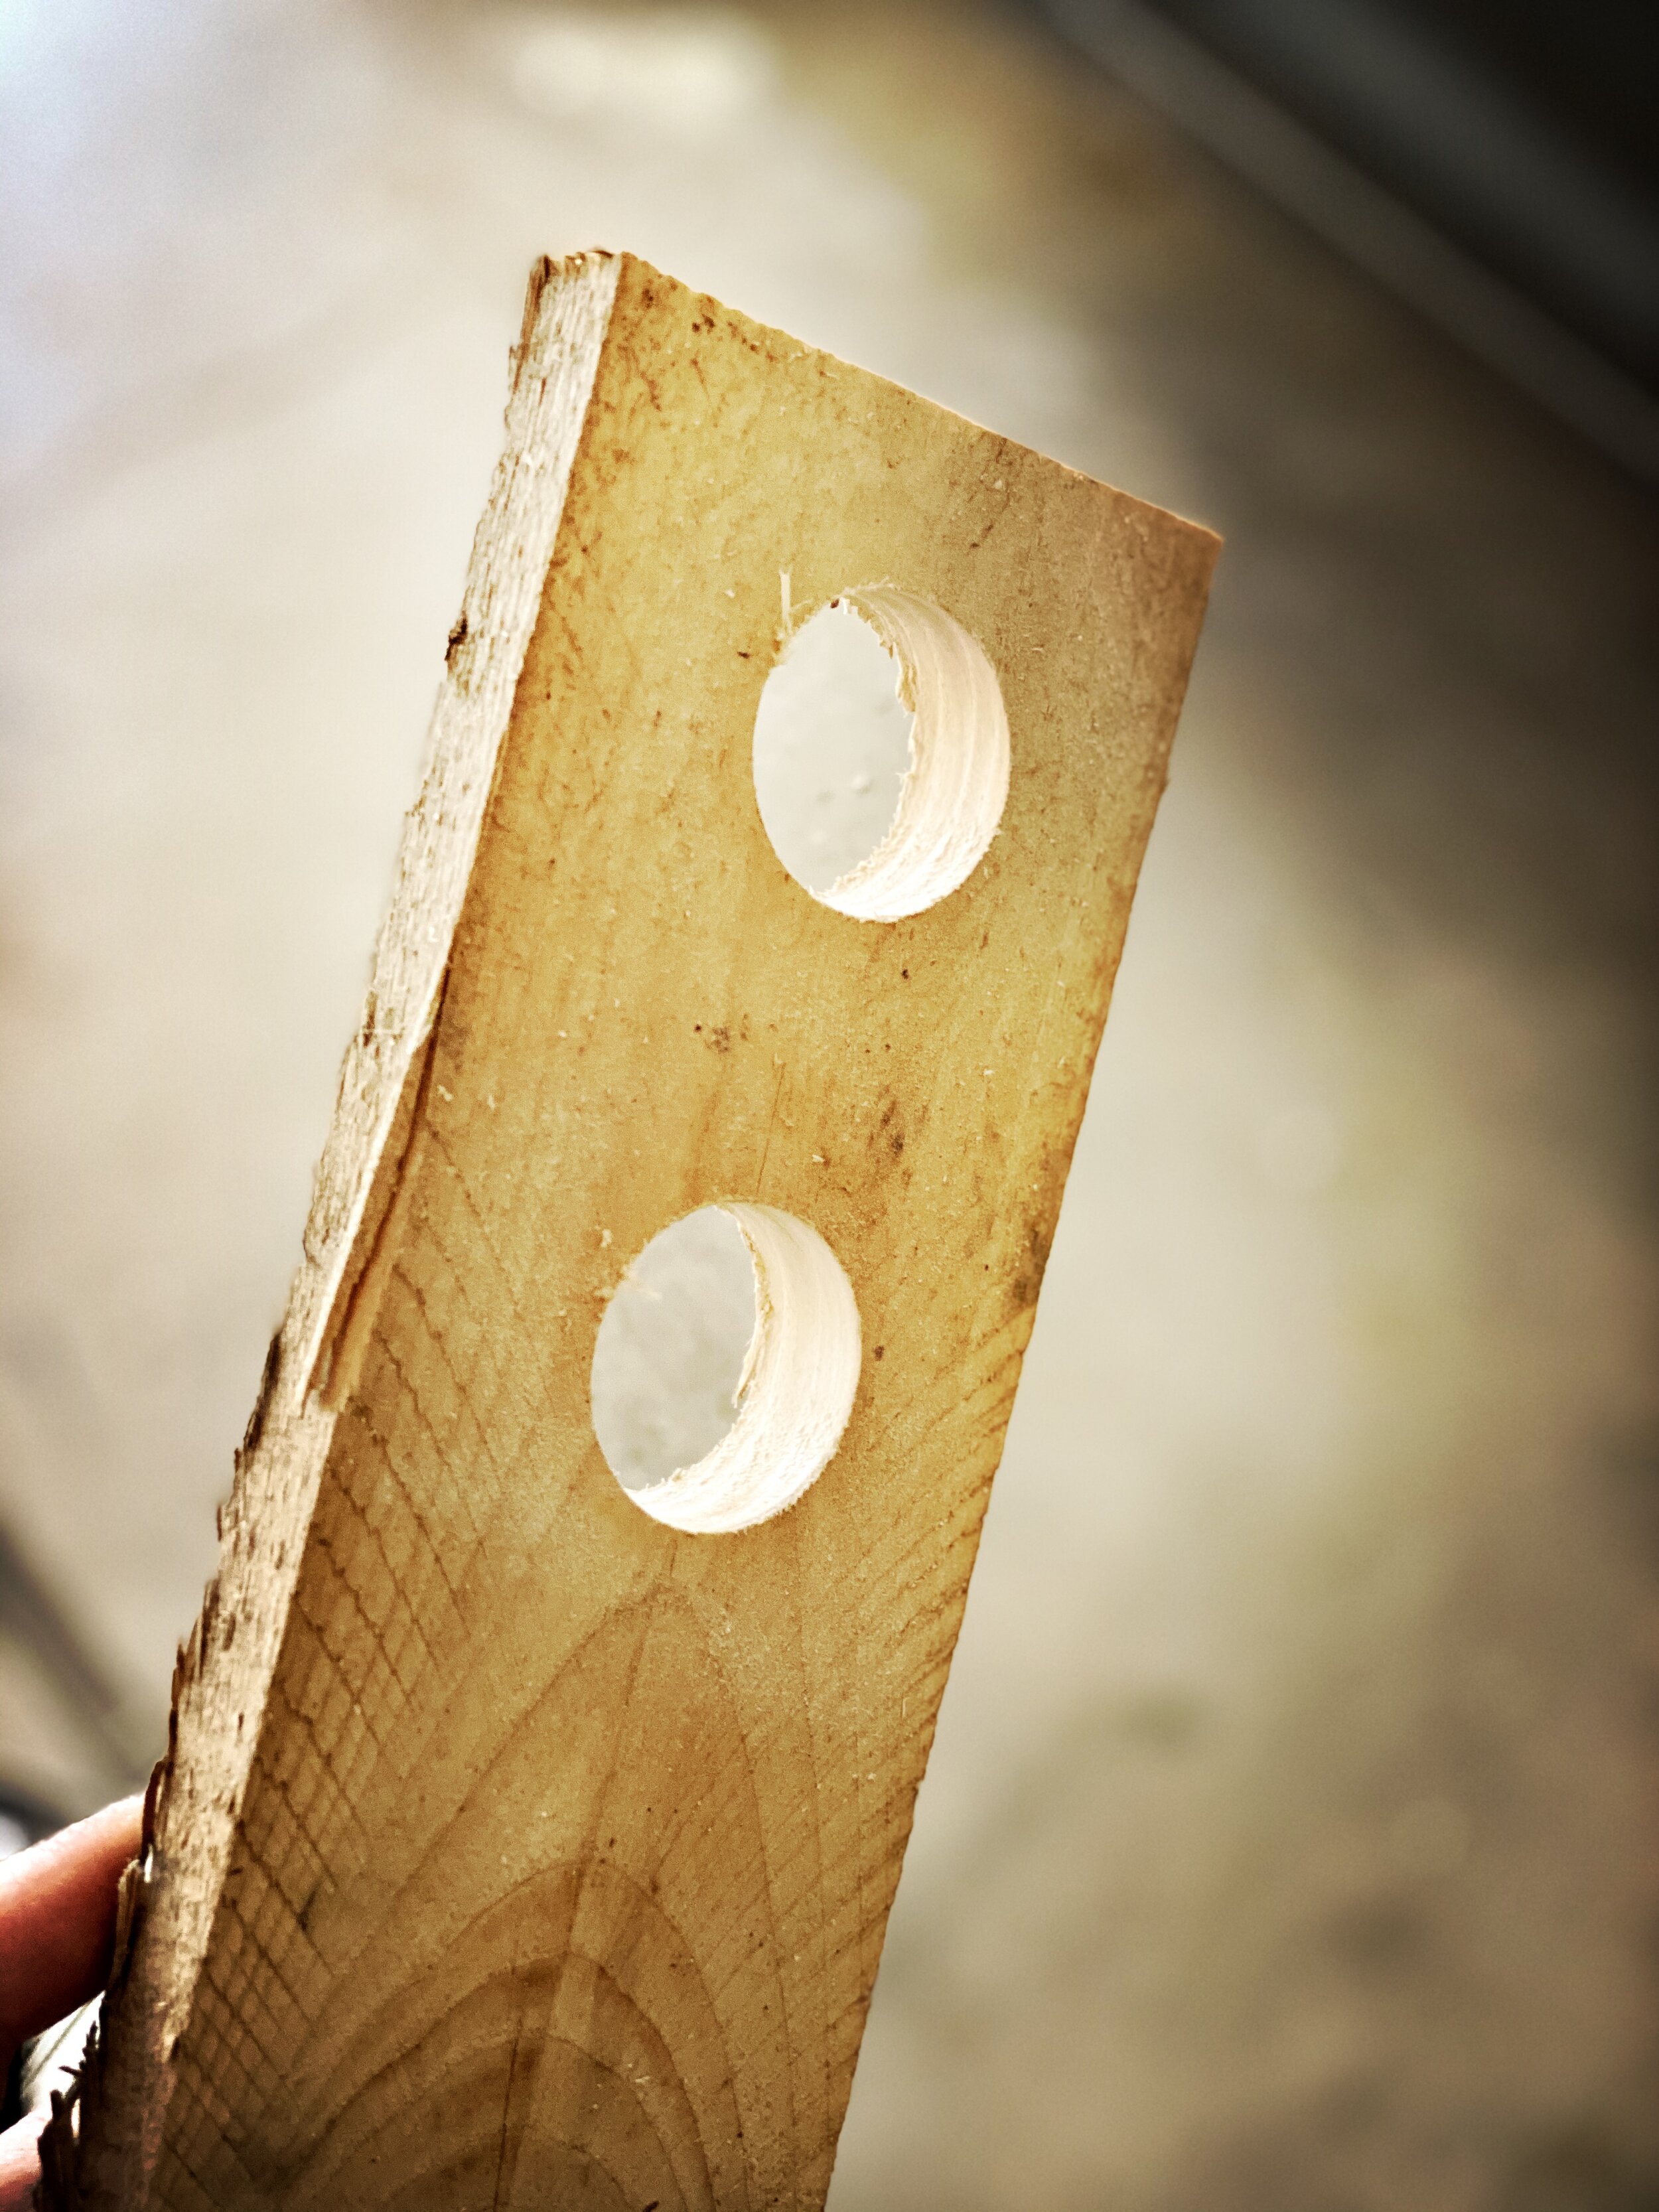
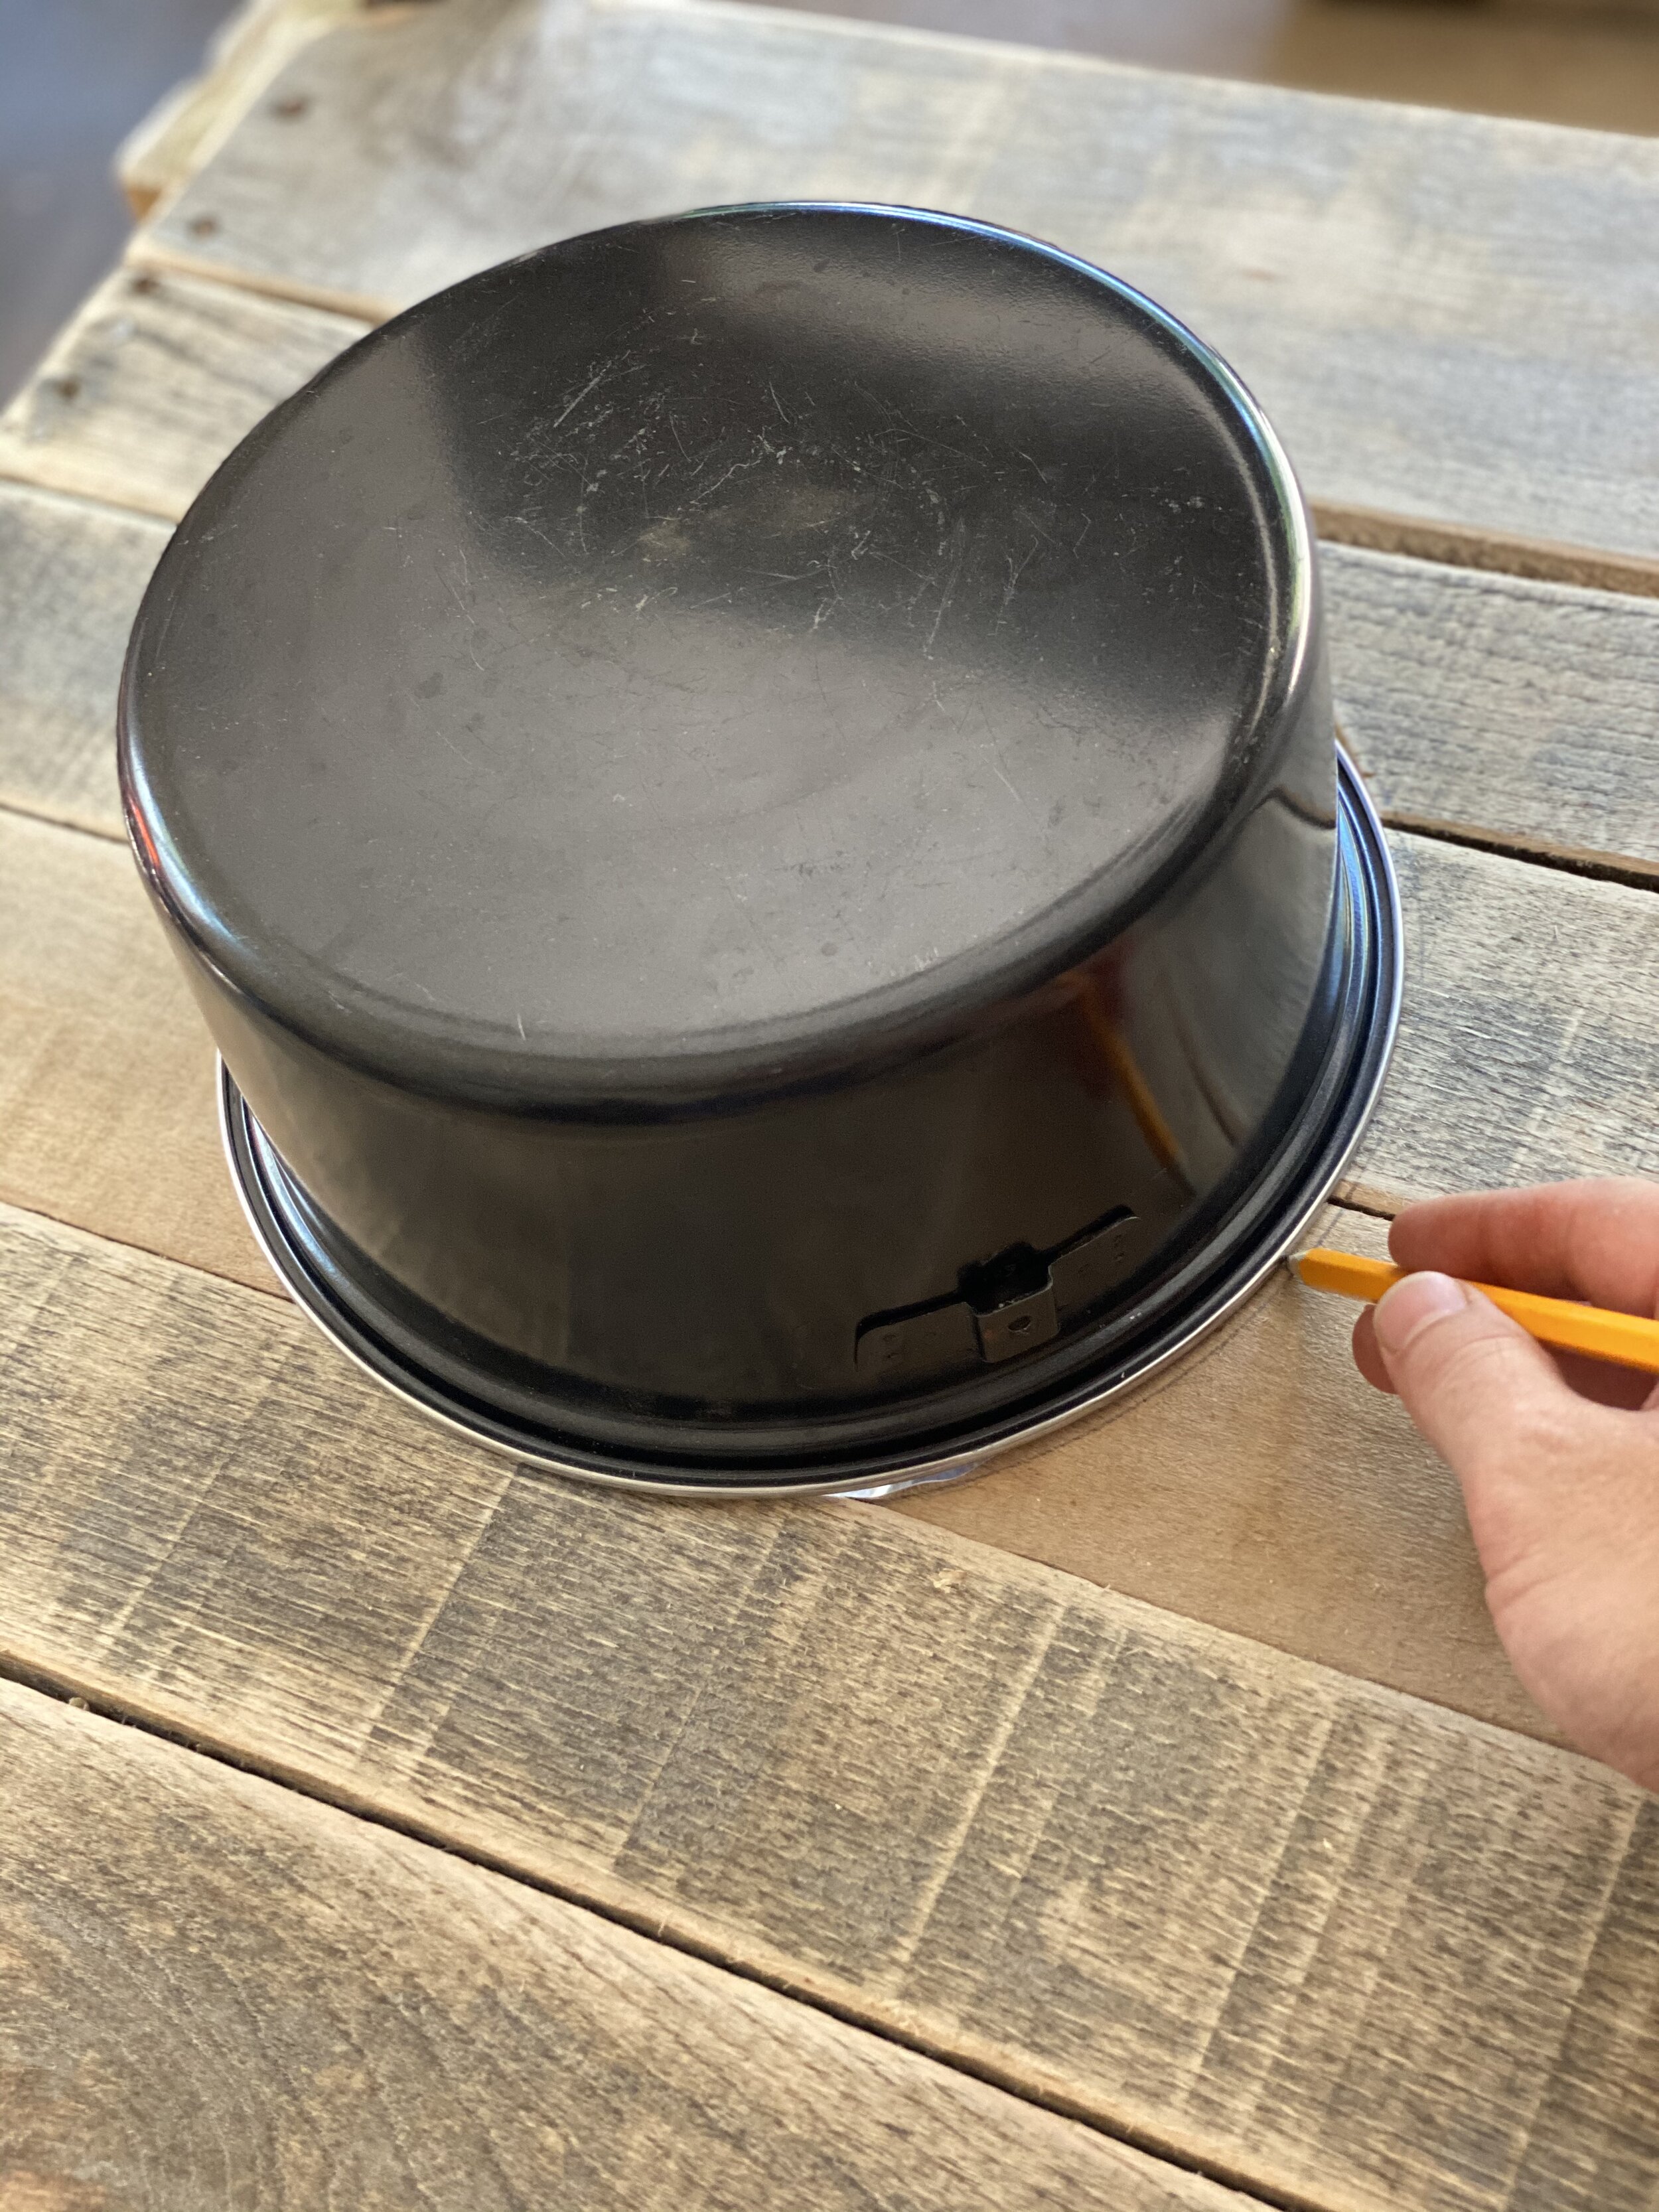
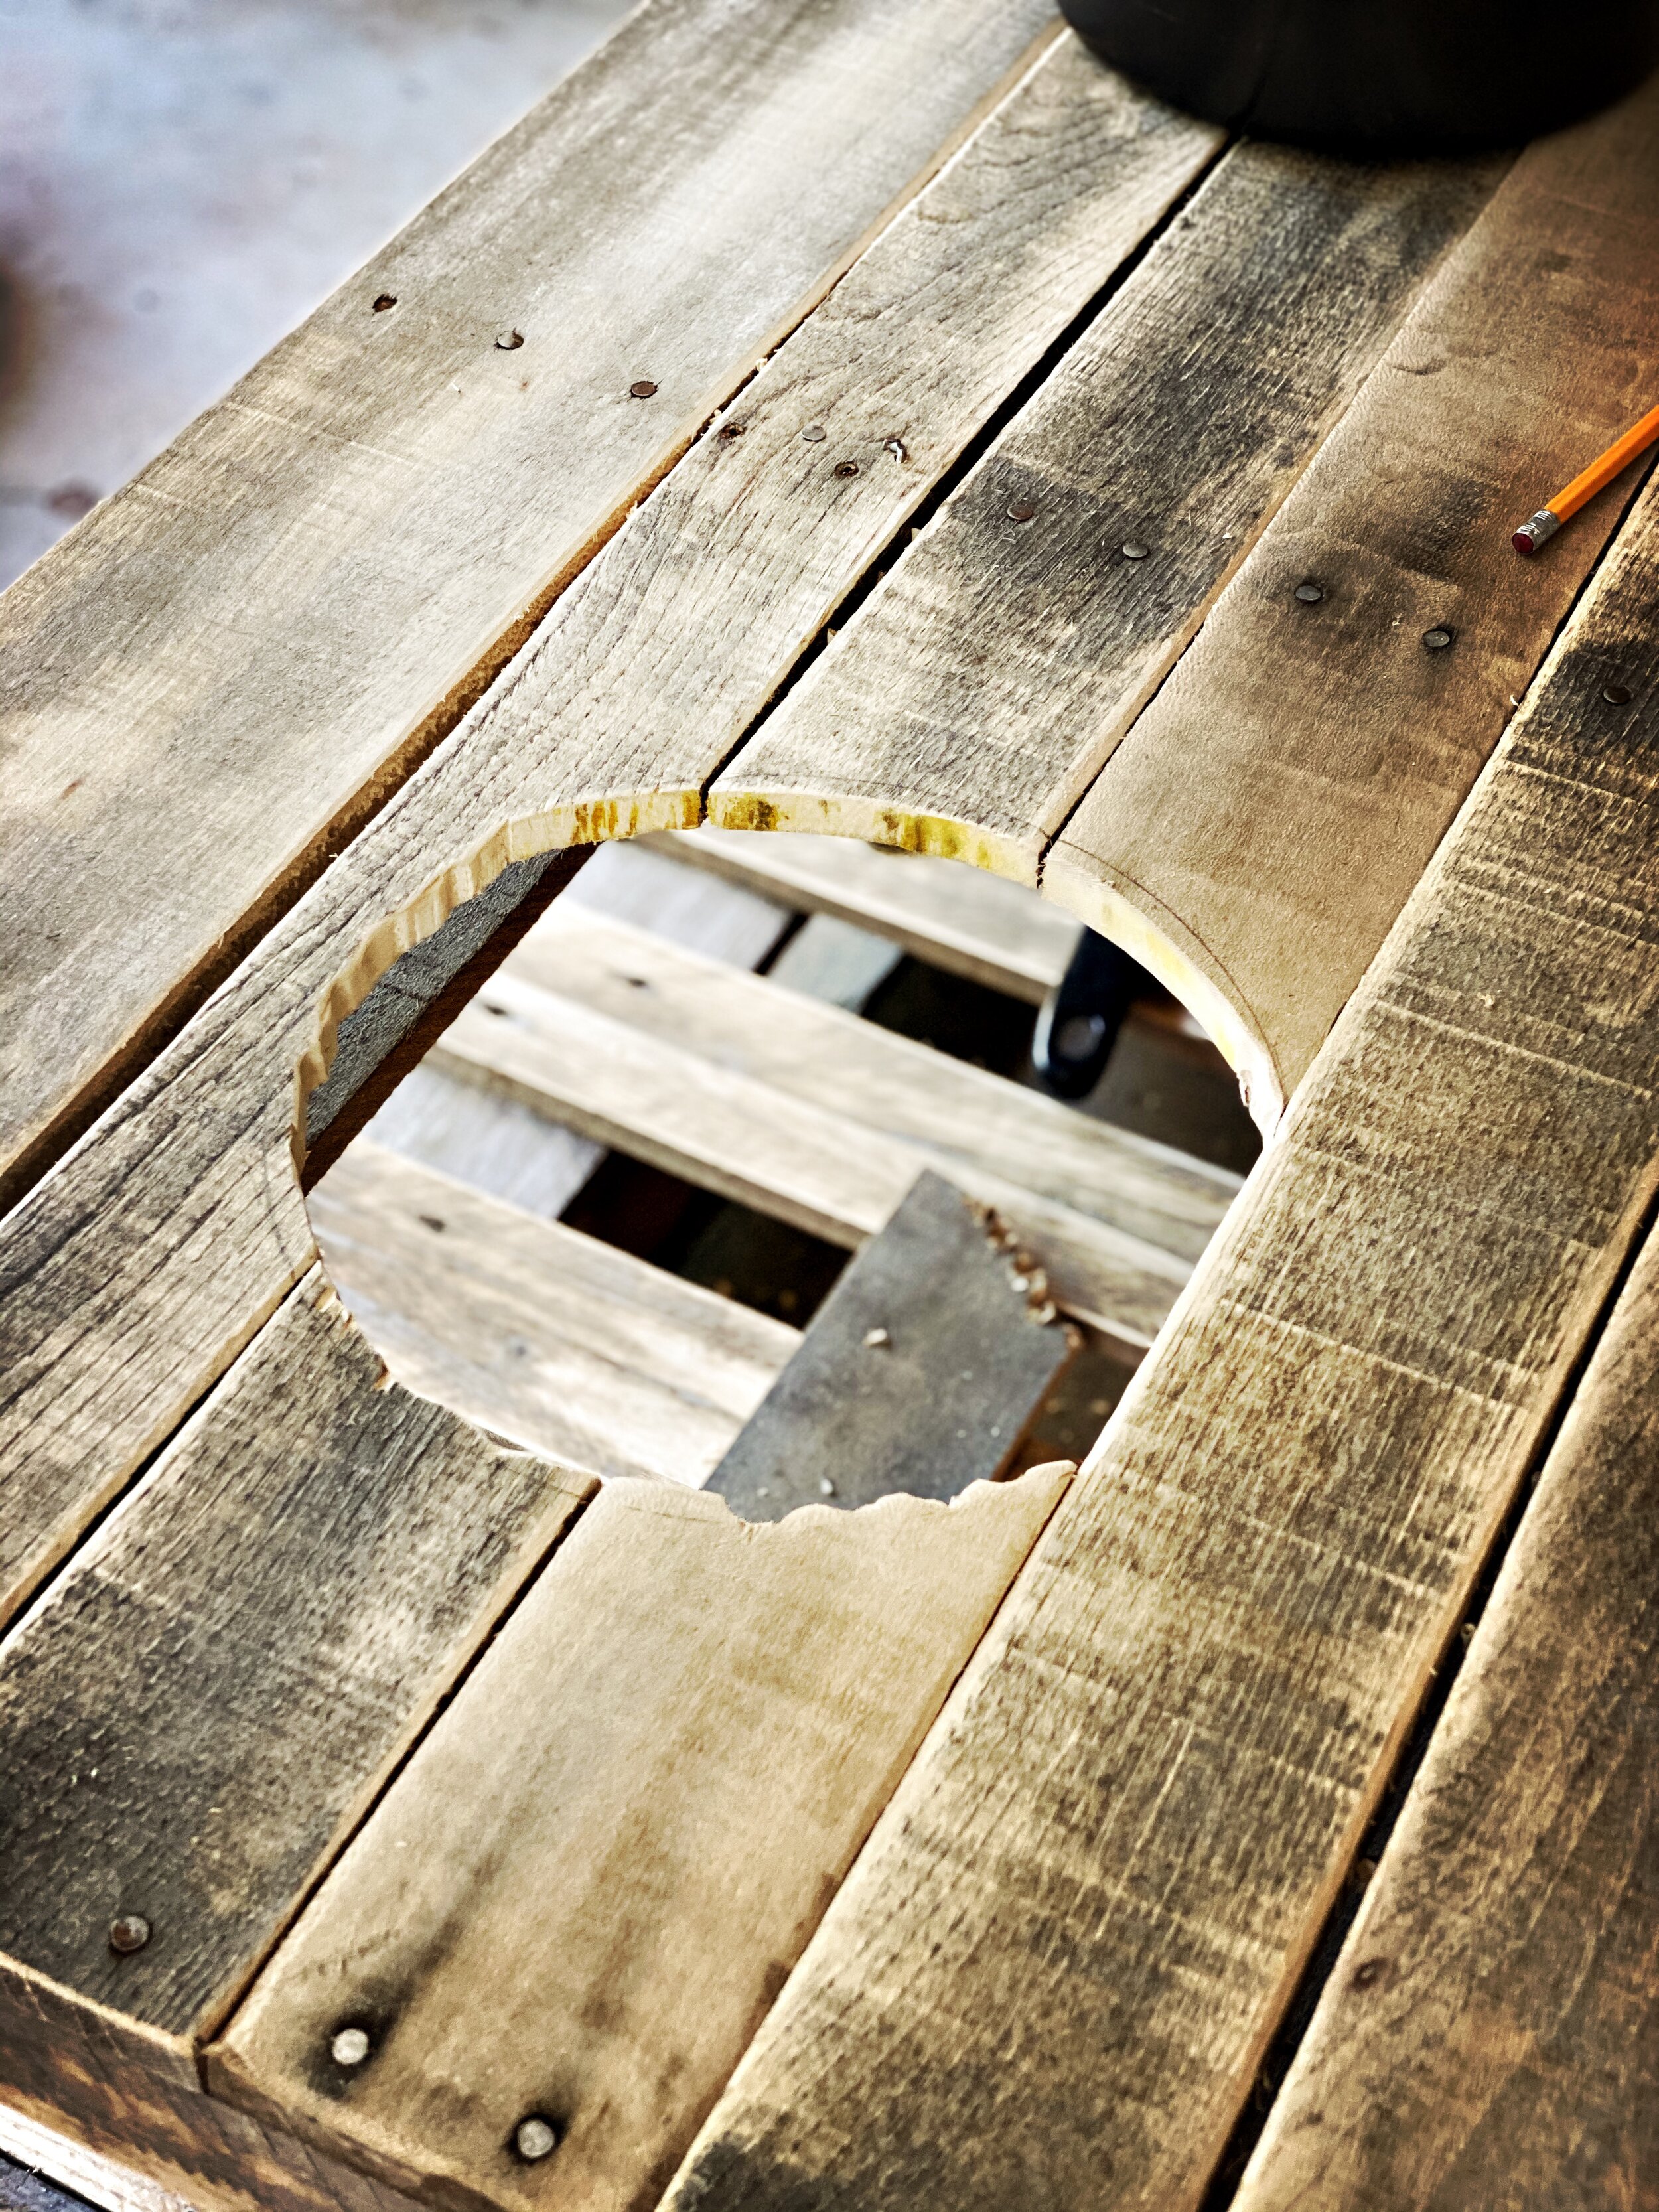
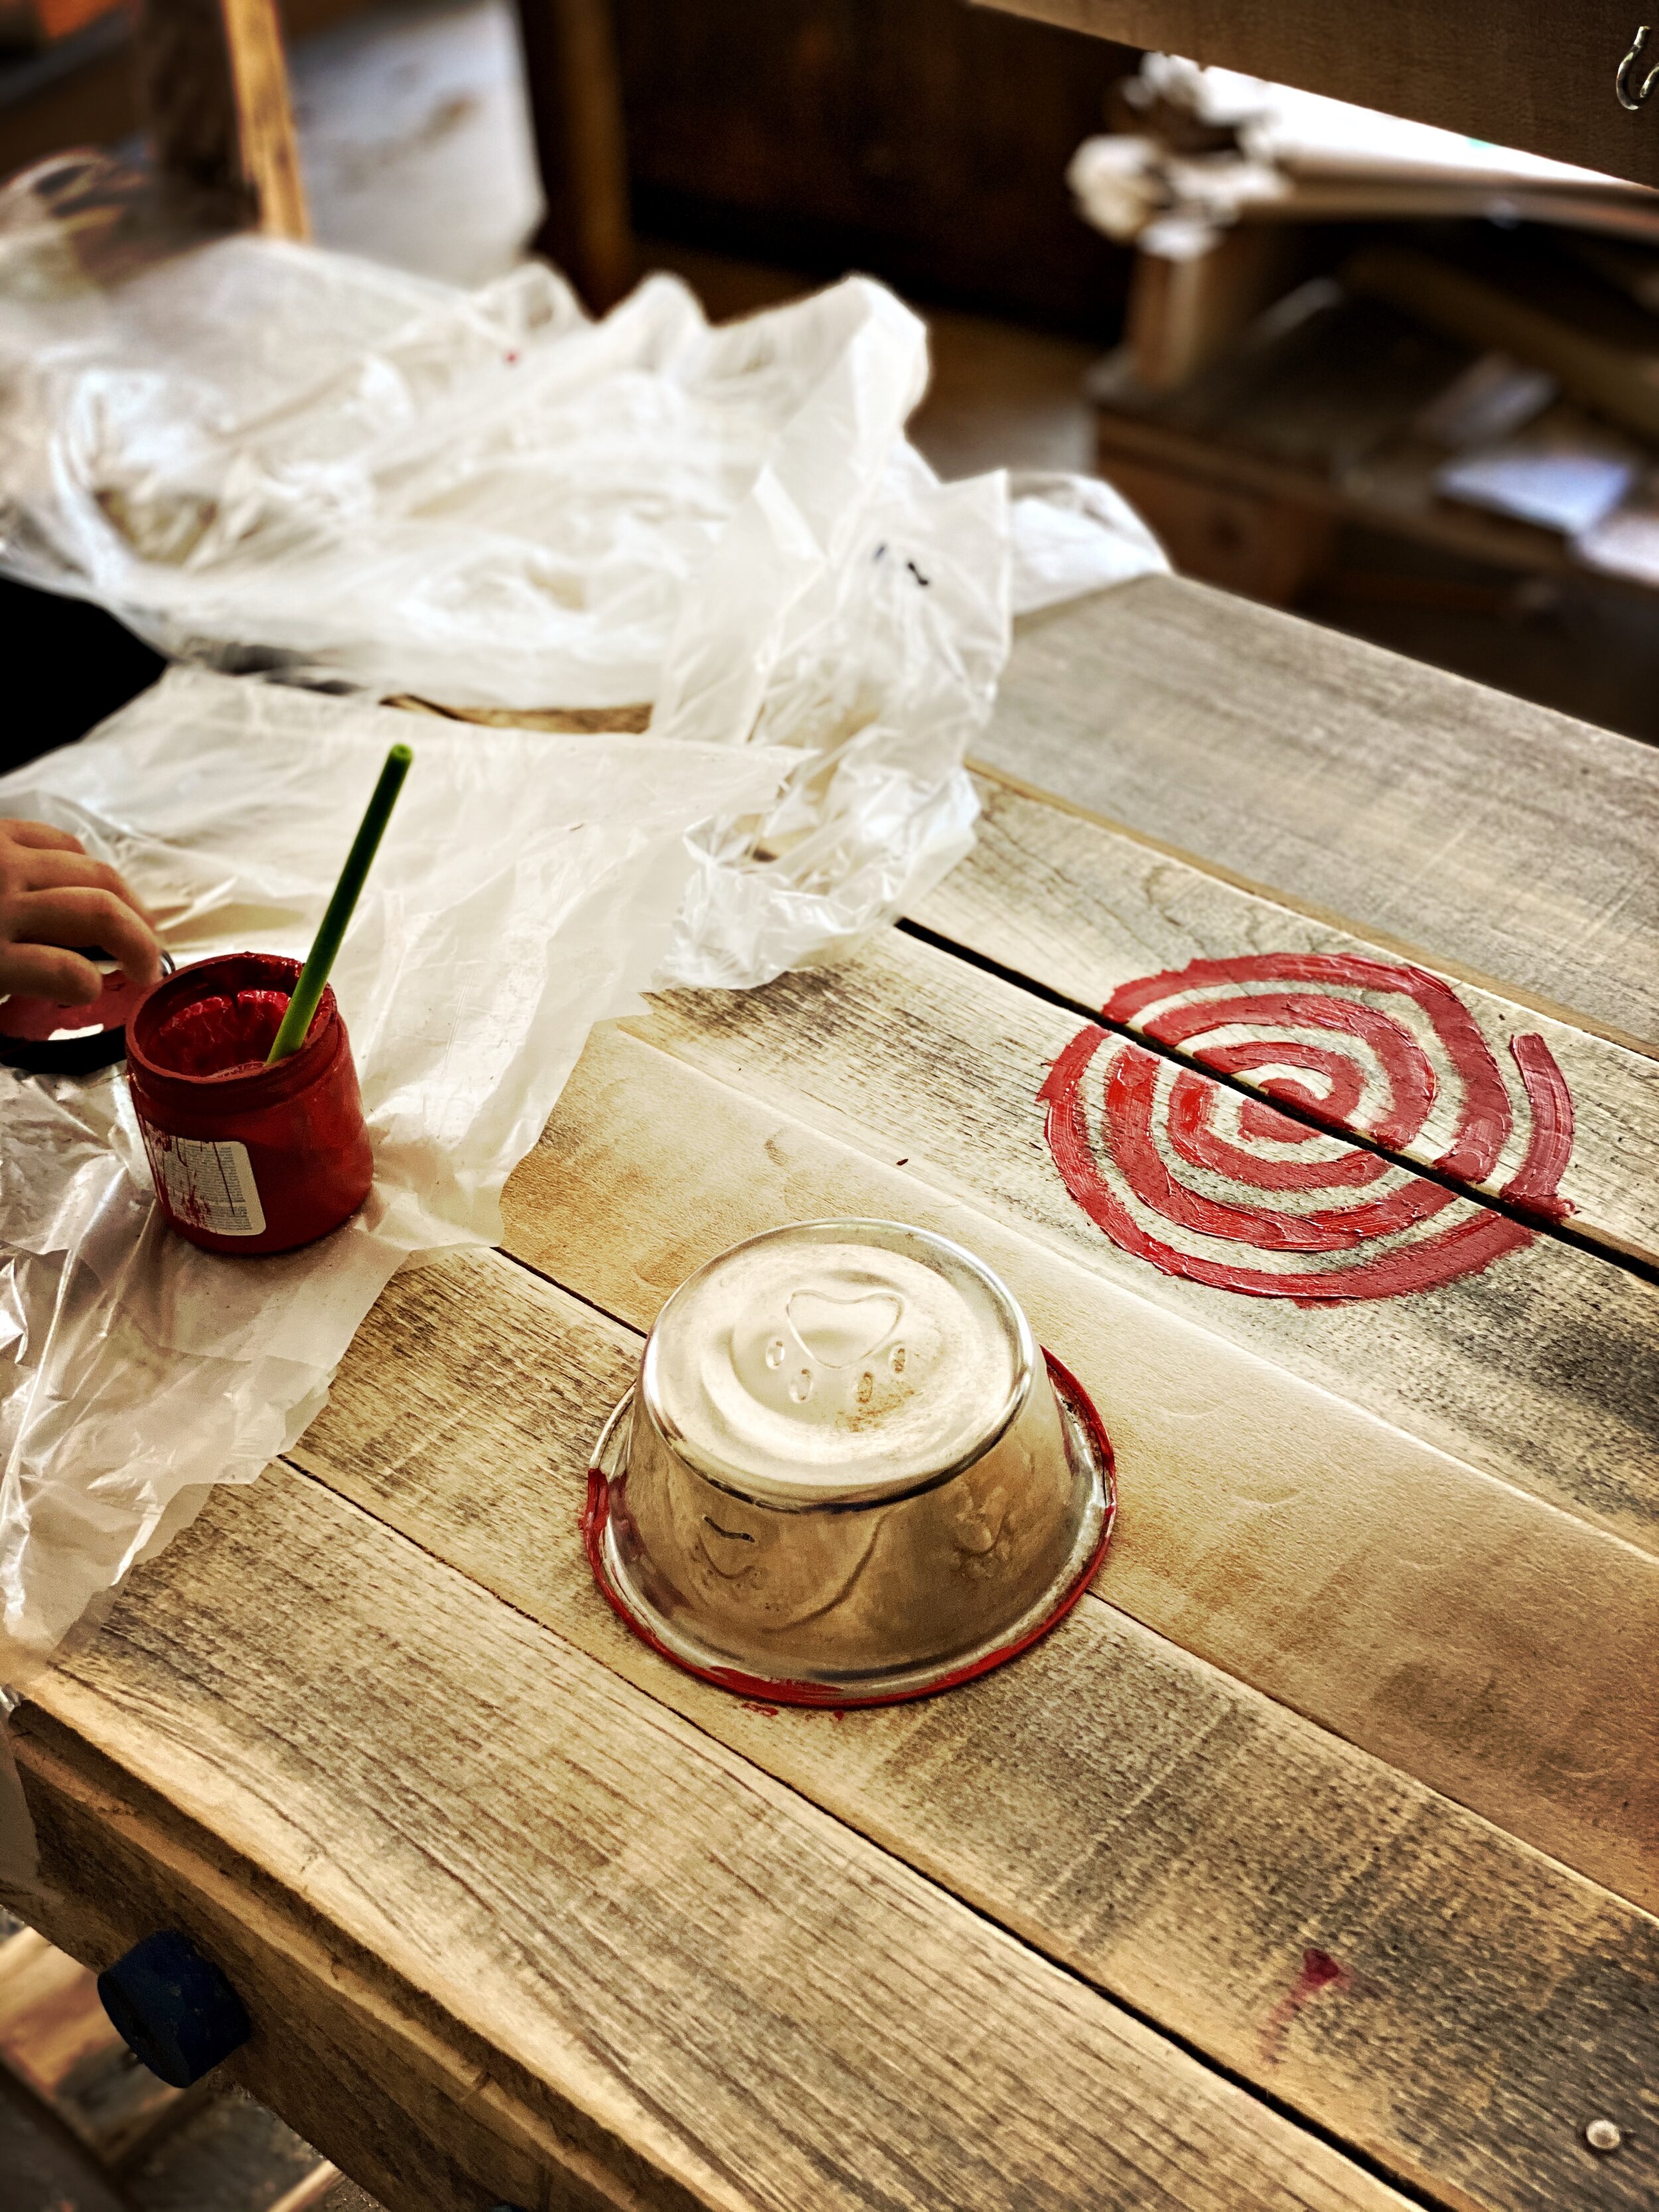
Step 7: Details & Accessories
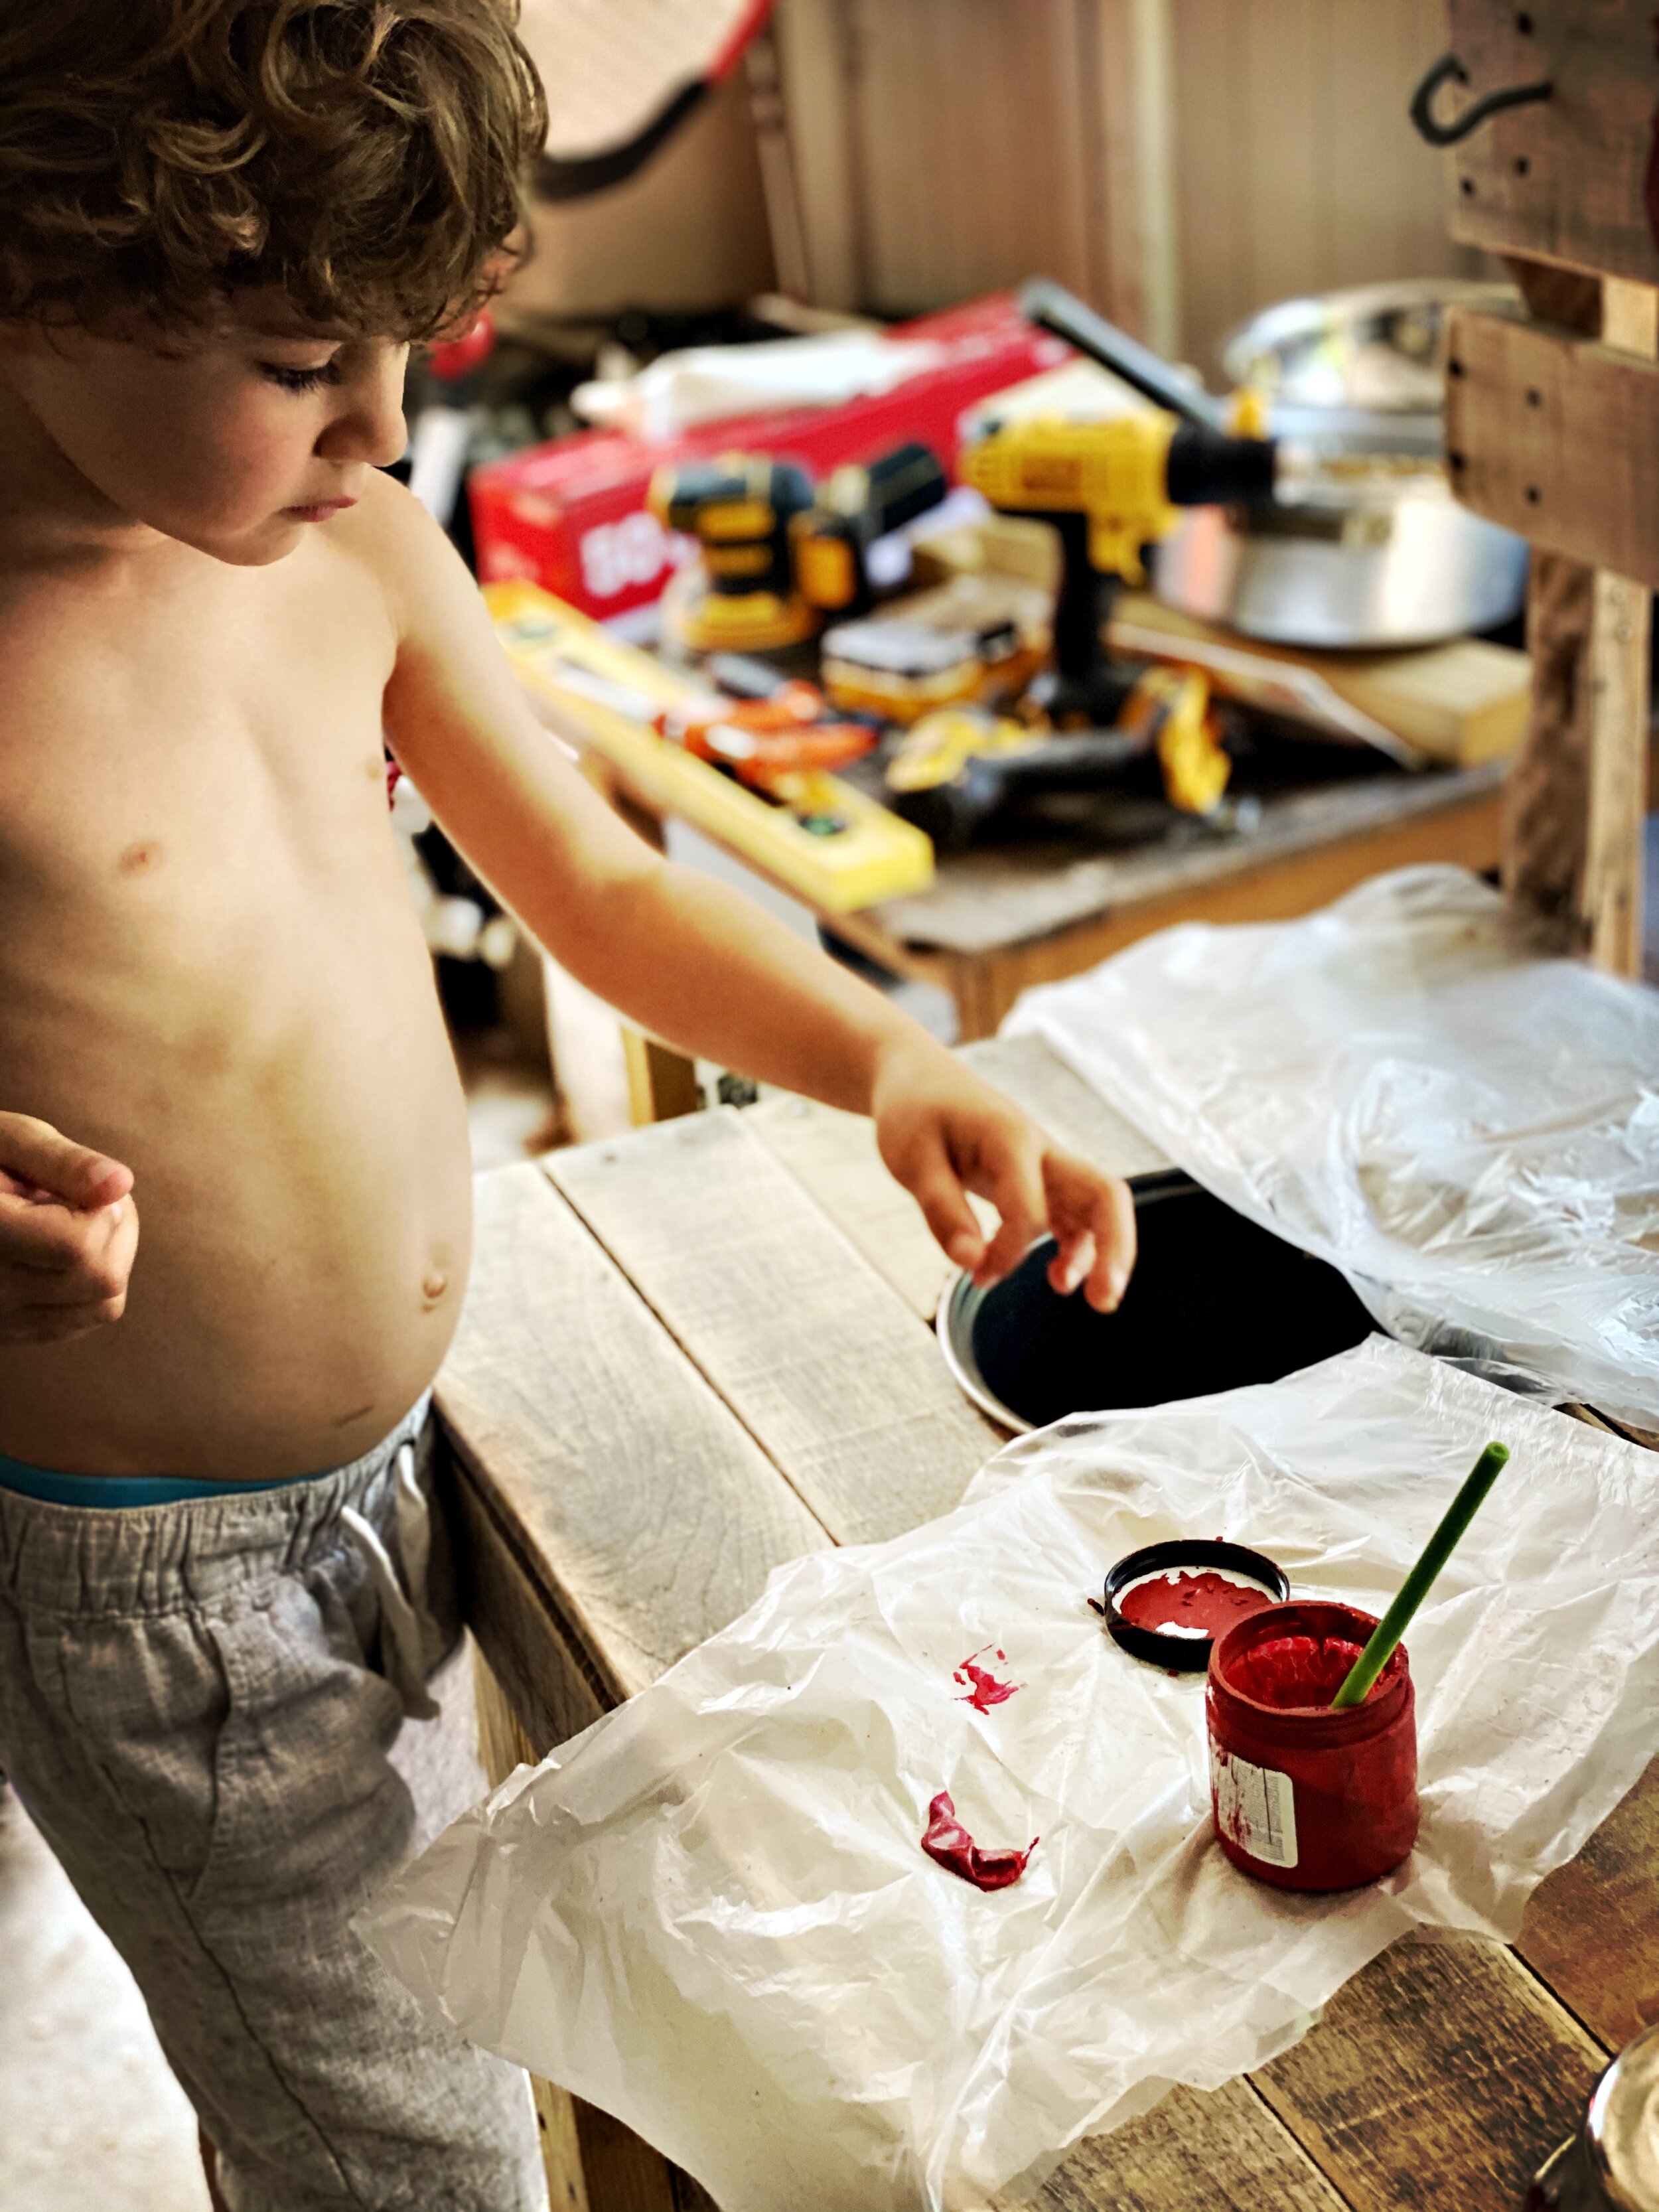
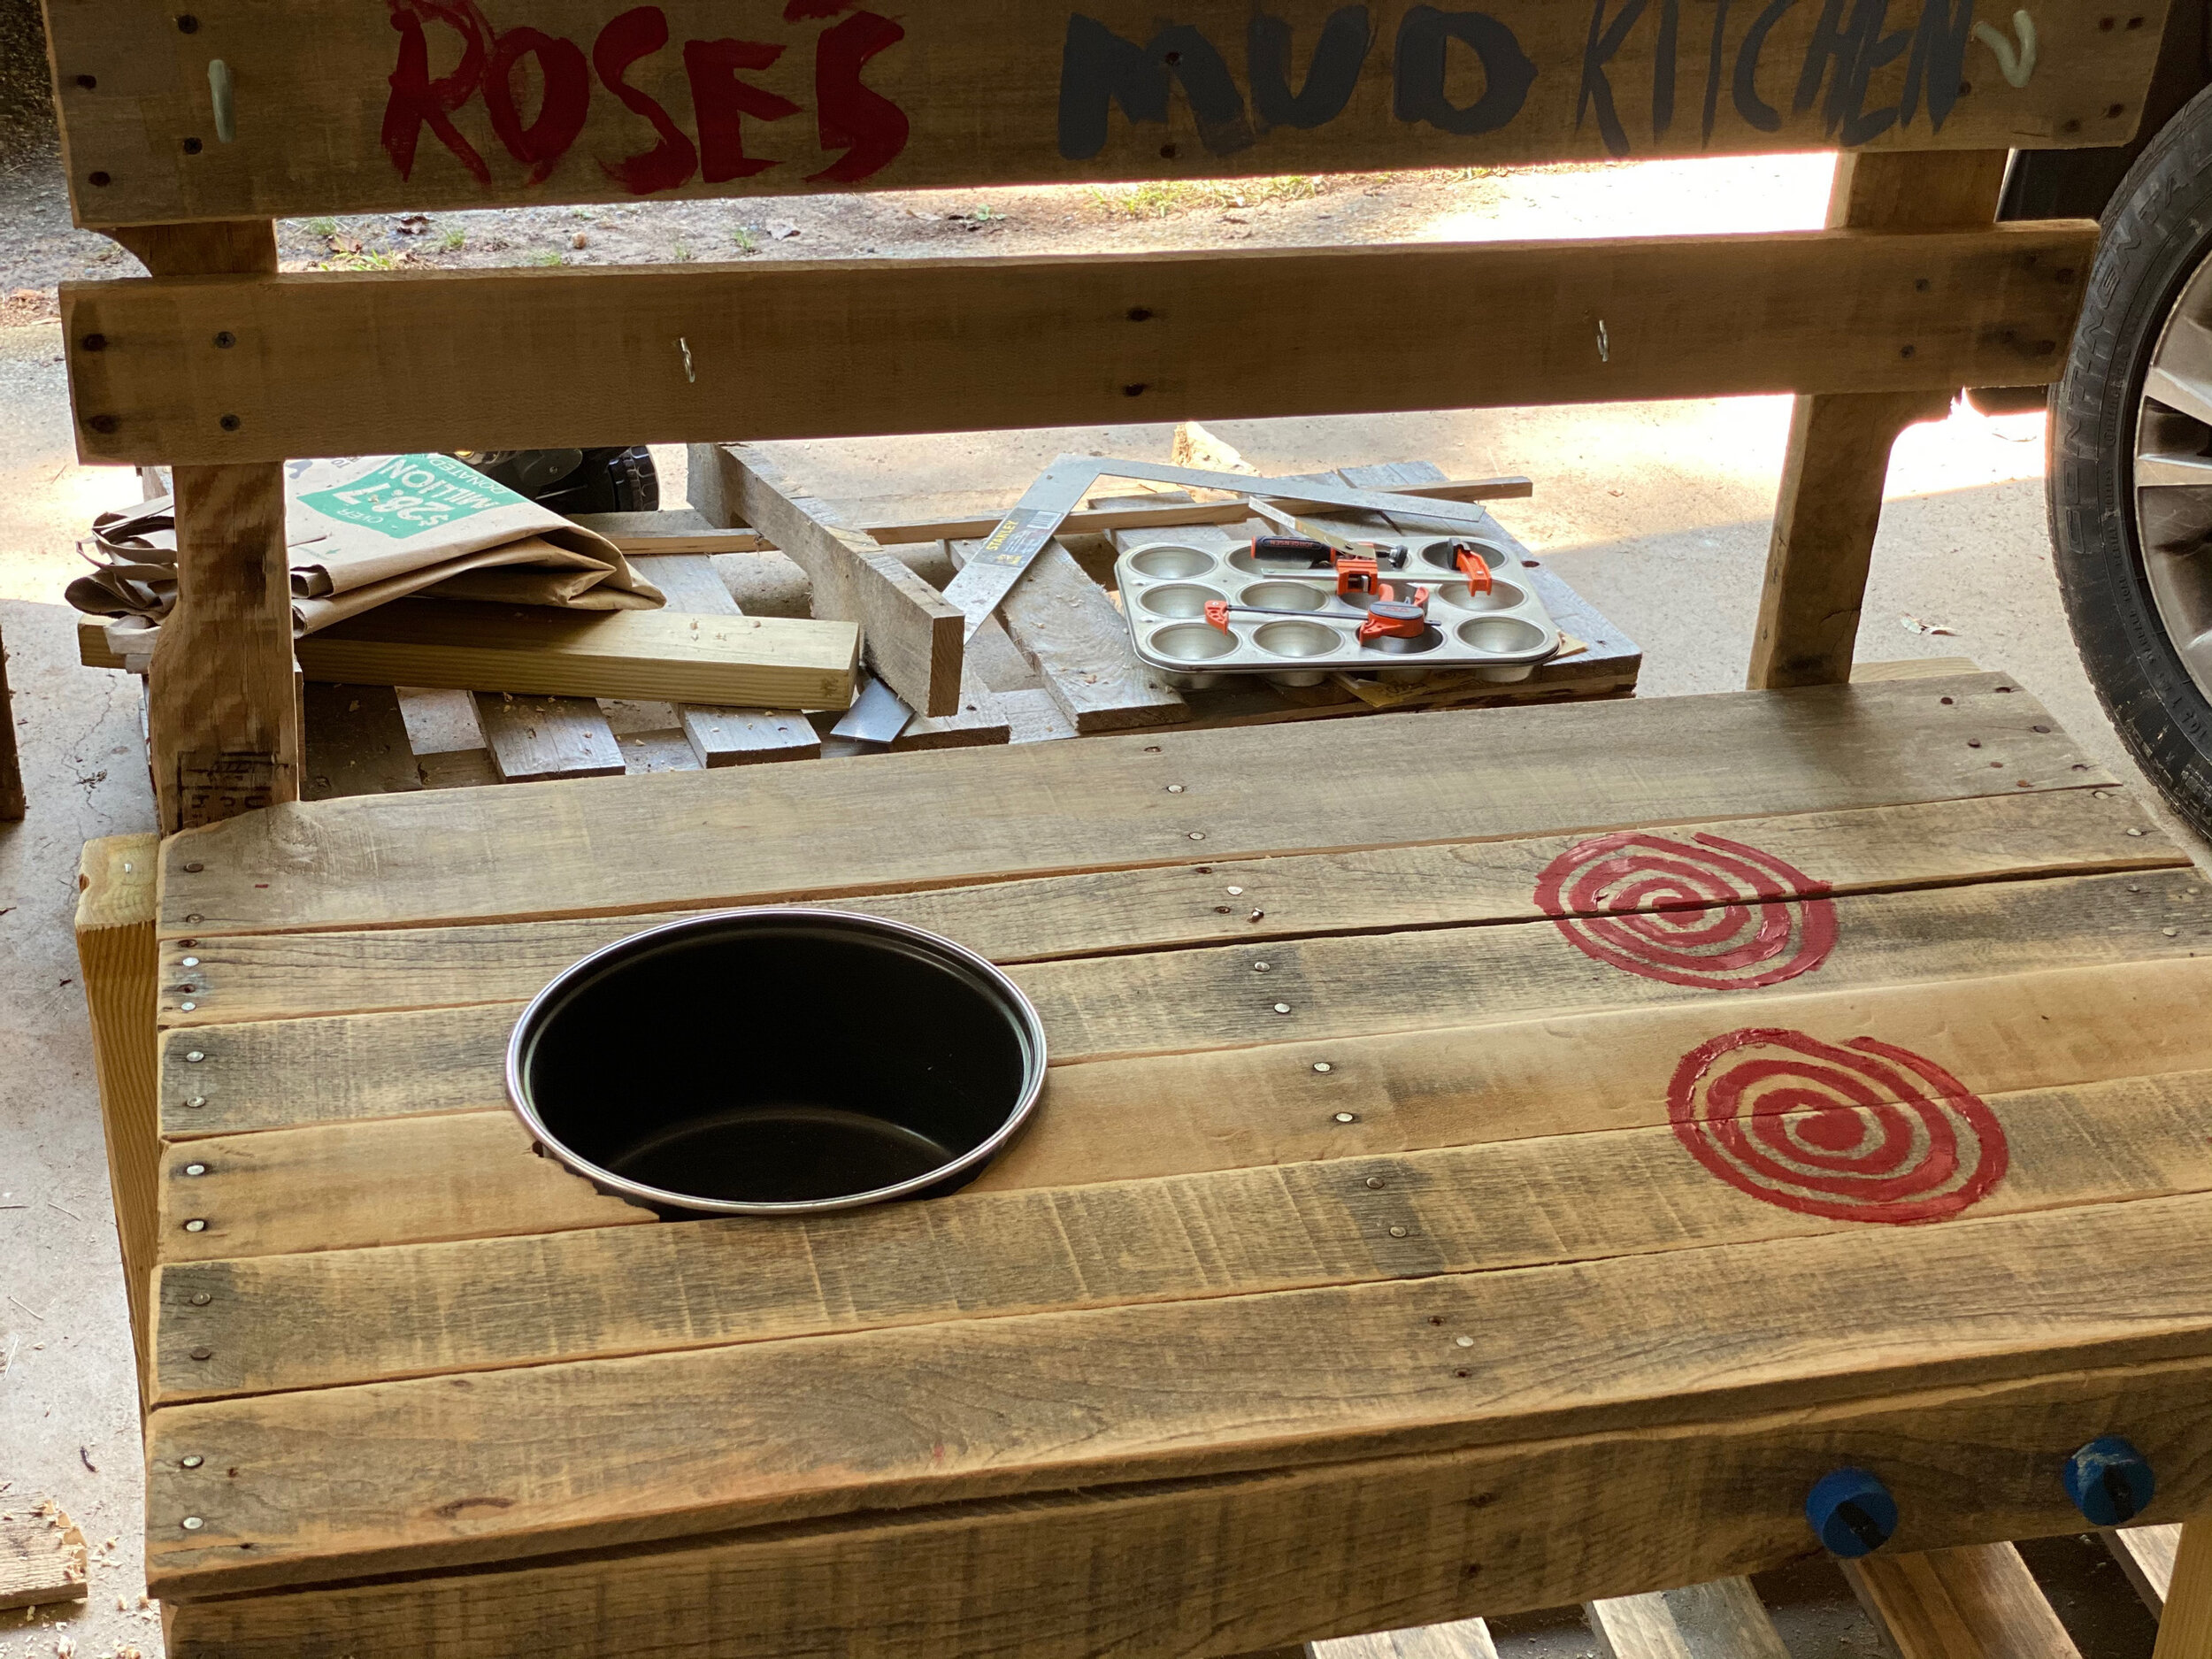
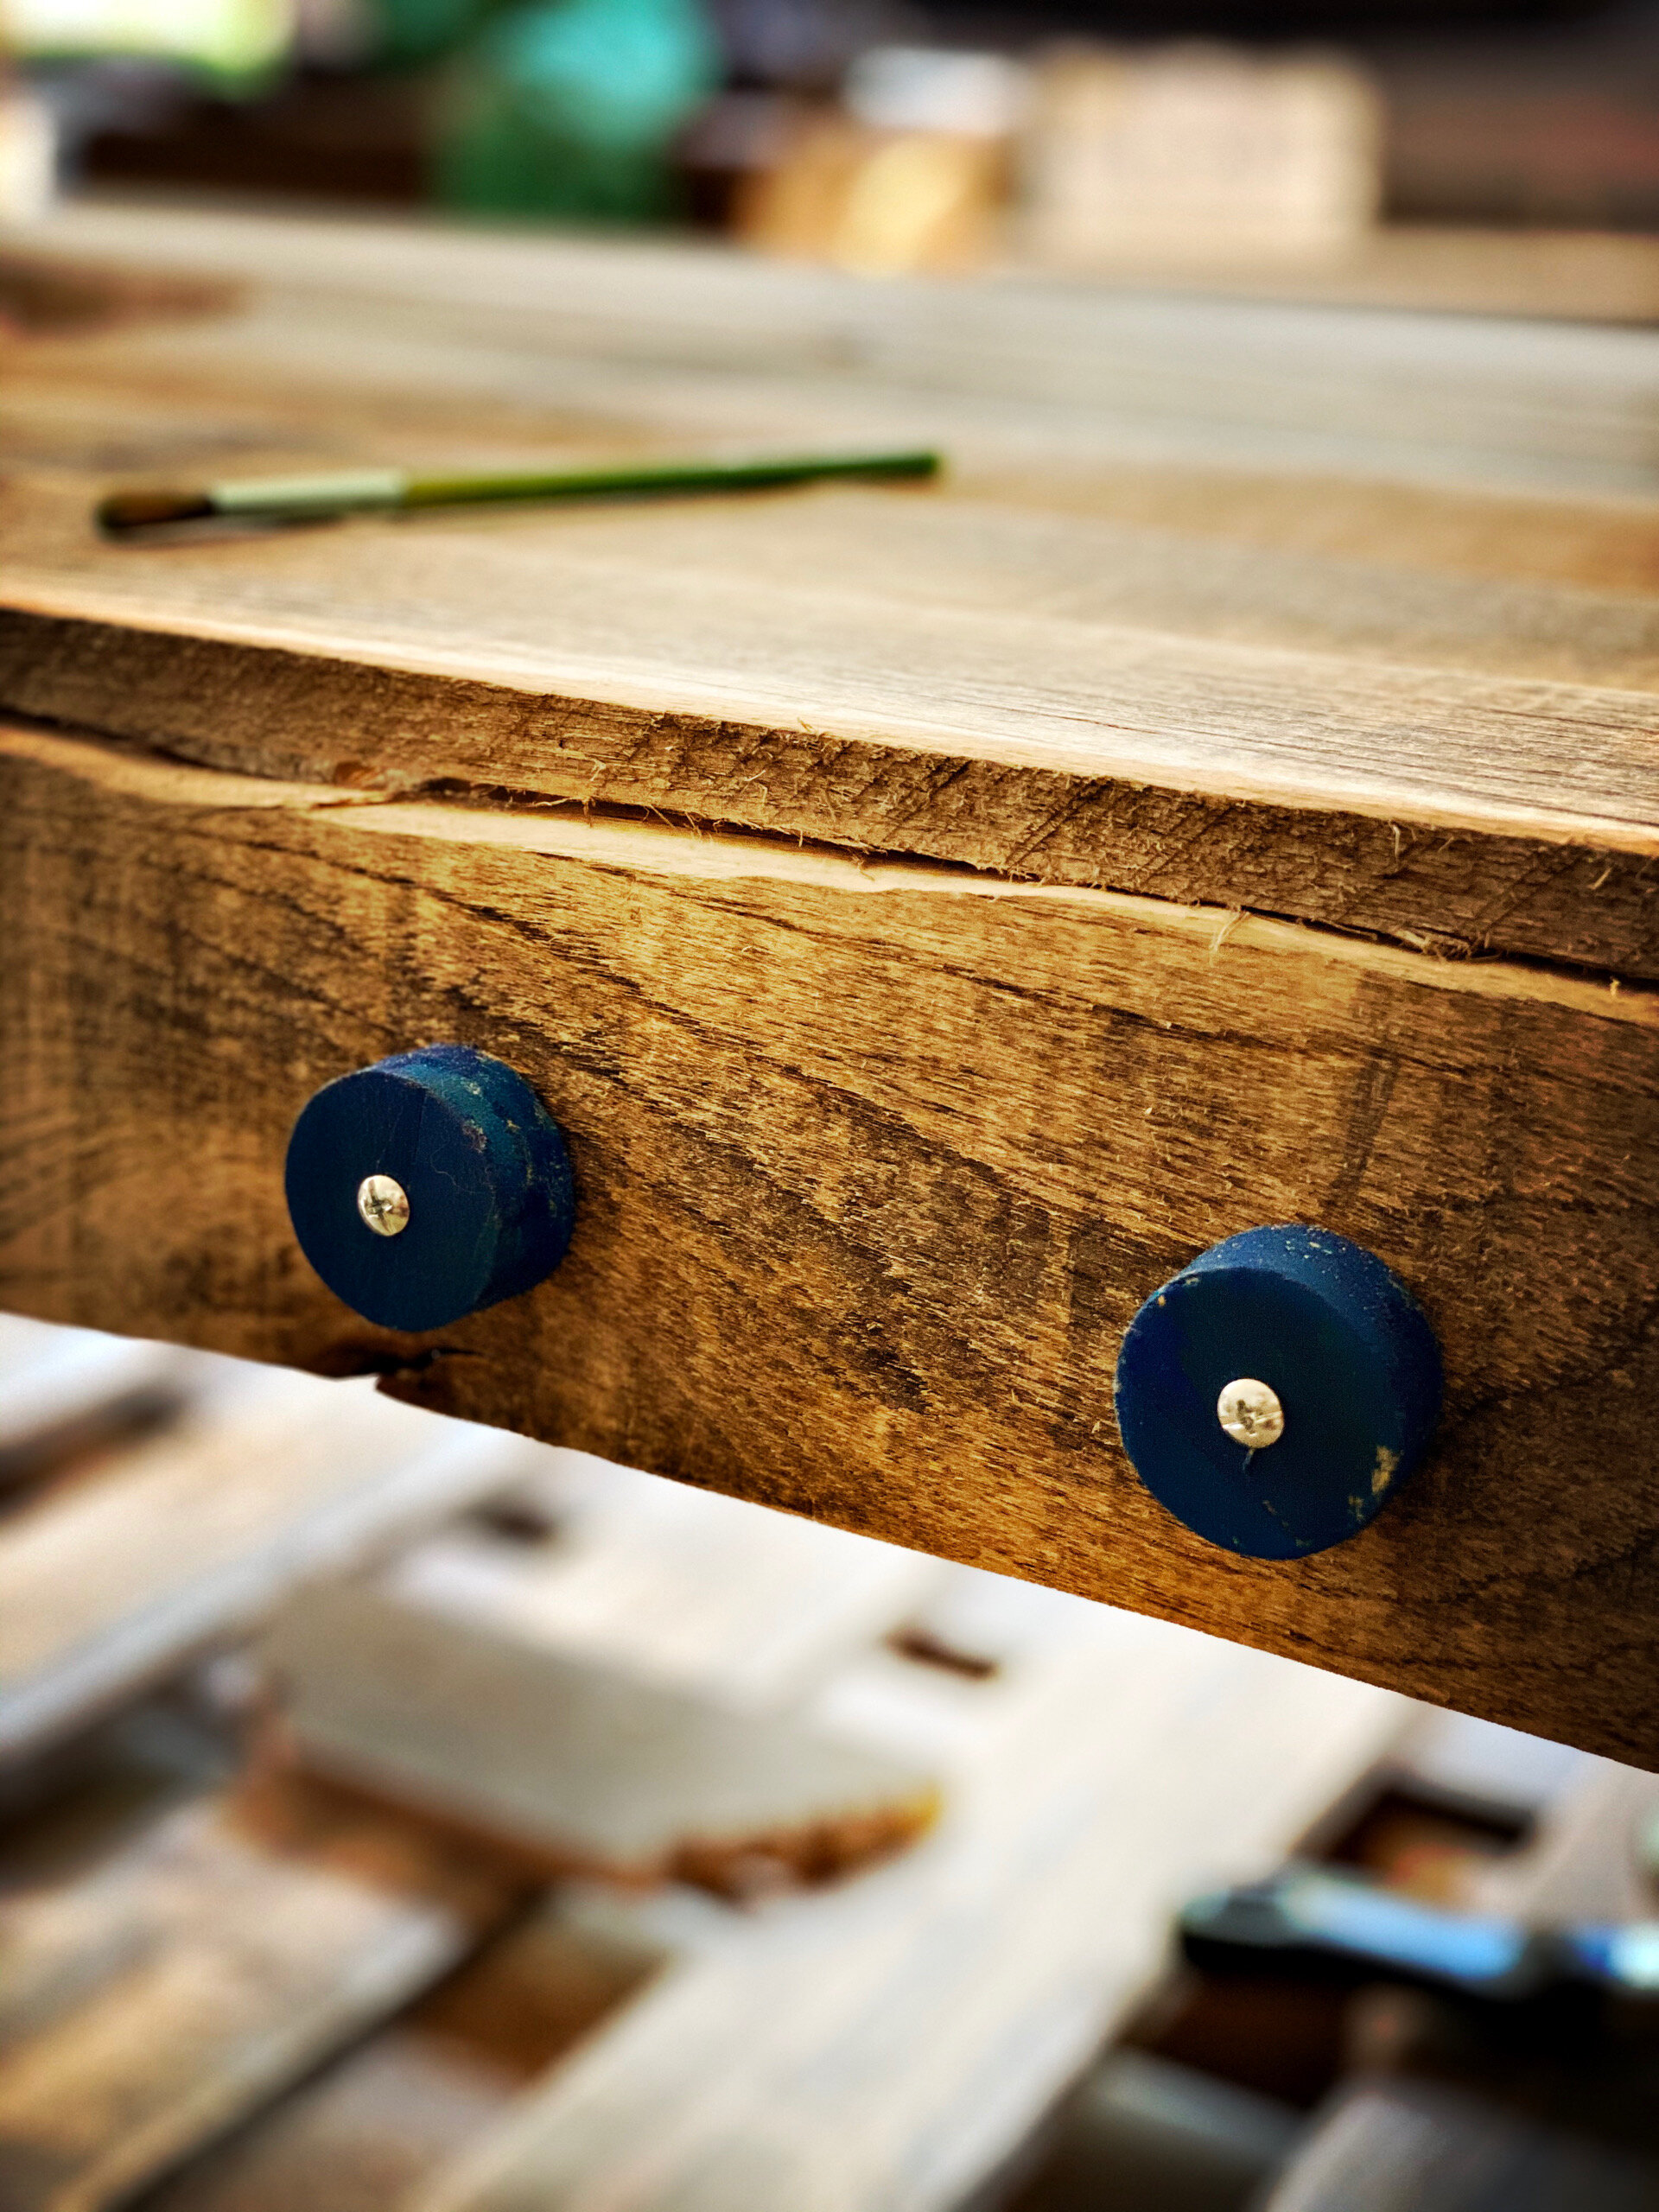
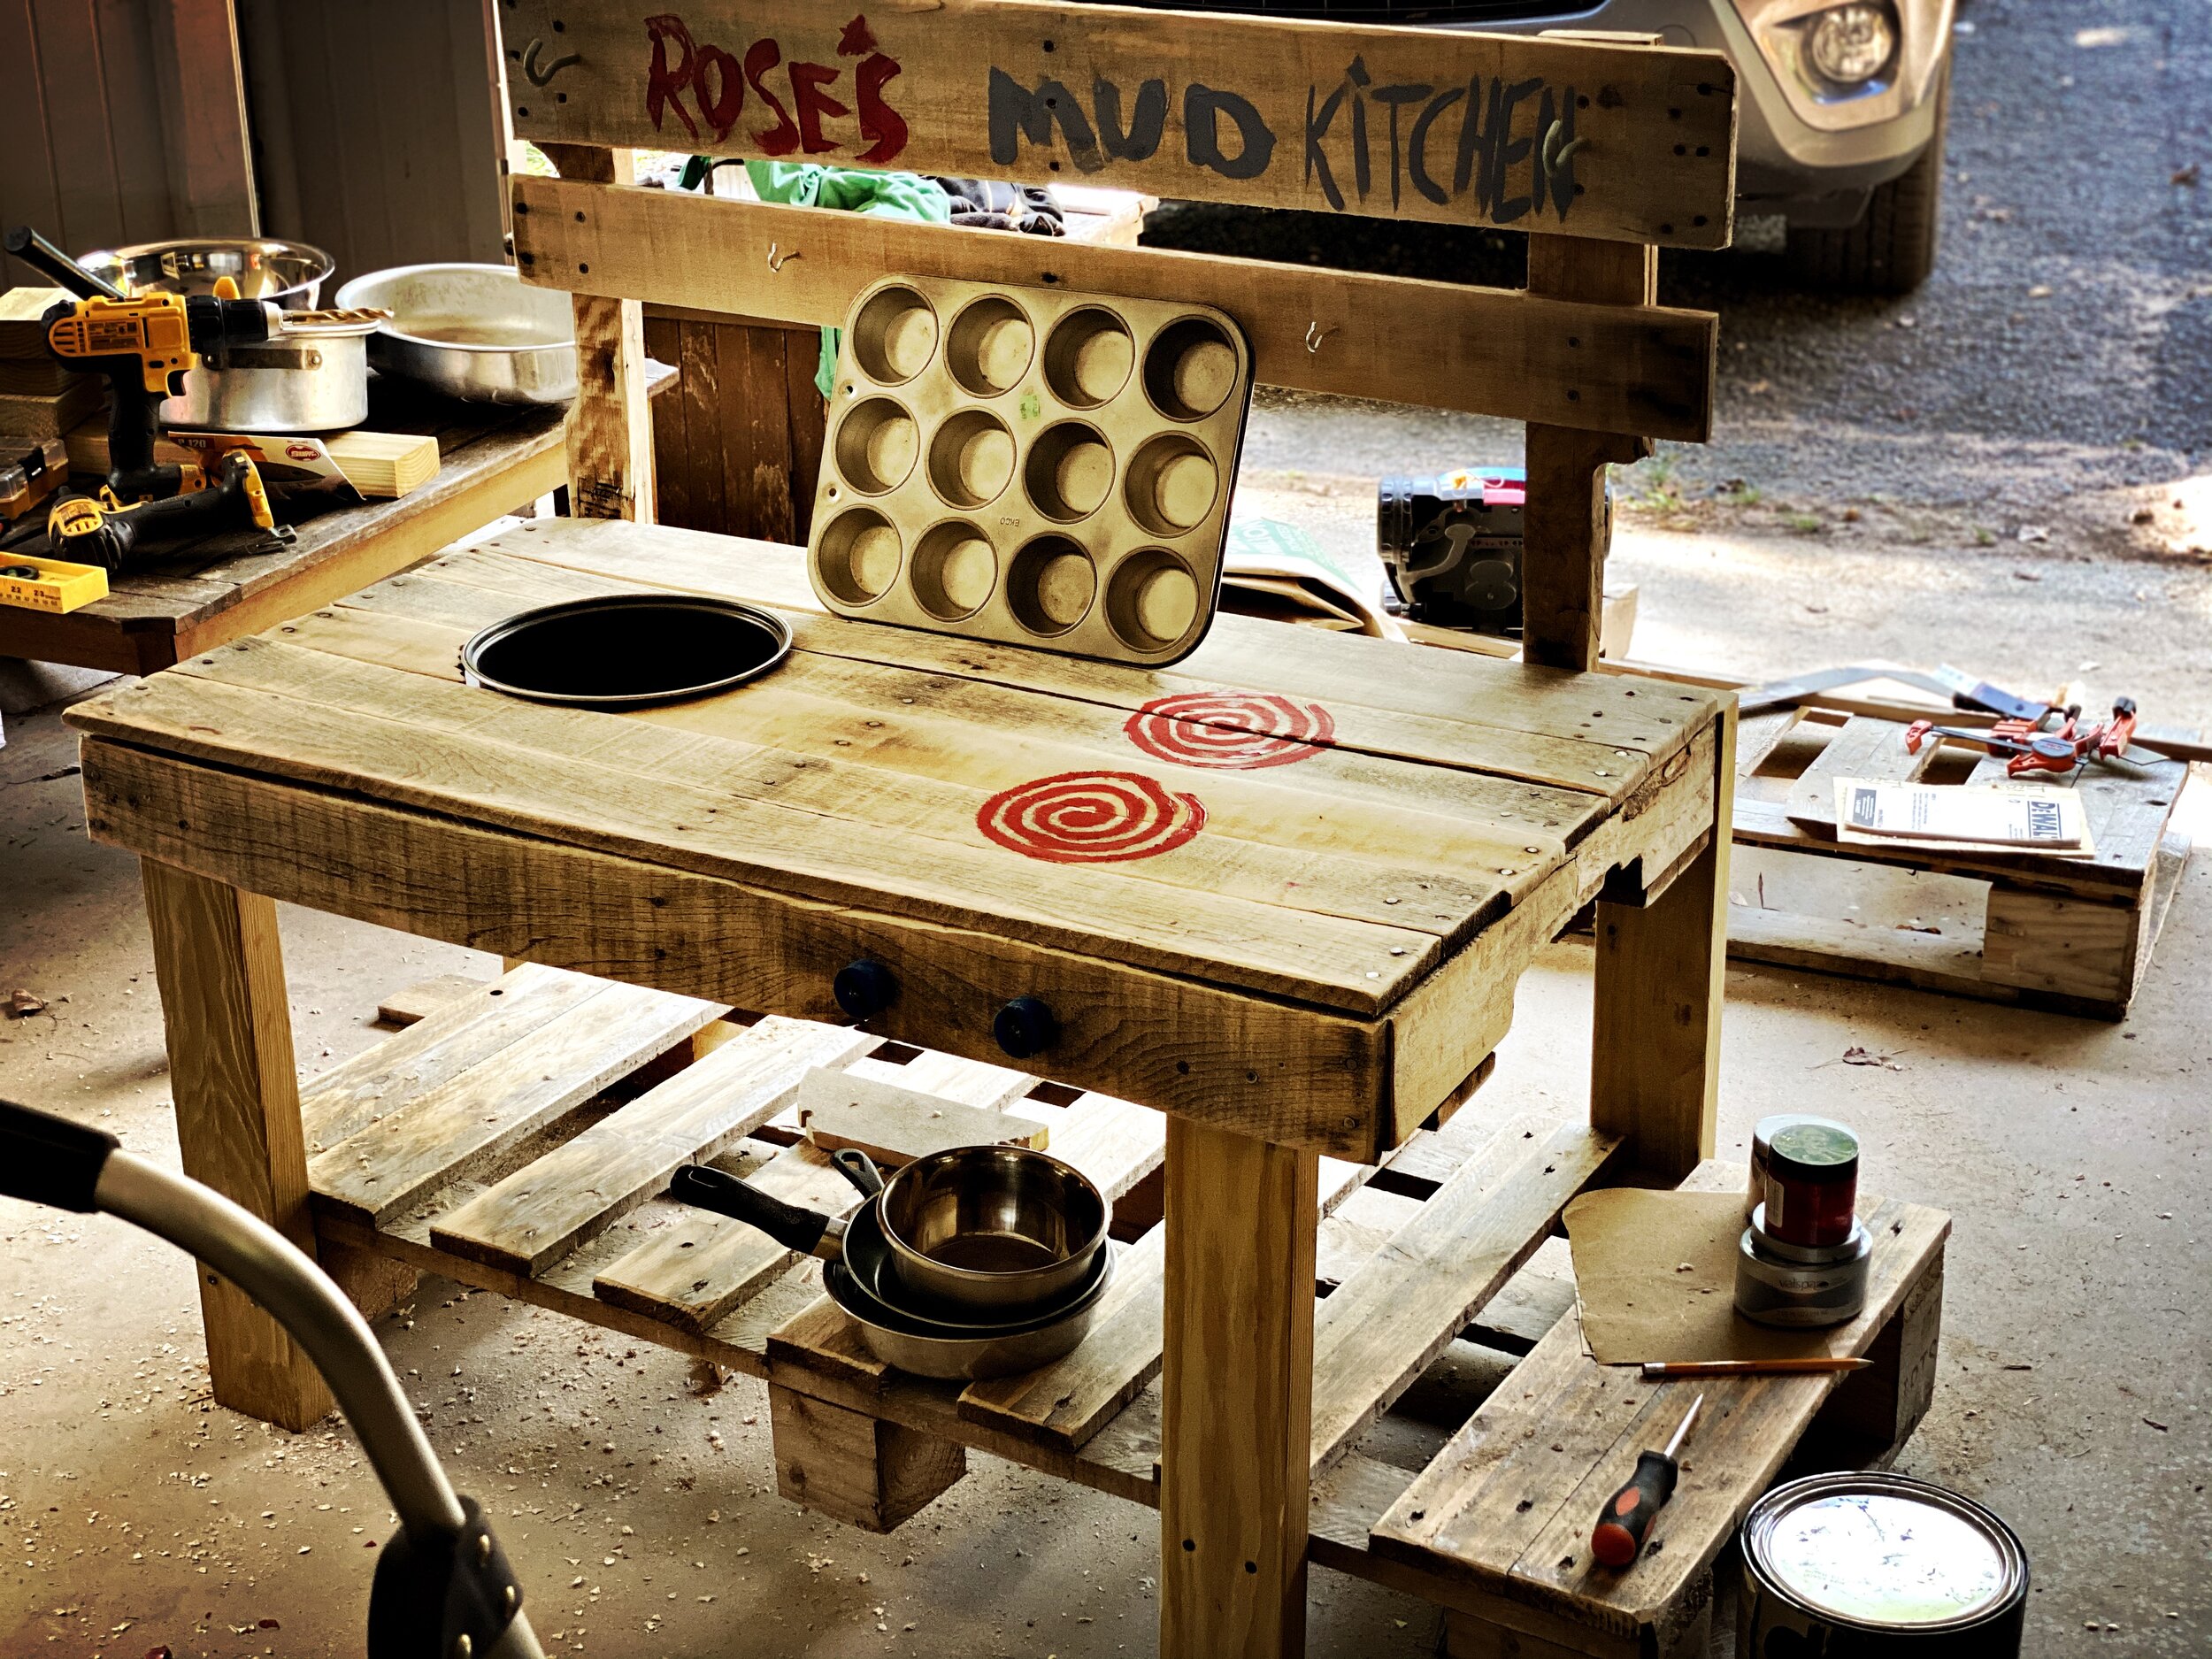
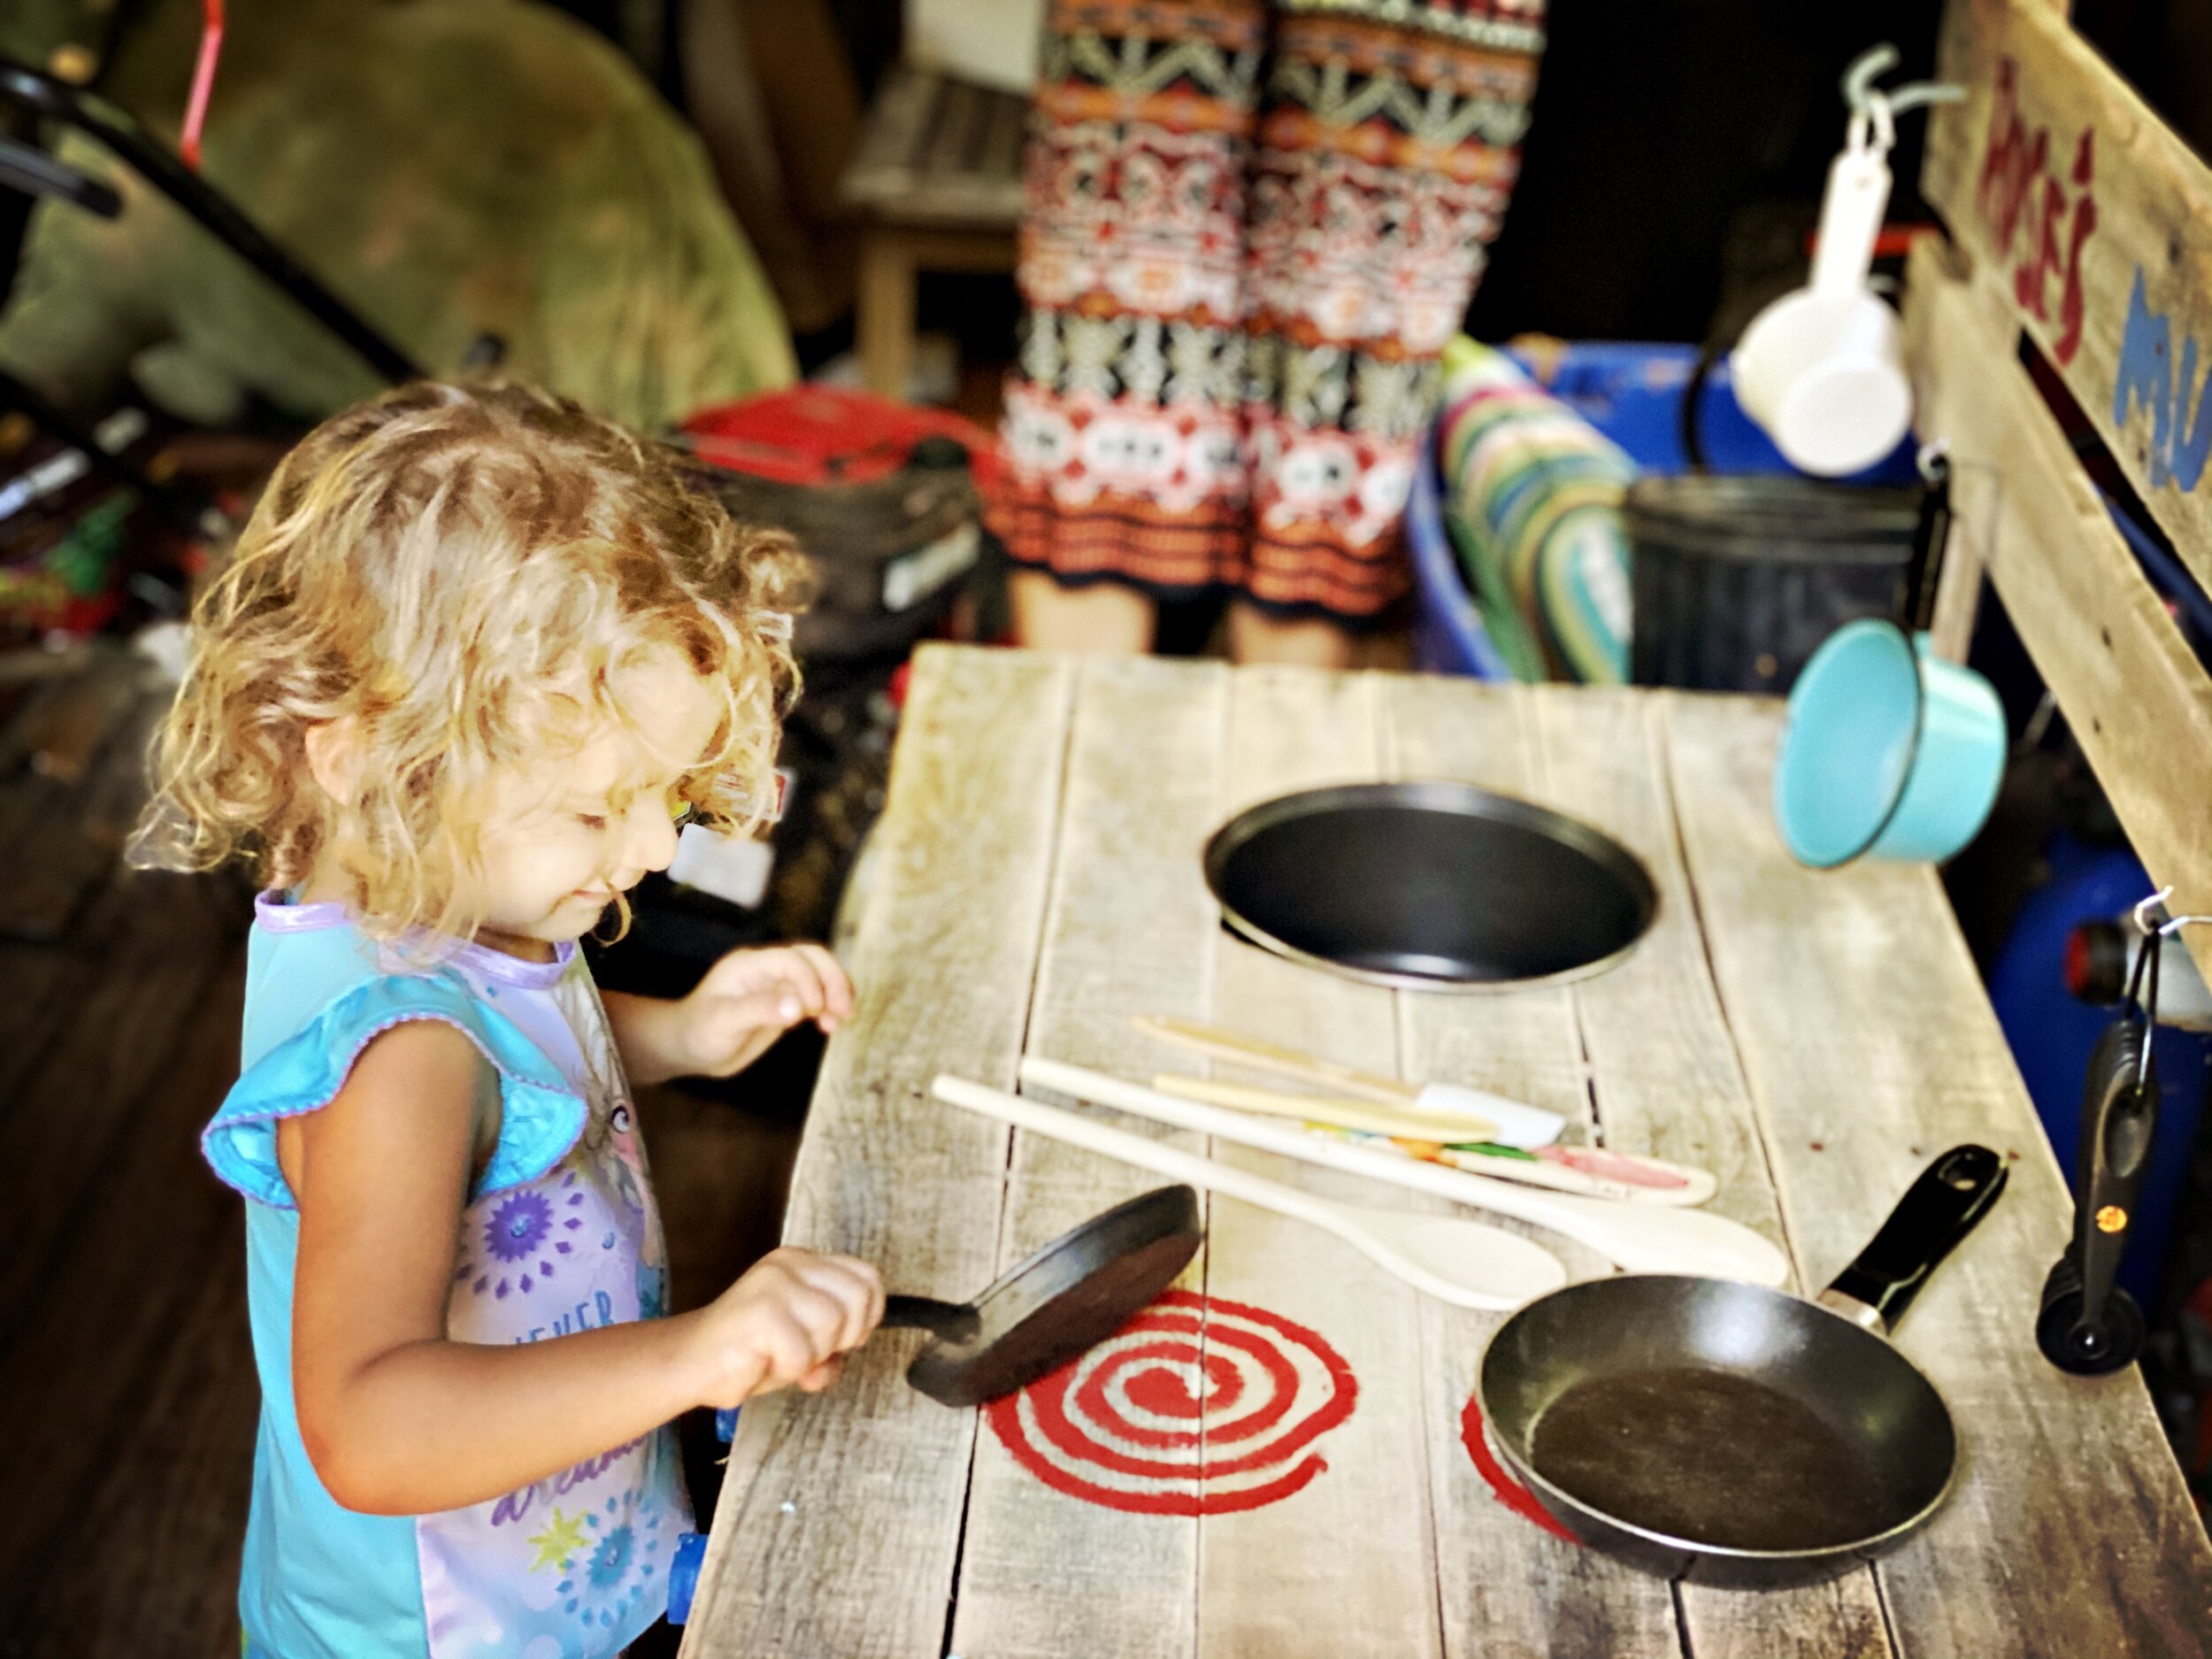
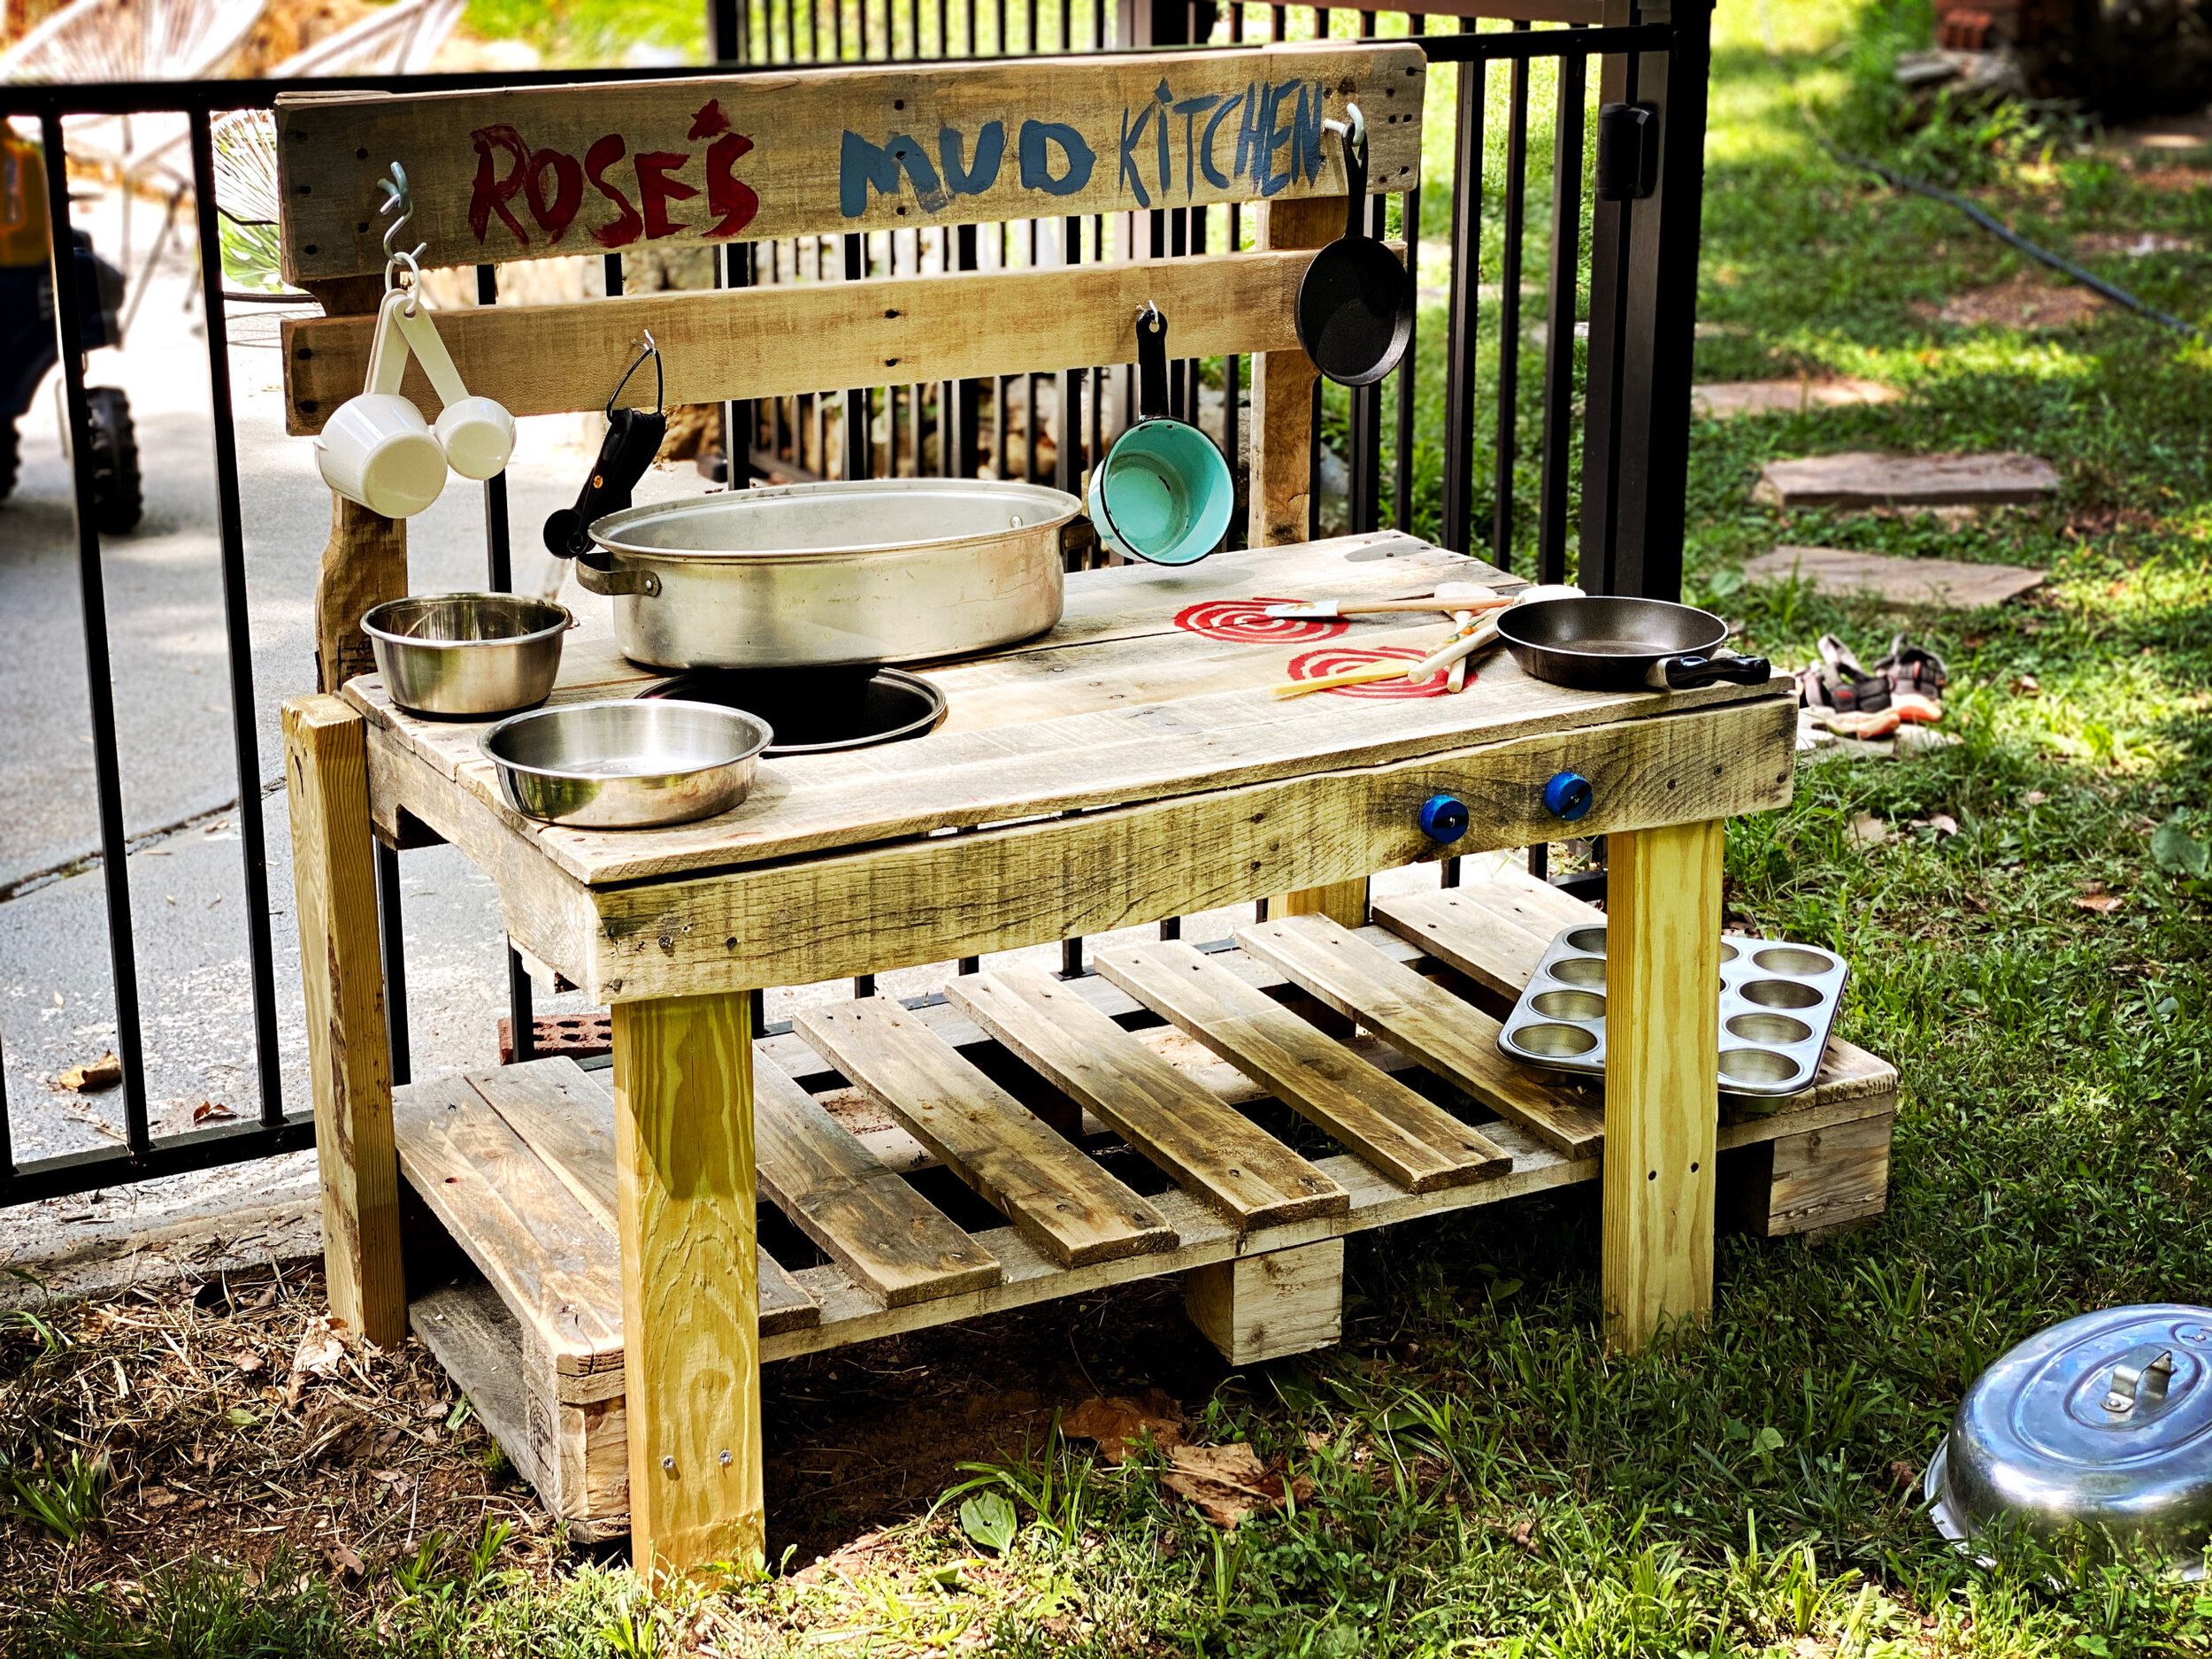
A hole saw drill bit gives you some circles for stove knobs, which we painted and then loosely attached to the front slat so she can turn the knobs. Some old pots from Goodwill made the sink, and we screwed some eyehooks to the backsplash where we can hang utensils or pots or whatever. Jack painted some spiral hotplates and a sign for lil' Rose. Then it was time for the reveal.
Step 8: The Reveal
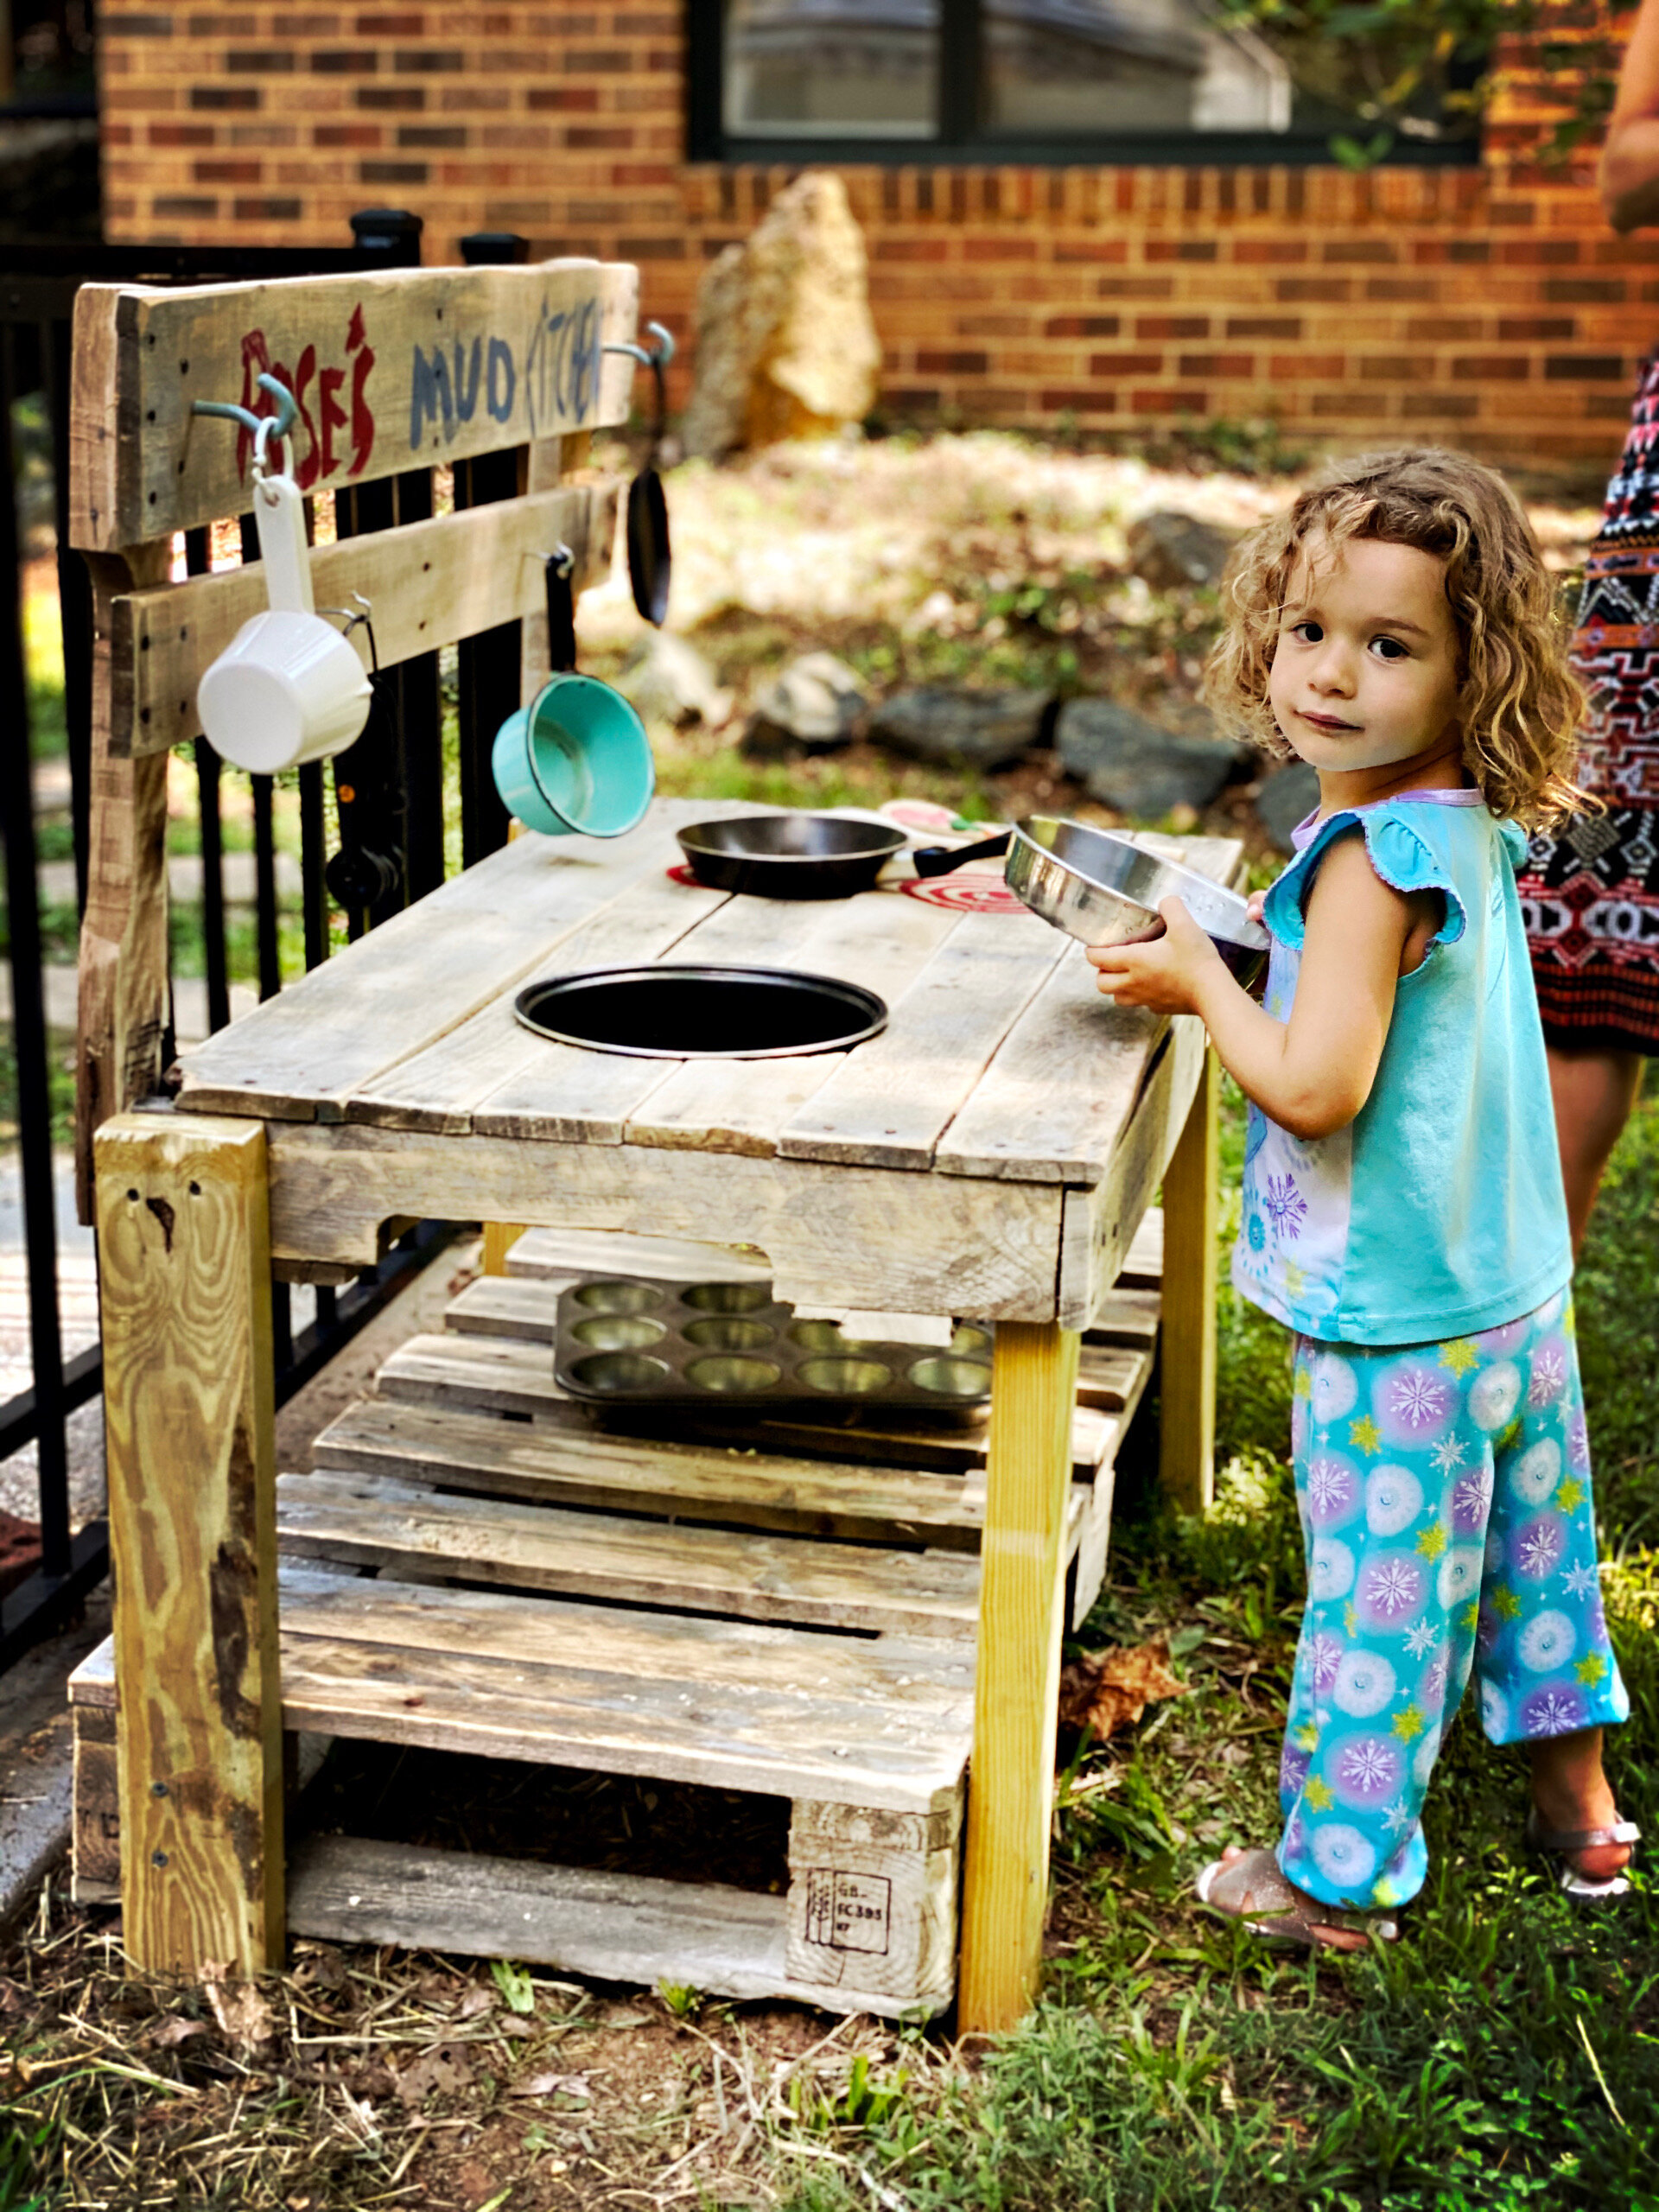
Jack insisted on creating a “treasure hunt” for her, which consisted of chalk arrows on the driveway leading to the mud kitchen hiding in our tool shed. I think Rose was onto our scheme, but she was kind enough to act surprised. After giving her a moment to test everything out, we brought the kitchen down to our pool area and let her go nuts.
Rose is now offering curbside pickup and delivery within 5 mi. Tips appreciated.
Research Phase: Standing on the Shoulders of “Uncle Knackers”
I’m a big believer in the beginner’s mindset. Before I made the first cut, I spent time researching the most efficient way to break down a pallet without splintering the wood or losing my mind or fingers to rusty nails.
That’s when I found the definitive masterclass from Uncle Knackers. His "chisel crack" method — using a hammer and chisel to create a gap for a reciprocating saw — was a total game-changer for this build. If you want to see the original inspiration for the dismantling technique I used in Step 2, his video is a must-watch.