How to Build a DIY Deer Fence for Gardens #2: Step-by-step instructions
Introduction
In Part 1, we covered the types of garden deer fences you can choose to keep deer away from your vegetable garden, including pre-fab deer-proof garden kits, plus details on planning.
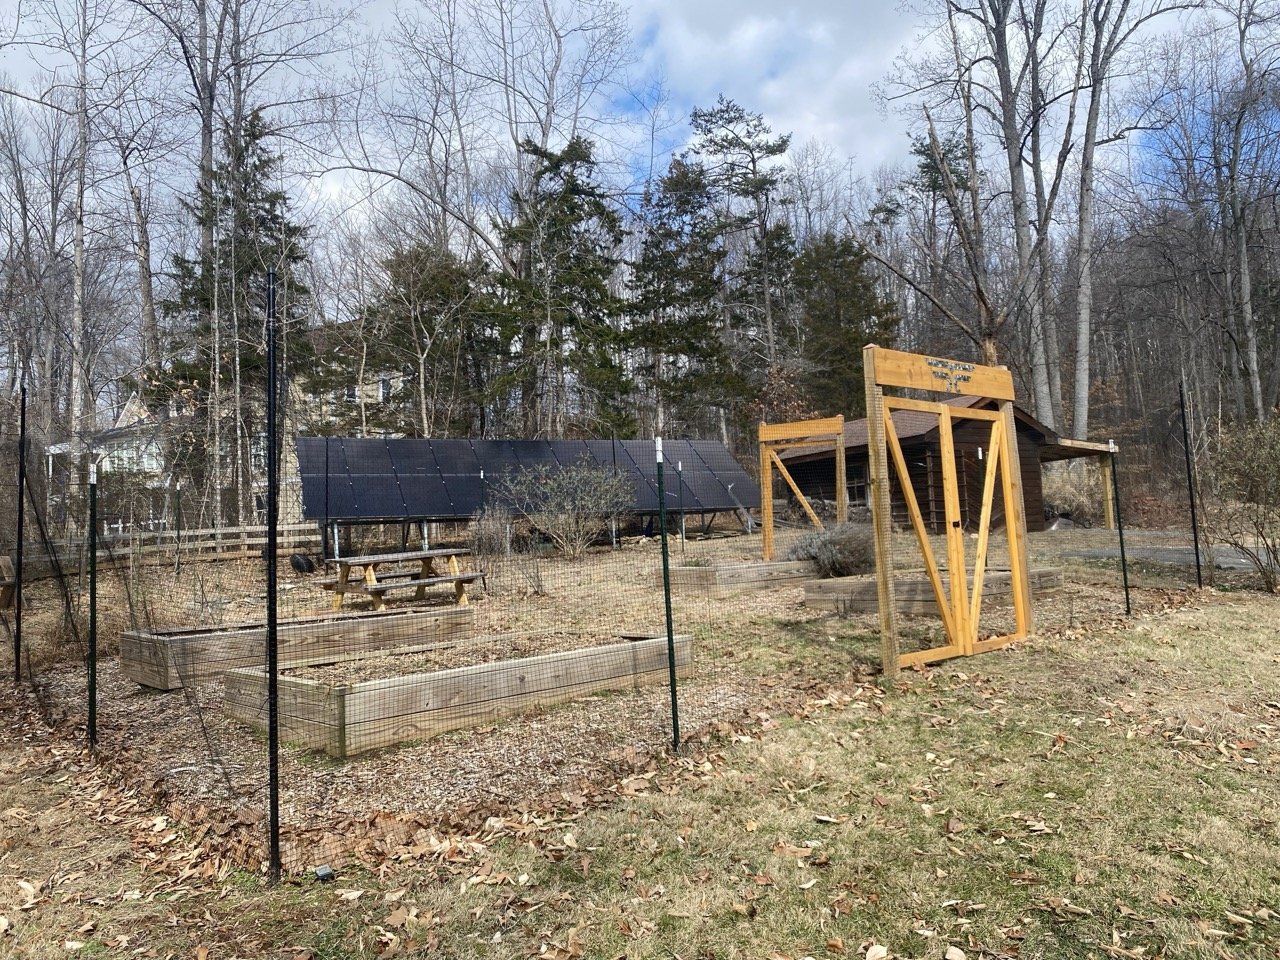
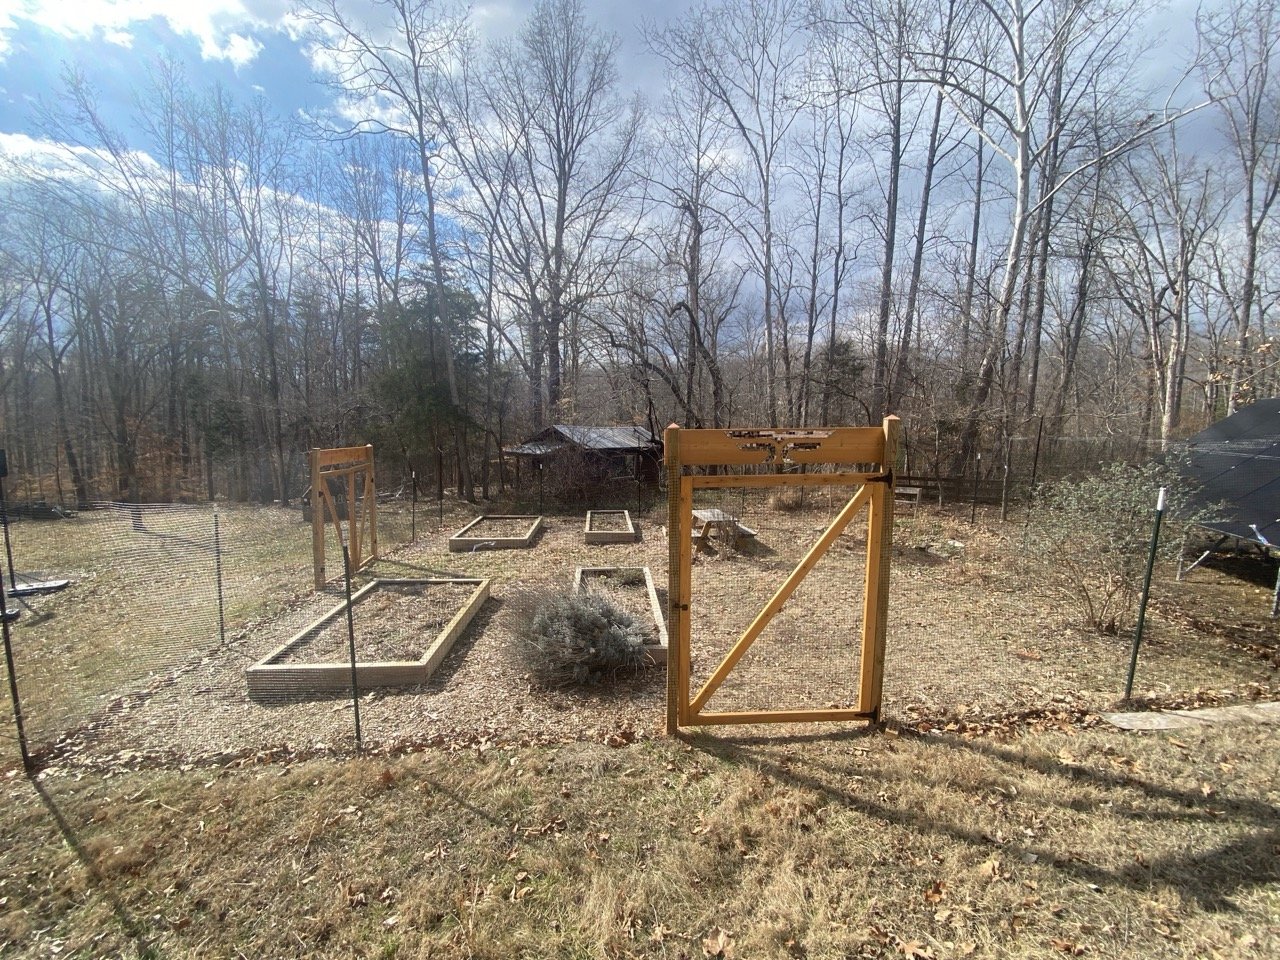
Here in Part 2, we'll give you our full recipe for how to build a DIY deer fence for gardens — specificaly the heavy duty, half-invisible/half-very-conspicuous wire mesh fence we made for Thunderbird Disco — with step-by-step instructions.
Our garden and its fence are one of the first things visitors see as they pull up the driveway, so we wanted something aesthetically pleasing that would highlight rather than obscure our vegetable garden, a combo of near-invisible fencing with just enough hotness where it counted.
Here's our 8-step process for installing such a thing to make sure deer stay away from your tomatoes.
Let's get into it.
This post may contain an affiliate code or link that is no additional cost to you, and I may earn a small commission when a purchase is made.

Steps to Install a diy deer fence for gardens
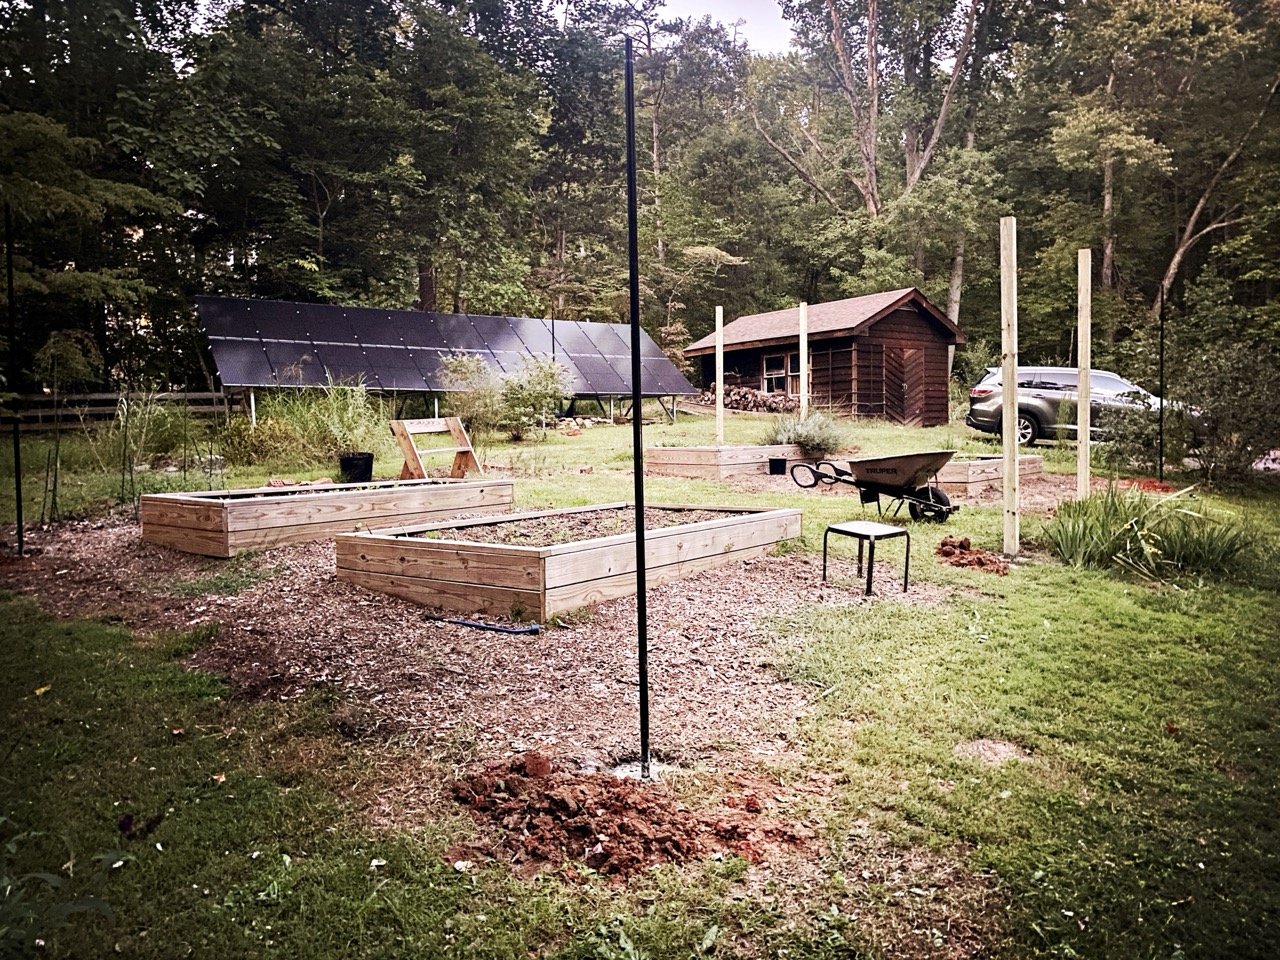
1. Clearing the area and marking boundaries
First, refer to your written plan in Part 1 and walk your property, clearing the space of any shrubs or anything else that will get in the way of your fence.
We marked out the expanded boundaries of our garden using some red string and makeshift stakes, creating a diagonal that would parallel the line of our solar panels and leave just enough space to get a wheelbarrow or push mower through there.
We measured the full length with a long, open-reel measuring tape, and then marked out the spots where we'd want a gate (two of them, one for main/front access and another closer to the shed) and drew out a floorplan on paper.
We knew we needed to place a post every 10-15 feet or so for tension, so with a little math we determined we'd need about seven black galvanized steel fence rails (to use as the corner and intermittent posts) plus four 4 x 4s (to use as the gate posts). We could've gone with a few more of these, but we didn't want to pour any more concrete than necessary, so we opted to drive in about eight 7-ft T-posts intermittently to help with tension (you’ll see below, but we should’ve gone with taller ones probably).
All of this gave us a rough sense of the quantity of materials and tools needed. Here was our recipe, yours will definitely differ depending on your size, layout, and personal preferences:
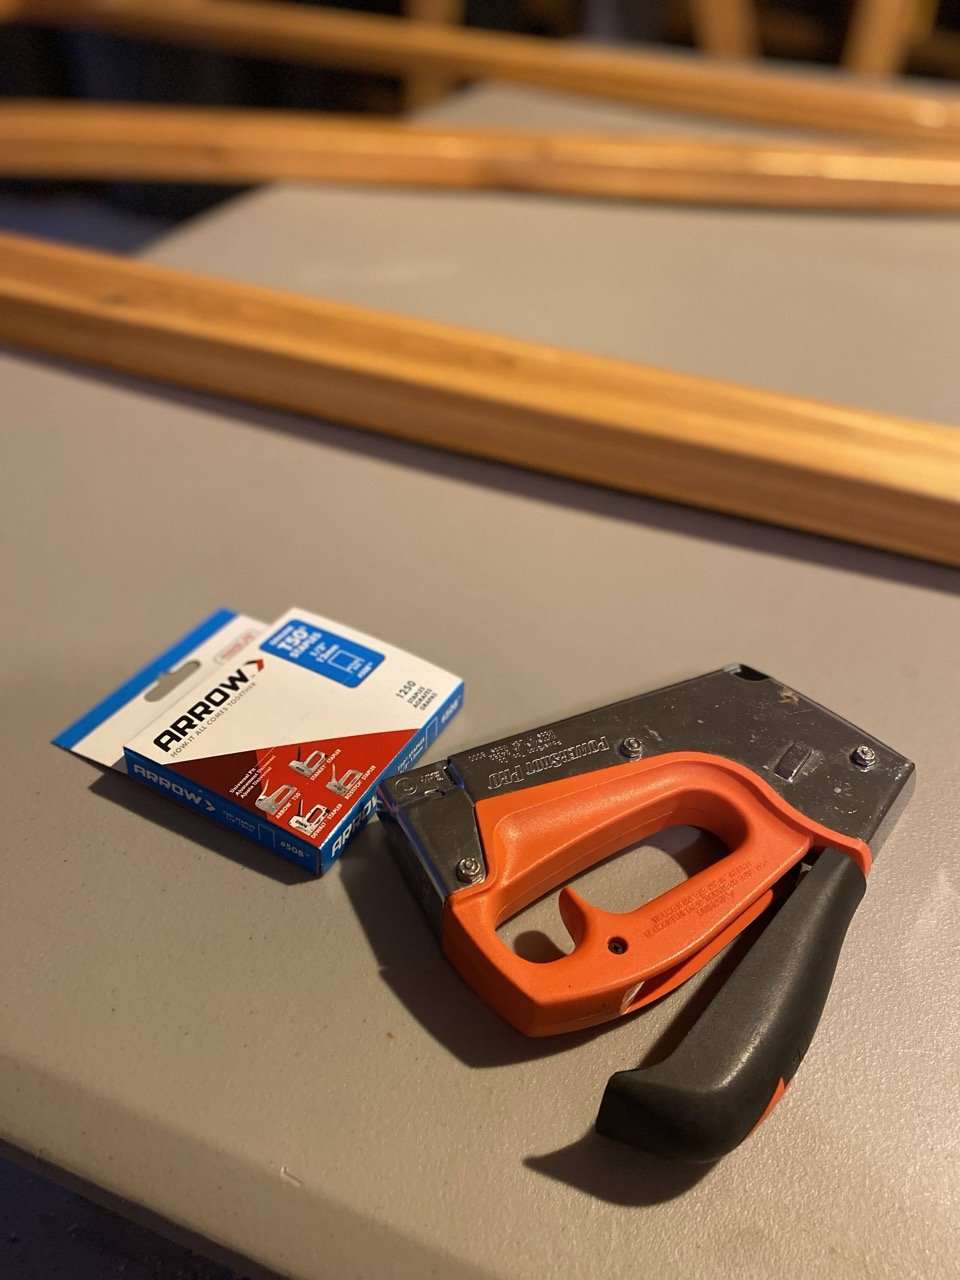
TOOLS You Need
Open-reel measuring tape, post hole digger, post/corner level, post driver, steel snips
For gate: circular saw, wood chisels, orbital sander w/coarse sandpaper, wood burning tool
MATERIALS
4” x 4” x 10’ pressure-treated wood posts
Red spray paint or other temporary ground marker
Gravel
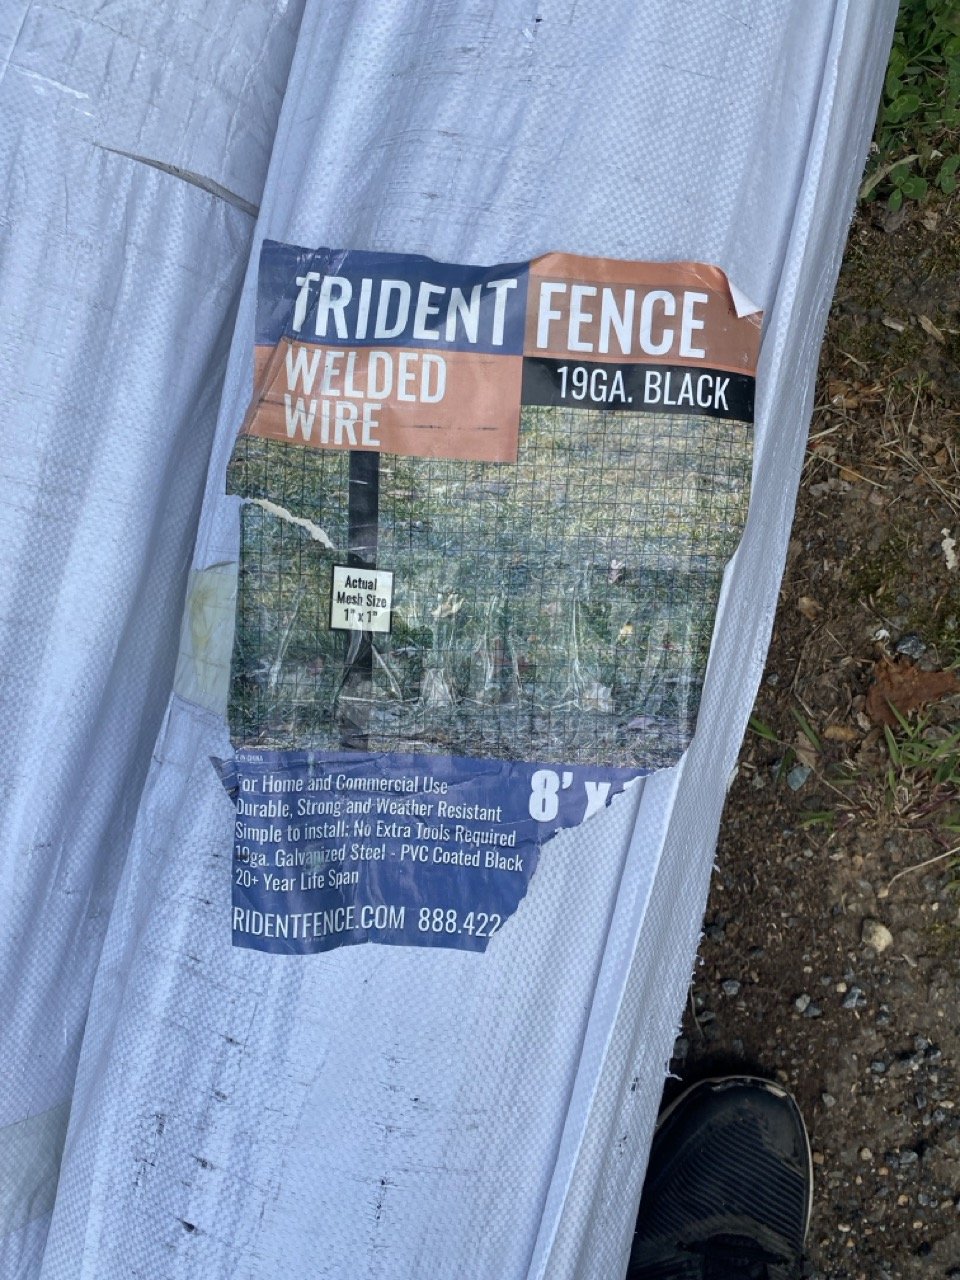
Deerbusters/Trident 8’ x 100’ welded wire fencing (uncoated), or black PVC-coated
(Optional) Tension wire kit
Gate hinges and latches
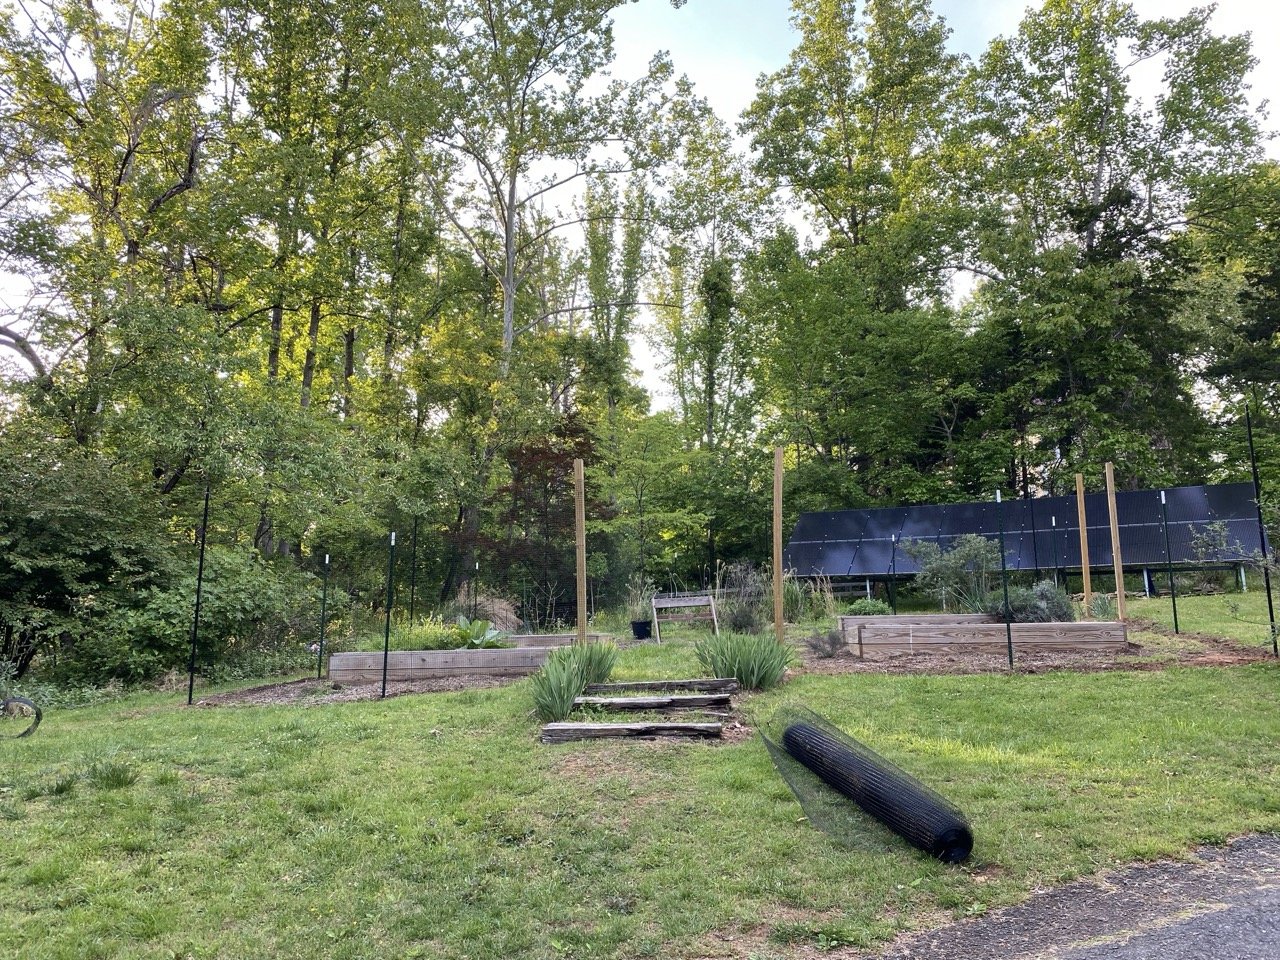
2. Installing fence posts
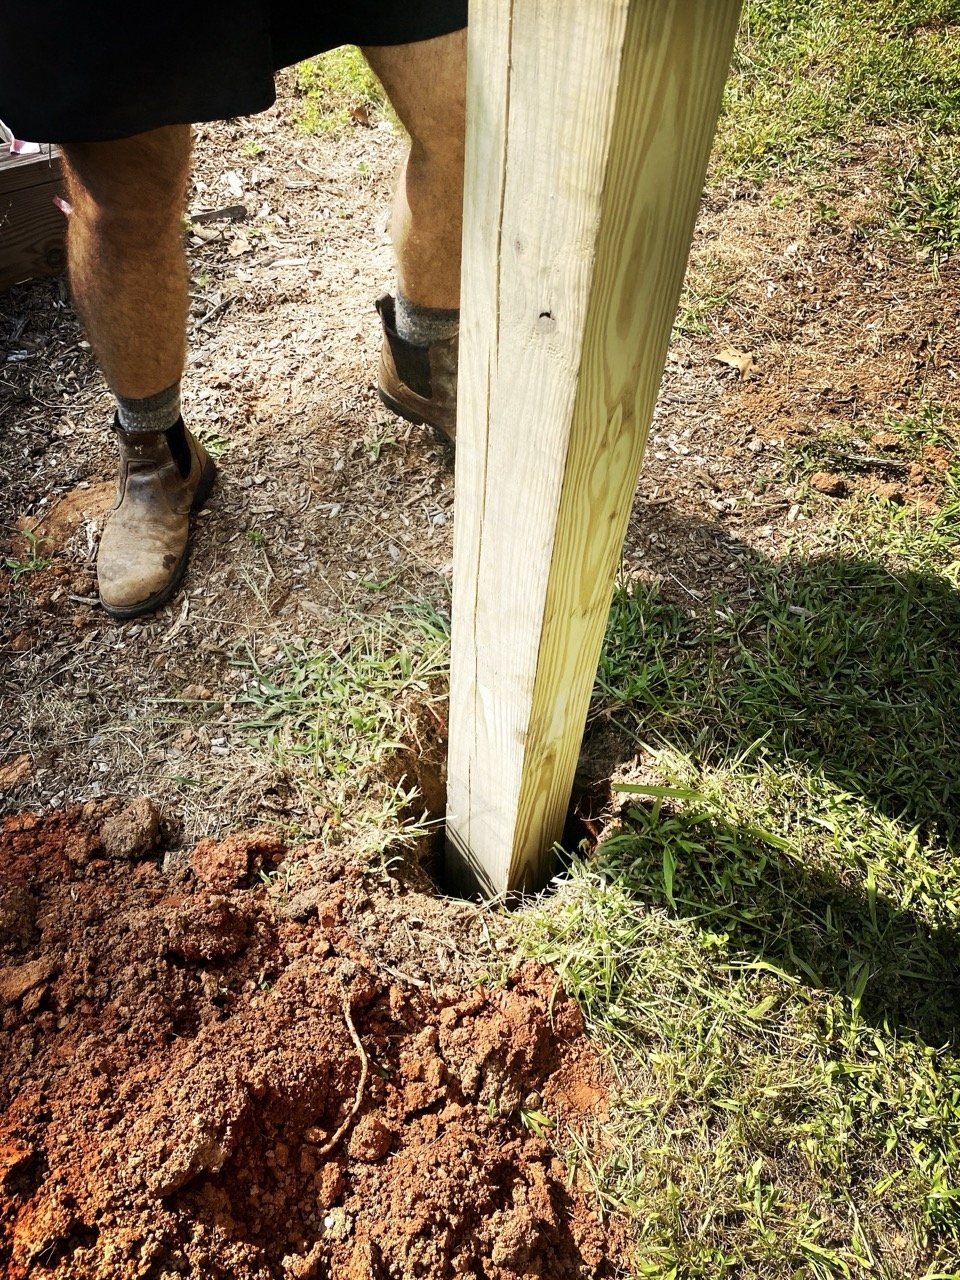
Then, we dug the post holes. A few notes here:
Digging post holes
Re-measure each edge of the fence line, marking out the spots for each post with red spray paint.
Ideally, it's good to put about a third of the length of your post underground. The longest steel posts we could find that were still affordable were 10', and we were going for 8' of height.
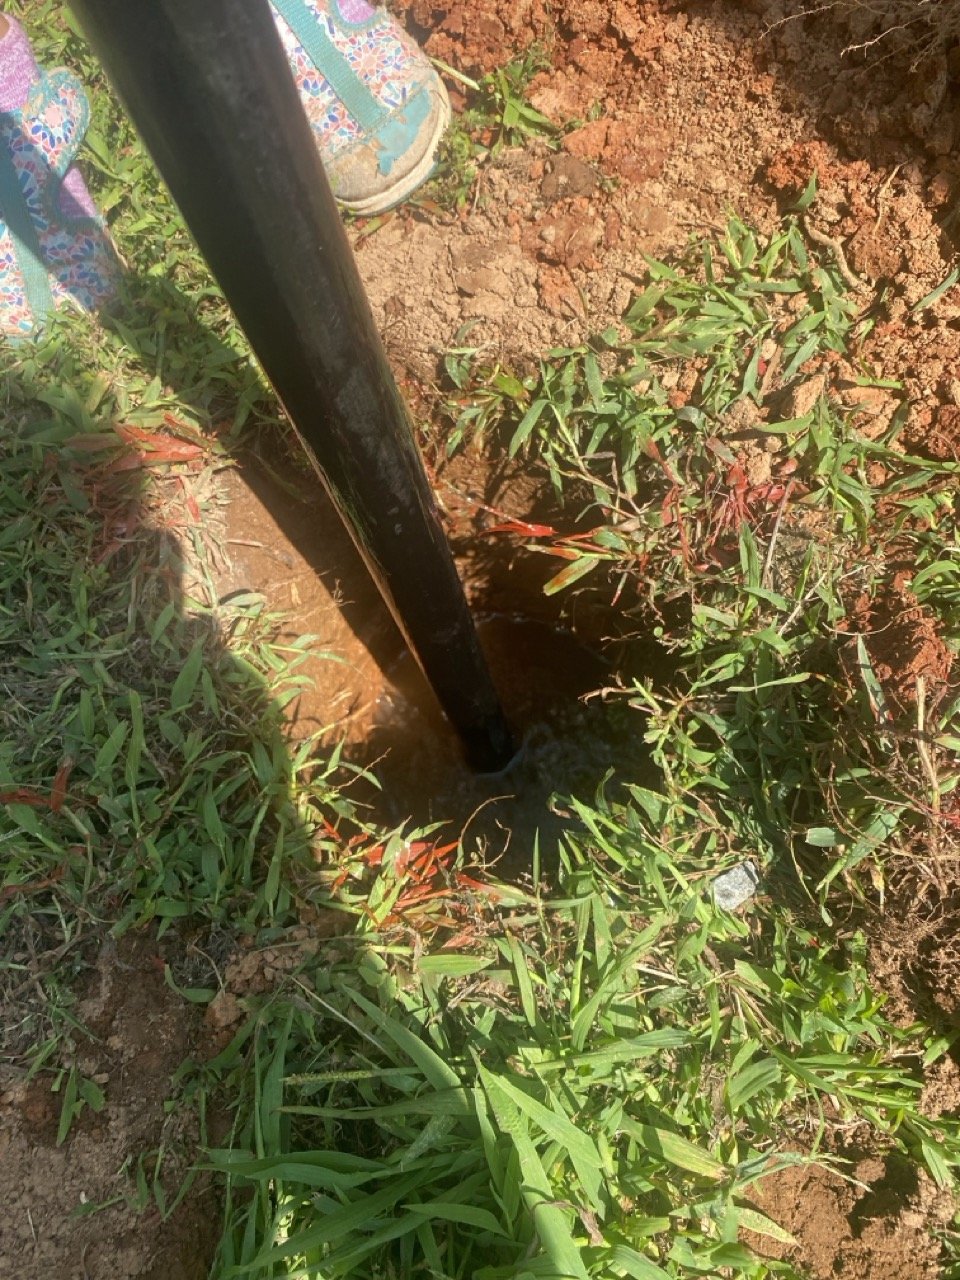
Our “frost line” or frost depth in this part of Central Virginia is 18”, so we knew we had to dig down at least 24" deep because...
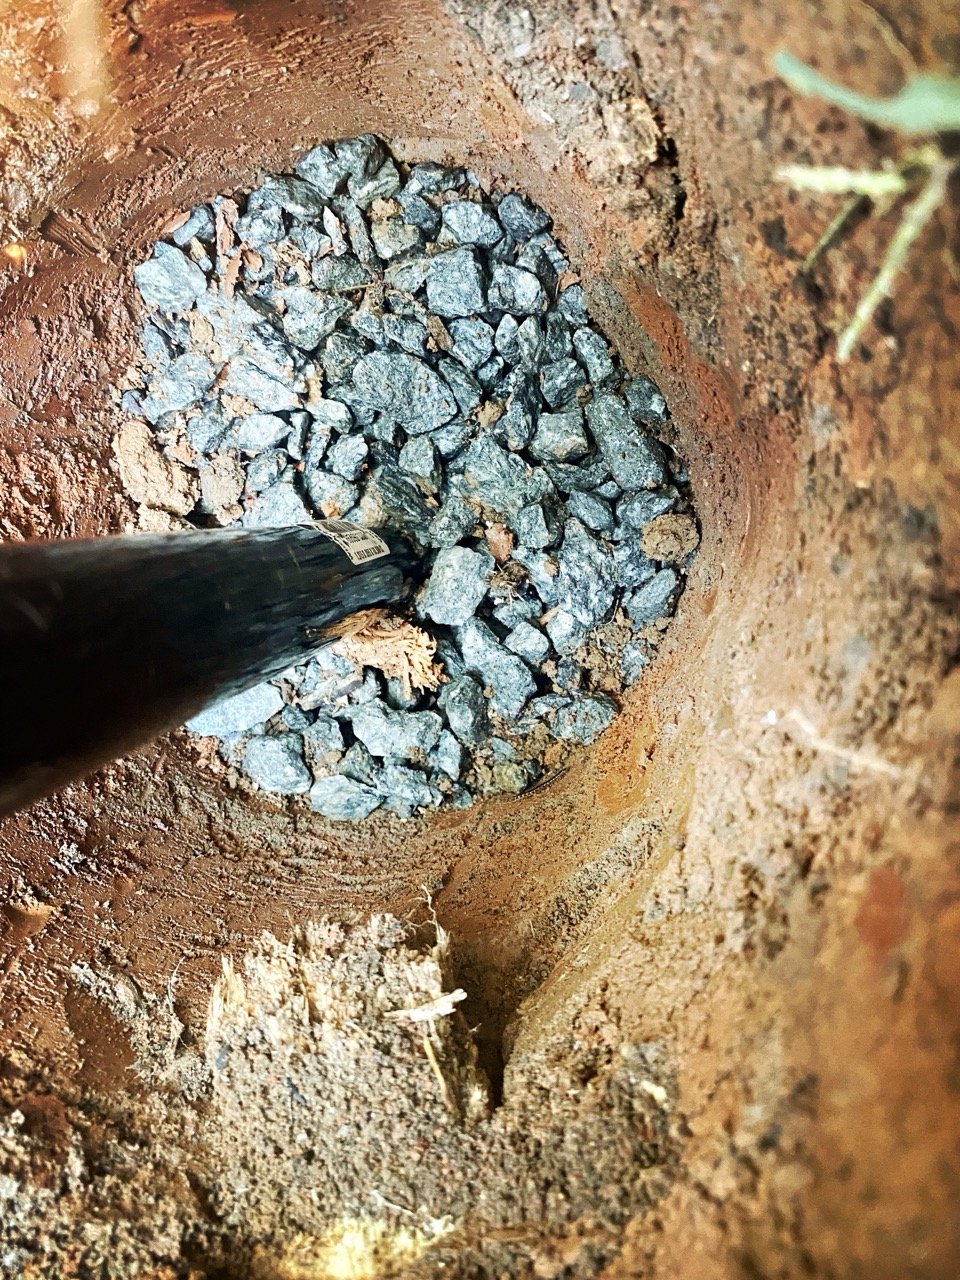
You need to add about 6" of gravel to the bottom of each hole for drainage. A 24" deep hole still left a good 18" of pole underground, which felt sufficient since these steel posts are strong but not super heavy.
To dig the 11 post holes, I thought we'd need a power auger. So I was looking around for one to rent, or maybe split the cost with a friend, but how often do I really need to dig post holes? So before dropping that much coin, I wanted to see if I could just dig by hand with a regular post hole digger, and boy howdy, that was the way to go. I highly recommend the one we used, a Truper Steel Post Hole Digger with 48" steel handles and a handy dandy ruler along the side to help you see how deep you've gone.
The level of difficulty here will totally depend on the kind of terrain you're digging in, the time of year, etc., but this post hole digger was easy enough for both me and my kids to use and we got all 11 holes dug in an hour or two.
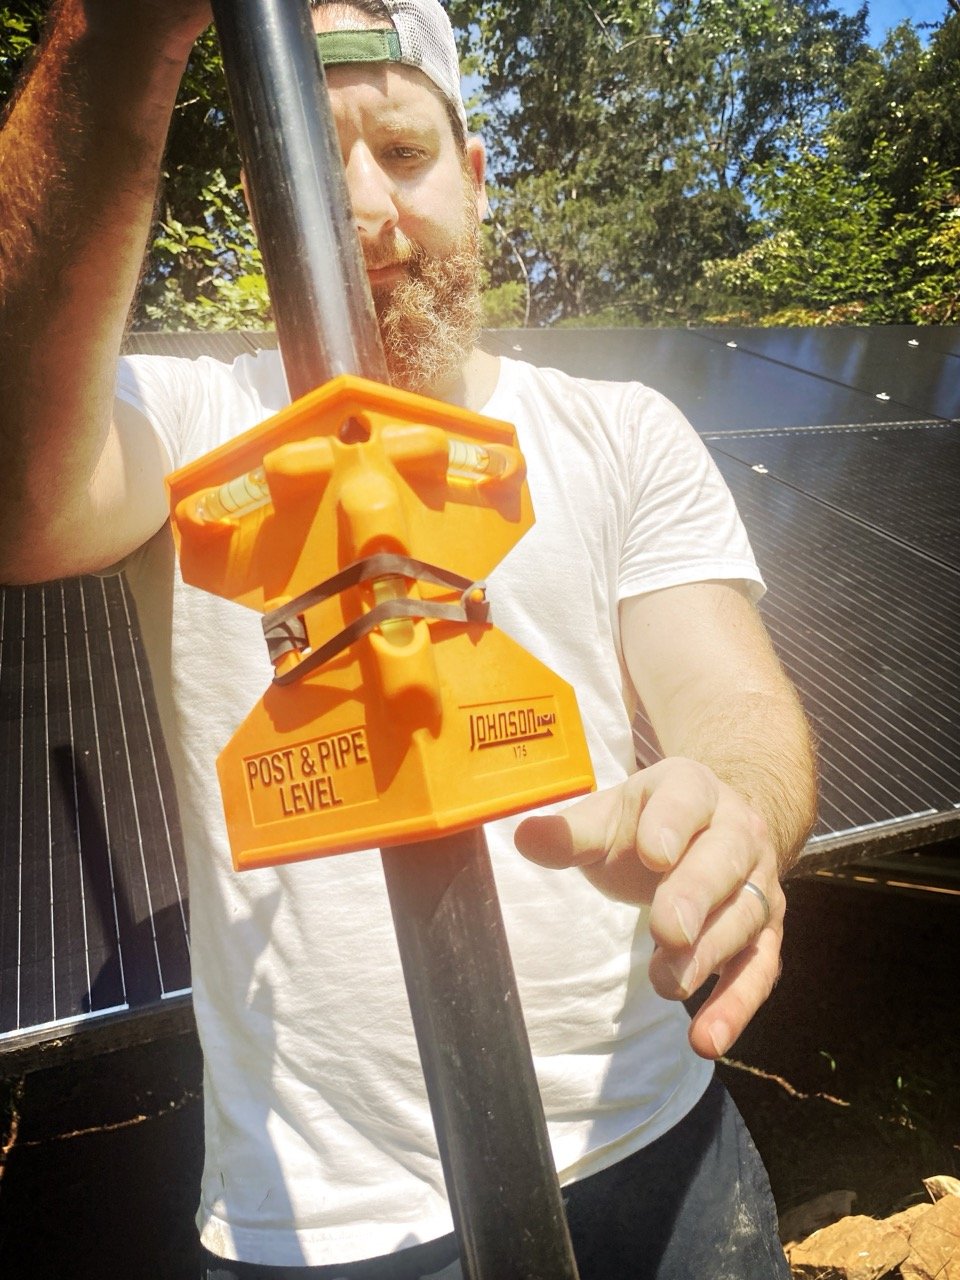
Adding Gravel and Leveling Posts
Next, fill each hole with 6" of gravel for drainage. We got a small shipment to use here and on a separate project. Just shovel it on in there and pack it down a bit with the end of a 4 x 4.
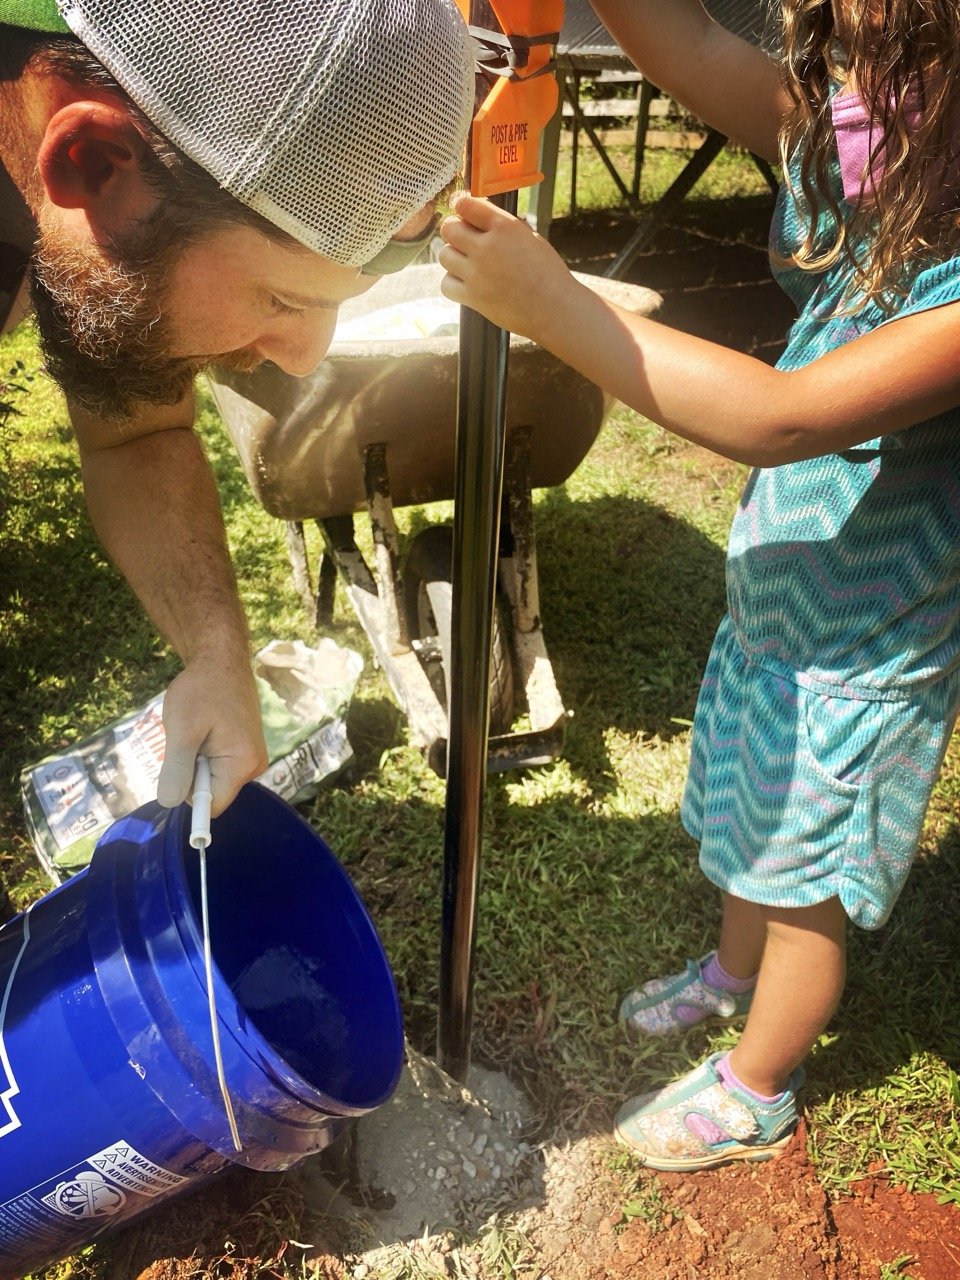
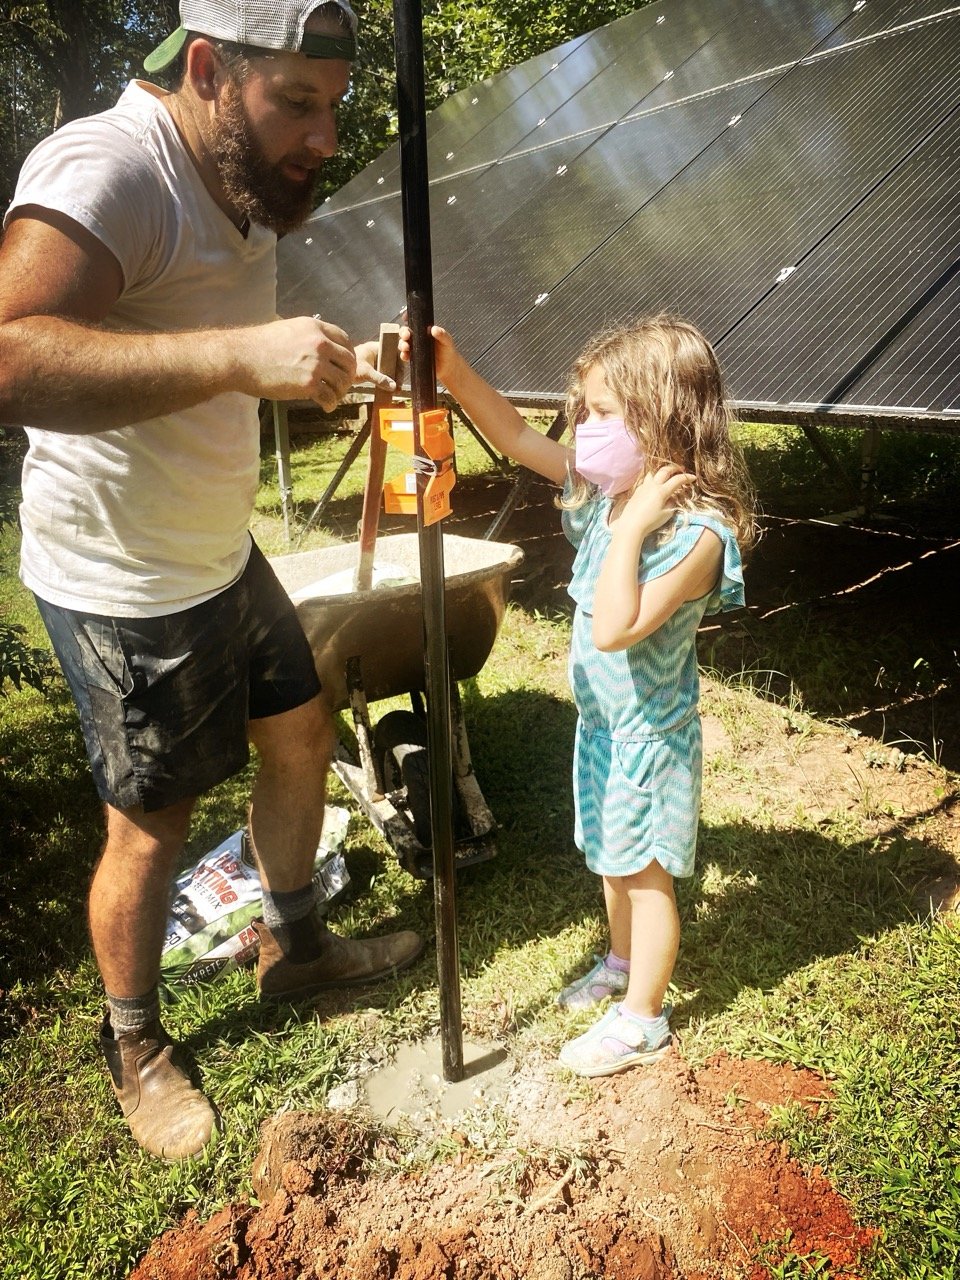
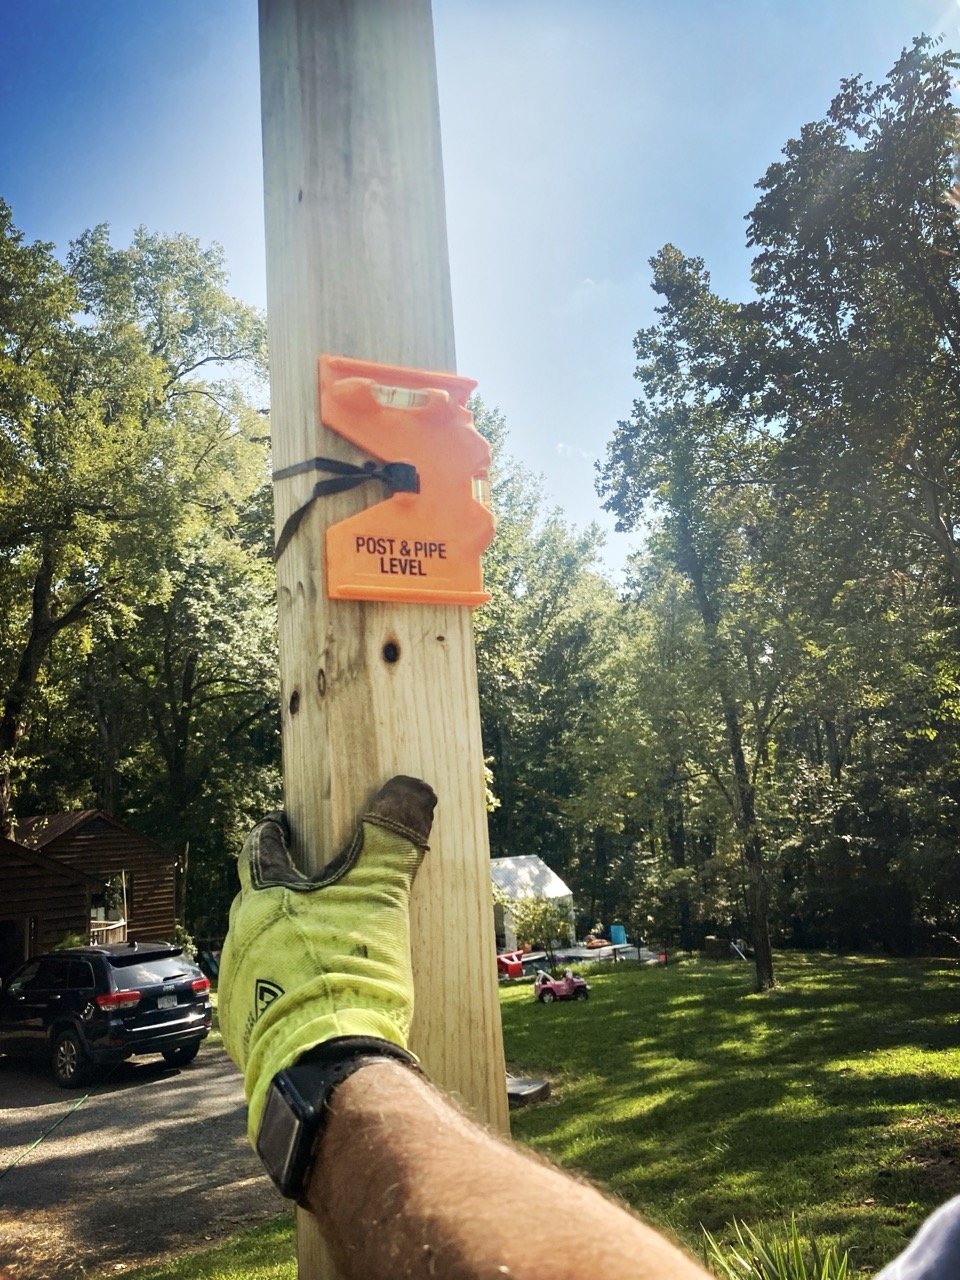
Next, insert and level each post. An essential tool here is a cheap post level (aka corner level). You use the rubber band to strap it to each post, and it'll give a hands-free view to ensure each post is level before you drop it into the concrete.
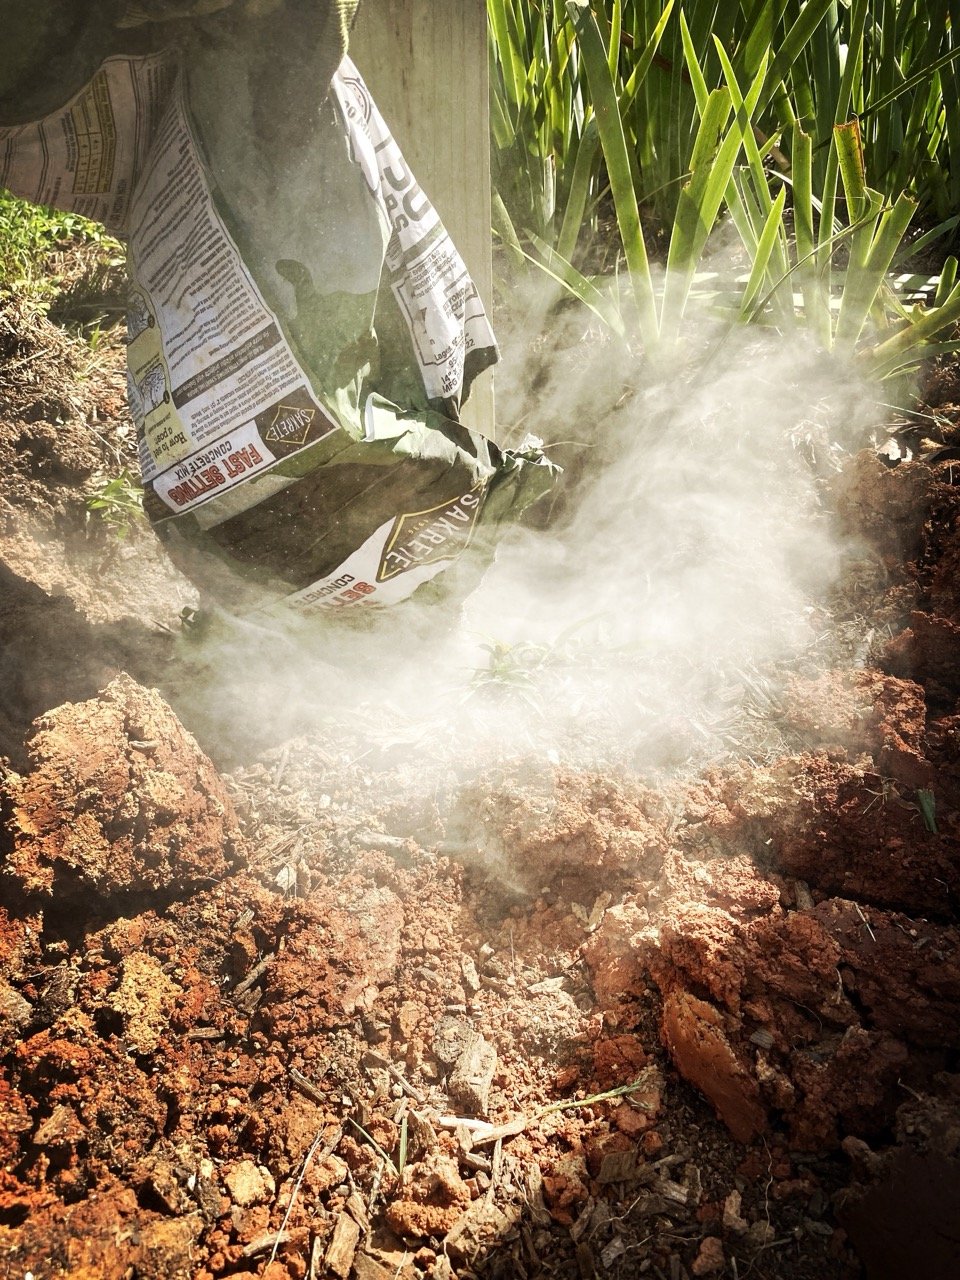
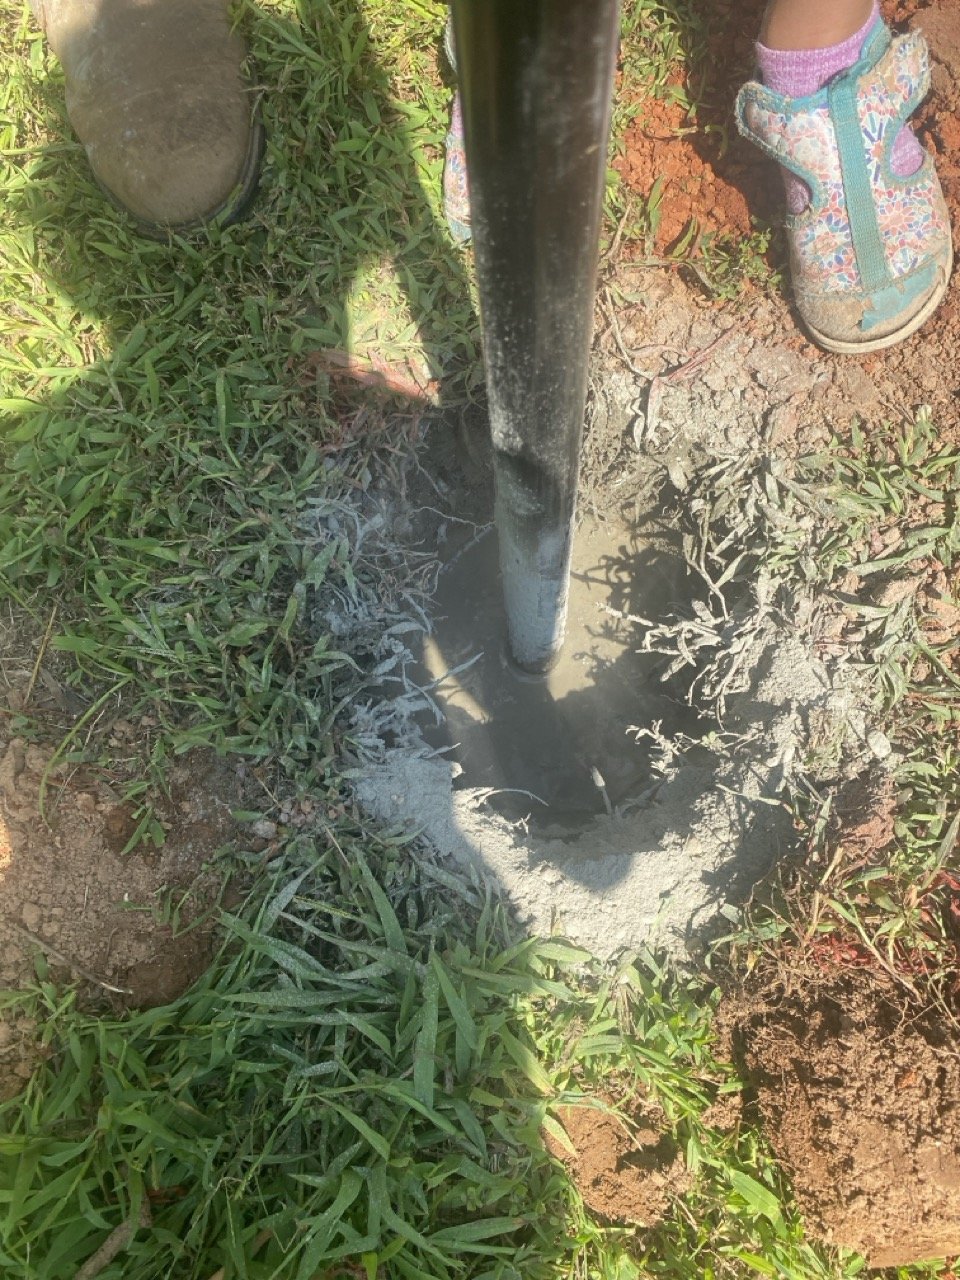
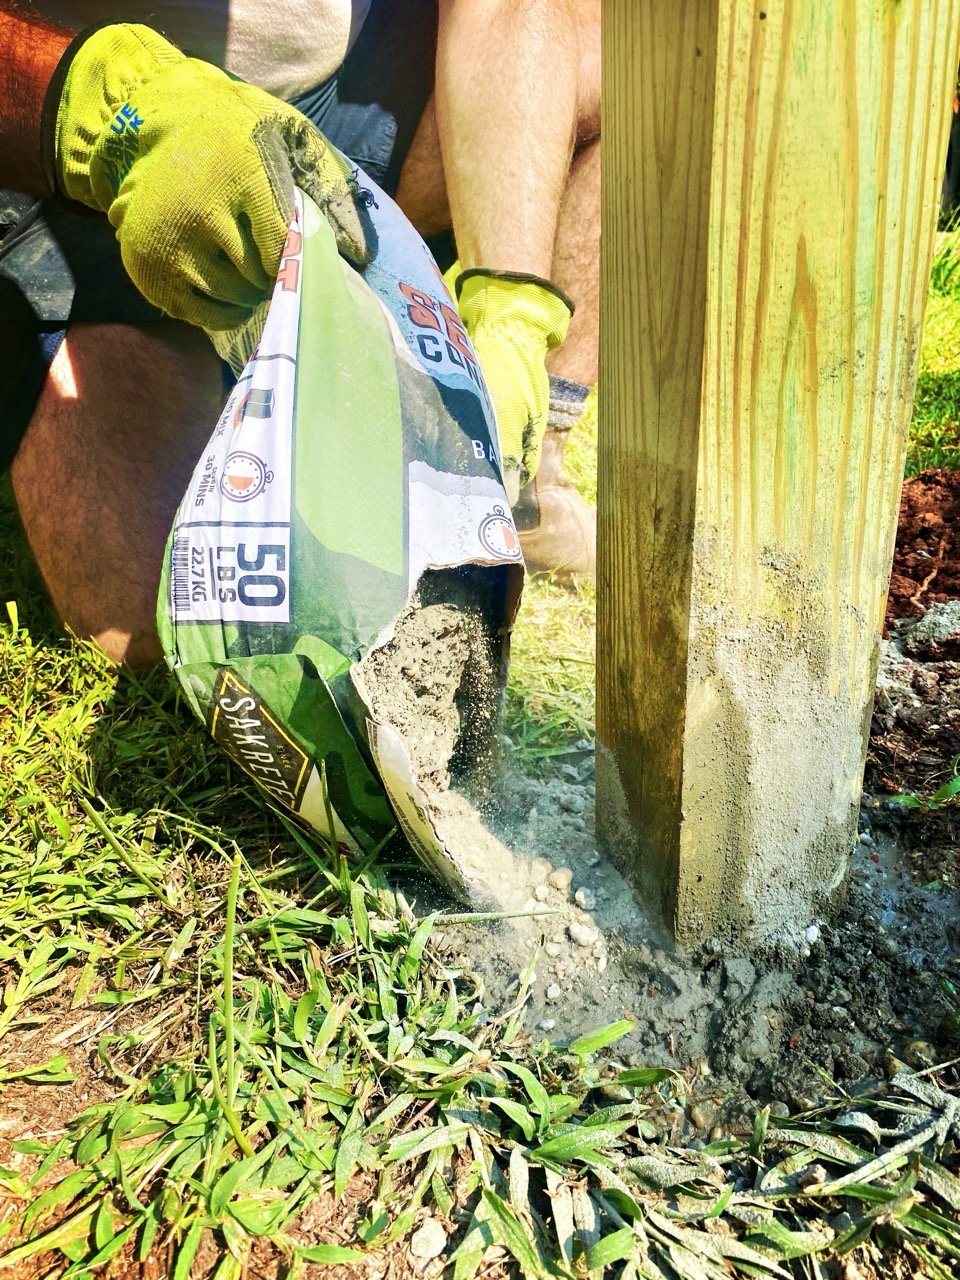
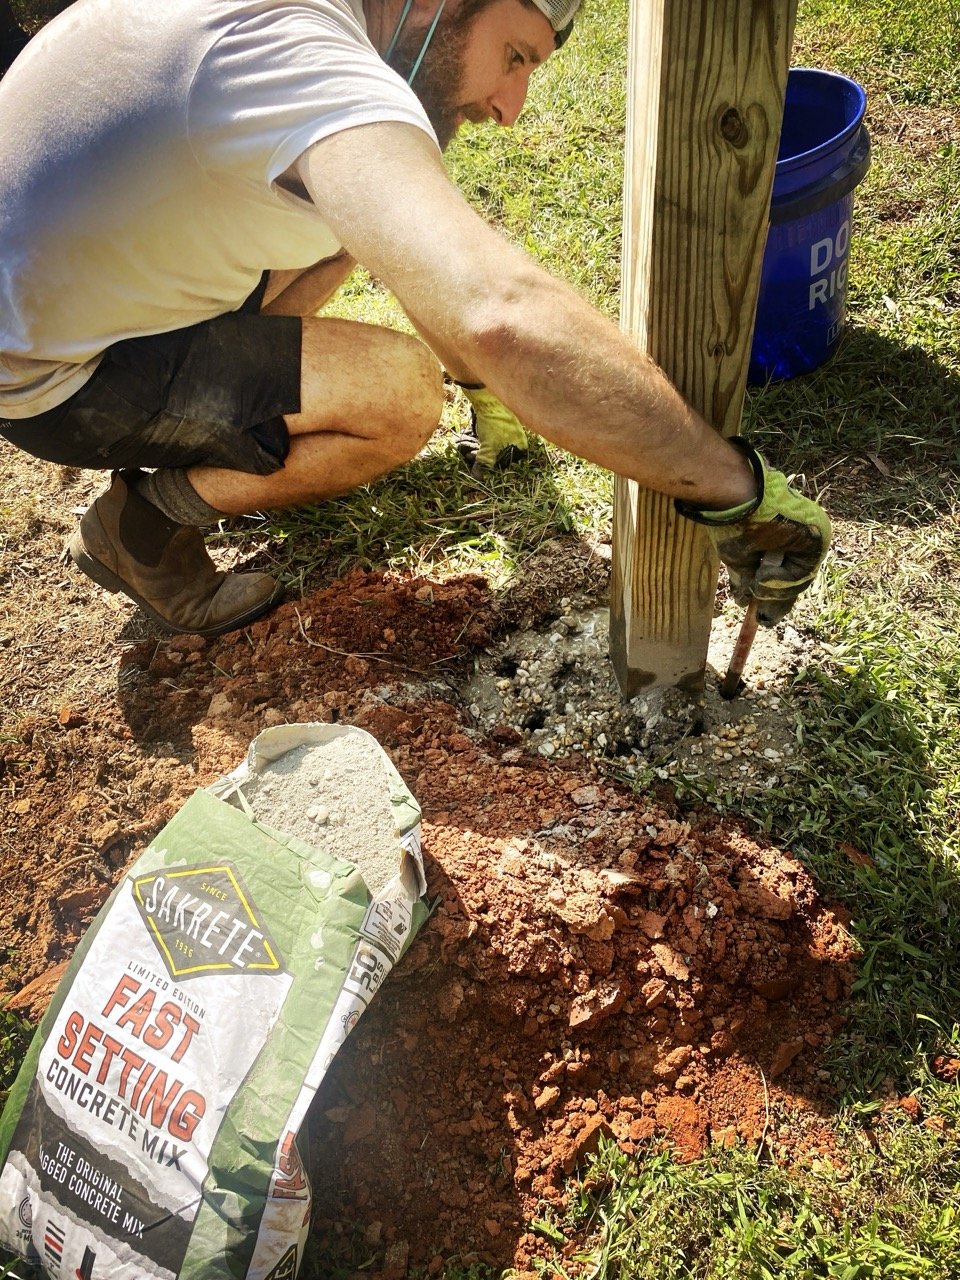
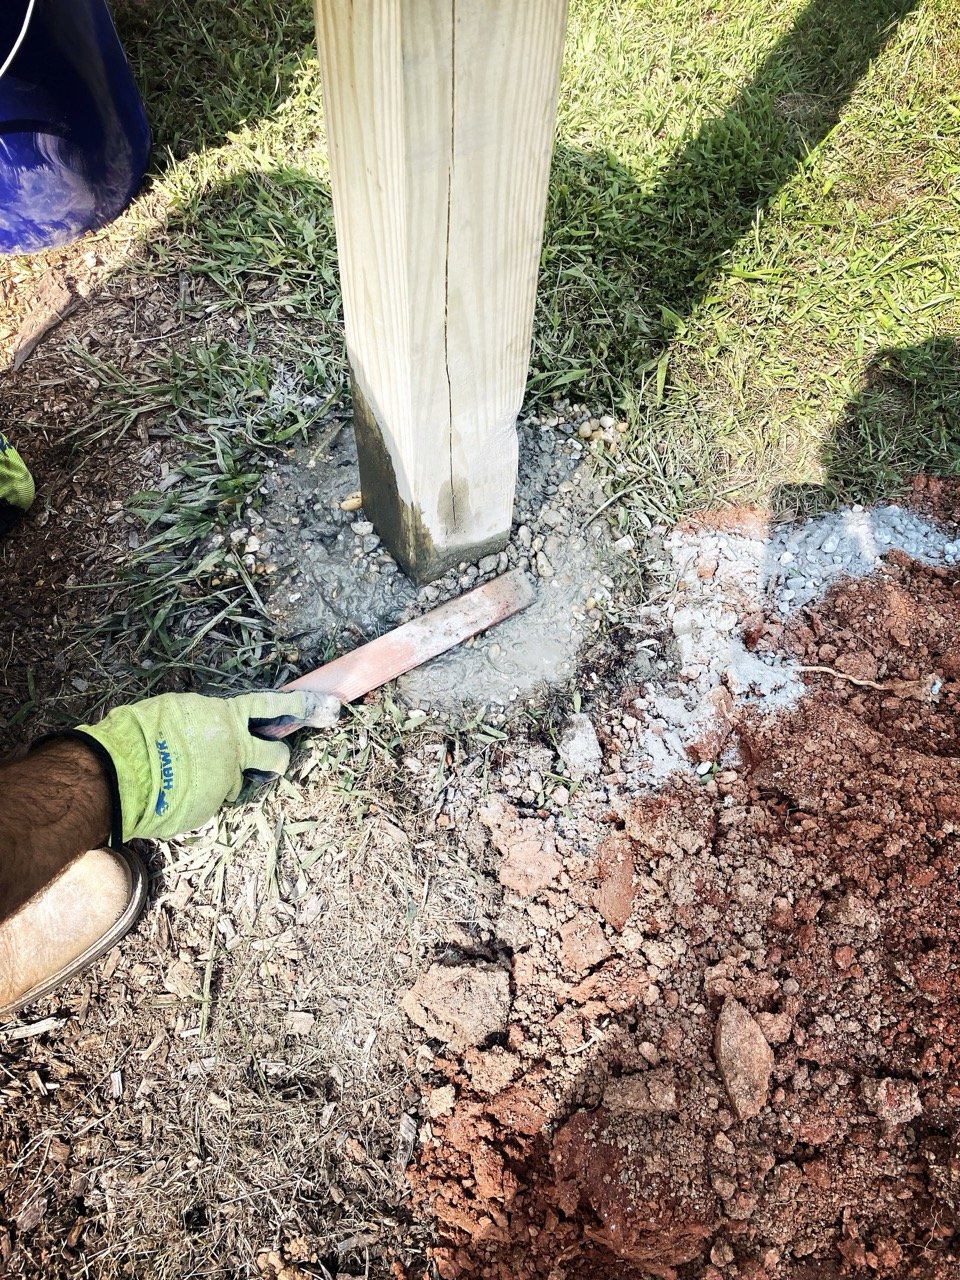
Pouring Concrete Footers
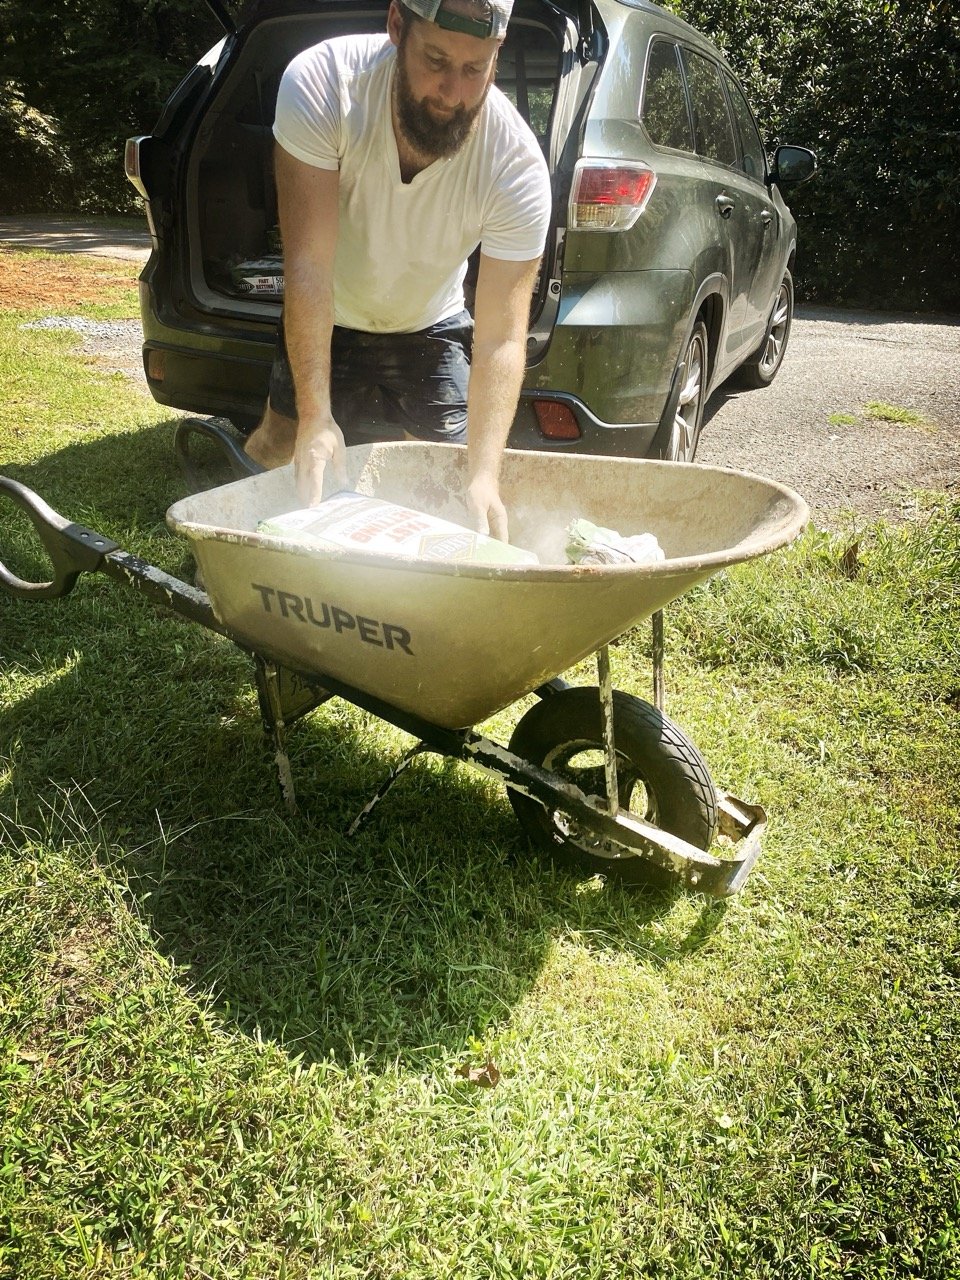
Now, the concrete. Friends all recommended using this Sakrete Fast Setting Concrete Mix; no mixing is required; just add water. I, too, would highly recommend.
Once the post is level (I had Rose brace it level for me while Jack did some filming)...
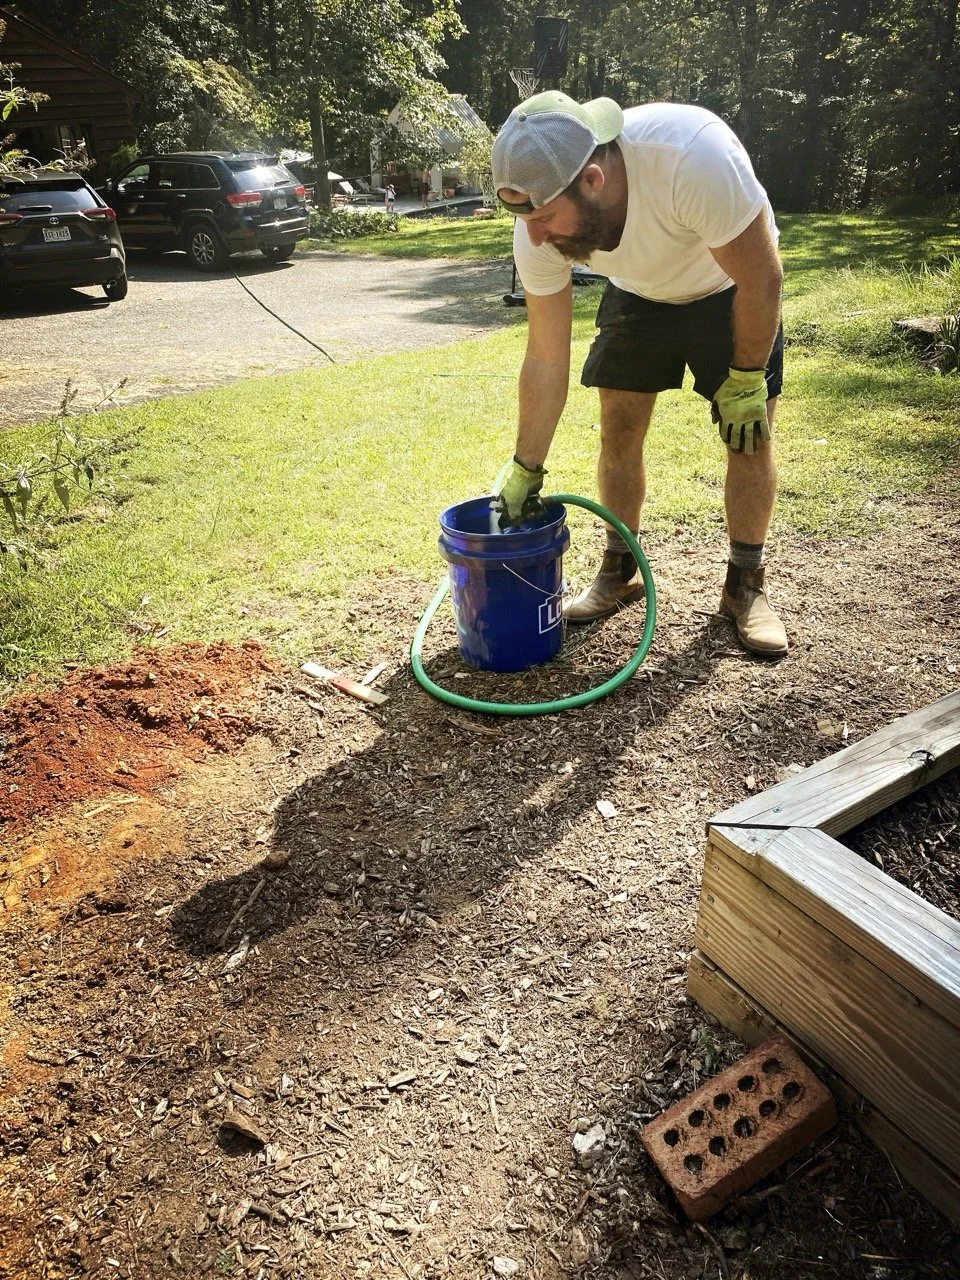
Fill a bucket and pour the hole about 1/3 full with water
Add concrete mix all the way around the post, up to the top of the hole
Add more water until well saturated and no obvious dry spots
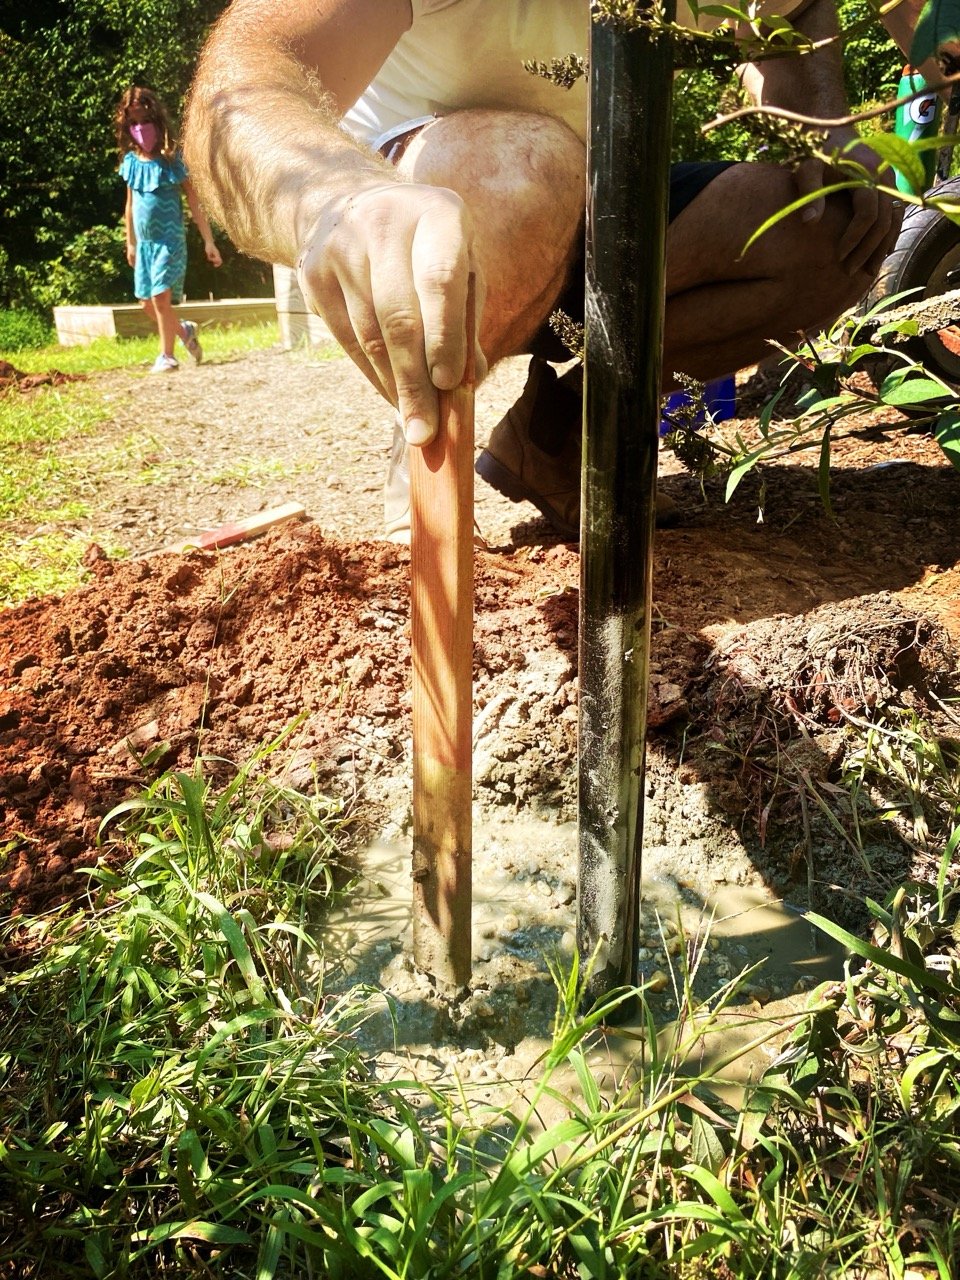
Shove a small piece of wood around to remove any air pockets
Shape the cap of the concrete so that it angles down and away from the post and water can run off it.
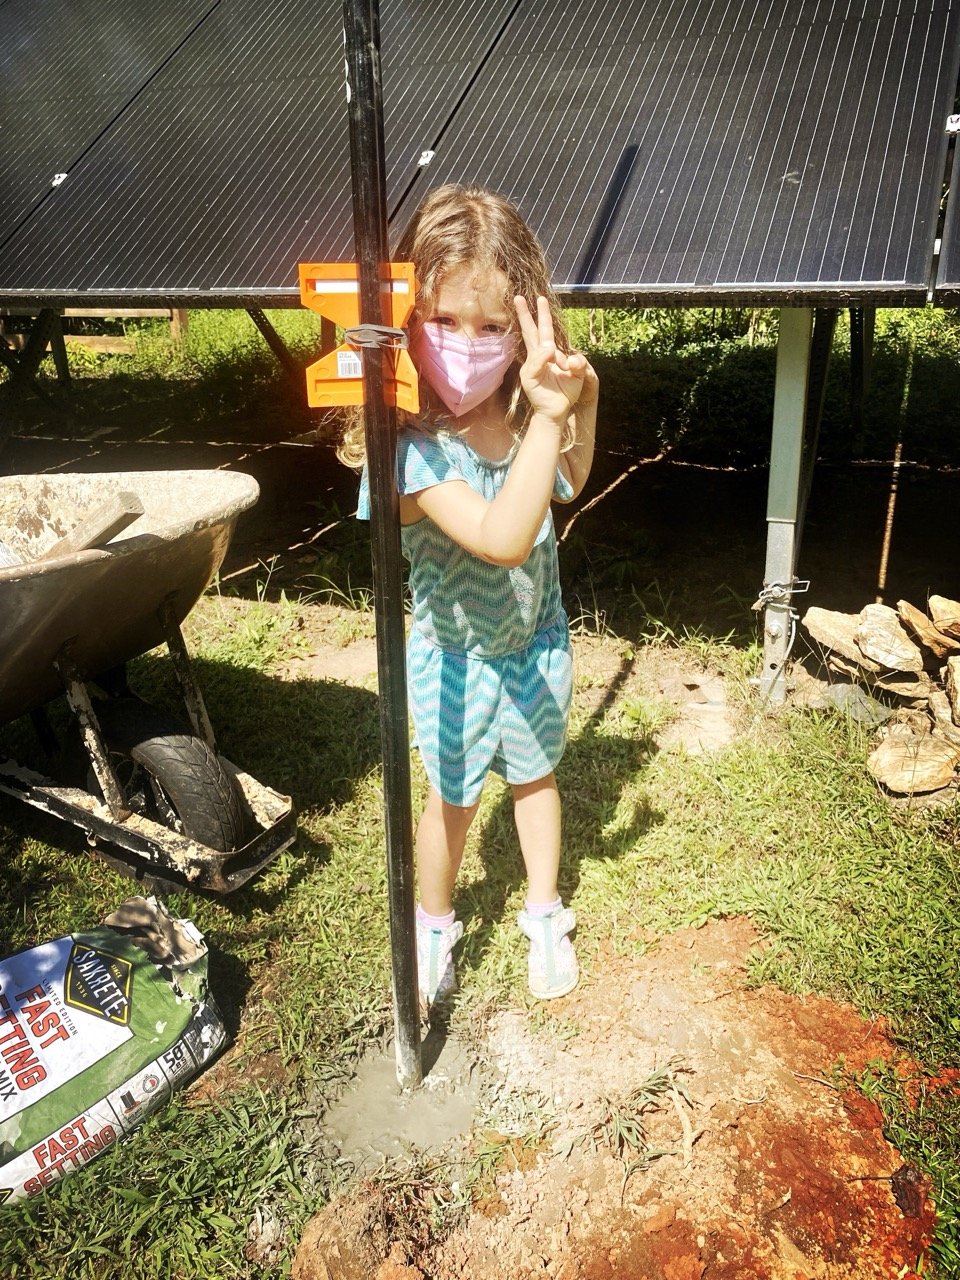
The concrete will start to set almost immediately, so you no longer have to brace the post in place. It'll be fully set in about 30 minutes.
We followed the same procedure for both the steel posts and pressure-treated 4 x 4s.
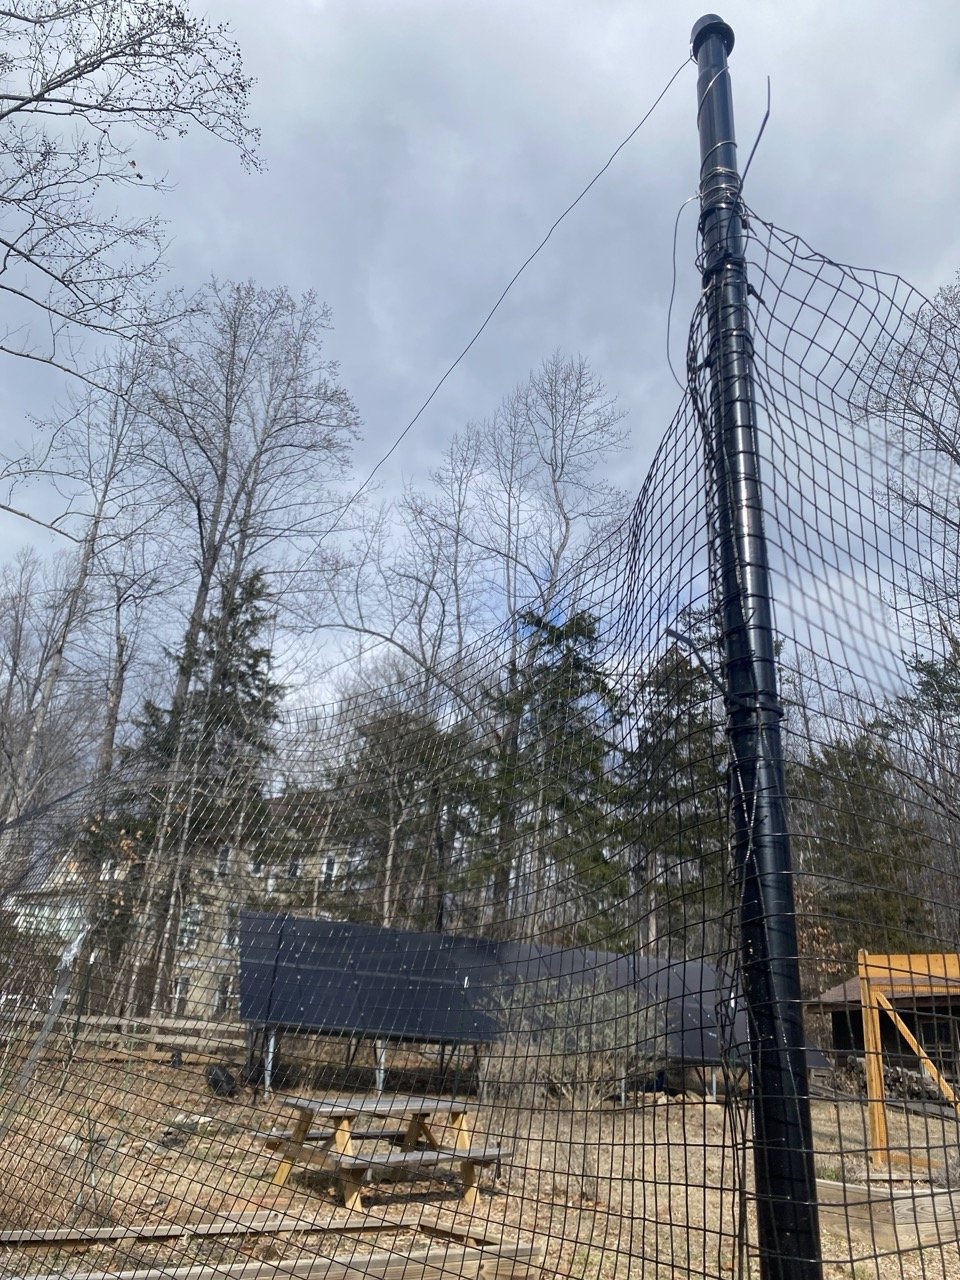
Last, we drove in T-posts in between each concrete-mounted post using a post driver. I made a judgment error here in buying 8' posts rather than 10' posts (I couldn't find the latter at the time at my local Tractor Supply and didn't want to wait any longer). I figured these were just to add a little stability, but if I had it to do over again, I would've definitely waited and sprung for the 10' posts to ensure they were the same height as the poured posts.
That's it! Now that you have your fence line all staked out it's time to add the fencing itself...
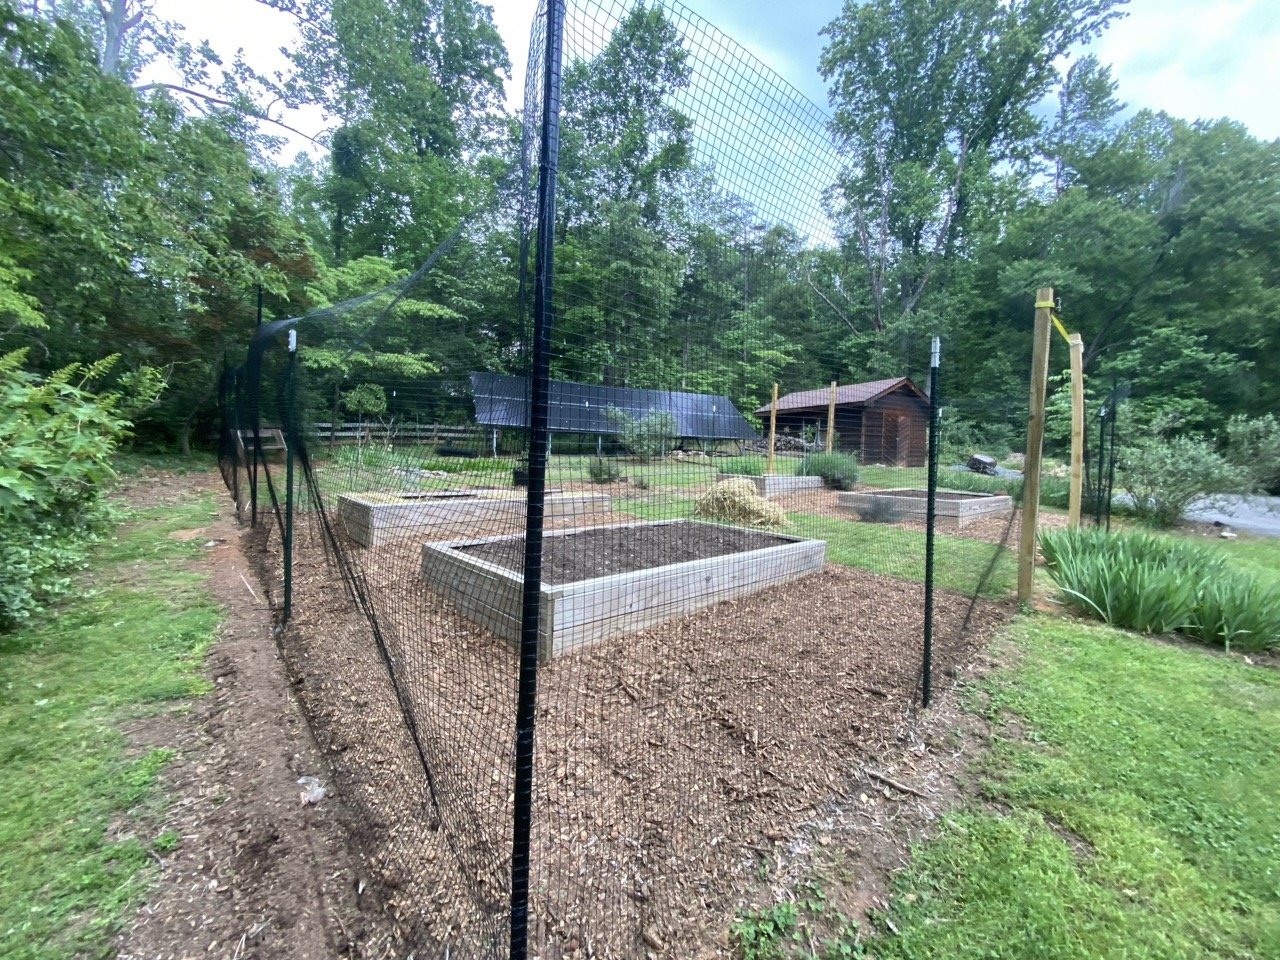
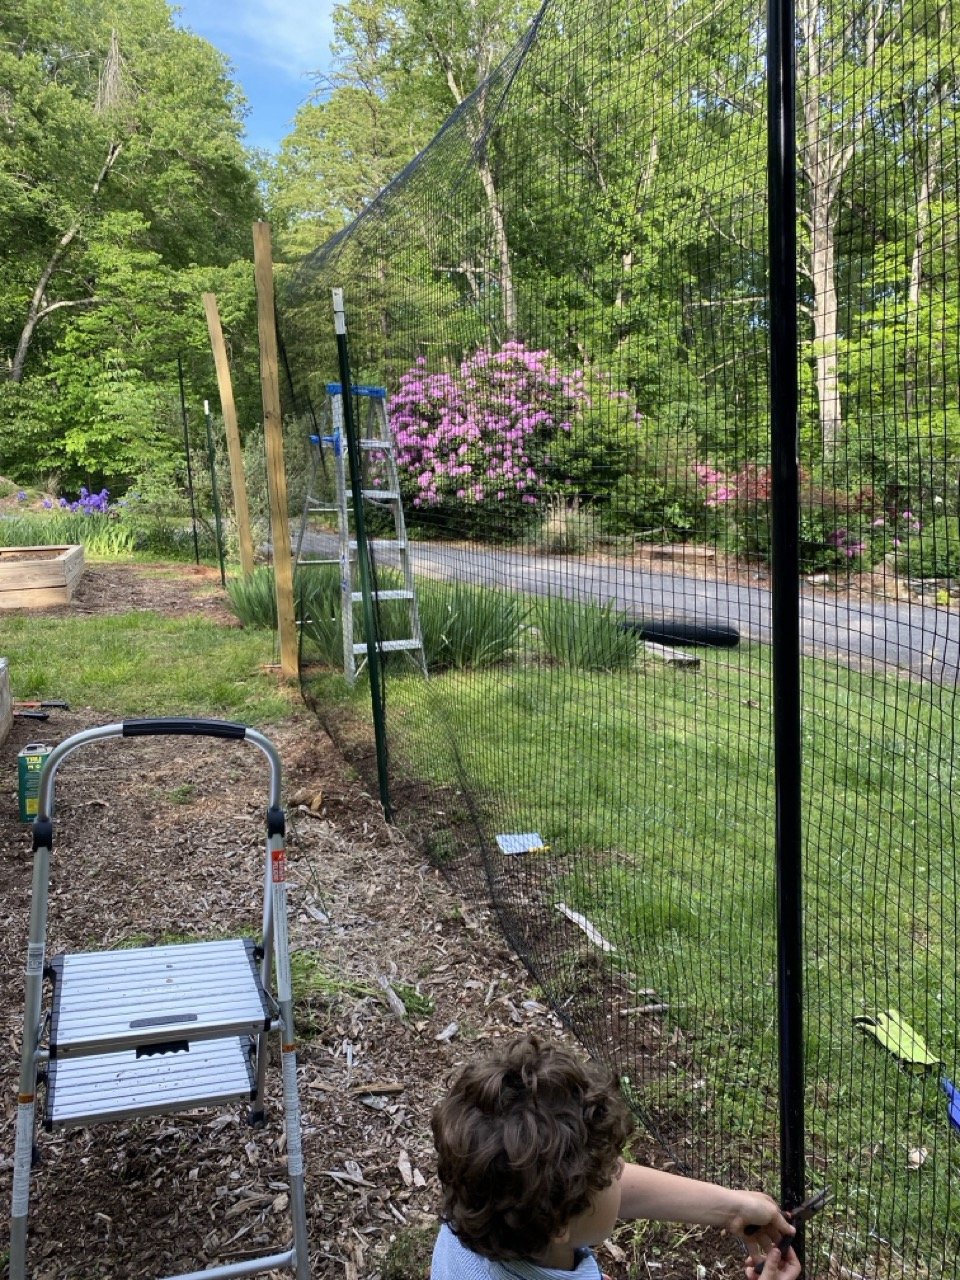
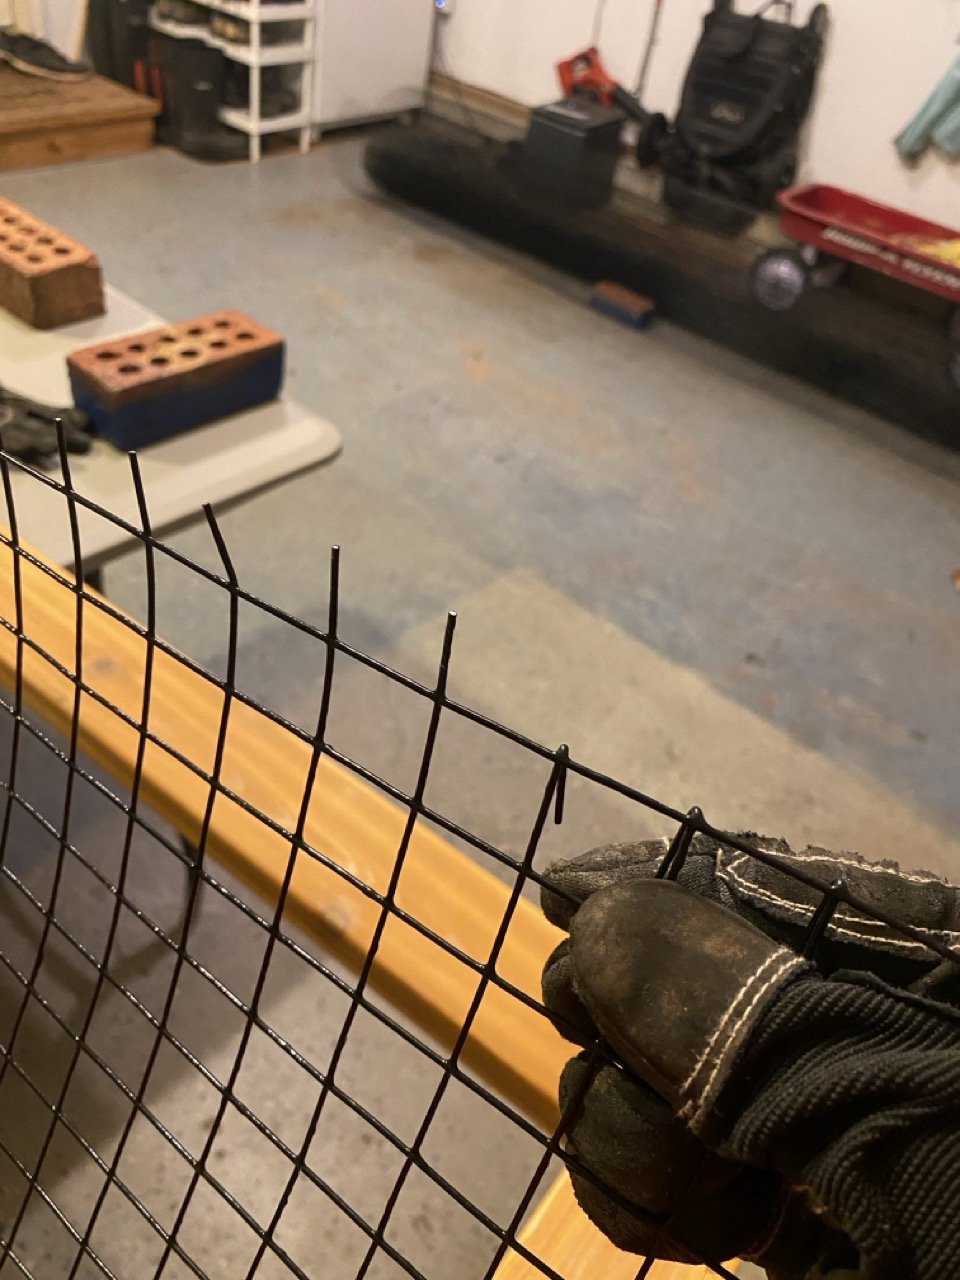
3. Securing the welded wire fence
This wasn't the most scientific part of our process, and I'm not gonna lie it was a pain in the ass.
Trace the entire perimeter, cutting into the soil with a pick axe or something. If you want to block smaller critters as well as deer, you'll ultimately want to bury the fencing at least a few inches rather than having it sit above the ground.
Unroll the wire mesh (again, we used this Deerbusters/Trident 19ga. Wire Fencing, 8’ x 100’ rolls) on the ground the full length of the section of fencing you're working on. You can approach this by either cutting small/medium sections, or you can roll out the fencing as far as it'll go. I'm not sure which is best, but especially if you're on a small slope, as we are, I found it easier to work in sections.
For each section, cut the wire mesh (a bit longer than you feel is necessary) with steel snips. You'll likely have to cut the bottom edge of the fencing on a slight diagonal to account for the slope of the terrain. This is a somewhat painstaking process, so invest in a good pair of snips that can easily cut through your wire, as you'll be doing a fair amount of cutting.
Work with a friend or spouse to lift it up against the posts, and start securing with galvanized staples, T-post clips, or UV-coated zip ties. This is the most challenging part of putting up a fence, as you need to maintain tension on the fencing as you secure to make sure it doesn't sag too much. Requires a bit of strength, endurance, and patience.
Along the bottom, drive U-shaped ground stakes into bottom edge of the fencing to tighten it to the ground so that pests, pets, and other garden predators can't slip in underneath.
Depending on how much sag/tension you need, you can consider adding a top rail or tension wire. Look into tension wire kits. I did some janky gerry-rigging but am looking to clean this up soon.
4. Interim mini-maintenance
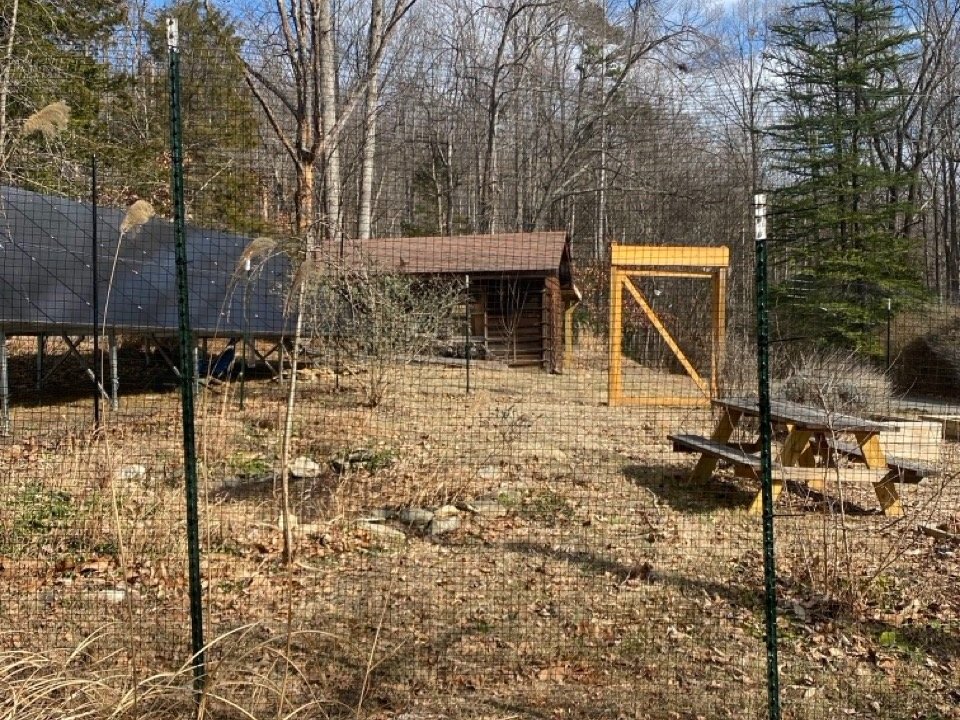
With the wire fencing in place, the next step was building and installing the gates. This became a whole other project (that I'll cover in a separate post), which took some time... and in that time I noticed that some of the 4x4s were starting to warp and twist under the tension of the wire mesh.
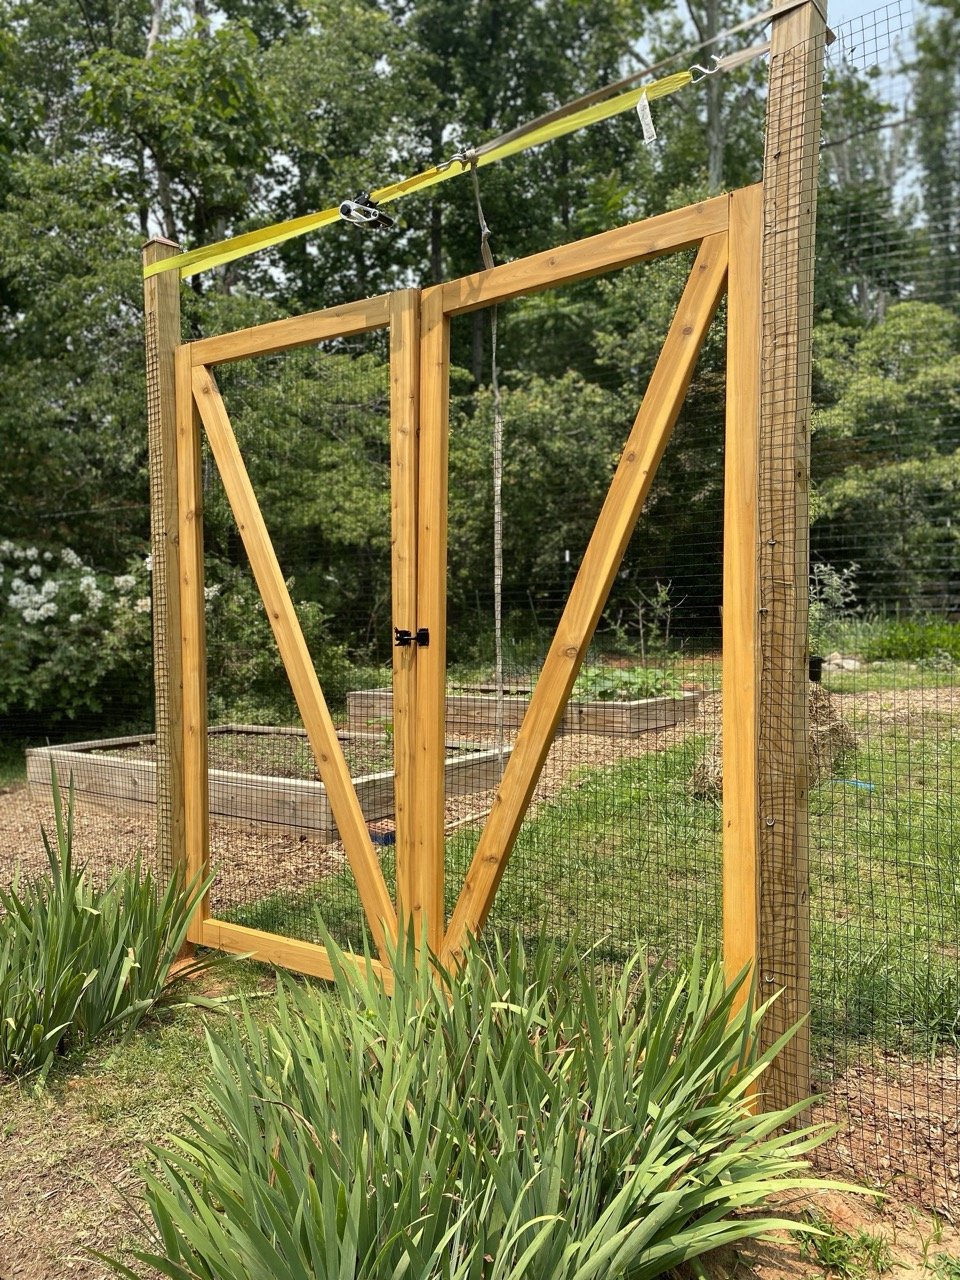
If I'd realized sooner, I would've immediately added a temporary piece of wood to the tops of these posts to keep them in place, but since they'd already started to move I opted for some long ratchet straps that could pull the posts back into position and keep them there until I'd built the gates and custom top board and was ready to install them.
With the 4x4s outside for a while, I also noticed that carpenter bees had started messing with them, and some cracks had formed (also called "checking"). Not unusual at all with pressure treated lumber, but I opted to add some waterproof caulk and an oil-based stain to the 4x4s to keep water out and help them last as long as possible.
Using ratchet straps to hold gate posts in place while I finished our custom top board.
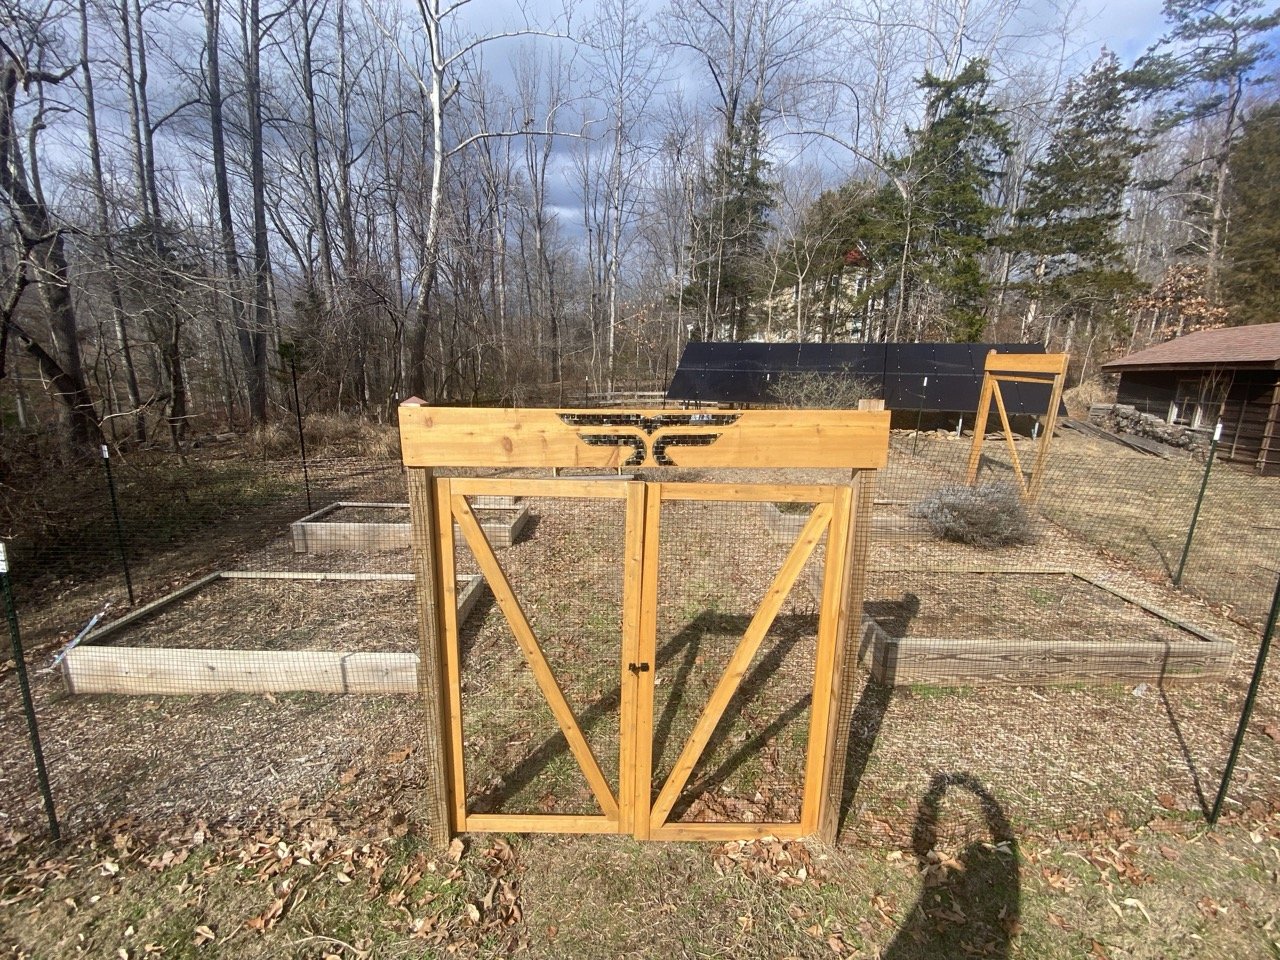
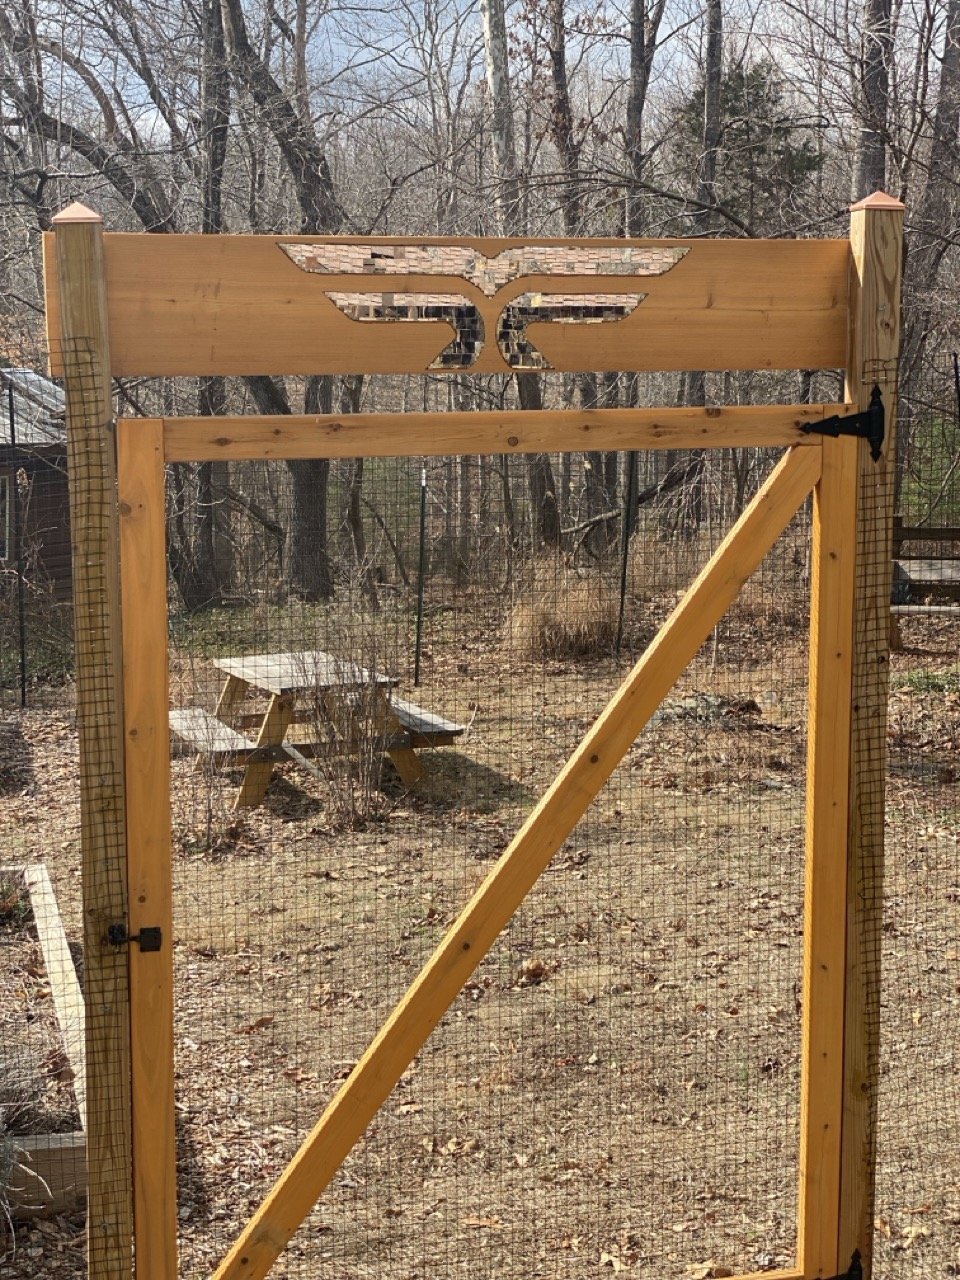
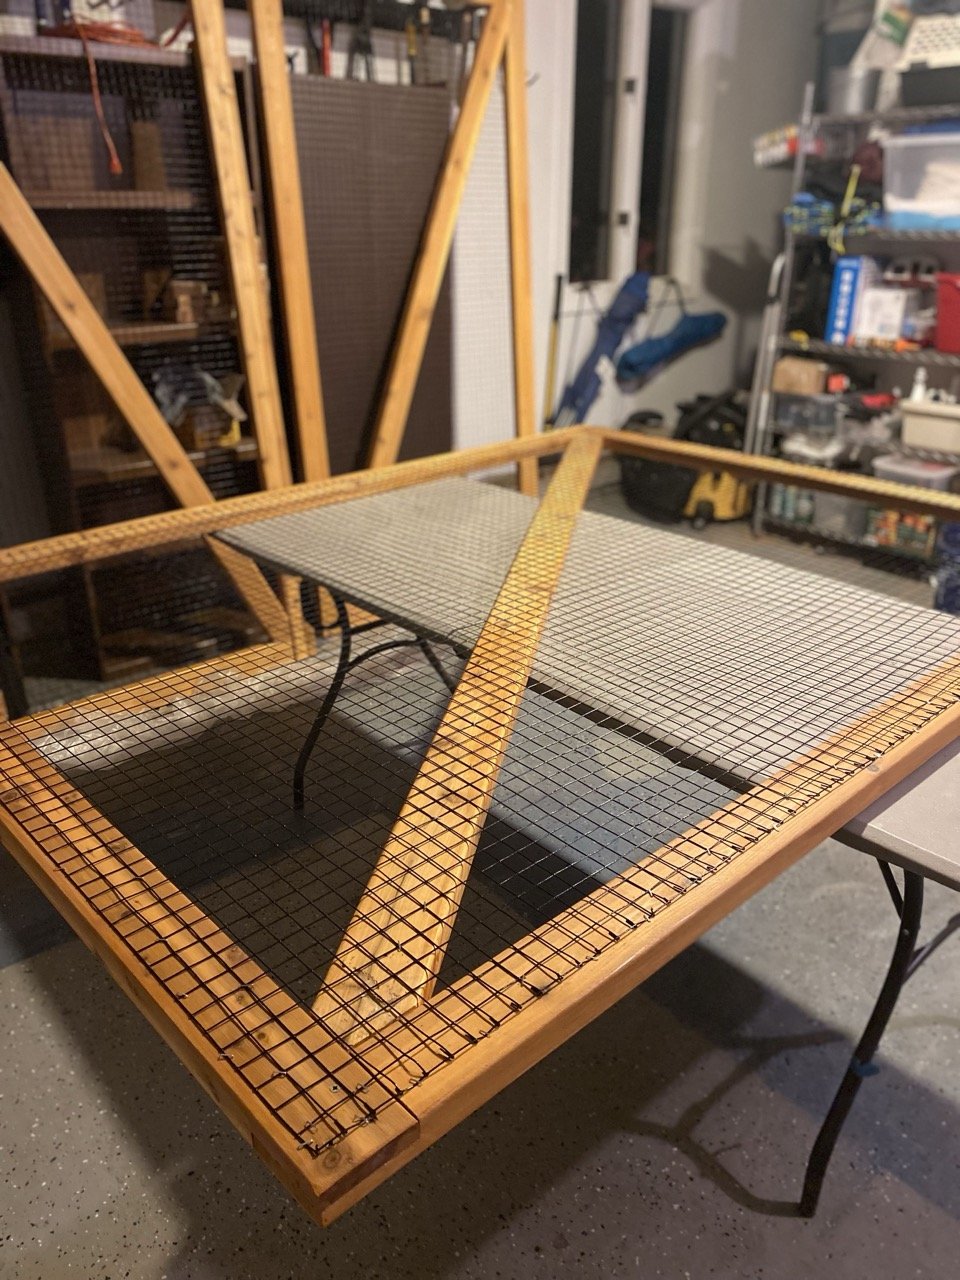
5. Building gates for your garden fence
I will cover this process more fully in a separate post, but for the gates...
PLAN CAREFULLY
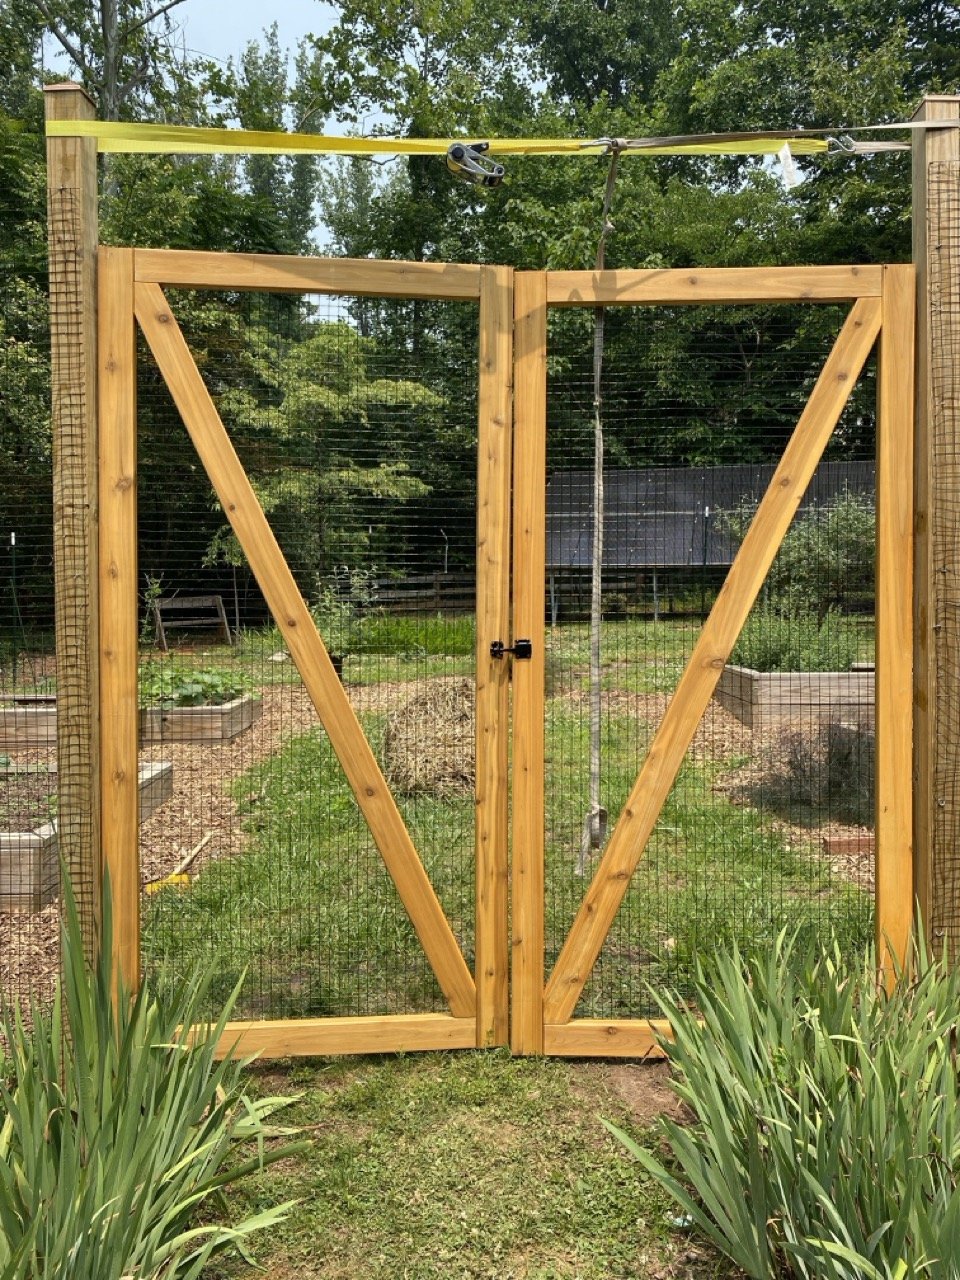
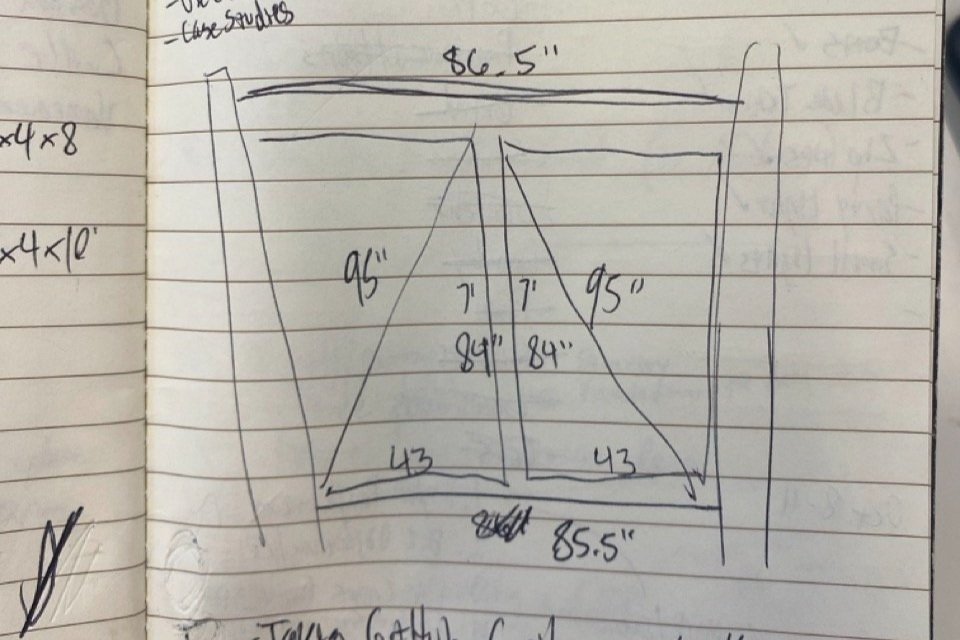
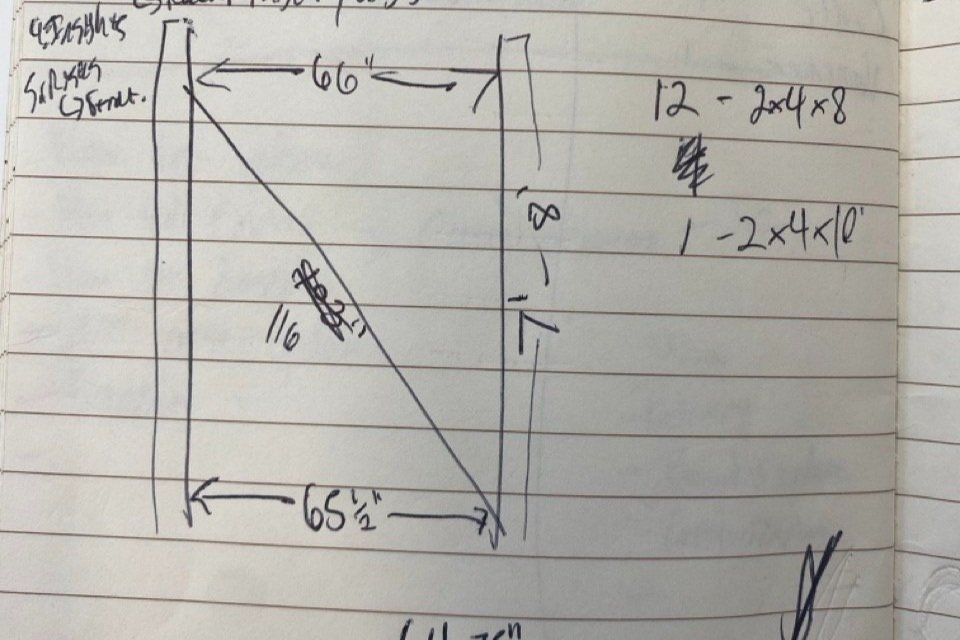
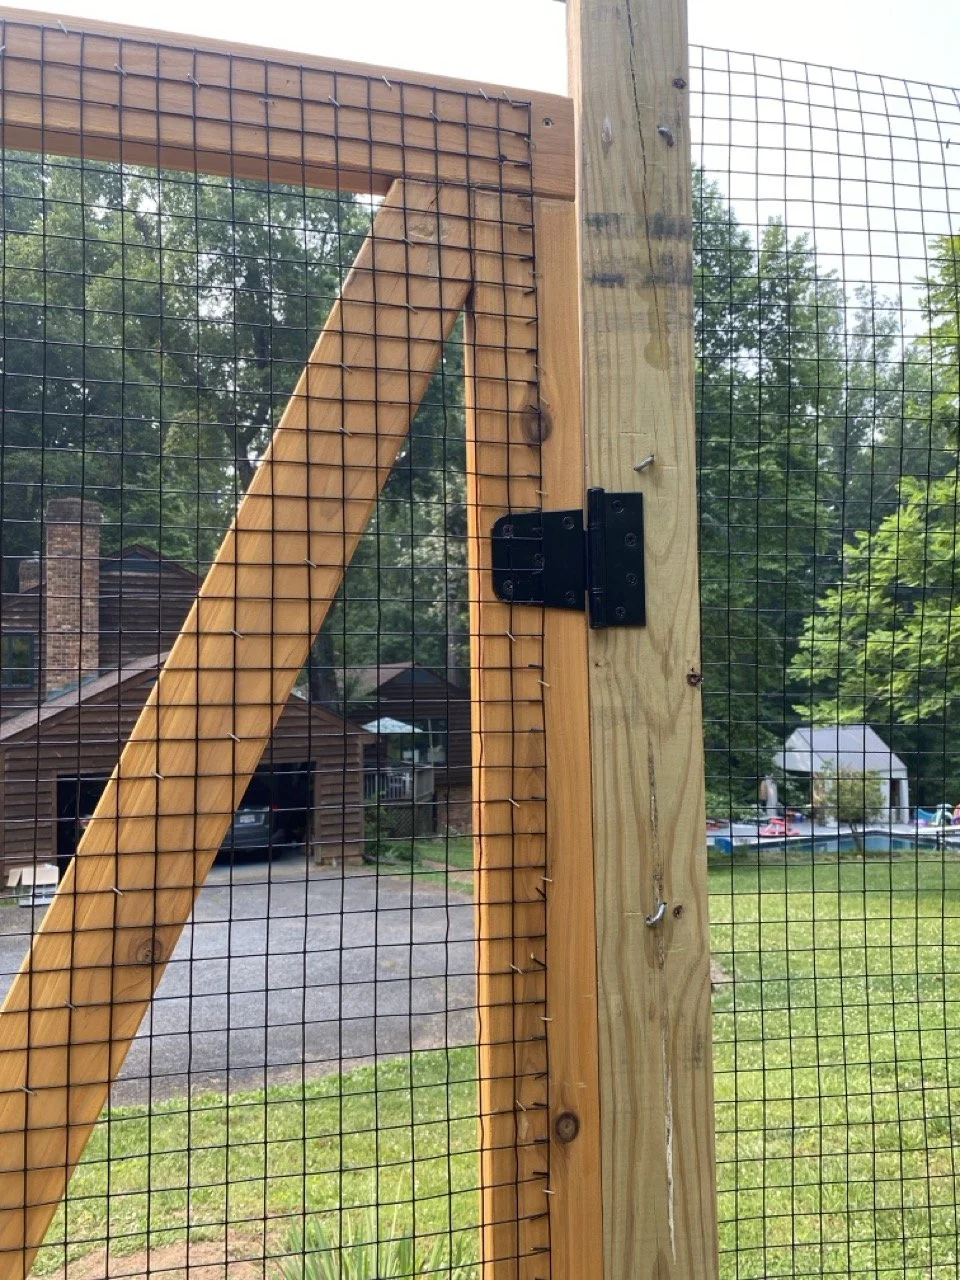
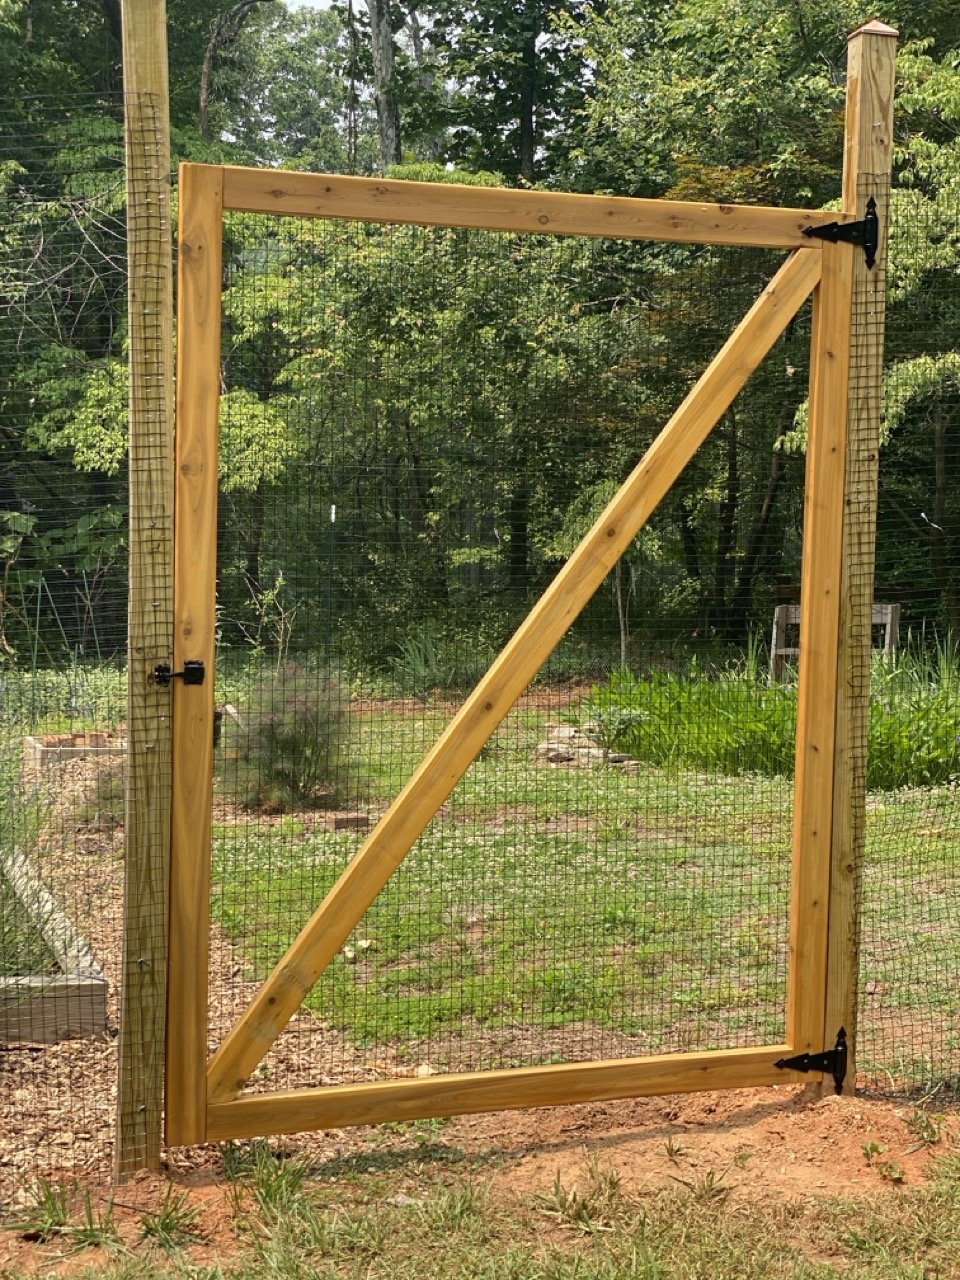
We have two gates that each needed a custom approach. The main gate would be a double-gate measuring about 86” wide, and the side gate near our shed would be a large single gate measuring about 66” wide.
Given the size and span of the gates, we went with lightweight and weather-durable cedar for the construction material here. Definitely more expensive, but PT lumber would've been way too heavy at this scale, and likely warped faster. Plus we liked the aesthetics of cedar for this statement piece.
I looked at a few different YouTube videos to learn how to do this, basically a mixture of this structure but incorporating the lap joints shown in this video.
MEASURE TWICE, CUT ONCE
IMPORTANT: when measuring out the width of your gate lumber…
Measure the width across the bottom of your gate posts AND the top. You’ll see from my measurements in the images that in both instances the space was a bit wider towards the top (where the posts were bowing outward slightly from the tension of the wire fencing I’d attached). Again, the ratchet straps can help correct this or at least keep it in range, but you may need to split the difference in cutting your gate, or cut slightly different length boards and be okay with the gates being slightly off-square, or get creative with the hinge hardware. On that note…
When you’re measuring/cutting, be sure to account for a little space for the gate hinges and latch hardware. Sometimes the hinges sit inside of the gate posts, so depending on your hardware, you might need to leave 1/2" or more of space between the gate posts to fit the hardware.
Again, a full step-by-step of this separate process is coming, but once I had the frame constructed...
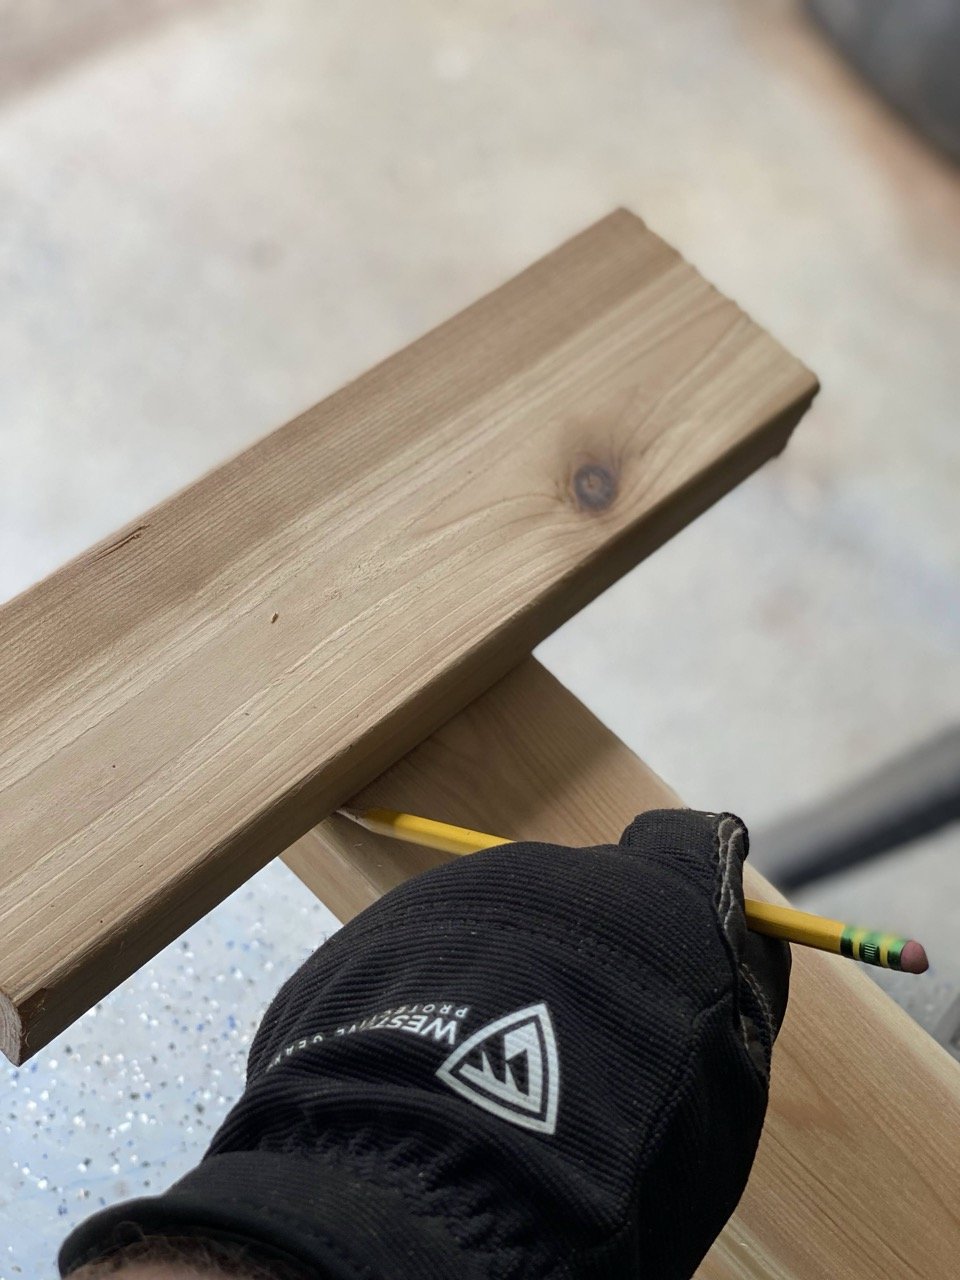
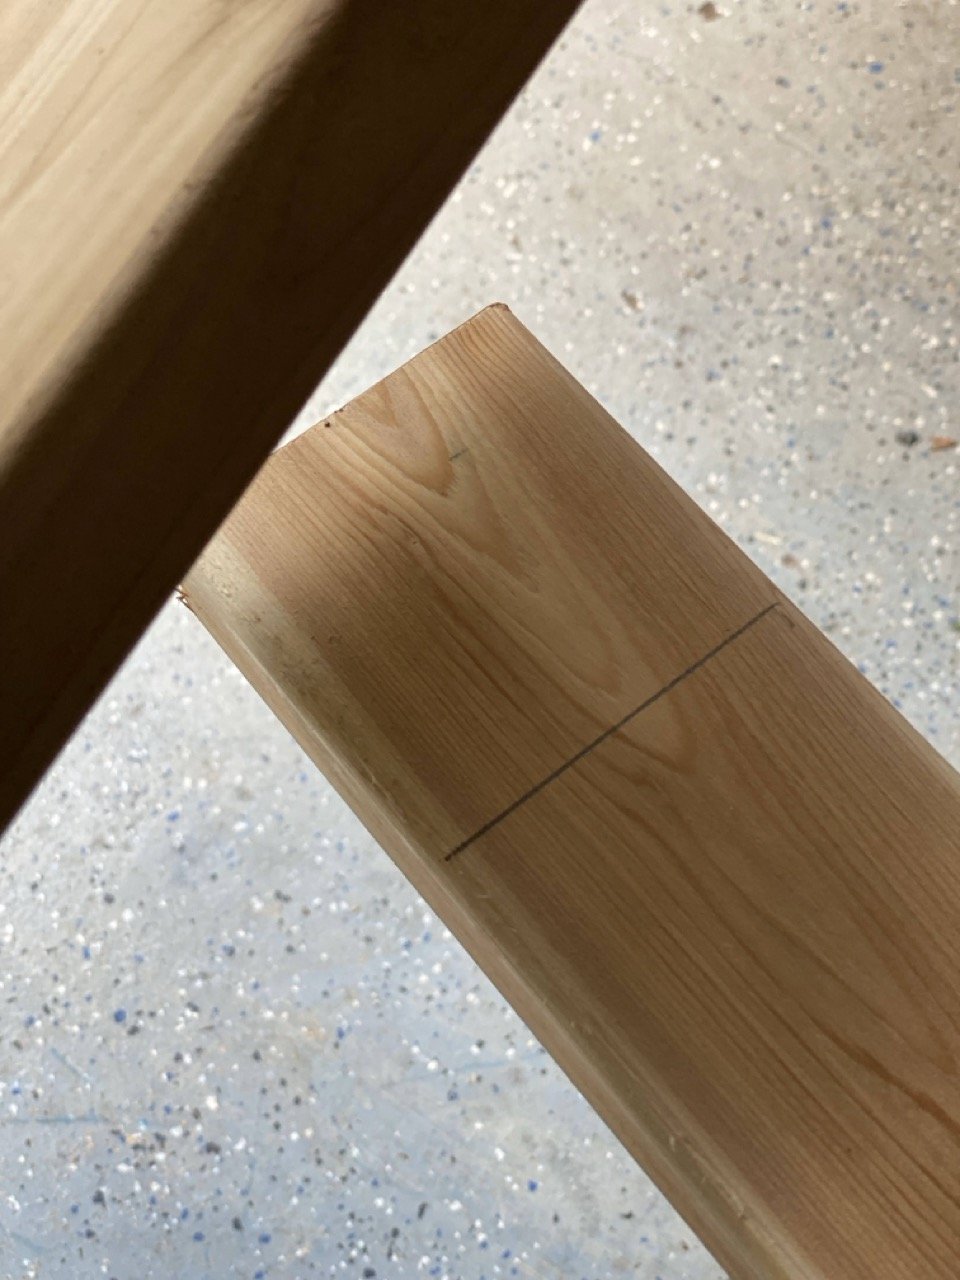
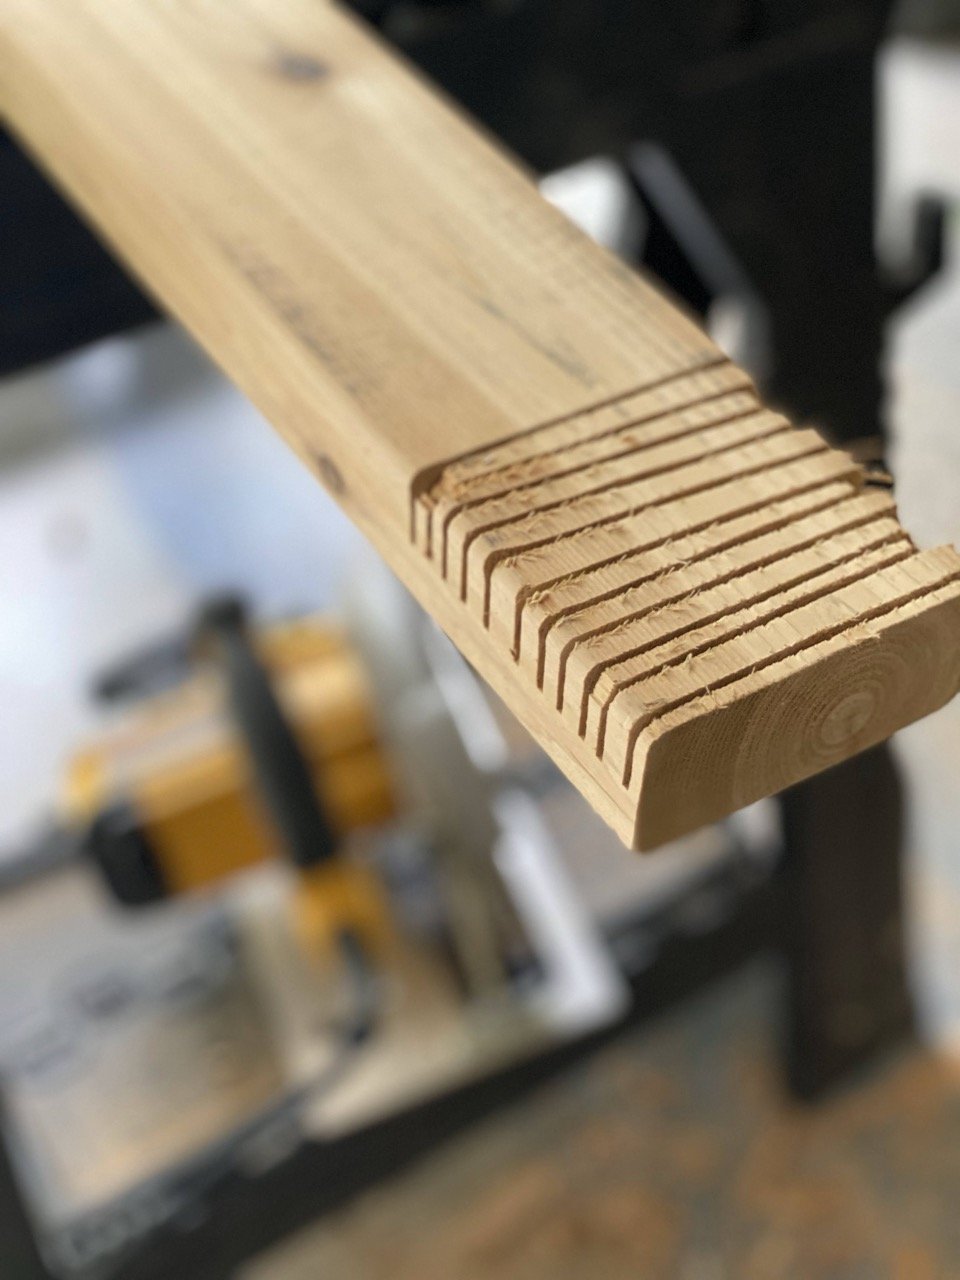
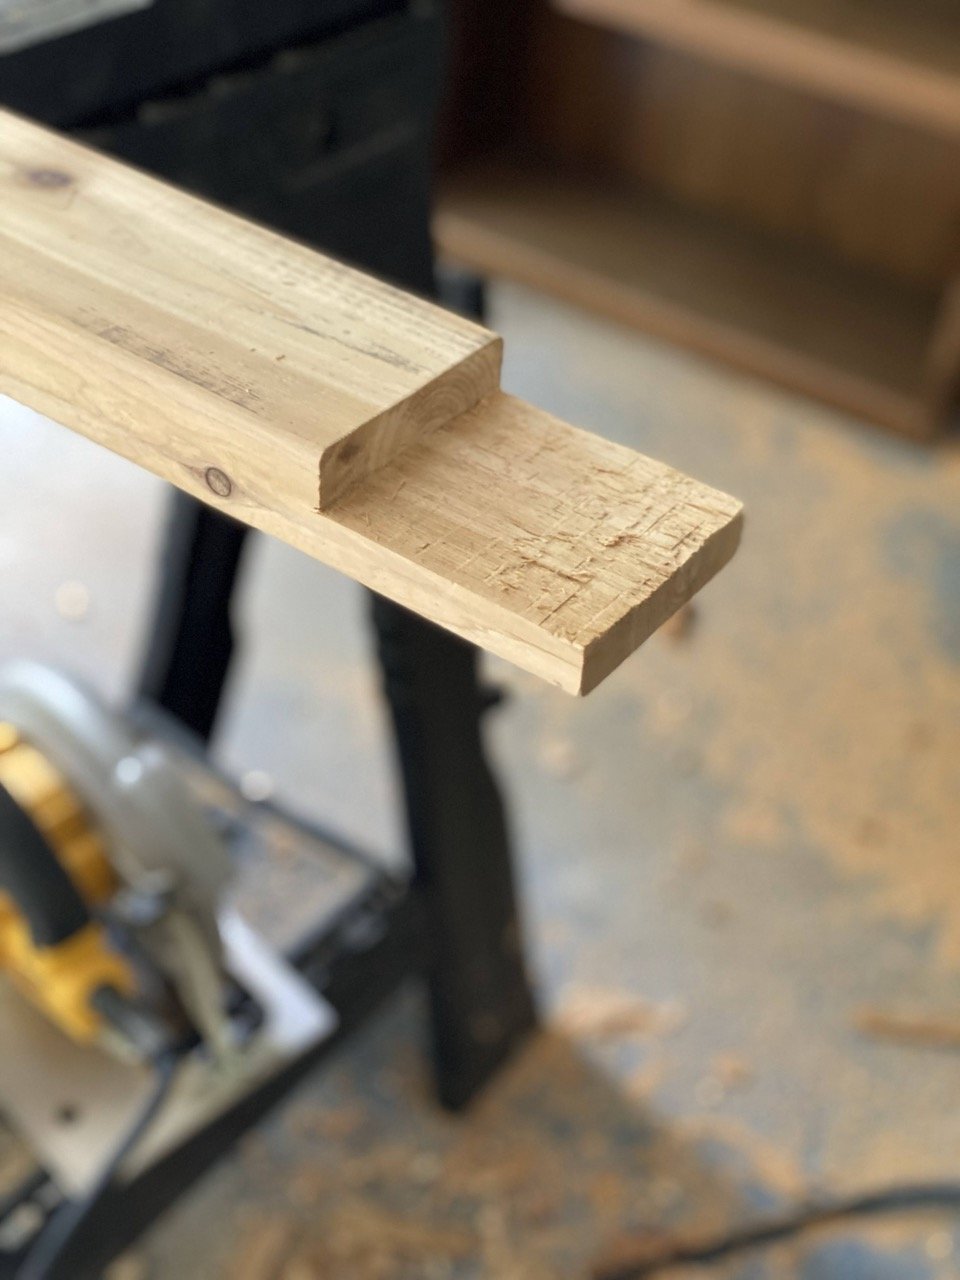
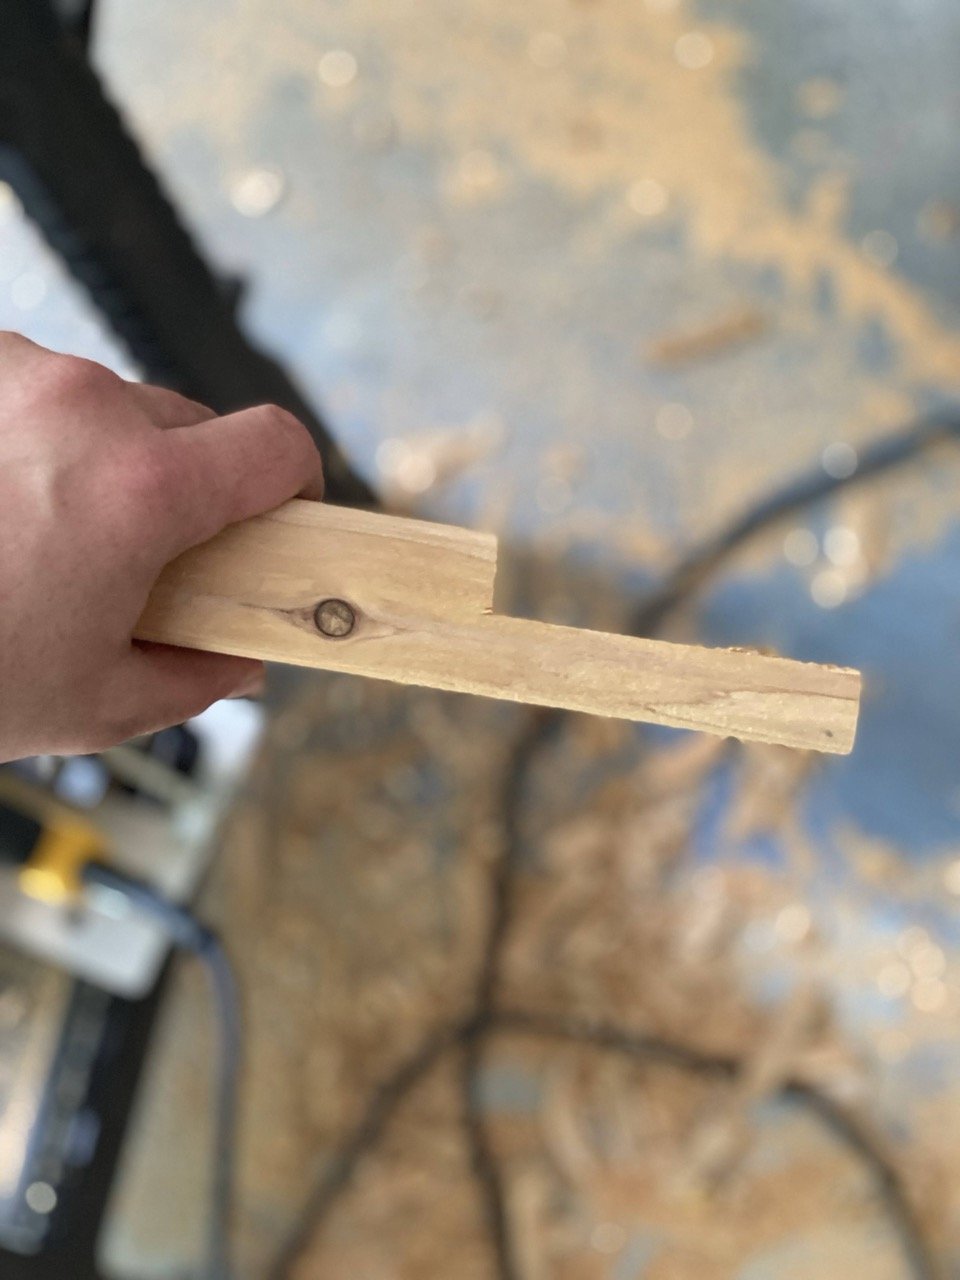
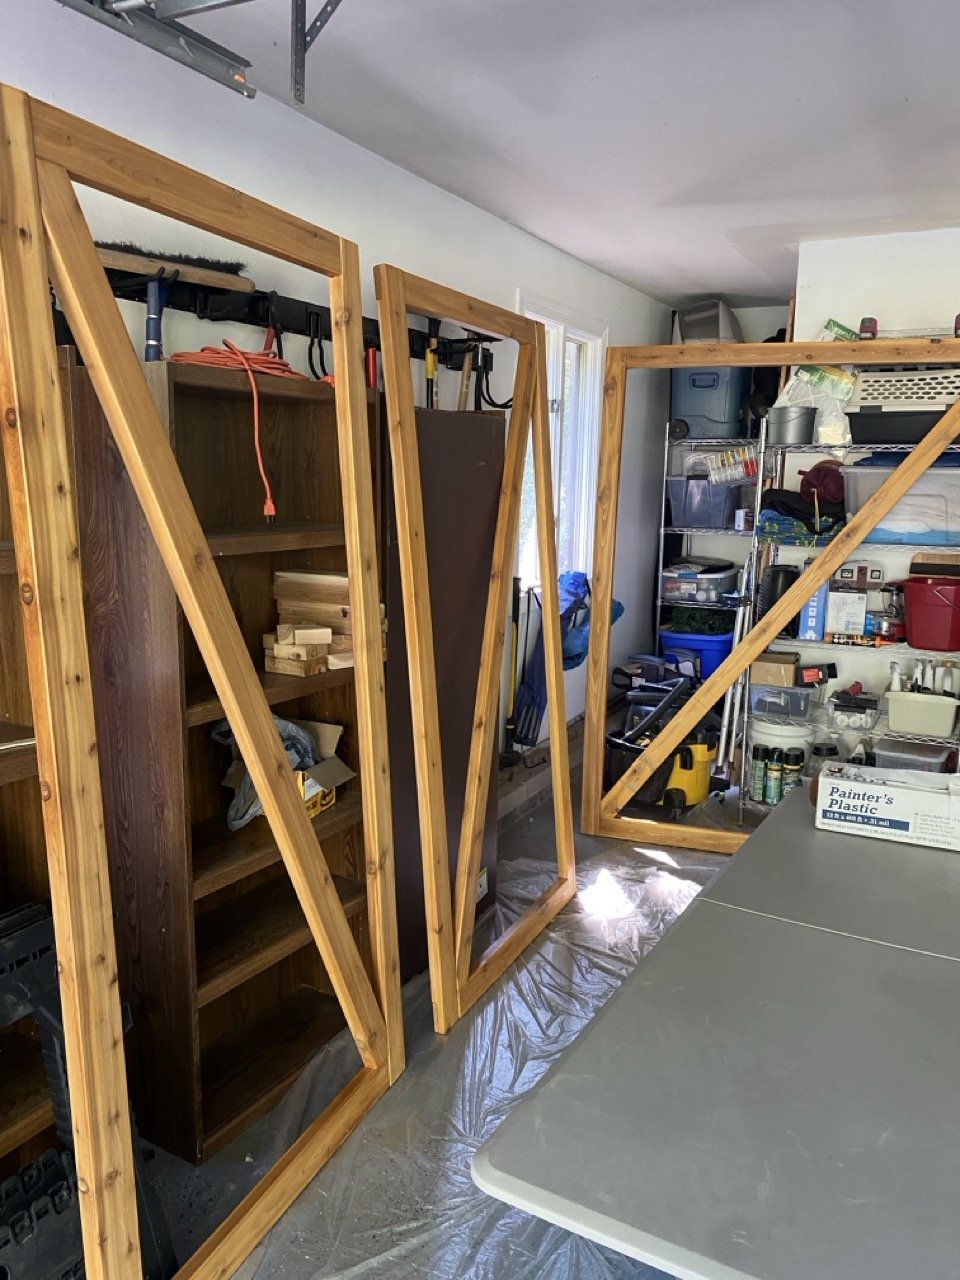
Crafting Half Lap Joints
There are multiple ways to join these cedar boards together, but I did some Googling and tried making half lap joints, which create a smooth, strong connection with 90-degree angles like this.
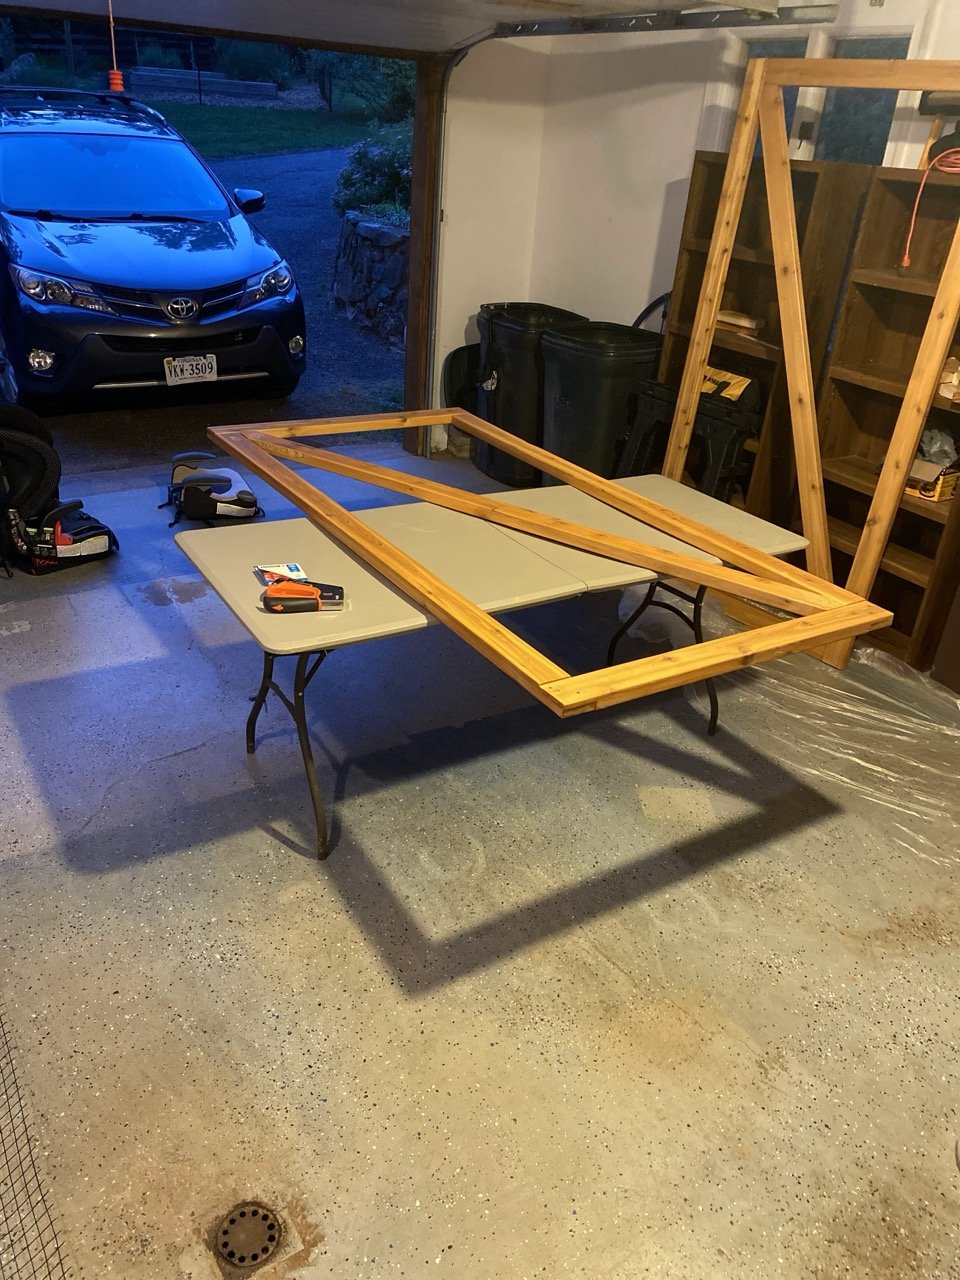
First, I measured out the width of one board perpendicular to the other.
Next, I changed the cut depth of my DeWalt Circular Saw to about 0.5-inch, and made a series of parallel cuts along this section.
With a soft wood like cedar, it’s then easy to knock out these segments with a hammer.
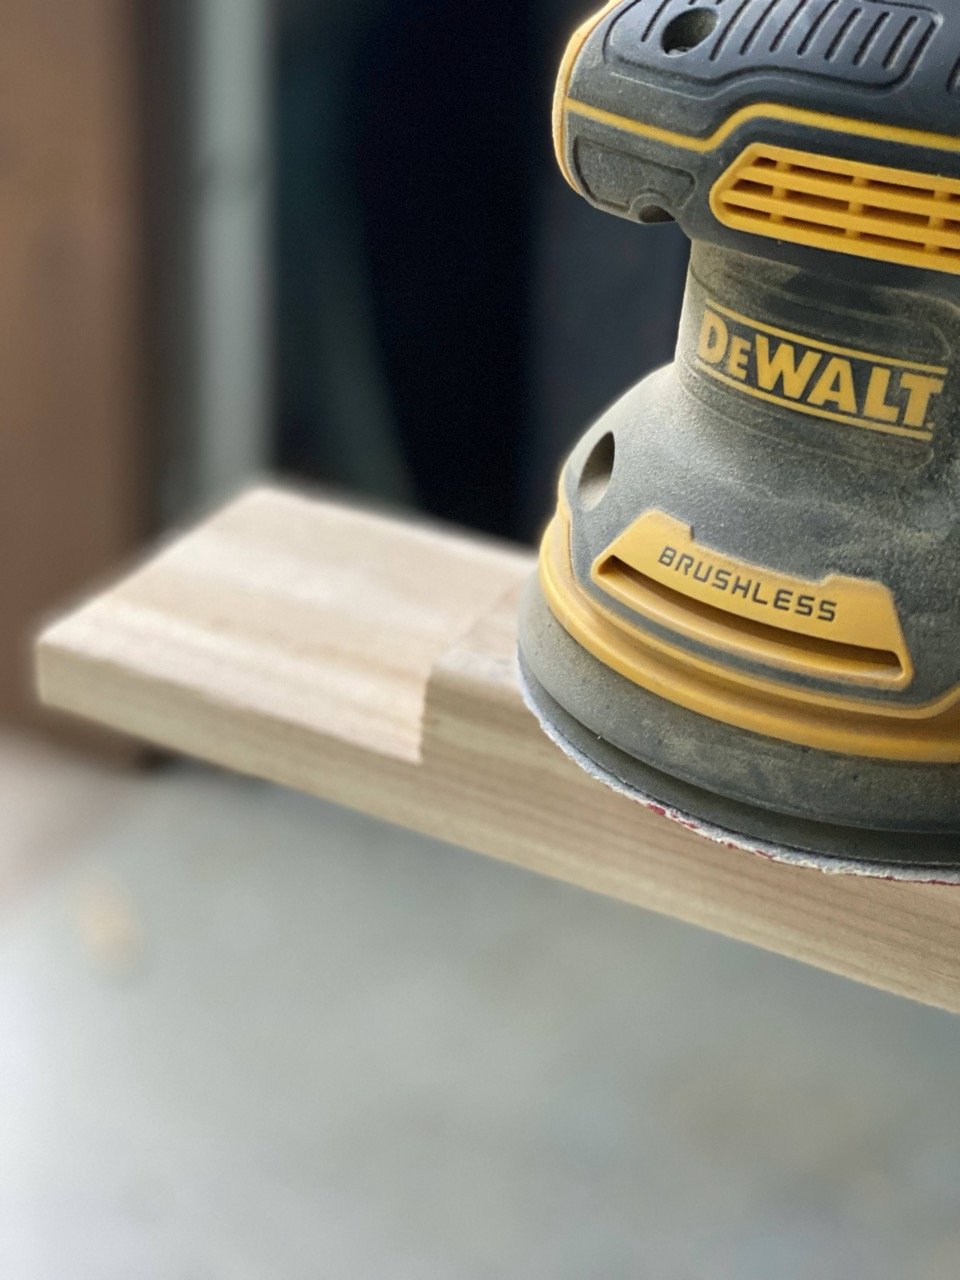
Next, I smoothed it out with a wood chisel, and then sanded it all down with my DeWalt Orbital Sander.
The joints should then fall into place squarely. Affix with wood glue and wood screws.
SANDING AND STAINING
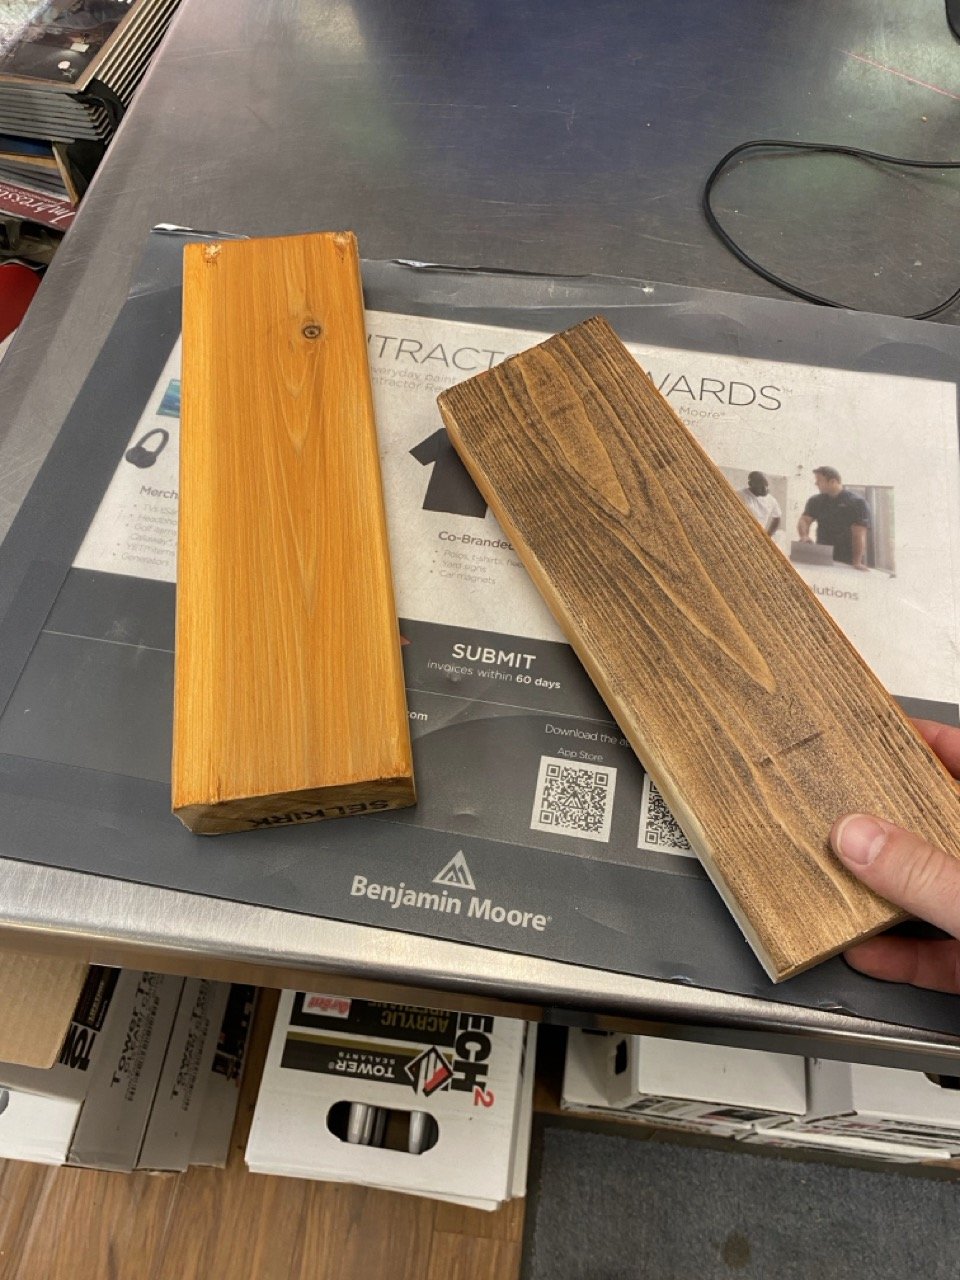
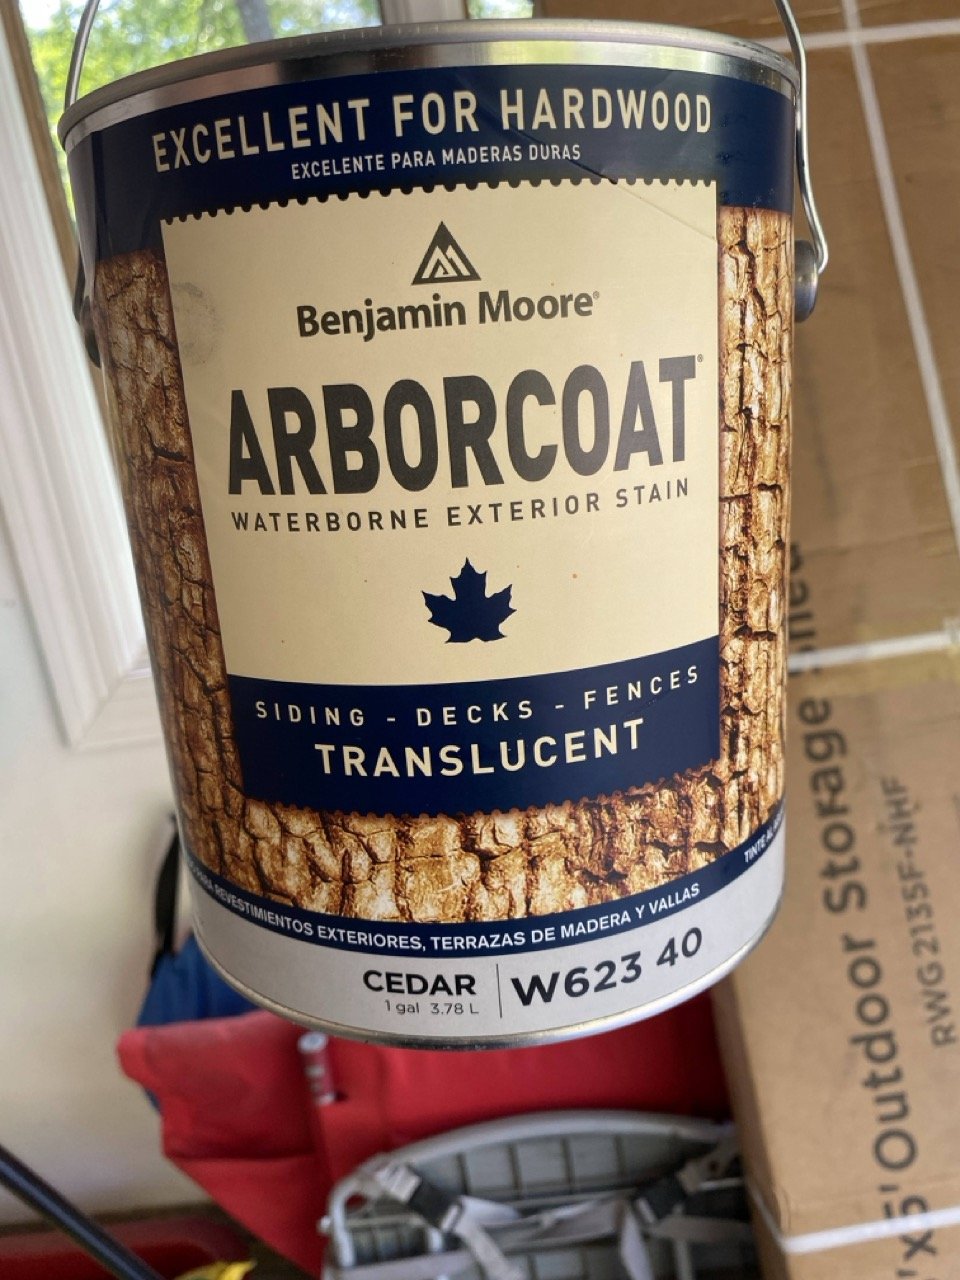
I tested out a few different cedar stains on some scrap pieces (definitely test!) and eventually settled on this translucent stain. It's a personal preference, but cedar is expensive so definitely take the time to be sure you're happy with the color before applying it to the full finished gate frames.
IMPORTANT: You need to sand the thing down really well before applying stain, because it'll take the stain very differently and impact the final color. Sand using a coarse grit sandpaper until the point where when you sprinkle a few drops of water on the cedar they absorb quickly and completely rather than beading on the surface.
Apply the stain and let dry for 24 hours.
ADDING WIRE MESH
Add more welded wire mesh to the gates, cutting to size, pulling tight, and affixing to the frame with staples. I used my steel snips, and then bent back the jagged edges of the mesh so they wouldn’t cut into the cedar.
(Optional) You can add some additional wire mesh hanging off the bottom of the gate to act as a threshold and keep smaller critters out, as the guy did in this video.

6. Installing the Gates
Now that you have your gates built it's time to attach them to the 4x4s. Again, this is best done with a partner.
Position your gates and make sure they'll fit with the added hinges and latch. Place some bricks underneath to help hold the gate in place.
Use a level and make sure you're happy with how the gates look from afar. Consider also which way you want the gate to open (from the left or right side? opening in or out?) based on whatever works best for your setup. Make sure the gate will swing evenly and open fully in the direction you want it to go. You may have to shave down the ground a bit after the fact if you're on a slope.
Use a pencil to mark locations of your hardware, fine-tuning as you go. A good time to measure twice and only "cut" once.
Place appropriate size hinges and latches according to you aesthetic taste, and drill everything in. We used this latch and these hinges.
We left the ratchet straps on the tops of our 4x4s as we were doing this, so we could tighten or loosen the width as needed and keep the 4x4s braced while I worked on the custom top board.
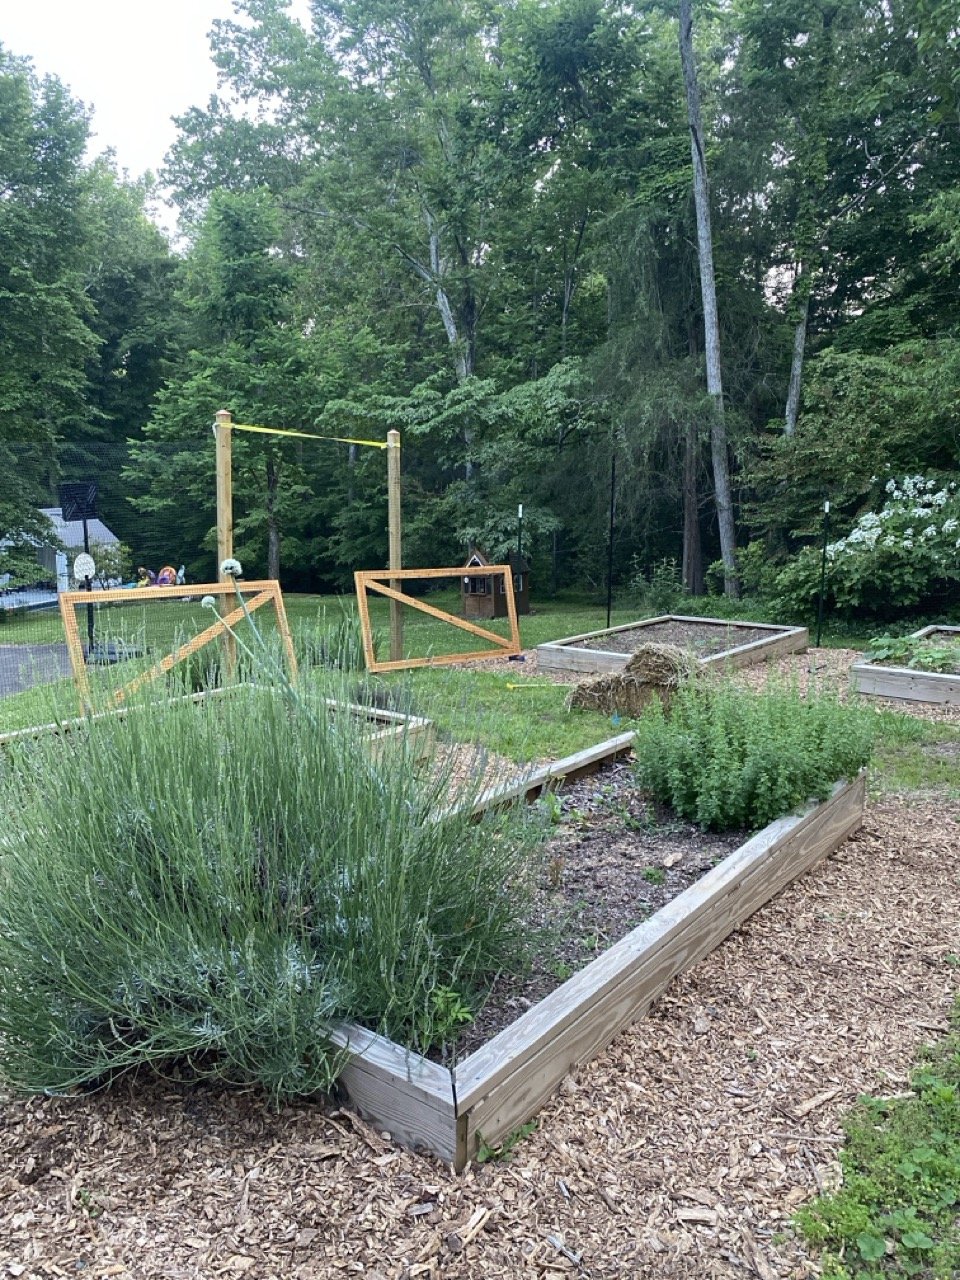

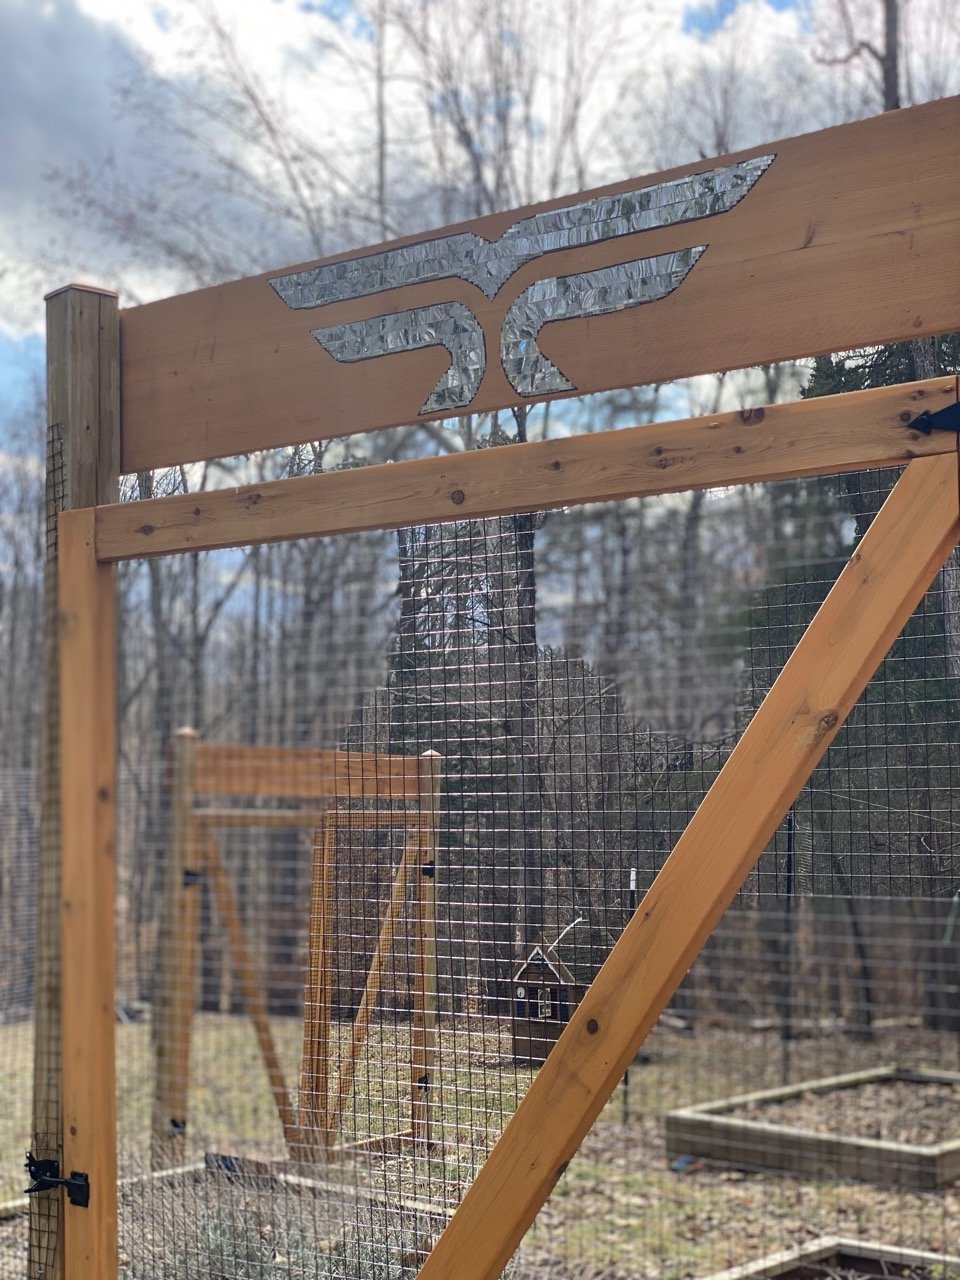
7. Creating a top board for a garden gate
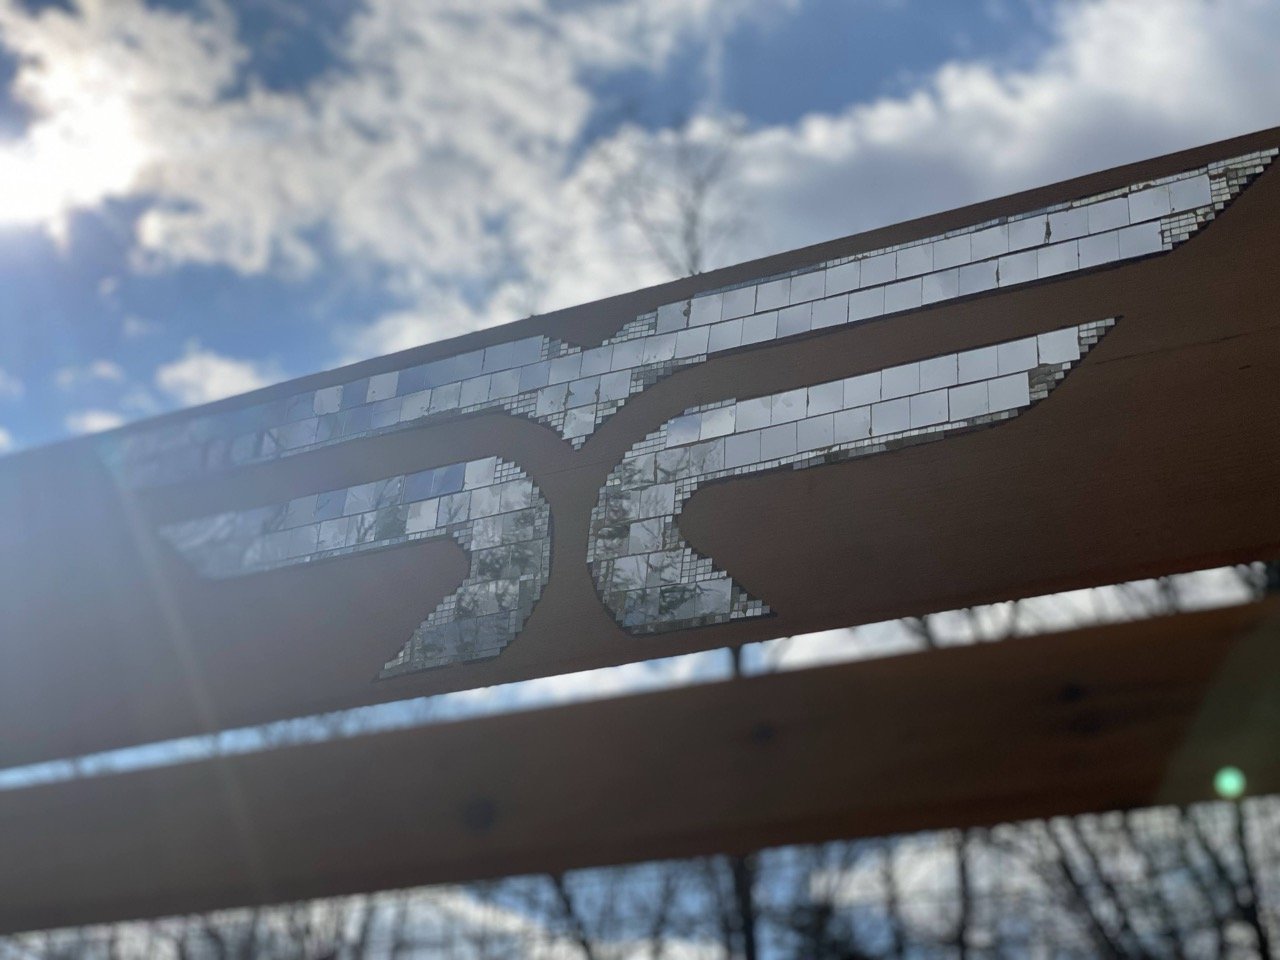
Finally, to keep everything in place and also add a little creative flourish, we planned out the top board for the gate.
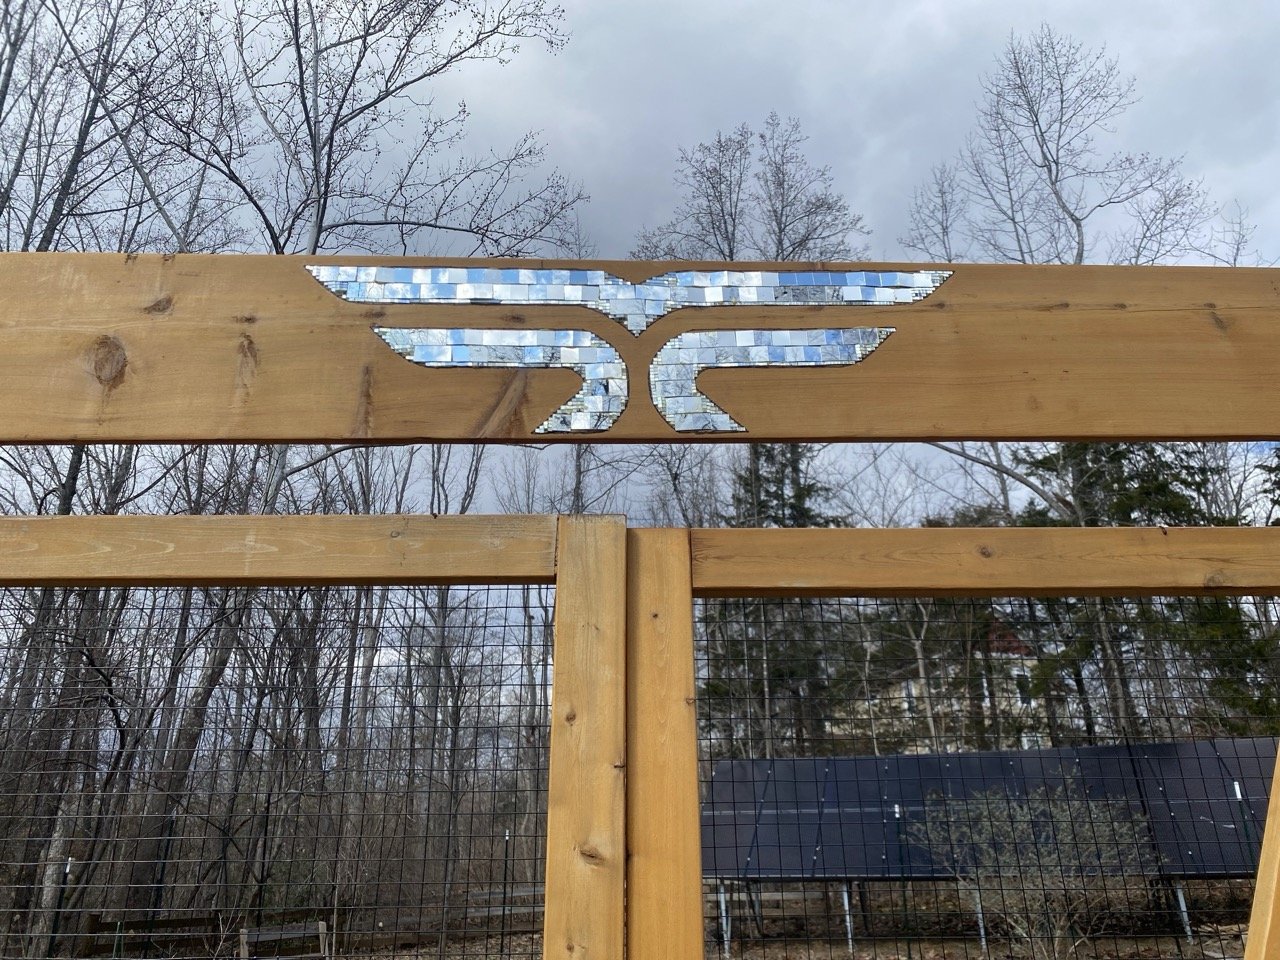
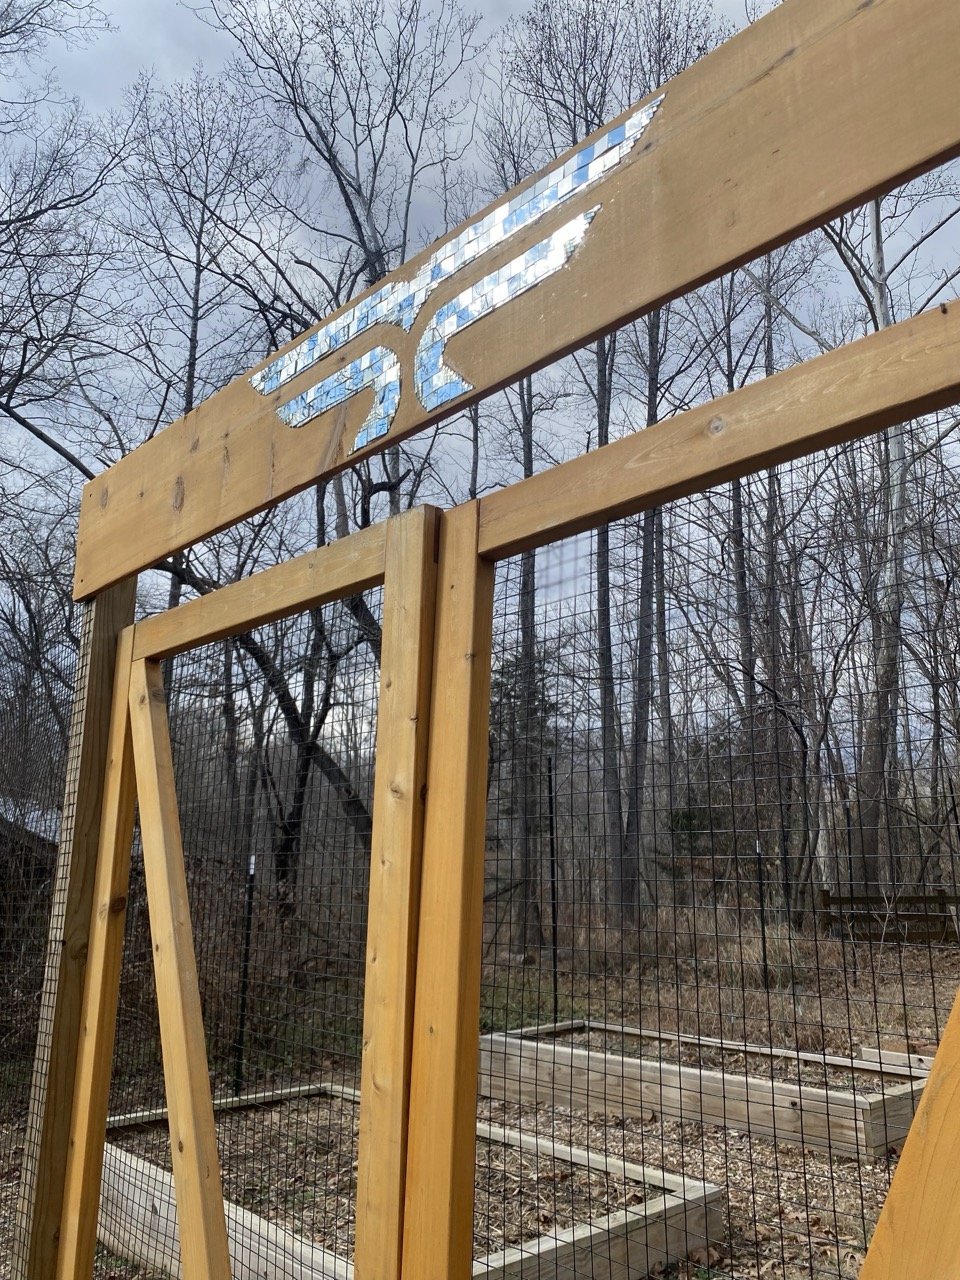
Obviously, this is the more custom part of the project that worked for us, you're welcome to do a similar mosaic or forge your own creative path here or just settle on a plain old top board that holds the 4x4s together long-term.
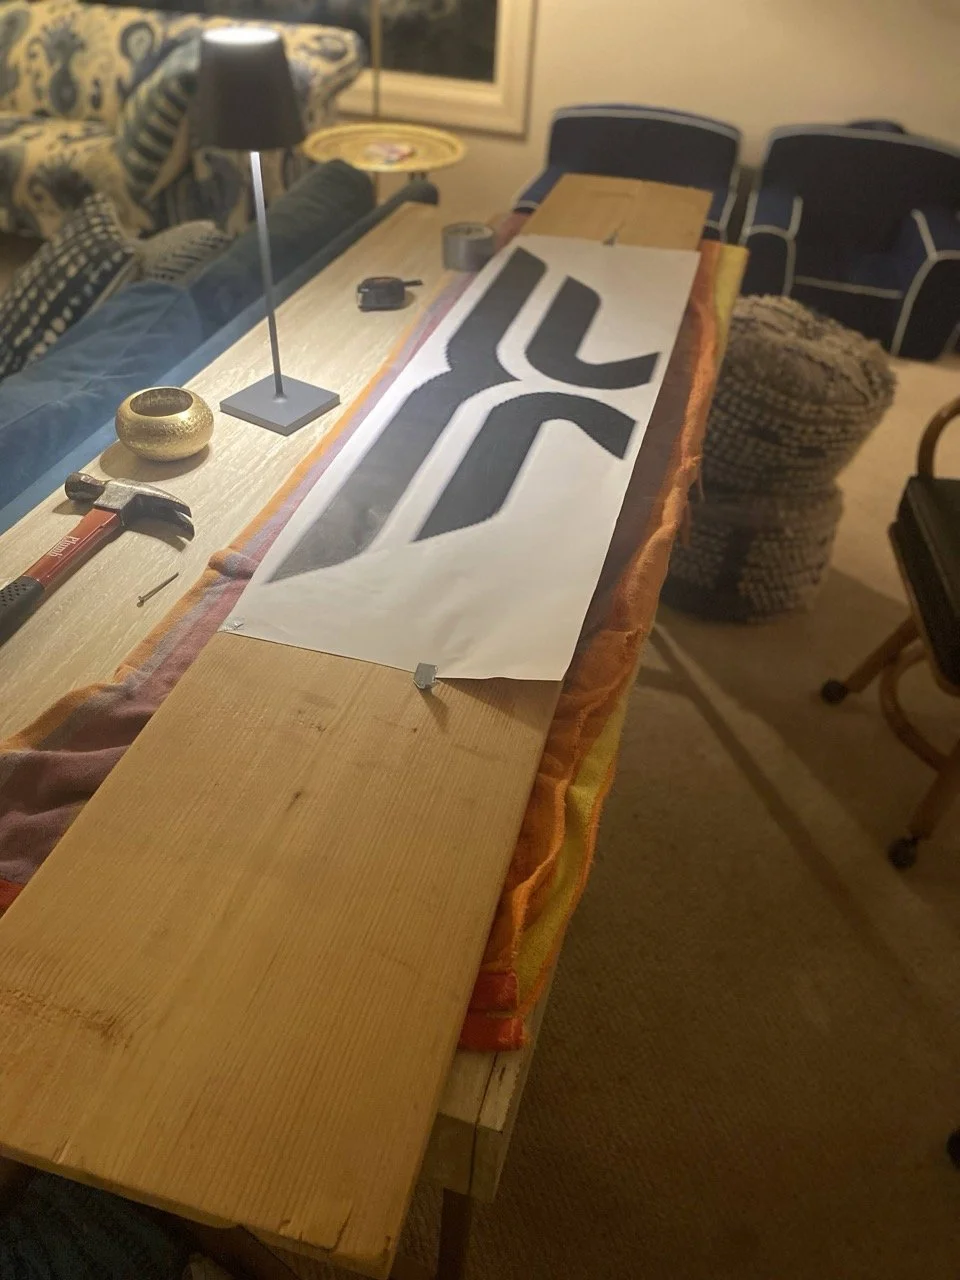
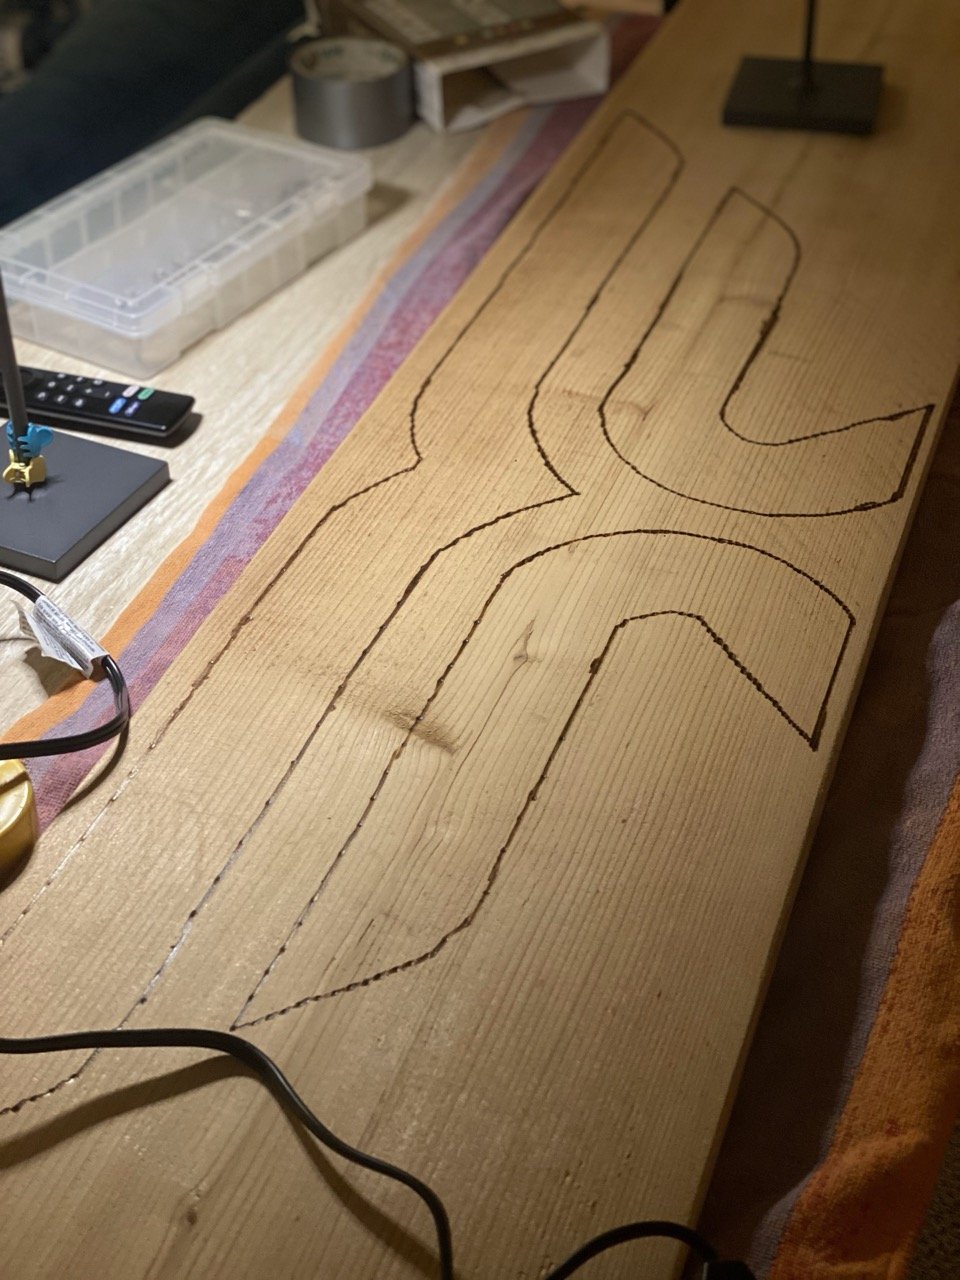
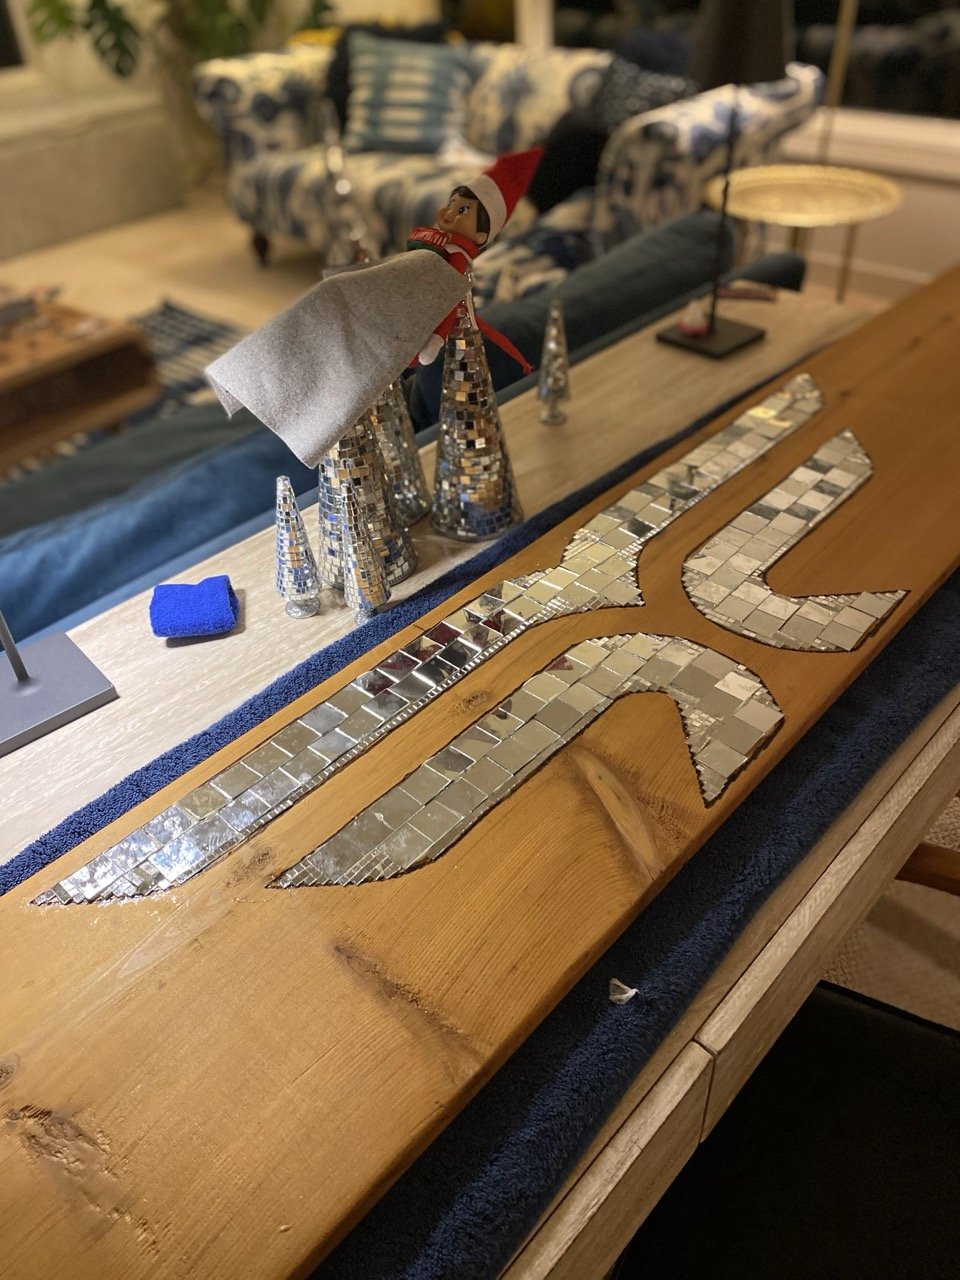
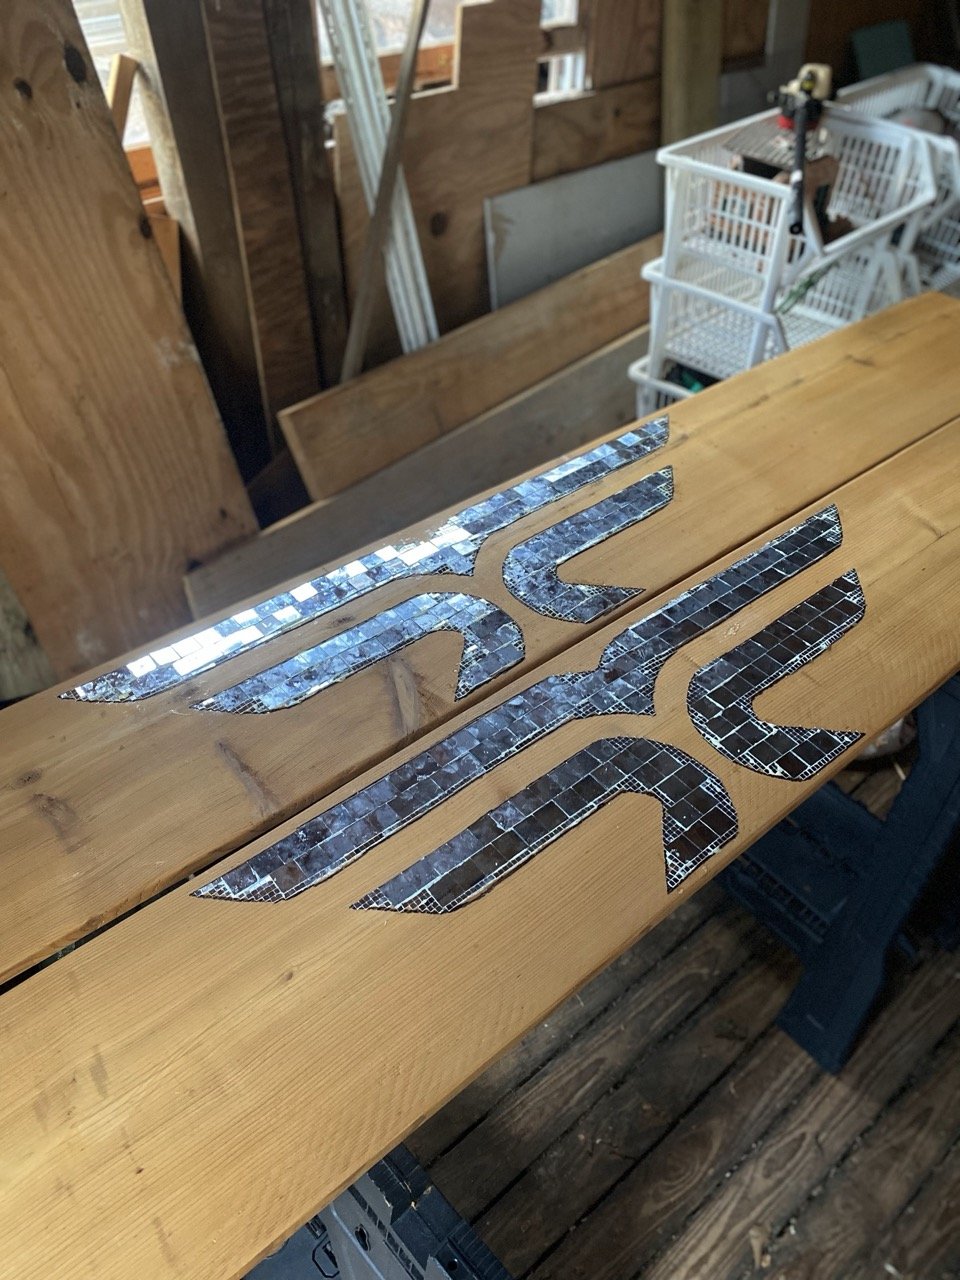
Kate created the logo design. We wanted something that felt like horizontally-oriented "thunderbird" but some early AI-generated options looked too much like cultural appropriation, or else a Third Reich logo, and that's certainly not what we're going for. We settled on this design, which has more of a vaguely Wonder Woman feel to it, and we can both get behind that.
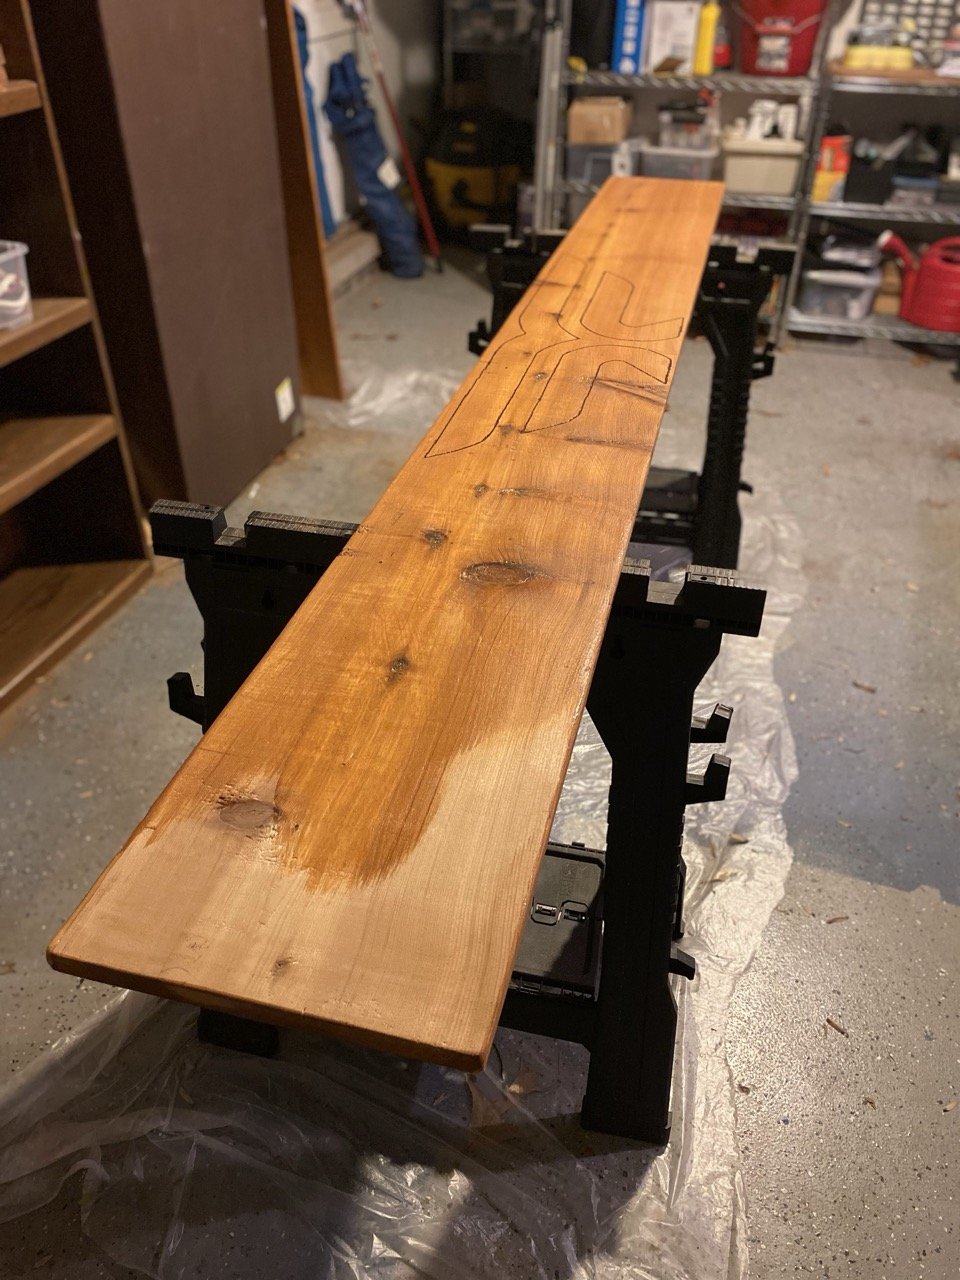
I sanded the top board down so it would take the stain later, just as with the process with the gates.
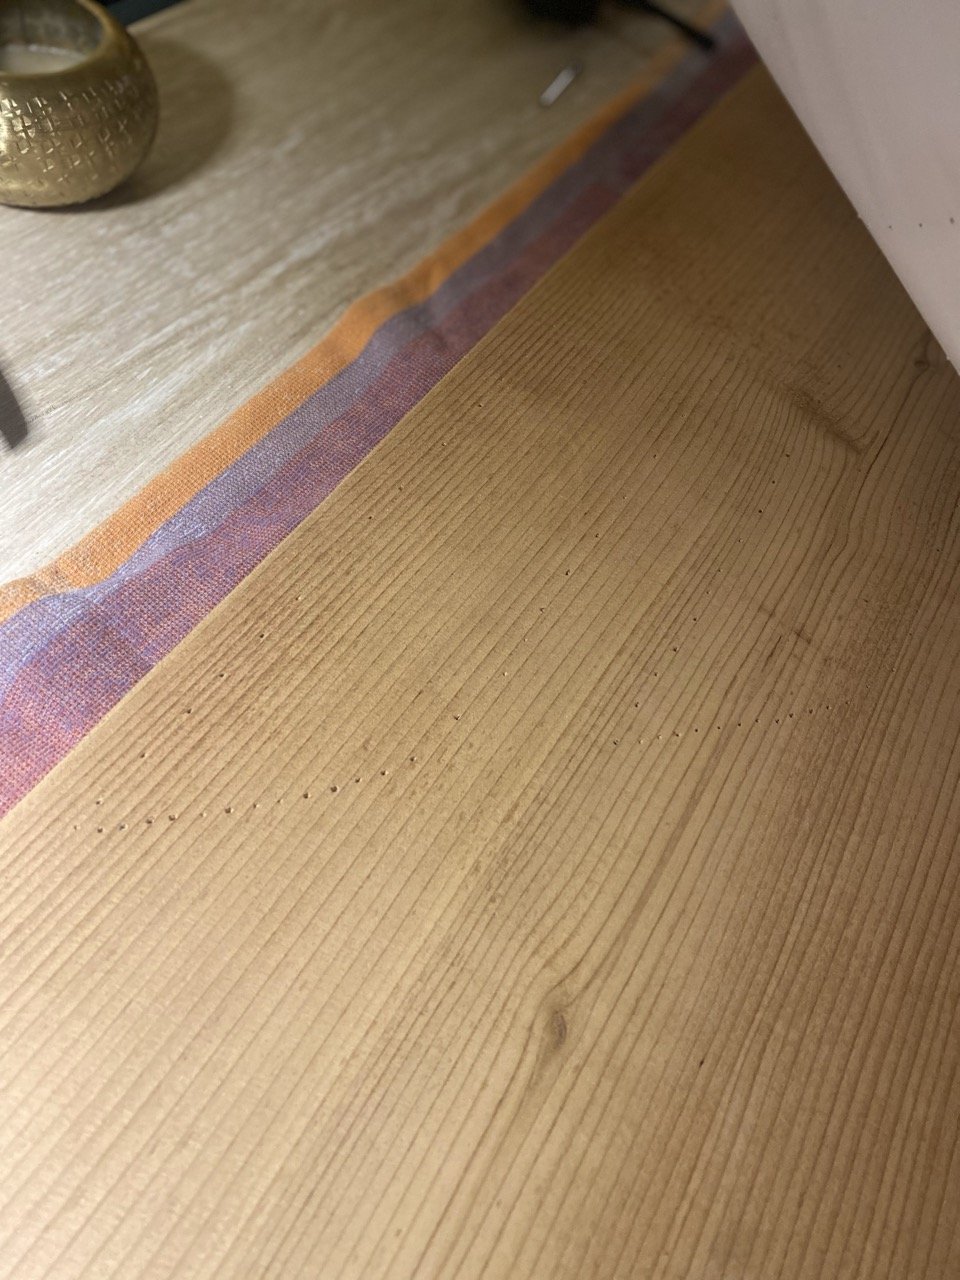
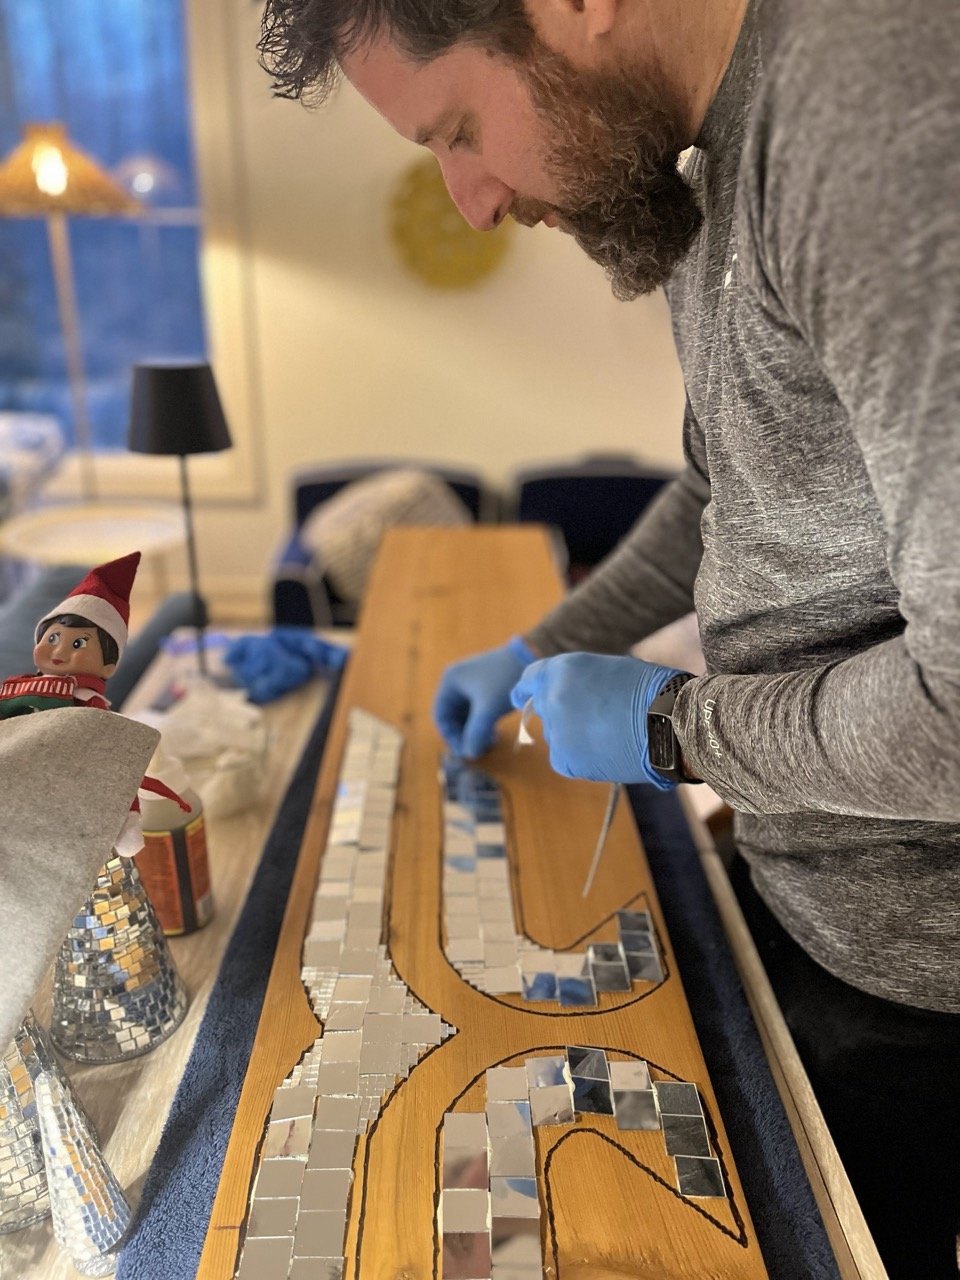
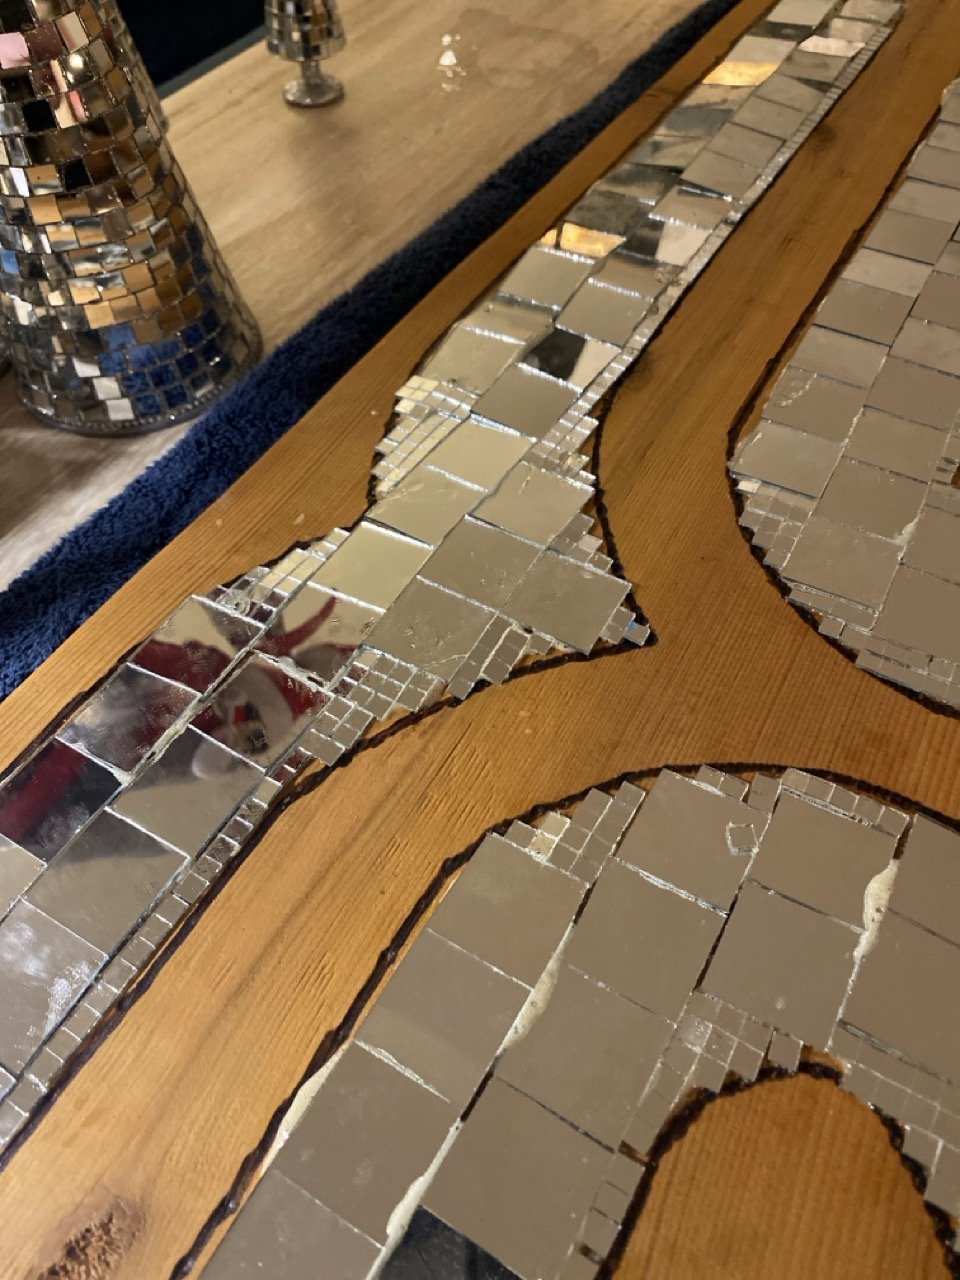
I printed to logo on a large plotter printer at work, and then traced it onto each piece of 1 x 8 cedar by lightly hammering a small nail around the outline of the design.
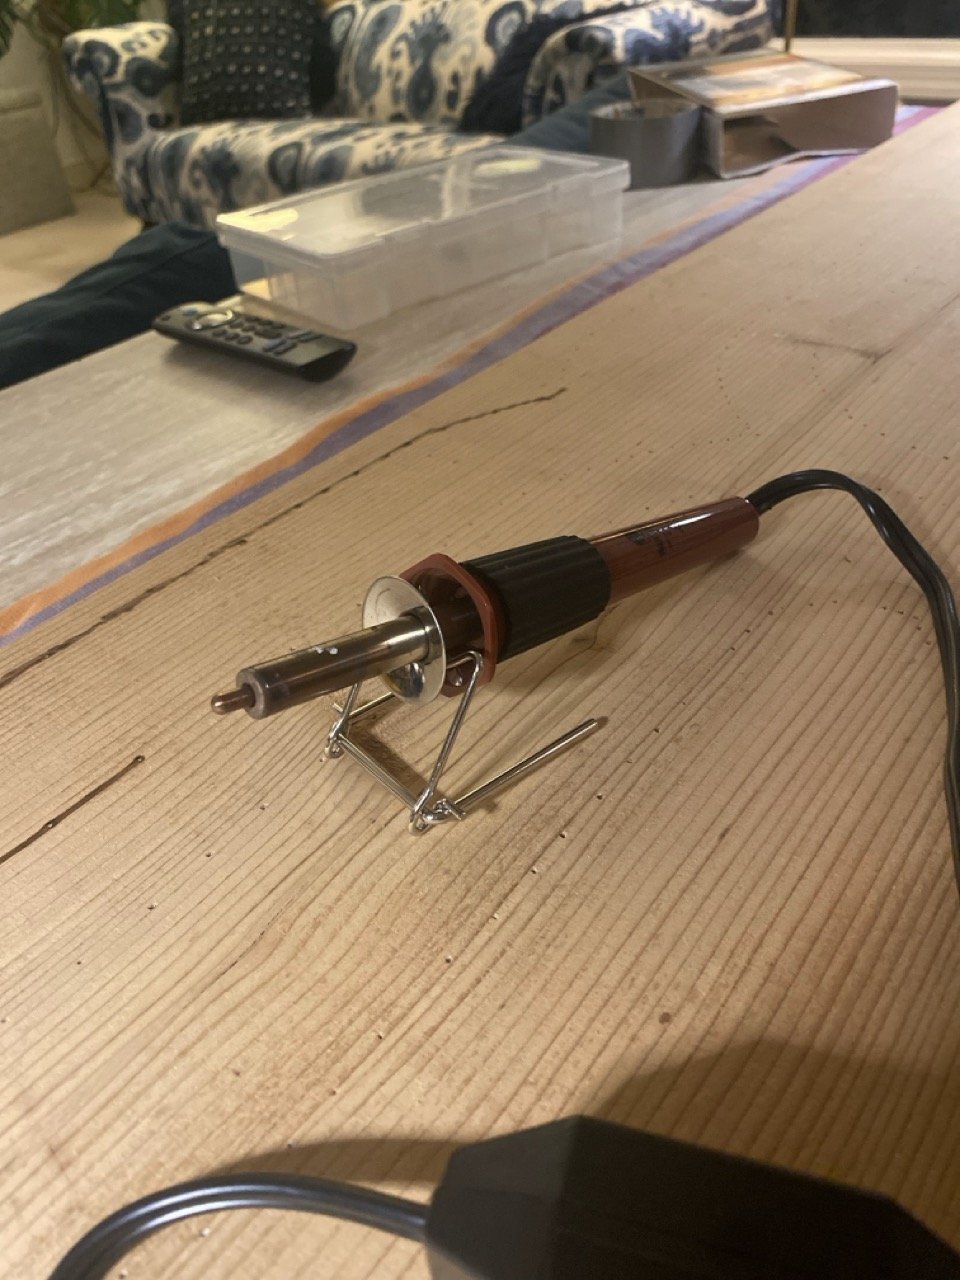
Next, I went over this outline with a wood burning tool.
After wood-burning, I stained the boards and let them dry.
Finally, I used small dots of this moisture activated polyurethane Gorilla Glue to add a bunch of 1x1" disco ball mirror squares, fine-tuning the edges with smaller 1/4" squares. I sponged a little water onto the surface of the cedar first, and the carefully placed sections of squares. Probably could’ve used a little less glue.
We installed the boards with galvanized screws. At first I used a level, but it looked way off kilter, so we ultimately eyeballed it, following the line along the top of the gate posts.
8. Finishing Touches and Fence Maintenance
We added these post caps to the steel poles to keep out the rain, and these post caps to the 4x4s. We didn't glue anything in place, as we might want to do something different on the tops of the 4x4s longer term (maybe adding bird houses? who knows!)
We're also adding a threshold on the bottom of each gate, and for the double gate we're adding this drop rod (aka cane bolt) that goes into a small pipe driven into the soil, to help anchor it in place when it's closed.
I've been doing regular inspections for damages, gaps, or sagging, adding additional zip ties, and may add more of a tension wire up top.
Deer are great jumpers but they've actually got piss-poor eyesight. Adding some reflective tape along the perimeter of the fencing will help them see the fencing and simultaneously confuse their vision (hanging old compact discs is another method). We're hoping the disco ball mirrors serve a similar purpose.
If the wire fencing doesn't feel like enough of a deterrent, consider motion-activated sprinklers, or light-emitting or noise-making devices like these or these, which can also help keep varmints and underground critters at bay. If you want to use deer repellent that smells like total asshole, go for it, but it's your funeral.
Depending on how things go, we might add some sections of electric fencing down the road.
Conclusion
So that's it! Easy, right?
Not really, and it took us like two years total to get this whole fence situation back up and running, but this was largely because we've got busy weekends, took a more custom approach than is probably necessary, and were interested in saving money wherever possible.
All in all, we were able to create a more permanent (or at least longer-lasting) deer fence for our garden using poured concrete fence posts, welded wire mesh, and custom cedar gates that stand a full 8' high and should hopefully keep the deer out of our business long term. The result is a relatively inexpensive, aesthetically pleasing, and durable fence for our garden that we can continue to improve over time.
Good luck and happy fencing!